


Sun Grid Engine(现在叫做 Oracle Gird Engine)是一套开源的分布式资源管理软件,用来统一管理和利用所有(愿意被管理的)电脑上的资源,使得这些电脑(集群)使用起来就像一台电脑一样,好处是可以随意扩展总的计算资源(买更多的电脑加入集群),并且管理上就像使用一台电脑一样方便。使用者只需要把需要计算的工作准备好,提交到 Sun Grid Engine (SGE),SGE 就会根据已经订好的管理策略以及使用者的需求在集群里找到合适的电脑来完成计算工作。SGE 主要用在高性能计算、网格计算等领域。
我们云计算项目里面有个想法就是能在我们的云计算平台上快速创建多个高配置虚拟机并自动接入到 SGE 集群,能迅速满足整个实验室高峰时期的计算需求。目前我们的 SGE 集群包含 2 台 IBM 超级计算机,n 台 PC 服务器和多个刀片服务器,以后为了临时满足高峰时期的计算要求会从云里申请多个虚拟机并自动配置到 SGE 集群里。
安装 Sun Grid Engine 需要 Java 的支持(最好是 SUN 的 Java 版本),所以所有结点都需要安装 Java 包。Ubuntu 从 11.10 版本不在提供 SUN 的官方 Java 版本,需要另外的源:
$ sudo apt-get install python-software-properties
$ sudo add-apt-repository ppa:ferramroberto/java
$ sudo apt-get update
$ sudo apt-get install sun-java6-jre
首先在所有结点上修改 /etc/hosts,grid00 是主控结点,grid01 和 grid02 是执行结点(我们一般把主控结点叫做 master 或者 head,执行结点叫做 client):
$sudo vi /etc/hosts
127.0.0.1	localhost.localdomain	localhost
192.168.2.10	grid00.vpsee.com	grid00
192.168.2.11	grid01.vpsee.com	grid01
192.168.2.12	grid02.vpsee.com	grid02
在主控结点(grid00)上安装 gridengine-master 以及一些管理工具 qhost/qconf/qstat 等(包含在 gridengine-client 中):
$ sudo apt-get install gridengine-client gridengine-common gridengine-master
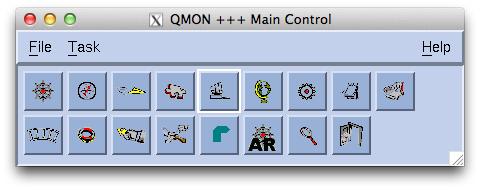
如果不习惯命令行界面,可以在主控结点上装个 qmon 图形管理工具,界面如下:
$ sudo apt-get install xserver-xorg gridengine-qmon
在所有执行结点(grid01 和 grid02)上安装 gridengine-exec:
$ sudo apt-get install gridengine-exec
在主控结点上执行以下操作把所有的执行结点加到集群里:
$ sudo -i

# qconf -ah grid01
# qconf -ah grid02
在所有执行结点执行以下操作,通过 act_qmaster 这个文件识别主控结点,然后启动服务:
$ sudo echo "grid00.vpsee.com" > /var/lib/gridengine/default/common/act_qmaster

$ sudo /etc/init.d/gridengine-exec start
最后在主控结点上查看一下是否成功:
# qhost
HOSTNAME                ARCH         NCPU  LOAD  MEMTOT  MEMUSE  SWAPTO  SWAPUS
-------------------------------------------------------------------------------
global                  -               -     -       -       -       -       -
grid00.vpsee.com        -               -     -       -       -       -       -
grid01.vpsee.com        lx26-amd64     24 24.00   63.0G    1.7G    3.7G     0.0
grid02.vpsee.com        lx26-amd64      8  0.01   55.2G  642.2M    1.0G     0.0
测试
如何知道这个集群是否能正常工作呢?提交一个任务(job)测试一下。在主控结点上写一个简单脚本打印当前 Linux 内核版本:
# vi uname.sge
#!/bin/bash
uname -a
然后用 qsub 提交这个脚本到 SGE 集群:
# vi uname.sge
#!/bin/bash
uname -a

# qsub uname.sge
qsub uname.sge
Your job 3557 ("uname.sge") has been submitted
如果运行成功就会在某个执行结点的自己目录下面(我这里用的是 root 帐号,所以是 /root 目录)得到2个文件,执行结果就在 uname.sge.o3557 这个文件里:
# ls
uname.sge.e3557  uname.sge.o3557

# cat uname.sge.o3557
Linux grid02 3.0.0-16-server #29-Ubuntu SMP Tue Feb 14 13:08:12 UTC 2012 x86_64 x86_64 x86_64 GNU/Linux
个人操作过程中,遇到两个错误:
1)启动qmon,出现 Warning: Cannot convert string “-adobe-helvetica-medium-r-*–14-*-*-*-p-*-*-*” to type FontStruct 。。。X Error of failed request: BadName (named color or font does not exist)
2)Unable to run job: warning: … your job is not allowed to run in any queue
通过google到的一篇文章解决,blogspot上的,国内被墙,需要翻墙查看。不翻译了,有问题,可以给我留言。
This post follows my previous note on how to “Set Up an MPICH2 Cluster With Ubuntu Server 11.04″.
8. Install a Job Scheduler-Sun Grid Engine (SGE)
8.1. Install SGE on master node:
mpiuser@ub0:~$ sudo apt-get install gridengine-client gridengine-common gridengine-master gridengine-qmon gridengine-exec
#remove gridengine-exec from the list if master node is not supposed to run jobs
#during the installation, we need to set the cluster CELL name (such as ‘default’)
8.2. Install SGE on other nodes:
mpiuser@ub1:~$ sudo apt-get install gridengine-client gridengine-exec
…
#The CELL name is set the same as that of the master node
8.3. Set SGE_ROOT and SGE_CELL environment variables:
$SGE_ROOT refers to the installation path of SGE
$SGE_CELL is cell name which is ‘default’ on our machine
Edit /etc/profile and /etc/bash.bachrc, add the following two lines
export SGE_ROOT=/var/lib/gridengine #this is the path on our machines
export SGE_CELL=default
Source the script: source /etc/profile
8.4. Configure SGE with qmon (This section is modified from a note by Junjun Mao [Ref. 1])
8.4.1. Invoke qmon as superuser:
mpiuser@ub0:~$ sudo qmon
#On our machine, qmon failed to start due to missing fonts ‘-adobe-helvetica-…”
# To solve the fonts problem:
mpiuser@ub0:~$ sudo apt-get install xfs xfstt
mpiuser@ub0:~$ sudo apt-get install t1-xfree86-nonfree ttf-xfree86-nonfree ttf-xfree86-nonfree-syriac xfonts-75dpi xfonts-100dpi
#I guess not all of these packages are required actually
mpiuser@ub0:~$ sudo reboot #after reboot, the problem is gone
8.4.2. Configure hosts
“Host Configuration” -> “Administration Host” -> Add master node and other administrative nodes
“Host Configuration” -> “Submit Host” -> Add master node and other submit nodes
“Host Configuration” -> “Execution Host” -> Add slave nodes
->Click on “Done” to finish
8.4.3. Configure user
Add or delete users that are allowed to access SGE here. In this example, a user is added to an existing group and later this group will be allowed to submit jobs. Everything else is left as default values.
“User Configuration” -> “Userset” -> Highlight userset “arusers” and click on “Modify” -> Input user name in “User/Group” field
->Click “Done” to finish
8.4.4. Configure queue
While Host Configuration deals what computing resources are available and User Configuration defines who have access to the resources, this Queue Control defines ways to connect hosts and users.
“Queue Control” -> “Hosts” -> Confirm the execution hosts show up there.
“Queue Control” -> “Cluster Queues” -> Click on “Add” -> Name the queue, add execution nodes to Hostlist;
and
“Use access” -> allow access to user group arusers;
“General Configuration” -> Field “Slots” -> Raise the number to total CPU cores on slave nodes (ok to use a bigger number than actual CPU cores).
“Queue Control” -> “Queue Instances” -> This is the place to manually assign hosts to queues, and control the state (active, suspend …) of hosts.
8.4.5. Configure parallel environment
“Queue Control” -> “Cluster Queues” -> Select a queue that will run parallel jobs -> Click on “Modify” -> “Parallel Environment” -> Click on icon “PE” below the right and left arrows -> Click on “Add” -> Name the PE, slots = 999, start_proc_args = $SGE_ROOT/mpi/startmpi.sh $pe_hostfile, stop_proc_args = $SGE_ROOT/mpi/stopmpi.sh, allocation_rule=$fill_up, check “Control slaves” to make this variable checked.
Make sure the configured PE is loaded from “Available PE” to “Referenced PE”.
Confirm and close all config windows and open “Queue Control” -> “Cluster Queues” -> “Parallel Environment” again, the named PE should show up.
Once created and linked to a queue, PE can be edited from “Queue Control” -> “PE” too.
8.5. Check whether sge hosts are running properly
mpiuser@ub0:~$ qhost #it should list the system info from all nodes
mpiuser@ub0:~$ qconf -sel #it should list the hostnames of nodes
mpiuser@ub0:~$ qconf -sql #it should list the queues
mpiuser@ub0:~$ ps aux | grep sge_qmaster | grep -v grep #check master daemon
mpiuser@ub0:~$ ps aux | grep sge_execd | grep -v grep #check execute daemon
mpiuser@ub1:~$ ps aux | grep sge_ execd | grep -v grep #check execute daemon
#If sge_qmaster or sge_execd daemon is not running, try starting by service
#mpiuser@ub1:~$ sudo service gridengine-master start
#mpiuser@ub1:~$ sudo service gridengine-exec start
…
#Reboot node(s) if sge_qmaster or sge_execd fails to start
8.6. Run a test script
Make a script named ‘test’ with content:
#!/bin/bash
### Request Bourne shell as shell for job
#$ -S /bin/bash
### Use current directory as working directory
#$ -CWD
### Name the job:
#$ -N test
echo “Running environment:”
env
echo “=============================”
###end of script
To submit the job: qsub test
#a job id returned if successful
Query the job status: qstat
#If the job is running successfully, there will be two output files produced in the current working directory with name test.oXXX (the standard output) and test.eXXX (the standard error), where test is the job name and XXX is the job id.
8.7. Check log messages if error occurs
mpiuser@ub0:~$ less /var/spool/gridengine/qmaster/messages #master node
mpiuser@ub0:~$ less /var/spool/gridengine/execd/ub0/messages #exec node
8.8. Frequently asked questions (FAQ)
Question: My output file has a Warning: no access to tty (Bad file descriptor).Thus no job control in this shell.
Answer: This warning is caused if you are using the tcsh or csh as shell for submitting job. It is safe to ignore this warning. Alternatively you can qsub -S /bin/bash to run your program in different shell or add a line of ‘#$ -S /bin/bash’ in the job script. [Modified from Ref. 2]
Question: Master host failed to respond properly. Error message is “error: commlib error: access denied (client IP resolved to host name ‘ub0…’. This is not identical to clients host name ‘ub0’) error: unable to contact qmaster using port 6444 on host ‘ub0’”
Answer: Reboot the master node or install the SGE from source code on master node (Solutions not confirmed yet). It also could be due to that the utility of gethostname (full path is ‘/usr/lib/gridengine/gethostname’ on our machines) returns a different hostname to that from running command ‘hostname -f’. If this is the case (e.g., host having multiple network interfaces), create a file named ‘host_aliases’ under ‘$SGE_ROOT/$SGE_CELL/common’ and populate as follows,
# cat host_aliases
ub0 ub0.my.com ub0-grid
ub1 ub1.my.com ub1-grid
ub2 ub2.my.com ub2-grid
ub3 ub3.my.com ub3-grid
and then restart the gridengine daemon (see man page of sge_host_aliases for details). Check the aliases:
mpiuser@ub0:~$ /usr/lib/gridengine/gethostname -aname ub0-grid
mpiuser@ub0:~$ /usr/lib/gridengine/gethostname -aname ub0
#both of them should return ub0
References
1. Put SGE and MPICH together under Ubuntu 9.10 (http://pka.engr.ccny.cuny.edu/~jmao/node/51)
2. http://system.cs.odu.edu/?page=cluster
http://www.yinqisen.cn/blog-212.html


 5465
5465


 被折叠的 条评论
为什么被折叠?
被折叠的 条评论
为什么被折叠?
 到【灌水乐园】发言


