


Notification用来显示在手机状态栏的通知,一般显示的为网络状态,电池状态等,它所代表的是一种全局的效果的通知,程序一般通过NotificationManager服务(一个重要的系统服务)来发送Notification。
Android3.0增加了Notification.Builder类,允许开发者更轻松的创建Notification对象,Notification.Builder的常用方法:
setDefaults():设置通知LED灯、音乐、震动等;
setAytoCancel():设置点击通知后,状态栏自动删除通知;
setContentTitle();设置通知标题;
setContentText():设置通知的内容;
setSmallIcon():设置通知图标;
setLargeIcon():设置通知大图标;
setTick();设置通知在状态栏的提示文本;
setContentIntent():设置点击通知后将要启动的程序组件对应的PendingIntent
发送Notification的步骤
(1)调用getSystemService()方法获取系统的Manager服务。
(2)通过构造器创建一个Notification对象。
(3)为Notification设置各种属性
(4)通过NotificationManager发送Notification.
package com.example.asdf;
import android.annotation.SuppressLint;
import android.app.Activity;
import android.app.Notification;
import android.app.NotificationManager;
import android.app.PendingIntent;
import android.content.Intent;
import android.os.Bundle;
import android.view.View;
import android.view.View.OnClickListener;
import android.widget.Button;
public class MainActivity extends Activity implements OnClickListener {
private Button btn_send;
private Button btn_cancle;
static final int NOTIFICATION_ID = 0X123;
private NotificationManager mNm;
@Override
protected void onCreate(Bundle savedInstanceState) {
super.onCreate(savedInstanceState);
setContentView(R.layout.activity_main);
initview();
mNm = (NotificationManager) getSystemService(NOTIFICATION_SERVICE);
}
@SuppressLint("NewApi")
@Override
public void onClick(View v) {
// TODO Auto-generated method stub
switch (v.getId()) {
case R.id.btn_send:
Intent intent = new Intent(MainActivity.this, MessageActivity.class);
PendingIntent mPi = PendingIntent.getActivity(MainActivity.this, 0,
intent, 0);
Notification notify = new Notification.Builder(this)
// 设置打开该通知,通知自动消失
.setAutoCancel(true)
// 设置显示在状态栏的通知提示信息
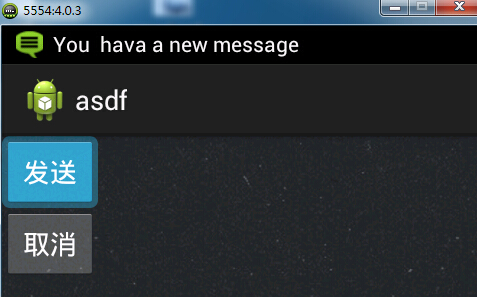
.setTicker("You hava a new message")
// 设置通知的图标
.setSmallIcon(R.drawable.comment)
// 设置通知的标题
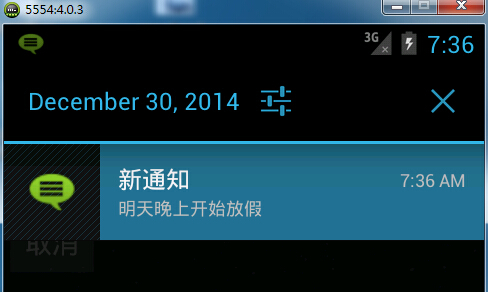
.setContentTitle("新通知")
// 设置通知的内容
.setContentText("明天晚上开始放假")
// 设置使用系统默认的声音和LED灯光
.setDefaults(Notification.DEFAULT_SOUND| Notification.DEFAULT_LIGHTS)
.setWhen(System.currentTimeMillis())
// 设置通知将要启动的intetnt
.setContentIntent(mPi).getNotification();
// 发送通知
mNm.notify(NOTIFICATION_ID, notify);
break;
//取消通知
case R.id.btn_cancle:
mNm.cancel(NOTIFICATION_ID);
break;
}
}
public void initview() {
btn_send = (Button) findViewById(R.id.btn_send);
btn_cancle = (Button) findViewById(R.id.btn_cancle);
btn_cancle.setOnClickListener(this);
btn_send.setOnClickListener(this);
}
}
运行截图 点击发送发出通知,点击取消将已经发送到通知取消
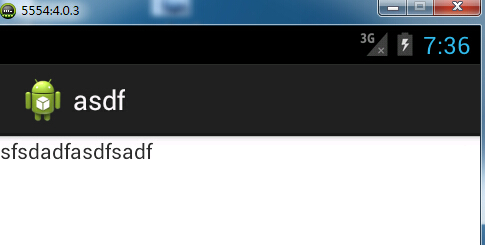
通知出现后,点击跳转到另外一个界面中
跳转的新界面
NotificationManager常用方法介绍:
public void cancelAll() 移除所有通知(只是针对当前Context下的Notification)
public  void cancel(int id) 移除标记为id的通知 (只是针对当前Context下的所有Notification)
public  void notify(String tag ,int id, Notification notification) 将通知加入状态栏,标签为tag,标记为id
public  void notify(int id, Notification notification) 将通知加入状态栏,标记为id
Notification类中的
常量:
DEFAULT_ALL    使用所有默认值,声音,震动,闪光
DEFAULT_LIGHTS 使用默认闪光提示
DEFAULT_SOUNDS 使用默认提示声音
DEFAULT_VIBRATE 使用默认手机震动 //设置自定义声音
setSound(Uri.parse("file:///sdcard/msg.mp3"));
//设置自定义震动
setVibrate(new long[]{0,50,100,150});
最后不要忘记加入权限
 <!-- 闪光灯权限 -->
    <uses-permission android:name="android.permission.FLASHLIGHT"/>
    <!-- 震动权限 -->
    <uses-permission android:name="android.permission.VIBRATE"/>


 4120
4120

 被折叠的 条评论
为什么被折叠?
被折叠的 条评论
为什么被折叠?
 到【灌水乐园】发言


