


先说结论:CLCameraXConverter,使用这个开源工具,即可实现所见即所得、优化的性能体验!
一. 当前CameraX结合实际使用的问题
CameraX 是Google的官方库Jitpack中的一个组件,可以快速便捷的使用Android设备相机进行预览、拍照、图像分析与录制视频。告别繁琐的Camera2与弃用的Camera。
使用虽然方便,但是依然有不少需要工程中去处理的问题,比如,想通过CameraX的ImageAnalysis图像分析通道进行帧数据提取,再进行一些图像操作(人脸识别、OCR等),它默认输出的是一张完整的相机视野图片,而不是“预览视野图片”。
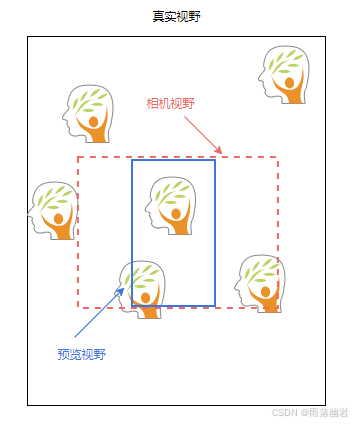
如上图,所以多出去的部分,是“浪费”。画面中都看不到的地方,还需要拿来做识别浪费计算资源吗?右侧被裁掉的也识别出一个人脸,有用吗?现在的机器学习都需要占用大量CPU时间,多出去的部分去除也可以提高不少识别速度。
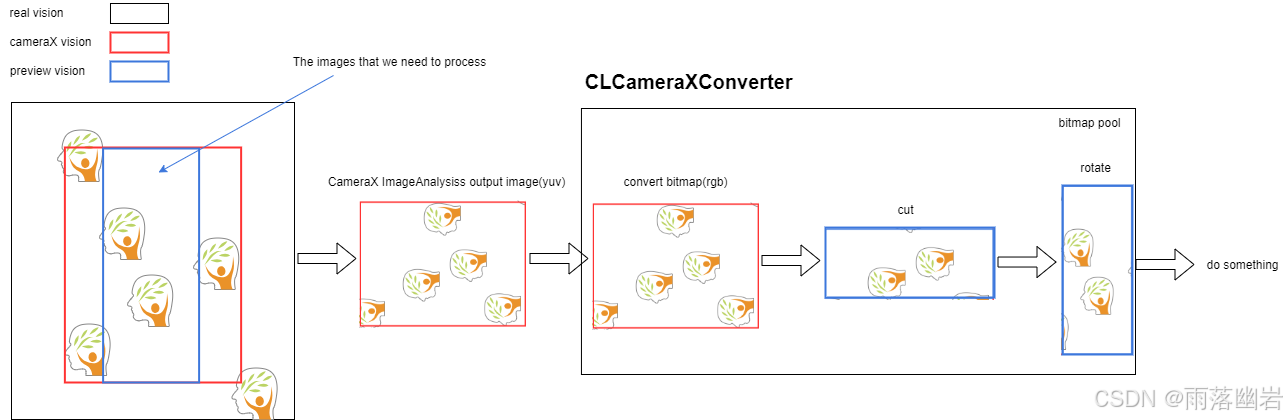
CLCameraXConverter架构图如下:
二. CameraX1.0.0稳定版前的做法
稳定版本之前,如果想将CameraX输出的ImageProxy转换为Bitmap再进行裁剪、旋转等操作,需要使用 RenderScript 进行转换,做过Android原生图像运算的兄弟们应该知道它。简单来说就是将yuv420数据转为rgb,注意下面的工具,在转换前我就进行了裁剪处理,找到预览视野的边界矩形,比全图转换要更省内存速度也更快一些。
public class YuvToRgbConverter {

    private Context mContext;
    private RenderScript rs;
    private ScriptIntrinsicYuvToRGB scriptYuvToRgb;
    private int pixelCount = -1;
    private ByteBuffer yuvBuffer;
    private Allocation inputAllocation;
    private Allocation outputAllocation;

    public YuvToRgbConverter(Context context) {
        mContext = context;
        rs = RenderScript.create(context);
        scriptYuvToRgb = ScriptIntrinsicYuvToRGB.create(rs, Element.U8_4(rs));
    }

    public synchronized void yuvToRgb(Image image, Bitmap output) {
        // Ensure that the intermediate output byte buffer is allocated
        if (null == yuvBuffer) {
            pixelCount = image.getCropRect().width() * image.getCropRect().height();
            // Bits per pixel is an average for the whole image, so it's useful to compute the size
            // of the full buffer but should not be used to determine pixel offsets
            int pixe
最低0.47元/天 解锁文章


 3332
3332

 被折叠的 条评论
为什么被折叠?
被折叠的 条评论
为什么被折叠?
 到【灌水乐园】发言


