


欢迎到我的github去forkgithub链接
其实我很早前就很讨厌Android原生系统默认状态栏了。顶部黑乎乎的一条很是难看,如下图所示。一直没找到资源怎样来设置成透明的状态栏,昨天在微博看到了一篇文章,用TranslucnetSystemBar有两种方式来实现透明的状态栏,官方称为TranslucentSystemBar。也就是我们经常说的沉浸式状态栏。我自己对照上面的方法实现了一下,效果很好。
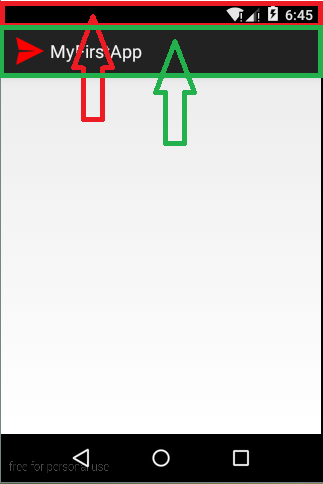
【OriginalSystemBar.png】
使用TranslucentBar后系统顶部的状态栏不再是黑色,而是和界面融为一体,如下图所示
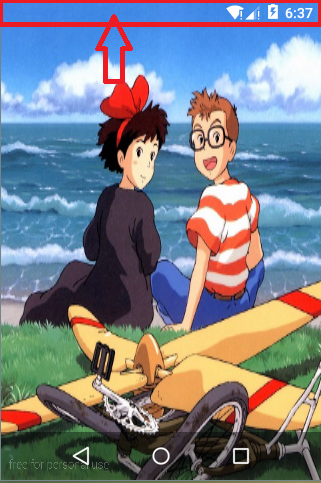
【TranslucentBar_1.png】
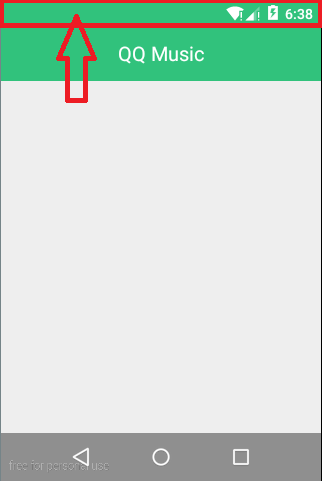
【TranslucentBar_2.png】
如上图所示, TranslucentBar_1 和 TranslucentBar_2 分别以两种不同的方式来实现,我在这里总结一下,包目录结构如下,核心代码已经圈出。
【TranslucentBarTest包目录.png】
简单说来第一种实现方式就是通过设置Activity的背景图片,并使这张背景图片向上延伸到顶部的状态栏,最终的效果如【TranslucentBar_1.png】所示,第二种方式分别设置状态栏的颜色和ActionBar的颜色相同来实现这样的效果,最终的效果如【TranslucentBar_2.png】所示。首先需要设置values/style.xml文件和values-v21/style.xml文件。需要注意不仅要在每个版本的sdk对应的values目录下设置style文件,都要记得设置values目录下的style.xml文件。
values/style.xml代码如下
<resources>

    <!--
        Base application theme, dependent on API level. This theme is replaced
        by AppBaseTheme from res/values-vXX/styles.xml on newer devices.
    -->
    <style name="AppBaseTheme" parent="Theme.AppCompat.Light.DarkActionBar">
        <item name="colorPrimary">@color/colorPrimary</item>
        <item name="colorPrimaryDark">@color/colorPrimaryDark</item>
        <item name="colorAccent">@color/colorAccent</item>
    </style>

    <!-- Application theme. -->
    <style name="ImageTranslucentTheme" parent="AppBaseTheme">
        <!-- All customizations that are NOT specific to a particular API-level can go here. -->
    </style>

    <style name="ColorTranslucentTheme" parent="AppBaseTheme">
        <!-- All customizations that are NOT specific to a particular API-level can go here. -->
    </style>

</resources>
values-v21/style.xml代码如下
    <?xml version="1.0" encoding="utf-8"?>
    <resources>
        <style name="AppBaseTheme" parent="Theme.AppCompat.Light.DarkActionBar">
            <item name="colorPrimary">@color/colorPrimary</item>
            <item name="colorPrimaryDark">@color/colorPrimaryDark</item>
            <item name="colorAccent">@color/colorAccent</item>
        </style>

        <style name="ImageTranslucentTheme" parent="Theme.AppCompat.Light.DarkActionBar">
            <item name="android:windowTranslucentStatus">false</item>
            <item name="android:windowTranslucentNavigation">true</item>
            <!-- Android 5.x开始需要把颜色设置为透明,否则导航栏会呈现系统默认的浅灰色 -->
            <item name="android:statusBarColor">@android:color/transparent</item>
        </style>

        <style name="ColorTranslucentTheme" parent="Theme.AppCompat.Light.DarkActionBar">
            <item name="android:windowTranslucentStatus">false</item>
            <item name="android:windowTranslucentNavigation">true</item>
            <item name="android:statusBarColor">@color/color_31c27c</item>
        </style>
    </resources>
接着需要在清单文件AndroidManifest.xml中对指定的Activity的theme属性进行设置,代码如下
<?xml version="1.0" encoding="utf-8"?>
<manifest xmlns:android="http://schemas.android.com/apk/res/android"
    package="com.example.translucentbartest"
    android:versionCode="1"
    android:versionName="1.0" >

    <uses-sdk
        android:minSdkVersion="21"
        android:targetSdkVersion="21" />

    <application
        android:name=".SystemUiApplication"
        android:allowBackup="true"
        android:icon="@drawable/ic_launcher"
        android:label="@string/app_name"
        android:supportsRtl="true"
        android:theme="@style/AppBaseTheme" >
        <activity
            android:name=".MainActivity"
            android:label="@string/app_name" >
            <intent-filter>
                <action android:name="android.intent.action.MAIN" />

                <category android:name="android.intent.category.LAUNCHER" />
            </intent-filter>
        </activity>
        <activity
            android:name=".ImageTranslucentBarActivity"
            android:label="@string/imageTranslucentBar"
            android:theme="@style/ImageTranslucentTheme" >
        </activity>
        <activity
            android:name=".ColorTranslucentBarActivity"
            android:label="@string/colorTranslucentBar"
            android:theme="@style/ColorTranslucentTheme" >
        </activity>
    </application>

</manifest>
具体是这两部分进行了设置,如下
<activity
    android:name=".ImageTranslucentBarActivity"
    android:label="@string/imageTranslucentBar"
    android:theme="@style/ImageTranslucentTheme" >
</activity>
<activity
    android:name=".ColorTranslucentBarActivity"
    android:label="@string/colorTranslucentBar"
    android:theme="@style/ColorTranslucentTheme" >
</activity>
到此这两种方式实现就完成了,效果就是上面看到的两个图片所示,我在贴一遍

【TranslucentBar_1.png】

【TranslucentBar_2.png】
最后一定要注意,一定不要忘记把ImageTranslucentBarActivity的布局文件activity_image_translucent_bar和ColorTranslucentBarActivity的布局文件activity_color_translucent_bar的android:fitsSystemWindows="true"属性设置为true。
下面我把整个项目的代码贴出来,仅供以后复习时参考。
activity_main.xml
<LinearLayout xmlns:android="http://schemas.android.com/apk/res/android"
    android:layout_width="match_parent"
    android:layout_height="match_parent"
    android:orientation="vertical" >

    <Button
        android:id="@+id/btn_image_translucent"
        android:layout_width="match_parent"
        android:layout_height="wrap_content"
        android:text="@string/imageTranslucentBar"
        android:onClick="translucentBar"
        />

    <Button
        android:id="@+id/btn_color_translucent"
        android:layout_width="match_parent"
        android:layout_height="wrap_content"
        android:text="@string/colorTranslucentBar"
        android:onClick="translucentBar"
        />

</LinearLayout>
activity_image_translucent_bar.xml
<?xml version="1.0" encoding="utf-8"?>
<LinearLayout xmlns:android="http://schemas.android.com/apk/res/android"
    android:layout_width="match_parent"
    android:layout_height="match_parent"
    android:background="@drawable/_background"
    android:fitsSystemWindows="true"
    android:orientation="vertical" >


</LinearLayout>
activity_color_translucent_bar.xml
<?xml version="1.0" encoding="utf-8"?>
<LinearLayout xmlns:android="http://schemas.android.com/apk/res/android"
    android:layout_width="match_parent"
    android:layout_height="match_parent"
    android:fitsSystemWindows="true"
    android:orientation="vertical" >

    <RelativeLayout
        android:layout_width="match_parent"
        android:layout_height="55dp"
        android:background="@color/color_31c27c" >
        <TextView
            android:layout_width="wrap_content"
            android:layout_height="wrap_content"
            android:layout_centerInParent="true"
            android:text="QQ Music"
            android:textColor="@android:color/white"
            android:textSize="20sp"
            />
    </RelativeLayout>

</LinearLayout>
MainActivity.java
package com.example.translucentbartest;

import android.os.Bundle;
import android.support.v7.app.AppCompatActivity;
import android.view.Window;

public class BaseActivity extends AppCompatActivity {

    @Override
    protected void onCreate(Bundle savedInstanceState) {
        super.onCreate(savedInstanceState);
        supportRequestWindowFeature(Window.FEATURE_NO_TITLE);
    }

}
BaseActivity.java
package com.example.translucentbartest;

import android.os.Bundle;
import android.support.v7.app.AppCompatActivity;
import android.view.Window;

public class BaseActivity extends AppCompatActivity {

    @Override
    protected void onCreate(Bundle savedInstanceState) {
        super.onCreate(savedInstanceState);
        supportRequestWindowFeature(Window.FEATURE_NO_TITLE);
    }

}
ImageTranslucentBarActivity.java
package com.example.translucentbartest;

    import android.os.Bundle;

    public class ImageTranslucentBarActivity extends BaseActivity {

        @Override
        protected void onCreate(Bundle savedInstanceState) {
            super.onCreate(savedInstanceState);
            setContentView(R.layout.activity_image_translucent_bar);
        }

    }
ColorTranslucentBarActivity.java
package com.example.translucentbartest;

import android.os.Bundle;

public class ColorTranslucentBarActivity extends BaseActivity {

    @Override
    protected void onCreate(Bundle savedInstanceState) {
        super.onCreate(savedInstanceState);
        setContentView(R.layout.activity_color_translucent_bar);
    }

}
SystemUiApplication.java
package com.example.translucentbartest;

import android.app.Application;

public class SystemUiApplication extends Application {

    @Override
    public void onCreate() {
        super.onCreate();
    }

}
values/colors.xml
<?xml version="1.0" encoding="utf-8"?>
<resources>
    <color name="colorPrimary">#3f51b5</color>
    <color name="colorPrimaryDark">#303f9f</color>
    <color name="colorAccent">#ff4081</color>
    <color name="color_31c27c">#31c27c</color>
</resources>
values/style.xml
<resources>

    <!--
        Base application theme, dependent on API level. This theme is replaced
        by AppBaseTheme from res/values-vXX/styles.xml on newer devices.
    -->
    <style name="AppBaseTheme" parent="Theme.AppCompat.Light.DarkActionBar">
        <item name="colorPrimary">@color/colorPrimary</item>
        <item name="colorPrimaryDark">@color/colorPrimaryDark</item>
        <item name="colorAccent">@color/colorAccent</item>
    </style>

    <!-- Application theme. -->
    <style name="ImageTranslucentTheme" parent="AppBaseTheme">
        <!-- All customizations that are NOT specific to a particular API-level can go here. -->
    </style>

    <style name="ColorTranslucentTheme" parent="AppBaseTheme">
        <!-- All customizations that are NOT specific to a particular API-level can go here. -->
    </style>

</resources>
values-v19/style.xml
<?xml version="1.0" encoding="utf-8"?>
<resources>
    <style name="AppBaseTheme" parent="Theme.AppCompat.Light.DarkActionBar">
        <item name="colorPrimary">@color/colorPrimary</item>
        <item name="colorPrimaryDark">@color/colorPrimaryDark</item>
        <item name="colorAccent">@color/colorAccent</item>
    </style>

    <style name="ImageTranslucentTheme" parent="Theme.AppCompat.Light.DarkActionBar">
        <item name="android:windowTranslucentStatus">true</item>
        <item name="android:windowTranslucentNavigation">true</item>
    </style>

    <style name="ColorTranslucentTheme" parent="Theme.AppCompat.Light.DarkActionBar">
        <item name="android:windowTranslucentStatus">false</item>
        <item name="android:windowTranslucentNavigation">true</item>
        <item name="android:statusBarColor">@color/color_31c27c</item>
    </style>
</resources>
values-v21/style.xml
<?xml version="1.0" encoding="utf-8"?>
<resources>
    <style name="AppBaseTheme" parent="Theme.AppCompat.Light.DarkActionBar">
        <item name="colorPrimary">@color/colorPrimary</item>
        <item name="colorPrimaryDark">@color/colorPrimaryDark</item>
        <item name="colorAccent">@color/colorAccent</item>
    </style>

    <style name="ImageTranslucentTheme" parent="Theme.AppCompat.Light.DarkActionBar">
        <item name="android:windowTranslucentStatus">false</item>
        <item name="android:windowTranslucentNavigation">true</item>
        <!-- Android 5.x开始需要把颜色设置为透明,否则导航栏会呈现系统默认的浅灰色 -->
        <item name="android:statusBarColor">@android:color/transparent</item>
    </style>

    <style name="ColorTranslucentTheme" parent="Theme.AppCompat.Light.DarkActionBar">
        <item name="android:windowTranslucentStatus">false</item>
        <item name="android:windowTranslucentNavigation">true</item>
        <item name="android:statusBarColor">@color/color_31c27c</item>
    </style>
</resources>


 382
382

 被折叠的 条评论
为什么被折叠?
被折叠的 条评论
为什么被折叠?
 到【灌水乐园】发言


