


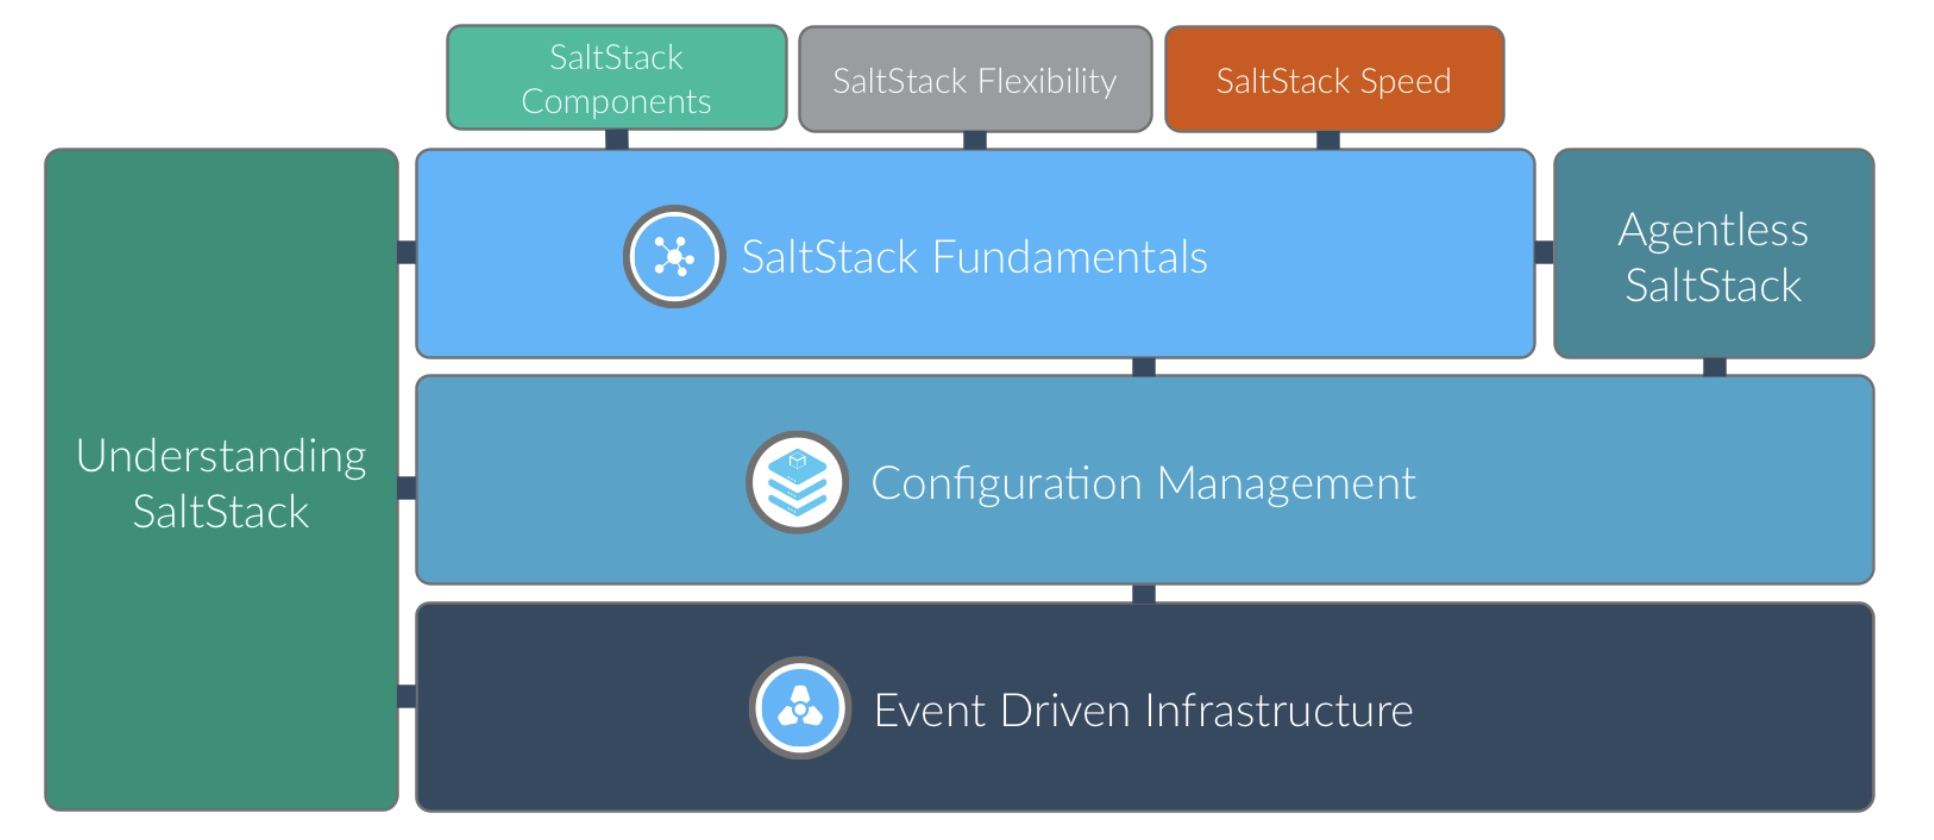
文章目录
1. Saltstack介绍
1.1 自动化运维工具
作为一个运维人员,很大一部分工作是在业务的配置管理和状态维护以及版本发布上,而当业务场景及公司规模上了一定规模后,人为手工的去做这些工作将变得极其困难,此时我们将需要利用一些自动化运维的工具来达到批量管理的目的。
常用的自动化运维工具有:
- puppet
- ansible
- saltstack
此三款属同类工具,皆可用来提高运维管理的效率,但它们又各有优势,目前主流的自动化运维工具是ansible和saltstack。其中ansible无需安装客户端,这是其最大的优势,而saltstack则需要安装客户端工具,类似zabbix的agent。应用场景方面,ansible常用于小型企业,而saltstack则常用于中大型企业,因为ansible无法并行执行而saltstack可以并行。但不论其特点如何,本质上均属同类,所以只需要掌握一种即可轻松胜任运维工作。
可以将SaltStack理解为神笔马良的那只笔!
1.2 saltstack的特点
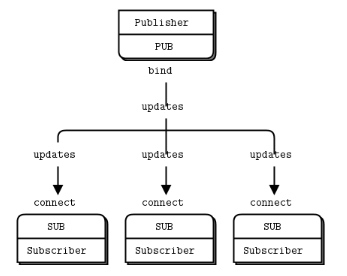
- 基于python开发的C/S架构配置管理工具
- 底层使用ZeroMQ消息队列pub/sub方式通信
- 使用SSL证书签发的方式进行认证管理,传输采用AES加密
1.3 saltstack服务架构
在saltstack架构中服务器端叫Master,客户端叫Minion。
在Master和Minion端都是以守护进程的模式运行,一直监听配置文件里面定义的ret_port(接受minion请求)和publish_port(发布消息)的端口。
当Minion运行时会自动连接到配置文件里面定义的Master地址ret_port端口进行连接认证。
saltstack除了传统的C/S架构外,其实还有一种叫做masterless的架构,其不需要单独安装一台 master 服务器,只需要在每台机器上安装 Minion端,然后采用本机只负责对本机的配置管理机制服务的模式。
2. SaltStack四大功能与四大运行方式
SaltStack有四大功能,分别是:
- 远程执行
- 配置管理/状态管理
- 云管理(cloud)
- 事件驱动
SaltStack可以通过远程执行实现批量管理,并且通过描述状态来达到实现某些功能的目的。
SaltStack四大运行方式:
- local本地运行
- Master/Minion传统方式
- Syndic分布式
- Salt ssh
3. SaltStack安装与最小化配置
两台主机,一台master一台minion
官方yum源地址:https://repo.saltproject.io/#rhel
[root@localhost ~]# systemctl disable --now firewalld
Removed /etc/systemd/system/multi-user.target.wants/firewalld.service.
Removed /etc/systemd/system/dbus-org.fedoraproject.FirewallD1.service.
[root@localhost ~]# setenforce 0
[root@localhost ~]# vi /etc/selinux/config
[root@localhost ~]# hostnamectl set-hostname master
[root@localhost ~]# bash

[root@localhost ~]# systemctl disable --now firewalld
Removed /etc/systemd/system/multi-user.target.wants/firewalld.service.
Removed /etc/systemd/system/dbus-org.fedoraproject.FirewallD1.service.
[root@localhost ~]# setenforce 0
[root@localhost ~]# vi /etc/selinux/config
[root@localhost ~]# hostnamectl set-hostname minion
[root@localhost ~]# bash
//仓库
[root@master ~]# sudo rpm --import https://repo.saltproject.io/py3/redhat/8/x86_64/latest/SALTSTACK-GPG-KEY.pub
[root@master ~]# curl -fsSL https://repo.saltproject.io/py3/redhat/8/x86_64/latest.repo | sudo tee /etc/yum.repos.d/salt.repo
[salt-latest-repo]
name=Salt repo for RHEL/CentOS 8 PY3
baseurl=https://repo.saltproject.io/py3/redhat/8/x86_64/latest
skip_if_unavailable=True
failovermethod=priority
enabled=1
enabled_metadata=1
gpgcheck=1
gpgkey=https://repo.saltproject.io/py3/redhat/8/x86_64/latest/SALTSTACK-GPG-KEY.pub
[root@minion ~]# sudo rpm --import https://repo.saltproject.io/py3/redhat/8/x86_64/latest/SALTSTACK-GPG-KEY.pub
[root@minion ~]# curl -fsSL https://repo.saltproject.io/py3/redhat/8/x86_64/latest.repo | sudo tee /etc/yum.repos.d/salt.repo
[salt-latest-repo]
name=Salt repo for RHEL/CentOS 8 PY3
baseurl=https://repo.saltproject.io/py3/redhat/8/x86_64/latest
skip_if_unavailable=True
failovermethod=priority
enabled=1
enabled_metadata=1
gpgcheck=1
gpgkey=https://repo.saltproject.io/py3/redhat/8/x86_64/latest/SALTSTACK-GPG-KEY.pub
[root@master ~]# dnf -y install salt-master salt-minion
[root@minion ~]# dnf -y install salt-minion
//修改主控制节点minion
[root@master ~]# sed -i '/^#master:/a master: 192.168.47.163' /etc/salt/minion //本机ip
//开机自启
[root@master salt]# systemctl enable --now salt-master
Created symlink /etc/systemd/system/multi-user.target.wants/salt-master.service → /usr/lib/systemd/system/salt-master.service.
[root@master salt]# ss -antl
State    Recv-Q   Send-Q       Local Address:Port       Peer Address:Port   Process
LISTEN   0        128                0.0.0.0:22              0.0.0.0:*
LISTEN   0        128                0.0.0.0:4505      #发布      0.0.0.0:*
LISTEN   0        128                0.0.0.0:4506       #接受请求的     0.0.0.0:*
LISTEN   0        128                   [::]:22                 [::]:*
[root@master salt]# systemctl enable --now salt-minion //启动后无端口号
Created symlink /etc/systemd/system/multi-user.target.wants/salt-minion.service → /usr/lib/systemd/system/salt-minion.service.
[root@minion ~]# sed -i '/^#master:/a master: 192.168.47.164' /etc/salt/minion
3.1 saltstack配置文件
saltstack的配置文件在/etc/salt目录
saltstack配置文件说明:
| 配置文件 | 说明 |
|---|---|
| /etc/salt/master | 主控端(控制端)配置文件 |
| /etc/salt/minion | 受控端配置文件 |
配置文件/etc/salt/master默认的配置就可以很好的工作,故无需修改此配置文件。
配置文件/etc/salt/minion常用配置参数
- master:设置主控端的IP
- id:设置受控端本机的唯一标识符,可以是ip也可以是主机名或自取某有意义的单词
在日常使用过程中,经常需要调整或修改Master配置文件,SaltStack大部分配置都已经指定了默认值,只需根据自己的实际需求进行修改即可。下面的几个参数是比较重要的
- max_open_files:可根据Master将Minion数量进行适当的调整
- timeout:可根据Master和Minion的网络状况适当调整
- auto_accept和autosign_file:在大规模部署Minion时可设置自动签证
- master_tops和所有以external开头的参数:这些参数是SaltStack与外部系统进行整合的相关配置参数
4. SaltStack认证机制
saltstack主控端是依靠openssl证书来与受控端主机认证通讯的,受控端启动后会发送给主控端一个公钥证书文件,在主控端用salt-key命令来管理证书。
salt-minion与salt-master的认证过程:
- minion在第一次启动时,会在/etc/salt/pki/minion/下自动生成一对密钥,然后将公钥发给master
// 第一次查看pki里面的两个目录,发现什么都没有
[root@minion salt]# tree pki
pki
├── master
└── minion

2 directories, 0 files

// 启动受控端的salt-minion并设置开机自启
[root@minion salt]# systemctl enable --now salt-minion
Created symlink /etc/systemd/system/multi-user.target.wants/salt-minion.service → /usr/lib/systemd/system/salt-minion.service.

// 再次查看pki(因为是第一次启动的时候生成这个证书有点慢,需要等一会)
[root@minion salt]# tree pki
pki
├── master
└── minion
    ├── minion.pem    ## 私钥
    └── minion.pub    ## 公钥

2 directories, 2 files
- master收到minion的公钥后,通过salt-key命令接受该公钥。此时master的/etc/salt/pki/master/minions目录将会存放以minion id命名的公钥,然后master就能对minion发送控制指令了
//salt-key常用选项
    -L      //列出所有公钥信息
    -a minion    //接受指定minion等待认证的key
    -A      //接受所有minion等待认证的key
    -r minion    //拒绝指定minion等待认证的key
    -R      //拒绝所有minion等待认证的key
    -f minion   //显示指定key的指纹信息
    -F      //显示所有key的指纹信息
    -d minion   //删除指定minion的key
    -D      //删除所有minion的key
    -y      //自动回答yes

//查看当前证书情况
[root@master ~]# salt-key -L
Accepted Keys:     ## 已接收的key
Denied Keys:       ## 已拒绝的key
Unaccepted Keys:   ## 没有接受(待处理)的key
master
minion1
Rejected Keys:     ## 已拒绝的key

//接受指定minion的新证书
[root@master salt]# salt-key -a minion1
The following keys are going to be accepted:
Unaccepted Keys:
minion1
Proceed? [n/Y] y
Key for minion minion1 accepted.
[root@master salt]# salt-key -L
Accepted Keys:
master
minion1
Denied Keys:
Unaccepted Keys:
Rejected Keys:

[root@minion1 salt]# tree pki/
pki/
├── master
└── minion
    ├── minion_master.pub  ## master的公钥,互相认证
    ├── minion.pem
    └── minion.pub

//接受所有minion的新证书
[root@master ~]# salt-key -yA
The following keys are going to be accepted:
Unaccepted Keys:
master
Key for minion master accepted.
[root@master ~]# salt-key -L
Accepted Keys:
master
minion1
Denied Keys:
Unaccepted Keys:
Rejected Keys:
5. SaltStack远程执行
//测试指定受控端minion主机是否存活
[root@master salt]# salt 'minion1' test.ping ## 对minion这个对象去执行test模块里面的ping函数
minion1:
    True
//测试所有受控端主机是否存活
[root@master salt]# salt 'minion1' test.ping
minion1:
    True
[root@master salt]# salt 'minion*' test.ping
minion1:
    True
[root@master salt]# salt 'mi*' test.ping
minion1:
    True
[root@master salt]# salt '*' test.ping
minion1:
    True
master:
    True
[root@master salt]# salt -S '192.168.47.0/24' test.ping
minion1:
    True
master:
    True
远程执行cmd.run’uptime’ 这是万能模块
[root@master ~]# salt-key -L
Accepted Keys:
master
minion1
minion2
Denied Keys:
Unaccepted Keys:
Rejected Keys:
[root@master ~]# salt '*' cmd.run 'date' #看时间
minion2:
    Tue Nov  2 17:59:24 CST 2021
minion1:
    Tue Nov  2 17:59:25 CST 2021
master:
    Tue Nov  2 17:59:24 CST 2021
//设置时间
[root@master ~]# salt '*' cmd.run 'date -s "2021-11-2 19:00:22"'
minion1:
    Tue Nov  2 19:00:22 CST 2021
minion2:
    Tue Nov  2 19:00:22 CST 2021
master:
    Tue Nov  2 19:00:22 CST 2021
6. salt命令使用
//语法:salt [options] '<target>' <function> [arguments]

//常用的options
    --version       //查看saltstack的版本号
    --versions-report   //查看saltstack以及依赖包的版本号
    -h      //查看帮助信息
    -c CONFIG_DIR   //指定配置文件目录(默认为/etc/salt/)
    -t TIMEOUT      //指定超时时间(默认是5s)
    --async     //异步执行
    -v      //verbose模式,详细显示执行过程
    --username=USERNAME     //指定外部认证用户名
    --password=PASSWORD     //指定外部认证密码
    --log-file=LOG_FILE     //指定日志记录文件

//常用target参数
    -E      //正则匹配
    -L      //列表匹配
    -S      //CIDR匹配网段
    -G      //grains匹配
    --grain-pcre    //grains加正则匹配
    -N      //组匹配
    -R      //范围匹配
    -C      //综合匹配(指定多个匹配)
    -I      //pillar值匹配
//示例
[root@master salt]# salt -E 'min*' test.ping
minion1:
    True
[root@master salt]# salt -L 'minion1,master' test.ping
minion1:
    True
master:
    True
[root@master salt]# salt -S '192.168.47.0/24' test.ping
minion1:
    True
master:
    True


 474
474


 被折叠的 条评论
为什么被折叠?
被折叠的 条评论
为什么被折叠?
 到【灌水乐园】发言


