


三、数据解析
3.1、数据解析概述
3.1.1、聚焦爬虫
爬取页面中指定的页面内容。
3.1.2、数据解析分类
● 正则
● bs4
● xpath (***)
3.1.3、数据解析原理概述
● 解析的局部文本内容都会在标签之间或者标签对应的属性中进行存储。
● 进行指定标签的定位。
● 标签或者标签对应的属性中存储的数据值进行提取(解析)。
3.1.4、聚焦爬虫编码流程:
● 指定url
● 发起请求
● 获取响应数据
● 数据解析
● 持久化存储
3.2、正则数据解析
3.2.1、回顾正则表达式

3.2.2、补充
● text :返回的是 字符串
● content: 返回的是 二进制数据
● json() :返回的是 对象
3.2.3、案例
(爬取一张图片)

import json
import os
import requests
"""爬取图片数据"""
headers = {
"User-Agent": "Mozilla/5.0 (Windows NT 10.0; Win64; x64; rv:86.0) Gecko/20100101 Firefox/86.0"
}
img_src_list = []
for page in range(1, 500):
page = str(page * 30)
url = "https://image.baidu.com/search/acjson?tn=resultjson_com&logid=9400449794205827936&ipn=rj&ct=201326592&is=&fp=result&queryWord=" \
"夏景&cl=2&lm=-1&ie=utf-8&oe=utf-8&adpicid=&st=&z=&ic=&hd=&latest=©right=&word=%E6%98%A5%E6%99%AF&s=&se=" \
"&tab=&width=&height=&face=&istype=&qc=&nc=&fr=&expermode=&force=&pn=" + page + "&rn=30&gsm=78&1614841933309="
# 使用通用爬虫对url对应的一整张页面进行爬取
page_text = requests.get(url=url, headers=headers).json()
fp = open("./ziyuan/pic.json", "w", encoding="utf-8")
json.dump(page_text, fp=fp, ensure_ascii=False)
for obj in page_text["data"]:
src = obj["thumbURL"]
pic = requests.get(url=src, headers=headers).content
# 生成原始图片
img_name = src.split("/")[-1]
with open("./pics2/" + img_name, "wb")as fp:
fp.write(pic)
(爬取所有图片)
import os
import re
import requests
"""爬取图片数据"""
headers = {
"User-Agent": "Mozilla/5.0 (Windows NT 10.0; Win64; x64; rv:86.0) Gecko/20100101 Firefox/86.0"
}
img_src_list = []
for page in range(1, 10):
page = str(page)
url = "https://www.qiushibaike.com/imgrank/page/" + page + "/"
# 使用通用爬虫对url对应的一整张页面进行爬取
page_text = requests.get(url=url, headers=headers).text
with open("./ziyuan/qiutubaike.html", "w", encoding="utf-8")as fp:
fp.write(page_text)
# 使用聚焦爬虫将页面中所有的图片进行解析/提取
"""
<div class="thumb">
<a href="/article/124115143" target="_blank">
<img src="//pic.qiushibaike.com/system/pictures/12411/124115143/medium/L68F0NWALL6LSCJ5.jpg" alt="糗事#124115143" class="illustration" width="100%" height="auto">
</a>
</div>
"""
# 提取<div class="thumb">标签下的 img标签的src
ex = '<div class="thumb">.*?<img src="(.*?)" alt.*?</div>'
# 将另一个列表的信息添加到第一个列表
img_src_list.extend(re.findall(ex, page_text, re.S))
if not os.path.exists("./pics"):
os.mkdir("./pics")
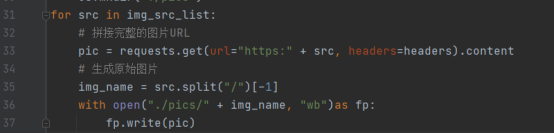
for src in img_src_list:
# 拼接完整的图片URL
pic = requests.get(url="https:" + src, headers=headers).content
# 生成原始图片
img_name = src.split("/")[-1]
with open("./pics/" + img_name, "wb")as fp:
fp.write(pic)

3.3、BS4数据解析
3.3.1、解析原理
① 实例化一个BeautifulSoup对象, 并且将页面源码数据加载到该对象中
② 通过调用Beaut ifulSoup对象中相关的属性或者方法进行标签定位和数据提取。
3.3.2、环境安装
pip install bs4
pip install lxml
同requests
3.3.3、使用步骤
实例化BeautifulSoup对象:
① 导包:from bs4 import BeautifulSoup
② 实例化对象:
● 将本地的html文档中的数据加载到该对象中

● 将互联网上获取的页面源码加载到该对象中

③ 数据解析
3.3.4、用于数据解析的方法——定位标签
soup.tagName(标签名):返回的是文档中第一次出现的tagName(标签名)对应的标签
soup.find():
find(‘tagName’):等同于soup.tagName
find(‘div’,class_/id/attr=’ '):属性定位
soup.find_all(): 返回符合要求的所有标签,返回值是列表
**soup.select():**相当于css中的选择器(类,id…),返回值是列表

注意:层级选择器 > 表示一个层级,空格表示多个层级
3.3.5、用于数据解析的方法——获取标签的文本数据
soup.find().text/string/get_text()
text/get_text() :可以获取某个标签中所有的文本内容
string:只可以获取该标签下面直系的文本内容
3.3.6、案例

import bs4
import lxml
import requests

"""爬取三国演义所有小说的章节和小说的内容"""
url = "http://www.loubiqu.com/0_383/"
headers = {
    "User-Agent": "Mozilla/5.0 (Windows NT 10.0; Win64; x64) AppleWebKit/537.36 (KHTML, like Gecko) Chrome/88.0.4324.190 Safari/537.36"
}
page_text = requests.get(url=url, headers=headers).text.encode('ISO-8859-1')
soup = bs4.BeautifulSoup(page_text, "lxml")
dds = soup.select("#list > dl > dd")
fp = open("./yuanzun/元尊.txt", "w", encoding="utf-8")
for dd in dds:
    title = dd.a.string
    value_hrefs = url + dd.a['href']
    print(title + ":" + value_hrefs)
    value_page = requests.get(url=value_hrefs, headers=headers).text.encode('ISO-8859-1')
    value_soup = bs4.BeautifulSoup(value_page, "lxml")
    div = value_soup.find("div", id="content")
    value_text = div.text
    fp.write(title + ":" + value_text + "\n")

3.4、xpath数据解析
3.4.1、简介
最常用且最便捷高效的一种解析方式。通用性强。
3.4.2、解析原理
① 实例化一个etree的对象,且需要将被解析的页面源码数据加载到该对象中。
● 将本地的html文档中的源码数据加载到etree对象中:
etree.parse(filePath)
● 可以将从互联网上获取的源码数据加载到该对象中
etree.HTML(‘page_text’)
② 调用etree对象中的xpath方法结合着xpath表达式实现标签的定位和内容的捕获。
3.4.3、环境安装
pip install lxml
3.4.4、定位标签
● / : 表示的是从根节点开始定位,表示的是一个层级。

● // : 表示的是多个层级,可以表示从任意位置开始定位

● tag[@attrName=“attrValue”]: 属性定位
//div[@class=‘song’]

● **//div[@class=“song”]/p[1]😗*索引定位,索引从1开始

3.4.5、获取文本(属性)内容
● 获取文本内容
/text():获取的是标签中直系的文本内容
//text():获取标签中非直系的文本内容(所有的文本内容)
● 获取属性内容
/@attrName:获取对应属性值

3.4.6、案例
爬取4k图片

import requests
from lxml import etree

"""爬取4k图片"""
headers = {
    "User-Agent": "Mozilla/5.0 (Windows NT 10.0; Win64; x64; rv:86.0) Gecko/20100101 Firefox/86.0"
}
for page in range(1, 100):
    page = str(page)
    url = "https://pic.netbian.com/4kfengjing/index_" + page + ".html"
    page_text = requests.get(url=url, headers=headers).text
    tree = etree.HTML(page_text)
    lis = tree.xpath('//div[@class="slist"]/ul/li')

    for li in lis:
        href = "https://pic.netbian.com" + li.xpath('./a/@href')[0]
        response = requests.get(url=href, headers=headers)
        # 手动设定编码格式
        # response.encoding = "gbk"
        pic_text = response.text
        pic_tree = etree.HTML(pic_text)
        title = pic_tree.xpath("//div[@class='photo-pic']/a/img/@alt")[0] + ".jpg"
        # 通用的处理中文乱码的解决方法
        title = title.encode("iso-8859-1").decode("gbk")
        pic_href = " https://pic.netbian.com" + pic_tree.xpath("//div[@class='photo-pic']/a/img/@src")[0]
        pic = requests.get(url=pic_href, headers=headers).content
        with open("./pic4k/" + title, "wb")as fp:
            fp.write(pic)
        print(title + "下载完成")
爬取城市名称信息:

修改:

修改:

import requests
from lxml import etree

"""爬取所有城市名称"""
headers = {
    "User-Agent": "Mozilla/5.0 (Windows NT 10.0; Win64; x64; rv:86.0) Gecko/20100101 Firefox/86.0"
}
url = "https://www.aqistudy.cn/historydata/"
page_text = requests.get(url=url, headers=headers).text
tree = etree.HTML(page_text)
# r_as = tree.xpath("//div[@class='bottom']/ul/li/a")
# q_lis = tree.xpath("//div[@class='all']/div[@class='bottom']/ul/div[2]/li")
# nums = tree.xpath("//div[@class='all']/div[@class='bottom']/ul/div[1]/b/text()")
# for a in r_as:
#     name = a.xpath("./text()")[0]
#     print(name, end="\t")
# print()
# for num in nums:
#     print(num)
#     for li in q_lis:
#         name = li.xpath("./a/text()")[0]
#         print(name, end=" ")
#     print()
a_list = tree.xpath("//div[@class='bottom']/ul/li/a "
                    "|"
                    "//div[@class='all']/div[@class='bottom']/ul/div[2]/li/a")
for a in a_list:
    print(a.xpath("./text()")[0])
print(len(a_list))


 1031
1031


 被折叠的 条评论
为什么被折叠?
被折叠的 条评论
为什么被折叠?
 到【灌水乐园】发言


