


什么是New-SelfSignedCertificate
The New-SelfSignedCertificate cmdlet creates a self-signed certificate for testing purposes.
其实New-SelfSignedCertificate就是powershell自带的命令,用来创建一个自签证的证书,作为测试用途。有时候局域网做一些https等等之类的需要安全证书,就可以生成了。
输入类型是可以传送到 cmdlet 的对象的类型—— Microsoft.CertificateServices.Commands.Certificate : The Certificate object can either be provided as a Path object to a certificate or an X509Certificate2 object.
输出类型是 cmdlet 发出的对象的类型——
System.Security.Cryptography.X509Certificates.X509Certificate2,An X509Certificate2 object for the certificate that has been created.
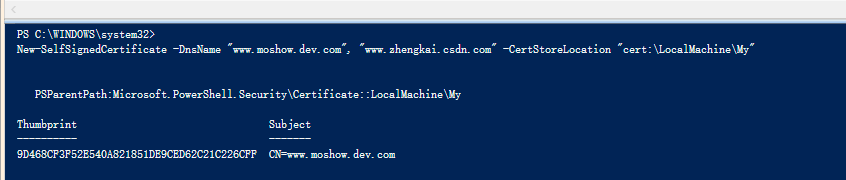
运行命令
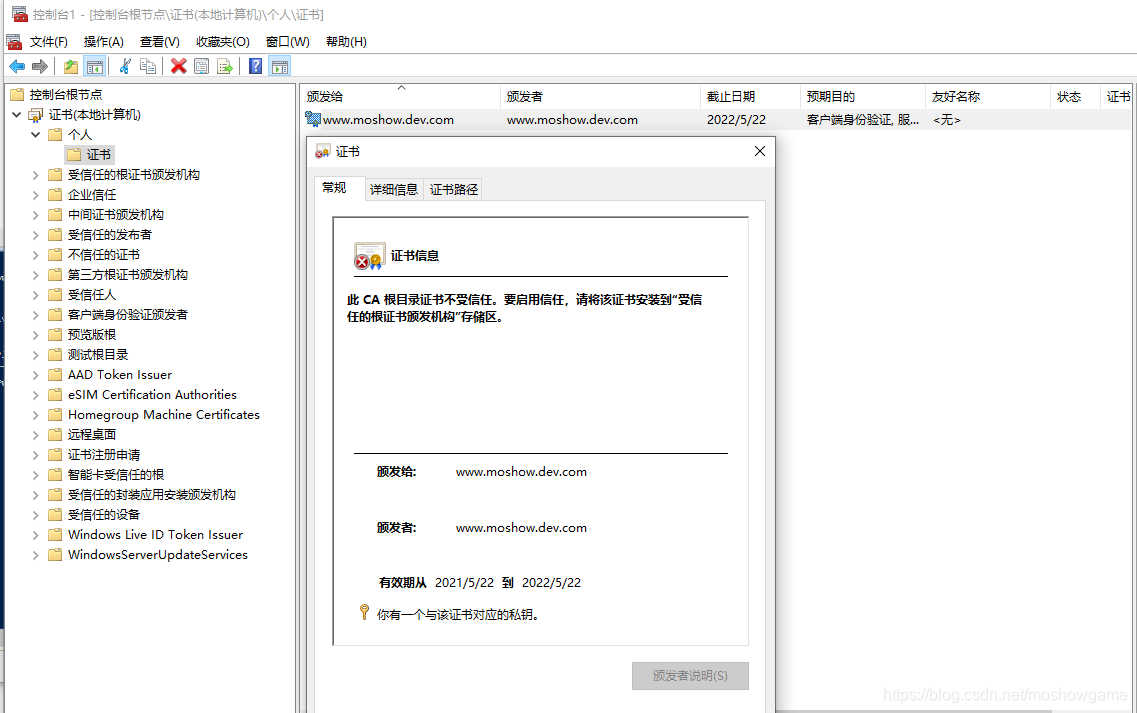
New-SelfSignedCertificate -DnsName "www.moshow.dev.com", "www.zhengkai.csdn.com" -CertStoreLocation "cert:\LocalMachine\My"
cert:\LocalMachine\My其实就对应了MMC里面的证书-个人
更多参数请看官方文档
可用参数还是相当多,但是每个参数官方都有对应的解释。
New-SelfSignedCertificate [-AlternateSignatureAlgorithm] [-CertStoreLocation <String> ] [-CloneCert <Certificate> ] [-Container <System.String> ] [-CurveExport <Microsoft.CertificateServices.Commands.CurveParametersExportType> {None | CurveParameters | CurveName} ] [-DnsName <String[]> ] [-ExistingKey] [-Extension <System.Security.Cryptography.X509Certificates.X509Extension[]> ] [-FriendlyName <System.String> ] [-HardwareKeyUsage <Microsoft.CertificateServices.Commands.HardwareKeyUsage[]> ] [-HashAlgorithm <System.String> ] [-KeyAlgorithm <System.String> ] [-KeyDescription <System.String> ] [-KeyExportPolicy <Microsoft.CertificateServices.Commands.KeyExportPolicy[]> ] [-KeyFriendlyName <System.String> ] [-KeyLength <System.Int32> ] [-KeyLocation <System.String> ] [-KeyProtection <Microsoft.CertificateServices.Commands.KeyProtection[]> ] [-KeySpec <Microsoft.CertificateServices.Commands.KeySpec> {None | KeyExchange | Signature} ] [-KeyUsage <Microsoft.CertificateServices.Commands.KeyUsage[]> ] [-KeyUsageProperty <Microsoft.CertificateServices.Commands.KeyUsageProperty[]> ] [-NotAfter <System.DateTime> ] [-NotBefore <System.DateTime> ] [-Pin <System.Security.SecureString> ] [-Provider <System.String> ] [-Reader <System.String> ] [-SecurityDescriptor <System.Security.AccessControl.FileSecurity> ] [-SerialNumber <System.String> ] [-Signer <Microsoft.CertificateServices.Commands.Certificate> ] [-SignerPin <System.Security.SecureString> ] [-SignerReader <System.String> ] [-SmimeCapabilities] [-Subject <System.String> ] [-SuppressOid <System.String[]> ] [-TestRoot] [-TextExtension <System.String[]> ] [-Type <Microsoft.CertificateServices.Commands.CertificateType> {Custom | CodeSigningCert | DocumentEncryptionCert | SSLServerAuthentication | DocumentEncryptionCertLegacyCsp} ] [-Confirm] [-WhatIf] [ <CommonParameters>]
官方文档地址为:
https://docs.microsoft.com/zh-cn/previous-versions/windows/powershell-scripting/hh848633(v=wps.640)
看不懂也没关系,直接看EXAMPLE就简单明了。
通常需要设置的参数:
- DnsName
- Subject
MMC查看已生成证书
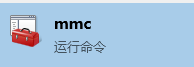
不知道MMC是什么?直接打开windows菜单或者win+r输入mmc。
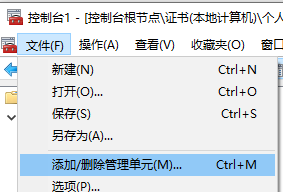
添加管理单元,如果英文版好像是add Snap-In之类。
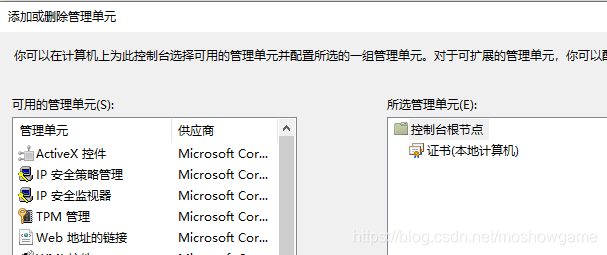
把证书添加过去
点击个人 - 证书 就可以看到刚才生成的证书了。有什么不对或者需要添加,重新生成即可。
TroubleShooting
如果遇到New-SelfSignedCertificate : CertEnroll::CX509Enrollment::_CreateRequest: 拒绝访问。 0x80090010 (-2146893808 NTE_PERM) 那么大概率是因为没有管理员权限,一定要右键以管理员权限运行Powershell ISE


 1308
1308

 被折叠的 条评论
为什么被折叠?
被折叠的 条评论
为什么被折叠?
 到【灌水乐园】发言


