


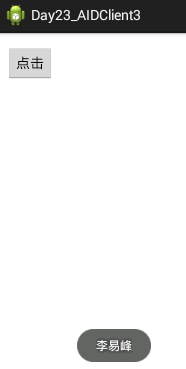
如图:
服务端APP:清单文件里注册服务
1.创建接口,写一个抽象方法
2.去工作环境中找到项目把接口的后缀名改为.aidl
3.创建继承service的类,写一个返回字符串的方法
4.写一个内部类去继承接口名.Stub,里面实现的抽象方法返回的是步骤3写的方法
5.onBind返回的是步骤4创建的内部类
接口文件,service类文件在在同一包内即可
逻辑代码文件和布局文件不需改动
接口文件:
<span style="font-size:18px;">package com.example.day23_aidservice3;

interface MyInterface {
	String aaa();
}
</span>
service类文件:
<span style="font-size:18px;">package com.example.day23_aidservice3;

import android.app.Service;
import android.content.Intent;
import android.os.IBinder;

public class MyService extends Service{

	@Override
	public IBinder onBind(Intent intent) {
		return new MyBinder();
	}
	class MyBinder extends MyInterface.Stub
	{

		@Override
		public String aaa(){
			return name();
		}

	}
	public String name()
	{
		return "李易峰";
	}
}
</span>
客户端APP:
1.创建一个和服务端接口所在包包名一样的包,在该包下创建接口(跟服务端的一样)
2.去工作环境中找到项目把接口后缀名改为.aidl
3.逻辑代码文件中定义一个接口类型变量
4.创建一个类实现ServiceConnection,里面onServiceConnected方法中写: myinterface=MyInterface.Stub.asInterface(service);
5.onCreate方法中创建Intent,绑定服务
6.按钮点击事件中直接调用接口方法
接口文件和服务端的一样,这里就不写了
逻辑代码文件:
<span style="font-size:18px;">package com.example.day23_aidclient3;

import com.example.day23_aidservice3.MyInterface;

import android.app.Activity;
import android.content.ComponentName;
import android.content.Context;
import android.content.Intent;
import android.content.ServiceConnection;
import android.os.Bundle;
import android.os.IBinder;
import android.os.RemoteException;
import android.view.View;
import android.widget.Toast;

public class MainActivity extends Activity {

	MyInterface myinterface;//该文件所在包名需与服务端对应的所在包名一样
    @Override
    protected void onCreate(Bundle savedInstanceState) {
        super.onCreate(savedInstanceState);
        setContentView(R.layout.activity_main);
        Intent intent=new Intent("mm.ss");
        bindService(intent, new MyConn(), Context.BIND_AUTO_CREATE);
    }

    public void click(View v)
    {
    	try
    	{
			String name=myinterface.aaa();
			Toast.makeText(getApplicationContext(), name, 0).show();
		}
    	catch (RemoteException e)
    	{
			e.printStackTrace();
		}

    }
    class MyConn implements ServiceConnection
    {

		@Override
		public void onServiceConnected(ComponentName name, IBinder service) {
			//通过aidl获取接口对象
			myinterface=MyInterface.Stub.asInterface(service);

		}

		@Override
		public void onServiceDisconnected(ComponentName name) {

		}

    }
}
</span>
布局文件:
<span style="font-size:18px;"><RelativeLayout xmlns:android="http://schemas.android.com/apk/res/android"
    xmlns:tools="http://schemas.android.com/tools"
    android:layout_width="match_parent"
    android:layout_height="match_parent"
    android:paddingBottom="@dimen/activity_vertical_margin"
    android:paddingLeft="@dimen/activity_horizontal_margin"
    android:paddingRight="@dimen/activity_horizontal_margin"
    android:paddingTop="@dimen/activity_vertical_margin"
    tools:context=".MainActivity" >

    <Button
        android:id="@+id/bt"
        android:layout_width="wrap_content"
        android:layout_height="wrap_content"
        android:text="调用服务里方法返回的数据"
        android:onClick="click"/>

</RelativeLayout>
</span>


 999
999

 被折叠的 条评论
为什么被折叠?
被折叠的 条评论
为什么被折叠?
 到【灌水乐园】发言


