


 本文介绍如何使用 Spring Cloud Config 实现配置中心,包括 ConfigServer 的搭建与配置、多种存储方式的选择,以及 ConfigClient 的配置与动态刷新机制。
最简单的配置中心,就是启动一个服务作为服务方,之后各个需要获取配置的服务作为客户端来这个服务方获取配置。
Spring Cloud Config,可以用 git ,还可以用数据库、svn、本地文件等作为存储。
1. Config Server
引入 config-server 和 starter-web
<dependency>
    <groupId>org.springframework.boot</groupId>
    <artifactId>spring-boot-starter-web</artifactId>
</dependency>

<!-- spring cloud config 服务端包 -->
<dependency>
    <groupId>org.springframework.cloud</groupId>
    <artifactId>spring-cloud-config-server</artifactId>
</dependency>
1.1 Git方式存储
spring:
  application:
    name: config-single-server  # 应用名称
  cloud:
     config:
        server:
          git:
            uri: https://github.com/huzhicheng/config-only-a-demo #配置文件所在仓库
            username: github 登录账号
            password: github 登录密码
            default-label: master #github默认配置分支
            search-paths: config  #配置文件所在根目录
1.2 本地类路径方式
通过在search-locations中指定classpath下的路径。需要设置spring.profiles.active=native
spring:
application:
name: config-server
profiles:
#native表示本地方式
active: native
cloud:
config:
server:
native:
# 配置文件存放路径
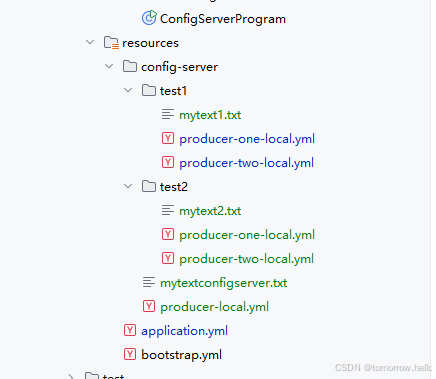
search-locations: file:/MyTemp/configserver,classpath:/config-server/{label}1.3本地文件系统方式
通过在search-locations中指定file协议的本地路径.。需要设置spring.profiles.active=native
spring:
  application:
    name: config-server
  profiles:
    #native表示本地方式
    active: native
  cloud:
    config:
      server:
        native:
          # 配置文件存放路径
          search-locations: file:/MyTemp/configserver,classpath:/config-server
1.4 启动类上增加 @EnableConfigServer
@SpringBootApplication
@EnableConfigServer
public class ConfigServerProgram {

    public static void main(String[] args) {
        Commons.setProperty(args);
        SpringApplication.run(ConfigServerProgram.class, args);
    }
}
2.Client 访问Config Server
配置完成之后启动服务,我们可以通过这几种规则访问config servver获取配置。
//使用EnvironmentController返回Environment
/{name}/{profiles:[^-]+}
/{name}/{profiles}/{label:.*}


//使用EnvironmentController返回ResponseEntity<String>
/{name}-{profiles}.properties
/{label}/{name}-{profiles}.properties
{name}-{profiles}.json
/{label}/{name}-{profiles}.json
/{name}-{profiles}.yml
/{name}-{profiles}.yaml
/{label}/{name}-{profiles}.yml
/{label}/{name}-{profiles}.yaml


//使用ResourceController
//client设置Accept=application/octet-stream返回byte[]
//client设置默认返回字符串
/{name}/{profile}/{label}/**
/{name}/{profile}/{path:.*}               --需要设置参数useDefaultLabel
{name}
就是应用名称,对应到配置文件上来,就是配置文件的名称部分,例如我上面创建的配置文件。
{profile}
配置文件的版本,我们的项目有开发版本、测试环境版本、生产环境版本,对应到配置文件上来就是以 application-{profile}.yml 加以区分,例如application-dev.yml、application-sit.yml、application-prod.yml。
{label}
- 对于git方式存储, 表示 git 分支,默认是 master 分支,如果项目是以分支做区分也是可以的,那就可以通过不同的 label 来控制访问不同的配置文件了。
- 对于本地文件方式,{label} 表示文件夹
EnvironmentController接口
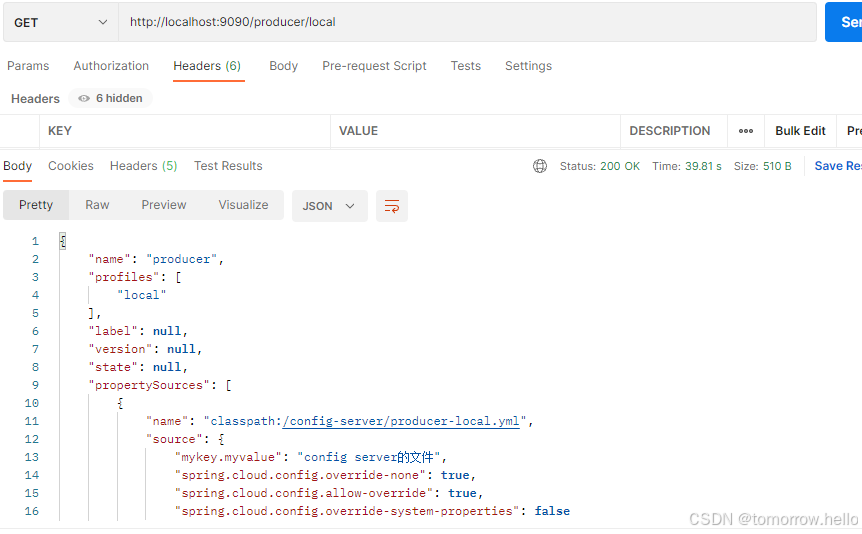
a. {name}+{profiles}
http://localhost:9090/producer/local
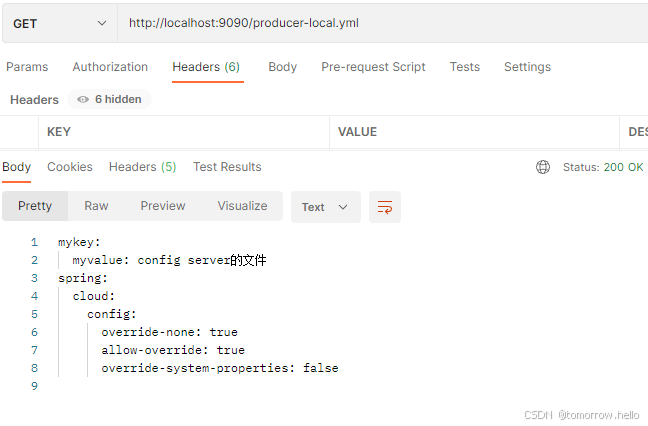
http://localhost:9090/producer-local.yml
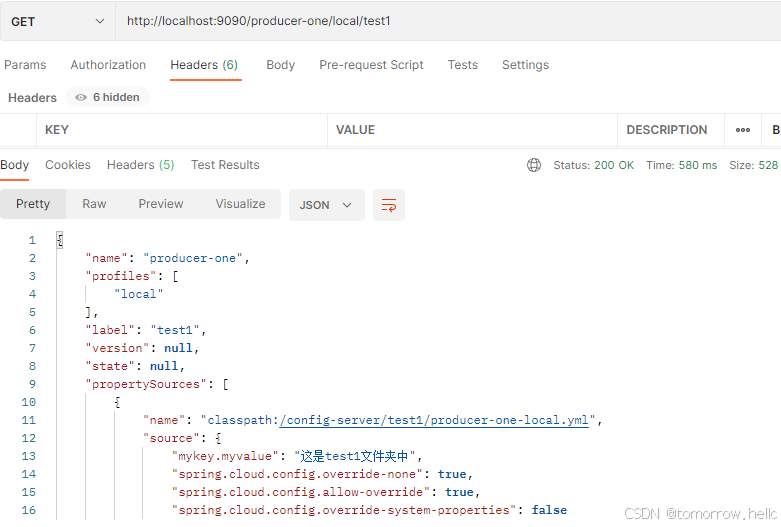
b. {name}+{profiles}+{label}
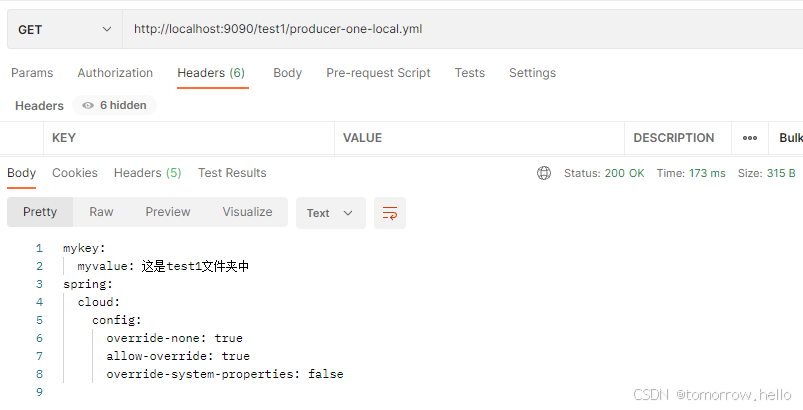
http://localhost:9090/producer-one/local/test1
http://localhost:9090/test1/producer-one-local.yml
ResourceController接口
a. {name}+{profiles}
http://localhost:9090/defaultname/defaultprofile/producer-local.yml?useDefaultLabel=11

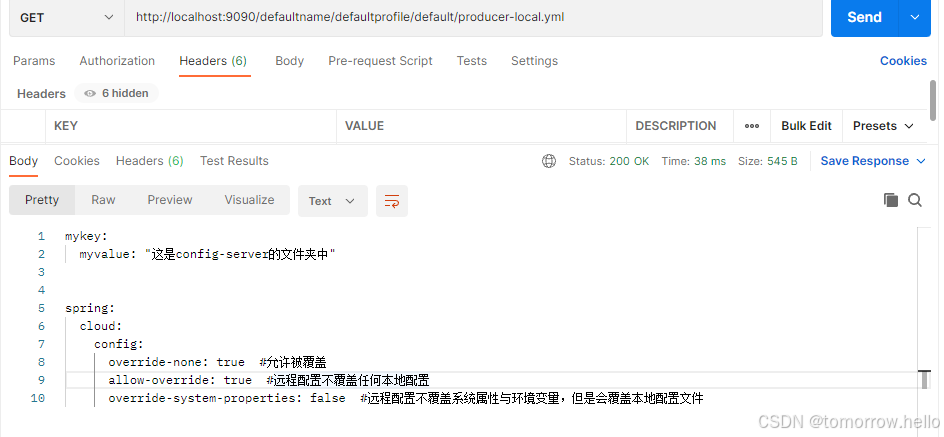
b. {name}+{profiles}+{label}
http://localhost:9090/defaultname/defaultprofile/default/producer-local.yml
http://localhost:9090/defaultname/defaultprofile/test1/mytext1.txt

对于本地文件方式,查找文件会对config中设置的search-locations的文件路径,再次增加label的路径。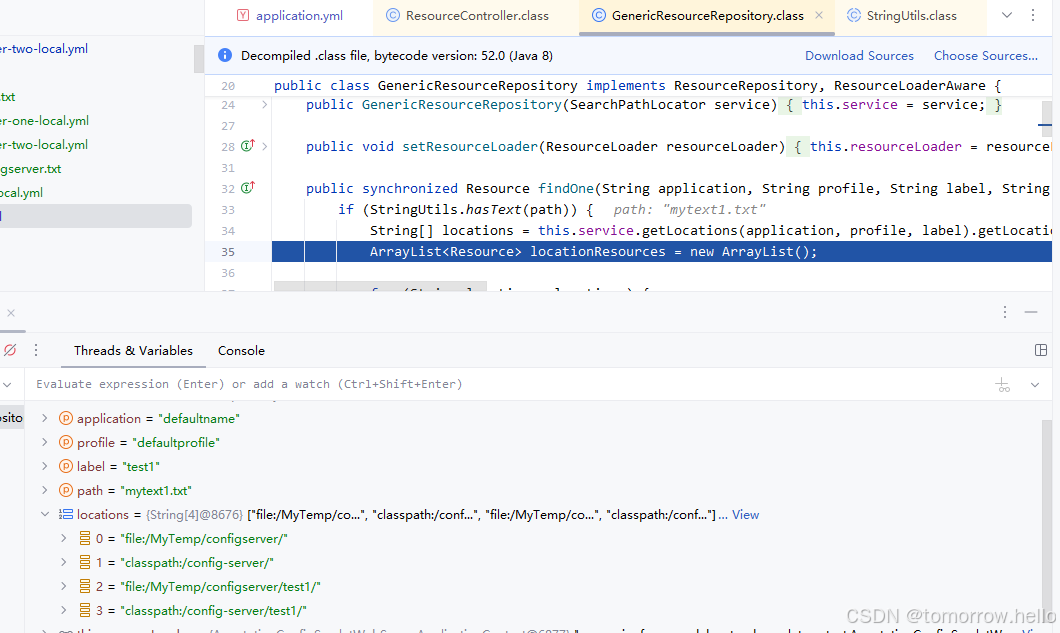
源码分析
#native方式
1种.org.springframework.cloud.config.server.environment.EnvironmentController -> org.springframework.cloud.config.server.environment.NativeEnvironmentRepository

2种.org.springframework.cloud.config.server.resource.ResourceController
-> org.springframework.cloud.config.server.resource.GenericResourceRepository ->  org.springframework.cloud.config.server.environment.NativeEnvironmentRepository


#git方式
1种.org.springframework.cloud.config.server.environment.EnvironmentController-> org.springframework.cloud.config.server.environment.MultipleJGitEnvironmentRepository

2种.org.springframework.cloud.config.server.resource.ResourceController
->  org.springframework.cloud.config.server.resource.GenericResourceRepository -> org.springframework.cloud.config.server.environment.MultipleJGitEnvironmentRepository
3. Config Client
引用相关的 maven 包
<dependencies>
<dependency>
            <groupId>org.springframework.boot</groupId>
            <artifactId>spring-boot-starter-web</artifactId>
            <version>2.6.3</version>
        </dependency>
<!-- spring cloud config 客户端包 -->
        <dependency>
            <groupId>org.springframework.cloud</groupId>
            <artifactId>spring-cloud-starter-config</artifactId>
        </dependency>
<!-- spring cloud 3.1版本需要手动引入bootstrap,不然加载不到bootstrap.yml文件 -->
        <dependency>
            <groupId>org.springframework.cloud</groupId>
            <artifactId>spring-cloud-starter-bootstrap</artifactId>
        </dependency>
    </dependencies>

    <dependencyManagement>
        <dependencies>
            <dependency>
                <groupId>org.springframework.cloud</groupId>
                <artifactId>spring-cloud-dependencies</artifactId>
                <version>2021.0.1</version>
                <type>pom</type>
                <scope>import</scope>
            </dependency>
        </dependencies>
    </dependencyManagement>
3.1 配置文件
bootstrap.yml
spring:
  profiles:
    active: dev

---
spring:
  application:
    name: config-client
  cloud:
    config:
      uri: http://localhost:9090
      name: producer-one,producerpublic
      profile: local
      fail-fast: true
      label: env1
3.2 失败快速响应
不作任何额外配置的情况下,失败响应有点迟钝,举个简单的例子,关掉config-server,我们直接启动config-client,此时启动会报错,但是报错时间较晚,报错的时候系统已经打印了许多启动日志了,如果我们希望在启动失败时能够快速响应,方式很简单,config-client中添加如下配置即可:
spring.cloud.config.fail-fast=true3.3 本地配置优先Config Server配置
如果要优先使用本地配置,需要在配置文件(Config Server中Client程序的配置文件而不是Cofig Server的程序的application yml或者bootstrap.yml)中加入一些参数。
spring.cloud.config.allow-override=true(允许被覆盖)
spring.cloud.config.override-none=true (远程配置不覆盖任何本地配置)
spring.cloud.config.override-system-properties=false (远程配置不覆盖系统属性与环境变量,但是会覆盖本地配置文件)
3.4 重试机制
如果由于网络抖动等原因导致config-client在启动时候访问config-server没有访问成功从而报错,这显然是不划算的,遇到这种情况我们希望config-client最好能重试几次,重试机制在这里也是受支持的,添加重试机制的方式很简单,引入如下两个依赖,不用做任何额外配置(当然要确保失败快速响应已开启):
<dependency>
    <groupId>org.springframework.retry</groupId>
    <artifactId>spring-retry</artifactId>
</dependency>
<dependency>
    <groupId>org.springframework.boot</groupId>
    <artifactId>spring-boot-starter-aop</artifactId>
</dependency>
重试机制也可以配置:
# 配置重试次数,默认为6
spring.cloud.config.retry.max-attempts=6
# 间隔乘数,默认1.1
spring.cloud.config.retry.multiplier=1.1
# 初始重试间隔时间,默认1000ms
spring.cloud.config.retry.initial-interval=1000
# 最大间隔时间,默认2000ms
spring.cloud.config.retry.max-interval=2000
3.5 动态刷新配置
有的时候,我动态的更新了Config Server的配置文件,那么我如何让我的config-client能够及时感知到呢?方式很简单,首先在config-client中添加如下依赖:
<dependency>
    <groupId>org.springframework.boot</groupId>
    <artifactId>spring-boot-starter-actuator</artifactId>
</dependency>
1.对actuator进行配置
management:
  endpoint:
    shutdown:
      enabled: false
  endpoints:
    web:
      exposure:
        include: "*"
2. 在需要读取配置的类上增加 @RefreshScope 注解
@SpringBootApplication
@Slf4j
@RefreshScope
public class ConfgClientProgram {

    public static void main(String[] args) {
        SpringApplication.run(ConfgClientProgram.class, args);
    }

    @Value("${mykey.myvalue}")
    String mykey_myvalue;

    @PostConstruct
    public void init() {
        log.info(mykey_myvalue);
    }
}
3. 调用Config Client,/actuator/refresh使用接口刷新
/actuator/refresh 接口就是用来触发加载新配置,接口会返回如下配置。
[
    "config.client.version",
    "data.env"
]
参考:


 167万+
167万+

 被折叠的 条评论
为什么被折叠?
被折叠的 条评论
为什么被折叠?
 到【灌水乐园】发言


