


1 redis在Linux系统的配置
1.1 新建文件夹
命令:
mkdir src
1.2 拖动软件到创建的项目中(使用Xshell 5)
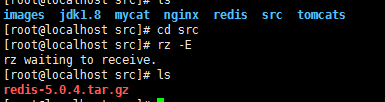
1.3 解压redis-5.0.4.tar.gz文件
命令:
tar -zxvf redis-5.0.4.tar.gz

1.4 把解压的文件移动redis文件夹里面
命令:
mv redis-5.0.4 redis

1.5 删除多余的压缩文件
命令:
rm -rf redis-5.0.4.tar.gz

1.6 安装redis文件
命令1:
make

命令2:
make install

1.7 修改配置文件
1.7.1 知识补充
1).补充知识
如果修改配置文件时,出现了.swp文件,则表示上一次改文件没有正确的保存,生成了保护性文件.所以一般删除改文件即可
方式1: 如果提示按D删除,则按D
方式2: 如果没有按D提示,则 采用 rm -rf .xxxxx.swp

2 单台redis的配置
2.1 Linux中redis的配置
2.1.1 编辑redis.conf
1).命令 vim redis.conf
(命令:":set nu "显示每行的序号)
2).修改ip绑定

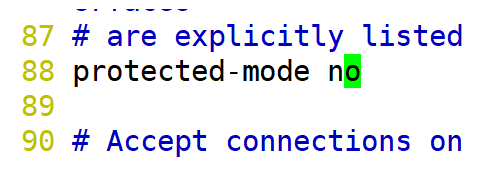
3).修改保护模式
4).开启后台启动

5)保存修改后文档
1)点击Esc
2):wq
2.1.2 编辑redis.conf
1)启动redis服务 redis-server redis.conf

2)进入redis客户端 redis-cli -p 6379

3)关闭redis客户端 redis-cli -p 6379

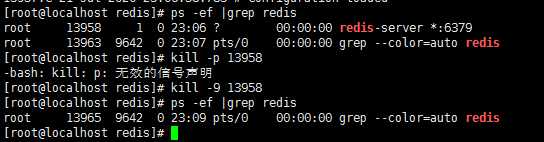
4)查看redis进程状态 ps -ef |grep redis

5)关闭redis的进程 kill -9 6379
6)redis相关的命令汇总
set a a 设置值
get a 获取值
keys * 获取所有的缓存值
sava 保存文件,导致前天不能执行
basave 后台保存
flushall 清除缓存中的所有数据
info replication 查看主从关系
2.2 java类中的Redis
2.2.1 引入redis的jar包
<!--spring整合redis -->
		<dependency>
			<groupId>redis.clients</groupId>
			<artifactId>jedis</artifactId>
		</dependency>
		<dependency>
			<groupId>org.springframework.data</groupId>
			<artifactId>spring-data-redis</artifactId>
		</dependency>
2.2.2 编辑测试类进行测试
package com.jt.test;
import org.junit.jupiter.api.Test;
import redis.clients.jedis.Jedis;

public class TestRedisPs {

	@Test
	public void redisTest() {
		Jedis jedis=new Jedis("192.168.126.129", 6379);
		jedis.set("a", "入门测试案例");
		String redis=jedis.get("a");
		System.out.println(redis);
	}

	//测试redis是否存在
	@Test
	public void redisexit() {
		Jedis jedis=new Jedis("192.168.126.129", 6379);
		if(jedis.exists("a")) {
			System.out.println("redis已经存在");
		}else {
			jedis.set("a", "这是设置新的redis新值");
			System.out.println(jedis.get("a"));
		}
	}
}
2.3 Spring整合redis
2.3.1 整合思路
说明:将jedis对象交给spring容器进行管理.之后哪里需要直接注入即可.
步骤:
1.编辑redis.properties文件,指定redis节点的ip:port
2.由于redis比较重要,很多业务系统都需要调用,所以将redis整合写入common
3.通过配置类(配置文件)形式整合redis.
2.3.2 编辑redis.properties
1)redis文件配置的位置
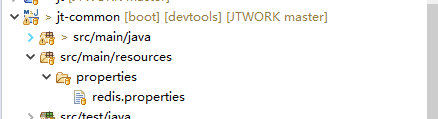
2)redis.properties编辑的内容
redis.host=192.168.126.129
redis.port=6379
2.3.3 编辑redis配置类
3.3.3.1 创建redis配置类文件
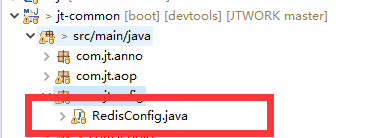
3.3.3.2 创建RedisConfig配置类(单台测试)
package com.jt.config;
import java.util.HashSet;
import java.util.Set;
import org.springframework.beans.factory.annotation.Value;
import org.springframework.context.annotation.Bean;
import org.springframework.context.annotation.Configuration;
import org.springframework.context.annotation.PropertySource;

import redis.clients.jedis.HostAndPort;
import redis.clients.jedis.JedisCluster;

@Configuration 	//我是一个配置类    一般都会与@Bean联用
@PropertySource("classpath:/properties/redis.properties")
public class RedisConfig {
	//单台测试
	@Value("${redis.host}")
	private String host;
	@Value("${redis.port}")
	private Integer port;

	//将返回值的结果交给spring容器进行管理,如果以后想要使用该对象则可以直接注入.
	@Bean
	public Jedis jedis() {

		return new Jedis(host, port);
	}
}
3.3.3.3 通过切面实现数据的缓存
1 单台测试
1.1 自定义注解
package com.jt.anno;

import java.lang.annotation.ElementType;
import java.lang.annotation.Retention;
import java.lang.annotation.RetentionPolicy;
import java.lang.annotation.Target;

@Target(ElementType.METHOD)	//标识注解 对谁生效
@Retention(RetentionPolicy.RUNTIME) //注解使用的有效期
public @interface CacheFind {

	public String key();			  //标识存入redis的key的前缀
	public int seconds() default 0;  //标识保存的时间 单位是秒
}
1.2.自定义切面
package com.jt.aop;

import org.aspectj.lang.JoinPoint;
import org.aspectj.lang.ProceedingJoinPoint;
import org.aspectj.lang.annotation.Around;
import org.aspectj.lang.annotation.Aspect;
import org.aspectj.lang.annotation.Before;
import org.aspectj.lang.annotation.Pointcut;
import org.aspectj.lang.reflect.MethodSignature;
import org.springframework.beans.factory.annotation.Autowired;
import org.springframework.stereotype.Component;

import com.jt.anno.CacheFind;
import com.jt.util.ObjectMapperUtil;

import redis.clients.jedis.Jedis;
import redis.clients.jedis.JedisCluster;
import redis.clients.jedis.ShardedJedis;

//1.将对象交给容器管理
@Component
//2.定义aop切面
@Aspect
public class CacheAOP {

	@Autowired(required = false)
	private Jedis jedis;				//单台redis注入
	/**
	 * 实现思路:  拦截被@CacheFind标识的方法 之后利用aop进行缓存的控制
	 * 通知方法:  环绕通知
	 * 实现步骤:
	 * 		1.准备查询redis的key   ITEM_CAT_LIST::第一个参数
	 *      2.@annotation(cacheFind) 动态获取注解的语法.
	 *        拦截指定注解类型的注解并且将注解对象当做参数进行传递.
	 */

	@SuppressWarnings("unchecked") //压制警告
	@Around("@annotation(cacheFind)")
	//@Around("@annotation(com.jt.anno.CacheFind)") //不需要获取注解中的内容
	public Object around(ProceedingJoinPoint joinPoint,CacheFind cacheFind) {

		//1.获取用户注解中的key     ITEM_CAT_LIST::0
		String key = cacheFind.key();
		//2.动态获取第一个参数当做key
		//joinPoint.getArgs() 获取的是目标方法中的参数信息
		String firstArg = joinPoint.getArgs()[0].toString();
		key += "::"+firstArg;

		Object result = null;
		//3.根据key查询redis.
		if(jedis.exists(key)) {
			//根据redis获取数据信息
			String json = jedis.get(key);
			//如何获取返回值类型
			MethodSignature methodSignature = (MethodSignature) joinPoint.getSignature();
			result = ObjectMapperUtil.toObject(json, methodSignature.getReturnType());
			System.out.println("aop查询redis缓存");
		}else {
			//如果key不存在,则证明是第一次查询.  应该查询数据库
			try {
				result = joinPoint.proceed(); //目标方法返回值
				System.out.println("AOP查询数据库获取返回值结果");
				//将数据保存到redis中
				String json = ObjectMapperUtil.toJSON(result);
				int seconds = cacheFind.seconds();
				if(seconds>0)
					jedis.setex(key, seconds, json);
				else
					jedis.set(key, json);

			} catch (Throwable e) {
				e.printStackTrace();
				throw new RuntimeException(e);
			}
		}
		return result;
	}
}
3 redis分片技术
3.1 为什么使用分片技术
1).说明: 虽然redis可以扩展内存空间的大小.但是如果需要存储海量的数据一味的扩大内存,其实效率不高.
2).分片介绍: 准备多台redis,共同为用户提供缓存服务.在保证效率的前提下,实现了内存的扩容.
用户在使用分片机制时,将多台redis当做1台使用.
3.2 分片搭建
1 分片规划
由3台redis构成 端口号分别为6379/6380/6381, 如果需要准备多台redis则准备多个配置文件即可,注意其中的端口号.
2 复制redis.conf,复制三份在shards在文件夹下面


shards文件的文件:

3 修改6379.conf/6380.conf/6381.conf端口号
修改命令为:vim 6379.conf

修改命令为:vim 6380.conf

修改命令为:vim 6381.conf

4 启动多个端口号
**同时启动多个redis端口号:**redis-server 6379.conf & redis-server 6380.conf & redis-server 6381.conf &
**检查端口是否启动:**ps -ef |grep redis

5 spring整合redis分片案例
package com.jt.test;
import java.util.ArrayList;
import java.util.List;
import org.junit.jupiter.api.Test;
import redis.clients.jedis.JedisShardInfo;
import redis.clients.jedis.ShardedJedis;

public class TestRedisShards {

	//思考:key=shards  存储到了哪台redis中? 如何存储的?
	@Test
	public void test01() {
		//1.准备list集合  之后添加节点信息
		List<JedisShardInfo> shards = new ArrayList<JedisShardInfo>();
		shards.add(new JedisShardInfo("192.168.126.129", 6379));
		shards.add(new JedisShardInfo("192.168.126.129", 6380));
		shards.add(new JedisShardInfo("192.168.126.129", 6381));
		//2.创建分片对象  改API中包含了hash算法.
		ShardedJedis shardedJedis = new ShardedJedis(shards);
		shardedJedis.set("shards", "准备分片操作!!!!!");
		System.out.println(shardedJedis.get("shards"));
	}

}
6 spring整合redis分片案例
6.1 一致性hash算法介绍
一致性哈希算法在1997年由麻省理工学院提出,是一种特殊的哈希算法,目的是解决分布式缓存的问题。 在移除或者添加一个服务器时,能够尽可能小地改变已存在的服务请求与处理请求服务器之间的映射关系。一致性哈希解决了简单哈希算法在分布式哈希表( Distributed Hash Table,DHT) 中存在的动态伸缩等问题 。
6.1.1 一致性hash原理说明
目的:解决数据如何在分布式环境下进行存储!!!
hash取值区间: 8位16进制数 共有 2^32种可能性!!! (24)8=2^32次方
1).数据如何存储

2).当节点发生变化带来哪些影响
当节点的数量发生了变化时,则节点中的对应的数据可以动态的迁移.
原则: 当发生了节点变化时,应该尽可能小的影响其他节点.
6.1.2 一致性hash特性
一致性哈希算法是在哈希算法基础上提出的,在动态变化的分布式环境中,哈希算法应该满足的几个条件:平衡性、单调性和分散性 [4] 。
**平衡性(均衡性)**是指hash的结果应该平均分配到各个节点,这样从算法上解决了负载均衡问题 。 利用虚拟节点实现数据平衡 (平衡数据不能做到绝对平均,只能是相对的)
单调性是指在新增或者删减节点时,不影响系统正常运行 . 可以实现动态的数据迁移.
分散性是指数据应该分散地存放在分布式集群中的各个节点(节点自己可以有备份),不必每个节点都存储所有的数据
鸡蛋不要放到一个篮子里。
6.1.3 关于计算机进制问题
二进制: 规则逢2进1 值: 0 -电位 1 +电位 二进制数:111 ---->十进制=
八进制: 规则逢8进1 值: 0-7 八进制数是3位2进制数
十六进制: 规则逢16进1 值: 0-9 A-F A=10 F=15 十六进制可以换算为4位个2进制数
练习: 二进制数110110110110是十六进制数的多少???

3.3 springBoot整合分片
1 编辑分片配置文件
redis.nodes=192.168.126.129:6379,192.168.126.129:6380,192.168.126.129:6381
2.编辑配置实现redis整合
package com.jt.config;
import java.util.HashSet;
import java.util.Set;
import org.springframework.beans.factory.annotation.Value;
import org.springframework.context.annotation.Bean;
import org.springframework.context.annotation.Configuration;
import org.springframework.context.annotation.PropertySource;

import redis.clients.jedis.HostAndPort;
import redis.clients.jedis.JedisCluster;

@Configuration 	//我是一个配置类    一般都会与@Bean联用
@PropertySource("classpath:/properties/redis.properties")
public class RedisConfig {
	@Value("${redis.nodes}")
	private String redisNodes;   //node,node,node

	/*整合分片实现Redis内存扩容*/
	@Bean
	public ShardedJedis shardedJedis() {
		String[] nodes = redisNodes.split(",");  //节点数组
		//动态获取Redis节点信息.
		List<JedisShardInfo> list = new ArrayList<JedisShardInfo>();
		for (String node : nodes) { //node= host:port ---->[host,port]
			String host = node.split(":")[0];
			int port = Integer.parseInt(node.split(":")[1]);
			list.add(new JedisShardInfo(host, port));
		}
		//返回分片对象
		return new ShardedJedis(list);
	}
3.引入redis缓存
package com.jt.aop;

import org.aspectj.lang.JoinPoint;
import org.aspectj.lang.ProceedingJoinPoint;
import org.aspectj.lang.annotation.Around;
import org.aspectj.lang.annotation.Aspect;
import org.aspectj.lang.annotation.Before;
import org.aspectj.lang.annotation.Pointcut;
import org.aspectj.lang.reflect.MethodSignature;
import org.springframework.beans.factory.annotation.Autowired;
import org.springframework.stereotype.Component;

import com.jt.anno.CacheFind;
import com.jt.util.ObjectMapperUtil;

import redis.clients.jedis.Jedis;
import redis.clients.jedis.JedisCluster;
import redis.clients.jedis.ShardedJedis;

//1.将对象交给容器管理
@Component
//2.定义aop切面
@Aspect
public class CacheAOP {
	@Autowired(required = false)
	private ShardedJedis jedis;		//分片redis注入  性能更高 内存更大

	@SuppressWarnings("unchecked") //压制警告
	@Around("@annotation(cacheFind)")
	public Object around(ProceedingJoinPoint joinPoint,CacheFind cacheFind) {

		//1.获取用户注解中的key     ITEM_CAT_LIST::0
		String key = cacheFind.key();
		//2.动态获取第一个参数当做key
		//joinPoint.getArgs() 获取的是目标方法中的参数信息
		String firstArg = joinPoint.getArgs()[0].toString();
		key += "::"+firstArg;

		Object result = null;
		//3.根据key查询redis.
		if(jedis.exists(key)) {

			//根据redis获取数据信息
			String json = jedis.get(key);
			//如何获取返回值类型
			MethodSignature methodSignature = (MethodSignature) joinPoint.getSignature();
			result = ObjectMapperUtil.toObject(json, methodSignature.getReturnType());
			System.out.println("aop查询redis缓存");
		}else {
			//如果key不存在,则证明是第一次查询.  应该查询数据库
			try {
				result = joinPoint.proceed(); //目标方法返回值
				System.out.println("AOP查询数据库获取返回值结果");
				//将数据保存到redis中
				String json = ObjectMapperUtil.toJSON(result);
				int seconds = cacheFind.seconds();
				if(seconds>0)
					jedis.setex(key, seconds, json);
				else
					jedis.set(key, json);

			} catch (Throwable e) {
				e.printStackTrace();
				throw new RuntimeException(e);
			}
		}
		return result;
	}
}
4 关于redis分片总结
1.当redis节点宕机之后,用户访问必然受到影响.
2.当redis服务宕机之后,该节点中的数据可能丢失
3.Redis分片可以实现内存数据的扩容.
4.Redis分片机制中hash运算发生在业务服务器中.redis只负责存取.不负责计算. 所以效率更高.
4 redis集群管理
为什么使用数据库集群
通常,为了提高网站响应速度,总是把热点数据保存在内存中而不是直接从后端数据库中读取。Redis是一个很好的Cache工具。大型网站应用,热点数据量往往巨大,几十G上百G是很正常的事儿。由于内存大小的限制,使用一台 Redis 实例显然无法满足需求,这时就需要使用多台 Redis作为缓存数据库。但是如何保证数据存储的一致性呢,这时就需要搭建redis集群.采用合理的机制,保证用户的正常的访问需求.
采用redis集群,可以保证数据分散存储,同时保证数据存储的一致性.并且在内部实现高可用的机制.实现了服务故障的自动迁移.
4.1 Linux系统集群的配置
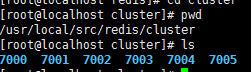
1 创建redis集群文件夹

2 创建7000-7005六个文件夹
创建文件夹:mkdir 7000 70001 7002 7003 7004 7005
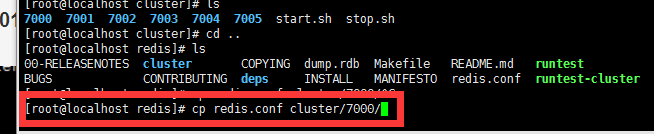
3.复制redis.conf配置文件到7000文件夹中
**复制文件:cp redis.conf cluster/7000/ **
1 修改文件redis.conf文件
命令: vim redis.conf

2 显示文件序号
命令: :set nu

2 注释 bing 127.0.0.1

3 关闭保护模式

4 修改端口号

5 启动后台启动
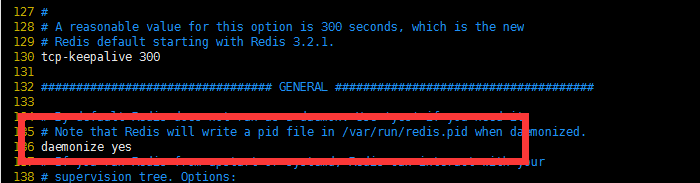
6 修改pid文件

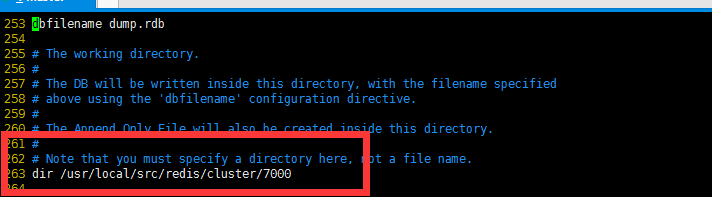
7 修改持久化文件
8 设定内存优化策略

9 关闭AOF模式

10 开启集群配置

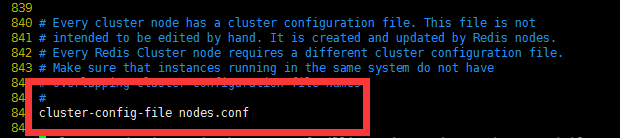
11 开启集群配置文件
12 修改集群超时时间

13 保存并退出
点击: Esc
保存: :wq
14 复制集群的配置
说明:将7000文件夹下的redis.conf配置文件复制到7001-7005文件夹中
[root@localhost cluster]# cp 7000/redis.conf  7001/
[root@localhost cluster]# cp 7000/redis.conf  7002/
[root@localhost cluster]# cp 7000/redis.conf  7003/
[root@localhost cluster]# cp 7000/redis.conf  7004/
[root@localhost cluster]# cp 7000/redis.conf  7005/
15 批量修改
说明:进入每一个redis.conf文件中,把各自文件修改为文件名
命令:
:%s/7000/7001/g
16通过脚本编辑启动/关闭指定
1.编辑启动指令 :vim start.sh
#!/bin/sh
redis-server 7000/redis.conf &
redis-server 7001/redis.conf &
redis-server 7002/redis.conf &
redis-server 7003/redis.conf &
redis-server 7004/redis.conf &
redis-server 7005/redis.conf &
2.编辑关闭指令: vim stop.sh
redis-cli -p 7000 shutdown &
redis-cli -p 7001 shutdown &
redis-cli -p 7002 shutdown &
redis-cli -p 7003 shutdown &
redis-cli -p 7004 shutdown &
redis-cli -p 7005 shutdown &
3.配置之后效果如下

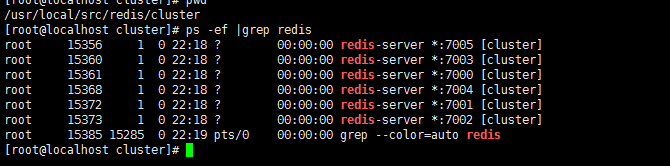
4.启动redis集群

5.查看服务是否正常启动
4.2 sprinBoot整合redis集群
1 配置redis.properties
redis.nodes=192.168.126.129:7000,192.168.126.129:7001,192.168.126.129:7002,192.168.126.129:7003,192.168.126.129:7004,192.168.126.129:7005

2 将redis集群交给spring管理
package com.jt.config;

import java.util.ArrayList;
import java.util.HashSet;
import java.util.List;
import java.util.Set;

import org.springframework.beans.factory.annotation.Value;
import org.springframework.context.annotation.Bean;
import org.springframework.context.annotation.Configuration;
import org.springframework.context.annotation.PropertySource;

import redis.clients.jedis.HostAndPort;
import redis.clients.jedis.Jedis;
import redis.clients.jedis.JedisCluster;
import redis.clients.jedis.JedisShardInfo;
import redis.clients.jedis.ShardedJedis;

@Configuration 	//我是一个配置类    一般都会与@Bean联用
@PropertySource("classpath:/properties/redis.properties")
public class RedisConfig {

	/**
	 * spring整合Redis集群
	 */
	@Value("${redis.nodes}")
	private String redisNodes;

	@Bean
	public JedisCluster jedisCluster() {
		Set<HostAndPort> nodeSet = new HashSet<HostAndPort>();
		String[] clusters = redisNodes.split(",");
		for (String cluster : clusters) {	//host:port
			String host = cluster.split(":")[0];
			int port = Integer.parseInt(cluster.split(":")[1]);
			nodeSet.add(new HostAndPort(host, port));
		}
		return new JedisCluster(nodeSet);
	}
}
3.引用在项目中应用redis集群
package com.jt.service;

import java.util.ArrayList;
import java.util.List;

import org.springframework.beans.factory.annotation.Autowired;
import org.springframework.stereotype.Service;

import com.baomidou.mybatisplus.core.conditions.query.QueryWrapper;
import com.jt.anno.CacheFind;
import com.jt.mapper.ItemCatMapper;
import com.jt.pojo.ItemCat;
import com.jt.util.ObjectMapperUtil;
import com.jt.vo.EasyUITree;

import redis.clients.jedis.Jedis;

@Service
public class ItemCatServiceImpl implements ItemCatService {

	@Autowired
	private ItemCatMapper itemCatMapper;
	//spring容器初始化时,改注解不是必须注入.但是如果程序调用则必须有值.
	@Autowired(required = false)
	private Jedis jedis;


	@SuppressWarnings("unchecked")
	@Override
	public List<EasyUITree> findItemCatByCache(Long parentId) {
		//1.定义key
		String key = "ITEM_CAT_LIST::"+parentId;
		List<EasyUITree> treeList = new ArrayList<EasyUITree>();
		Long  startTime = System.currentTimeMillis();
		//2.判断redis中是否有值
		if(jedis.exists(key)) {
			//不是第一次查询,则获取缓存数据之后直接返回
			String json = jedis.get(key);
			Long endTime = System.currentTimeMillis();
			treeList =
					ObjectMapperUtil.toObject(json, treeList.getClass());
			System.out.println("redis查询缓存的时间为:"+(endTime-startTime)+"毫秒");
		}else {
			//redis中没有这个key,表示用户第一次查询.
			treeList = findItemCatByParentId(parentId);
			Long endTime = System.currentTimeMillis();
			//需要将list集合转化为json
			String json = ObjectMapperUtil.toJSON(treeList);
			//将数据保存到redis中
			jedis.set(key, json);
			System.out.println("查询数据库的时间为:"+(endTime-startTime)+"毫秒");
		}
		return treeList;
	}
}


 1288
1288


 被折叠的 条评论
为什么被折叠?
被折叠的 条评论
为什么被折叠?
 到【灌水乐园】发言


