


1.Bean的生命周期底层原理
AppConfig
package com.zhouyu;

import com.zhouyu.service.OrderService;
import org.springframework.context.annotation.*;

@ComponentScan("com.zhouyu")
public class AppConfig {

	@Bean
	public OrderService orderService1(){
		return new OrderService();
	}

	@Bean
	public OrderService orderService2(){
		return new OrderService();
	}

}
OrderService
package com.zhouyu.service;

import org.springframework.stereotype.Component;

@Component
public class OrderService {

}
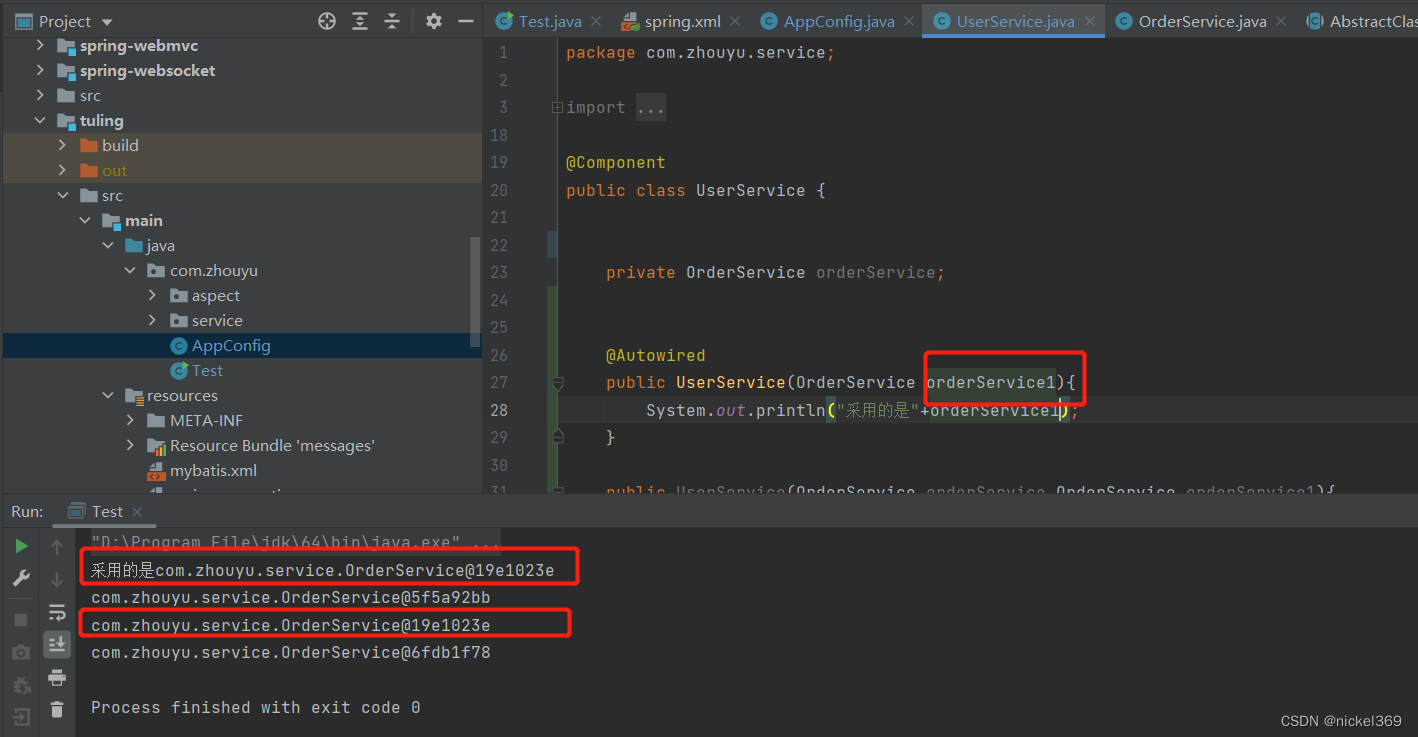
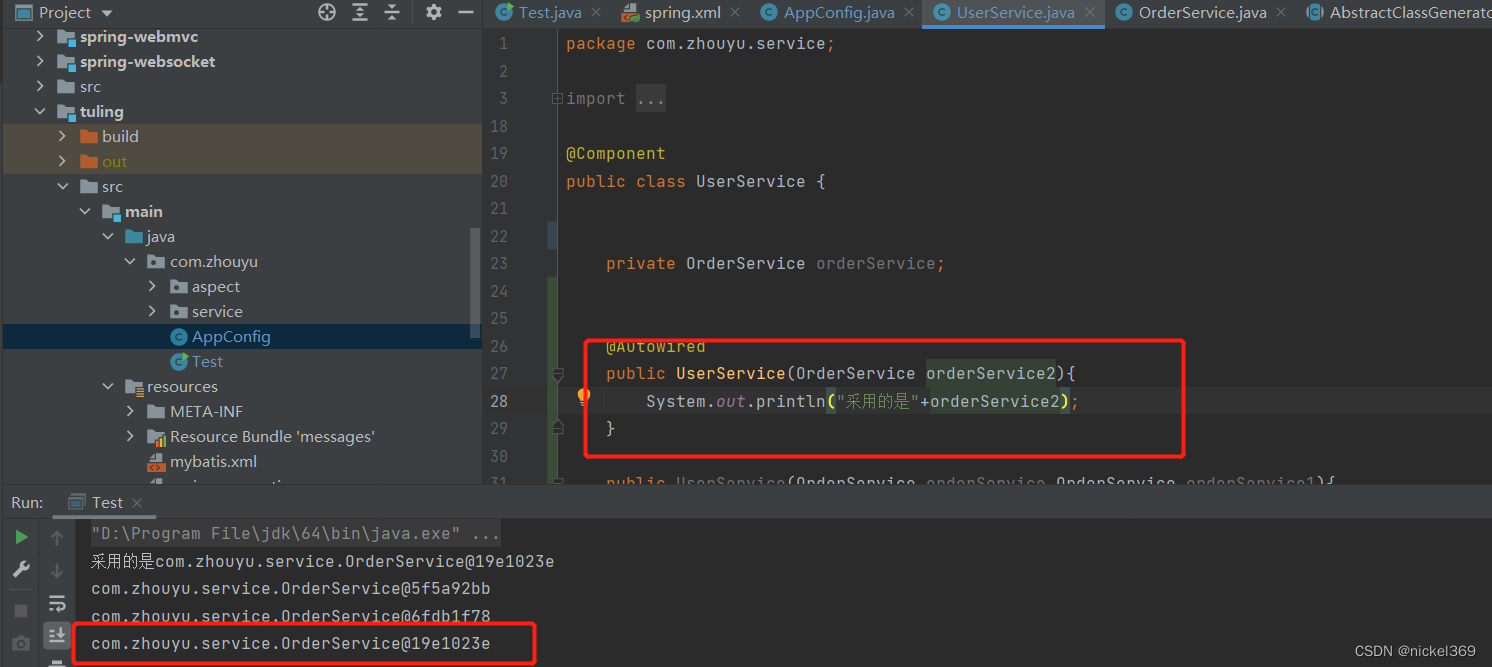
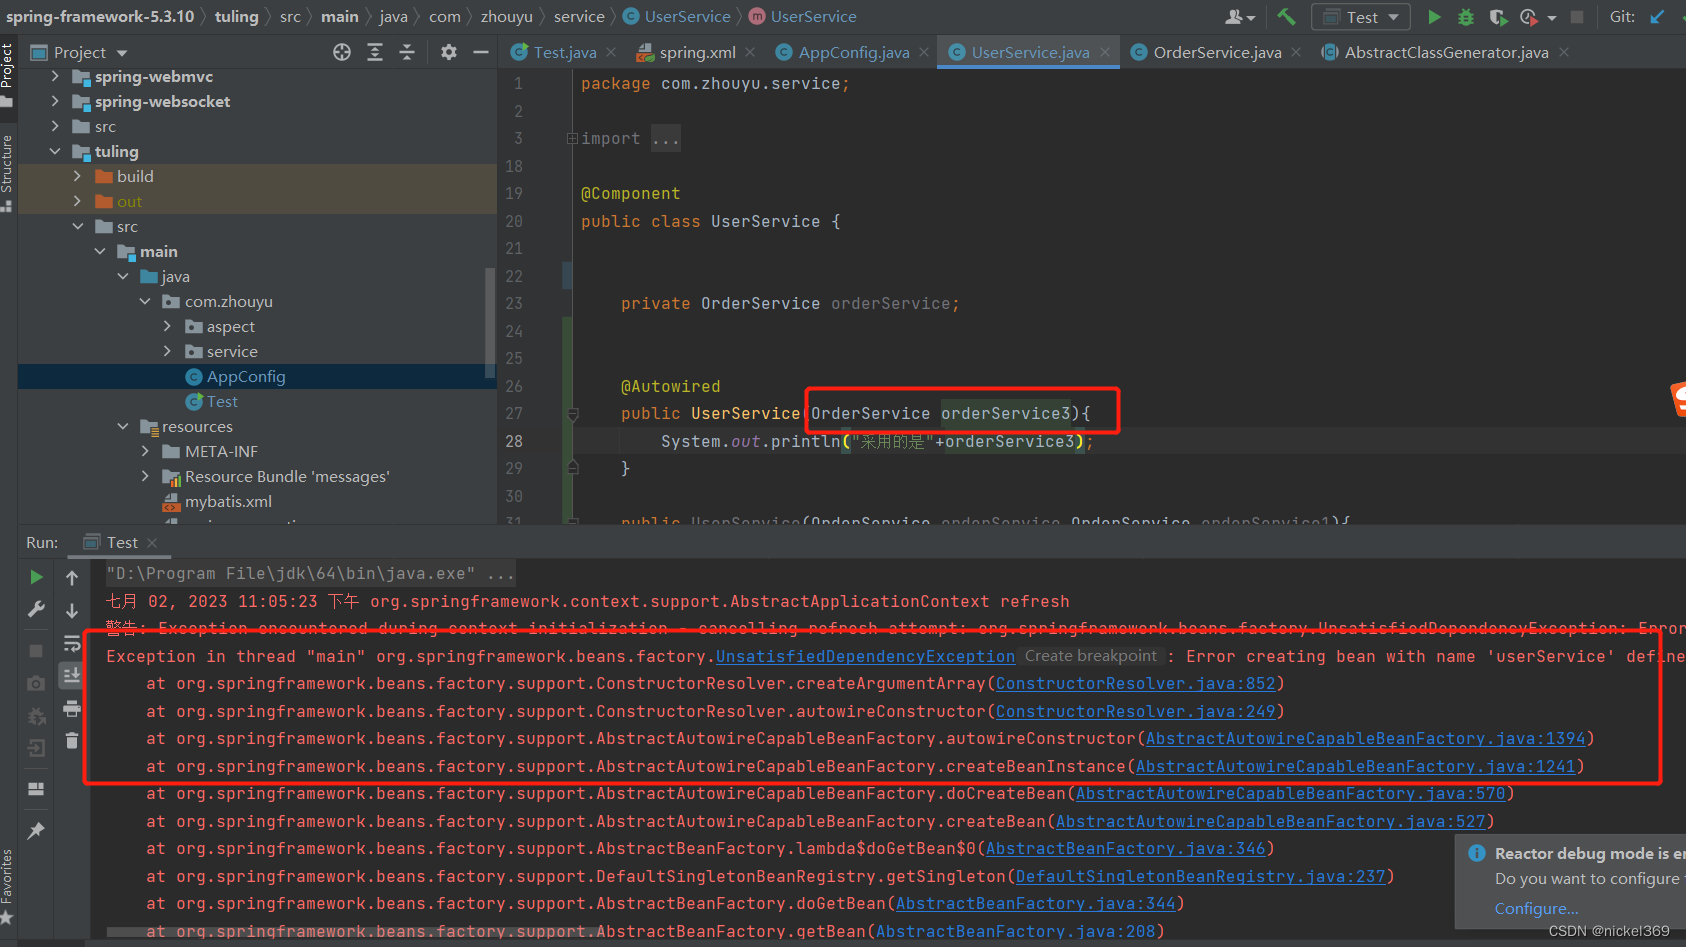
说明:在spring容器中存在多个bean对象时,bean在无参构造方法中引入某个bean,更改参数名称决定具体引入那一个bean,当参数的名称在bean中不存在时,此时程序就会报错。
2.依赖注入底层原理
2.1 通过spring.xml方式进行注入
spring.xml
<?xml version="1.0" encoding="UTF-8"?>
<beans xmlns="http://www.springframework.org/schema/beans"
	   xmlns:xsi="http://www.w3.org/2001/XMLSchema-instance"
	   xmlns:context="http://www.springframework.org/schema/context"
	   xmlns:aop="http://www.springframework.org/schema/aop"
	   xsi:schemaLocation="http://www.springframework.org/schema/beans
	   https://www.springframework.org/schema/beans/spring-beans.xsd
	   http://www.springframework.org/schema/context https://www.springframework.org/schema/context/spring-context.xsd http://www.springframework.org/schema/aop https://www.springframework.org/schema/aop/spring-aop.xsd"
	   >

	<context:component-scan base-package="com.zhouyu"/>


	<bean id="user1" class="com.zhouyu.service.User" scope="prototype"/>

	<bean id="user2" class="com.zhouyu.service.User" parent="user1"/>
</beans>
java获取对象
package com.zhouyu;

import com.zhouyu.service.User;
import com.zhouyu.service.UserService;
import org.aopalliance.aop.Advice;
import org.aopalliance.intercept.MethodInterceptor;
import org.aopalliance.intercept.MethodInvocation;
import org.jetbrains.annotations.NotNull;
import org.jetbrains.annotations.Nullable;
import org.springframework.aop.Pointcut;
import org.springframework.aop.framework.ProxyFactory;
import org.springframework.aop.support.AbstractPointcutAdvisor;
import org.springframework.beans.factory.InitializingBean;
import org.springframework.beans.factory.annotation.Autowired;
import org.springframework.beans.factory.support.AbstractBeanDefinition;
import org.springframework.beans.factory.support.BeanDefinitionBuilder;
import org.springframework.cglib.proxy.Enhancer;
import org.springframework.cglib.proxy.MethodProxy;
import org.springframework.context.ApplicationContext;
import org.springframework.context.annotation.AnnotationConfigApplicationContext;
import org.springframework.context.support.ClassPathXmlApplicationContext;

import javax.annotation.PostConstruct;
import java.lang.reflect.Field;
import java.lang.reflect.InvocationTargetException;
import java.lang.reflect.Method;
import java.util.concurrent.ScheduledThreadPoolExecutor;
import java.util.concurrent.TimeUnit;

public class Test {

	public static void main(String[] args) {

		ClassPathXmlApplicationContext applicationContext=new ClassPathXmlApplicationContext("spring.xml");
		UserService userService = (UserService) applicationContext.getBean("userService");
		userService.test();

	}
}
2.2 通过注解方式进行注入
AppConfig
package com.zhouyu;

import org.springframework.context.annotation.*;
import org.springframework.scheduling.annotation.EnableScheduling;

@ComponentScan("com.zhouyu")
@EnableScheduling
@PropertySource("classpath:spring.properties")
public class AppConfig {

}
java获取对象
package com.zhouyu;

import com.zhouyu.service.UserService;
import org.springframework.context.annotation.AnnotationConfigApplicationContext;

public class Test {

	public static void main(String[] args) {

		// 创建一个Spring容器
		AnnotationConfigApplicationContext applicationContext = new AnnotationConfigApplicationContext(AppConfig.class);

		UserService userService = (UserService) applicationContext.getBean("userService");
		userService.test();
	}
}
说明:spring通过解析appConfig.class得到扫描路径,然后遍历该路径下的含有@Component、@Service注解对象记录下来,放在一个map集合中,通过beanName作为key,当前类作为value。
3.初始化底层原理
3.1 初始化前
User对象
package com.zhouyu.service;

import org.springframework.stereotype.Component;

@Component
public class User {
	private String name;
	private String password;

	public String getName() {
		return name;
	}

	public void setName(String name) {
		this.name = name;
	}

	public String getPassword() {
		return password;
	}

	public void setPassword(String password) {
		this.password = password;
	}
}
UserService 对象的test方法
package com.zhouyu.service;

import org.springframework.aop.framework.AopContext;
import org.springframework.beans.factory.BeanNameAware;
import org.springframework.beans.factory.InitializingBean;
import org.springframework.beans.factory.annotation.Autowired;
import org.springframework.context.annotation.Bean;
import org.springframework.context.annotation.Lazy;
import org.springframework.context.annotation.Scope;
import org.springframework.jdbc.core.JdbcTemplate;
import org.springframework.scheduling.annotation.Scheduled;
import org.springframework.stereotype.Component;
import org.springframework.transaction.annotation.Propagation;
import org.springframework.transaction.annotation.Transactional;

import javax.annotation.PostConstruct;
import java.util.Date;

@Component
public class UserService{

    @Autowired
	private OrderService orderService;

	@Autowired
    private User admin;


	public void test(){
       System.out.println(admin.getName());
	}


	@PostConstruct
	public User getAdmin(){
		admin.setPassword("123");
		admin.setName("LiMing");
		return admin;
	}

}
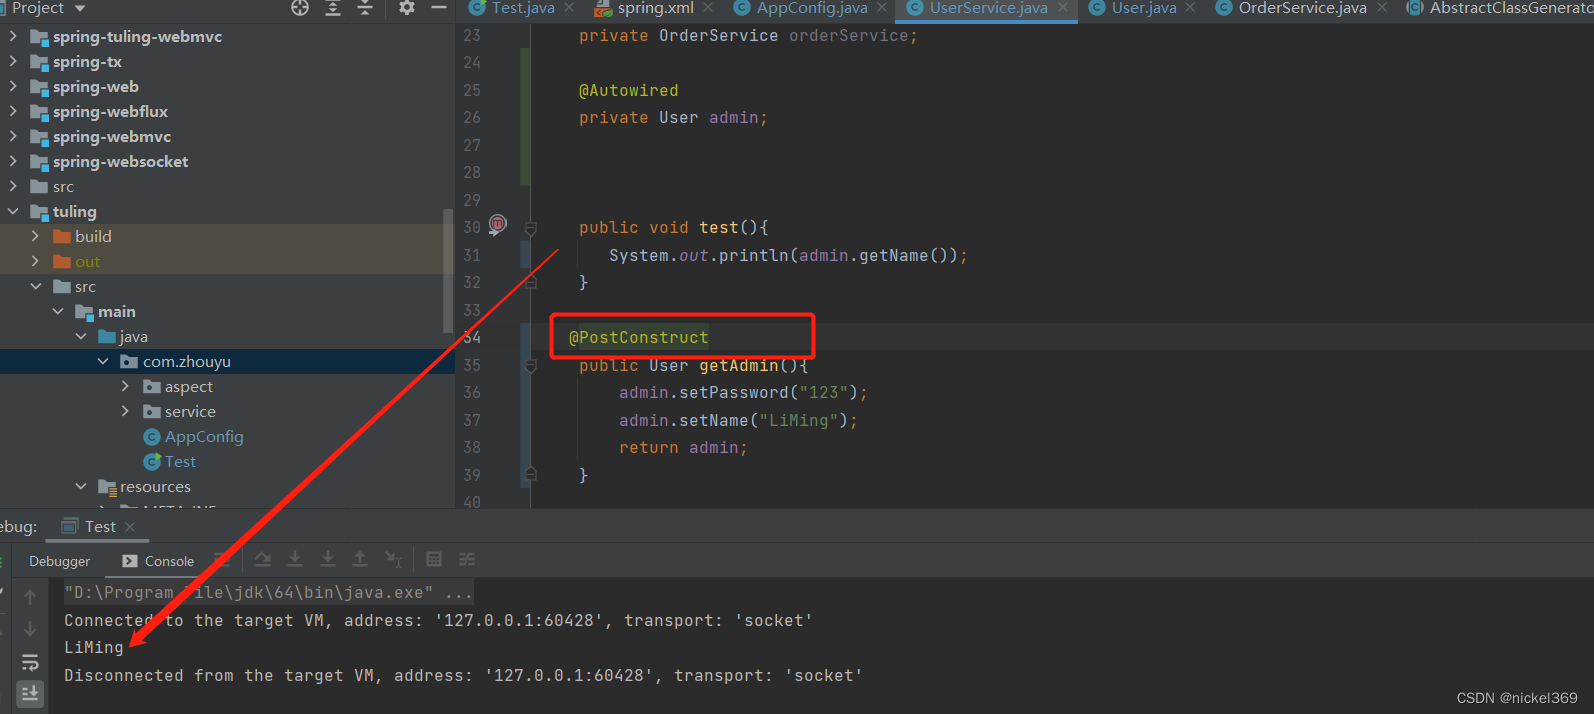
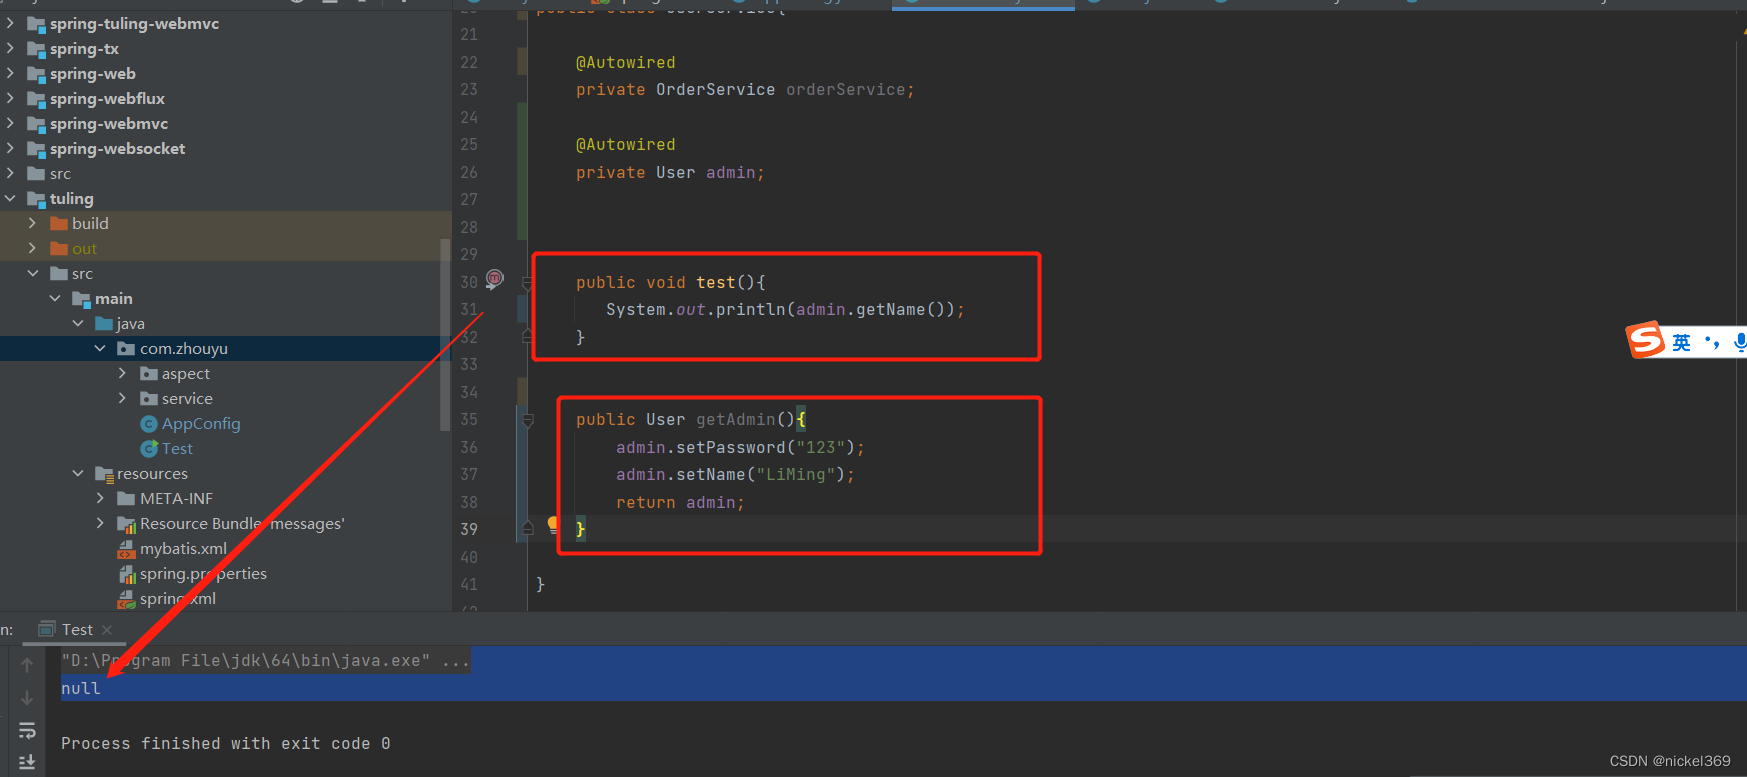
说明:User对象必须加上Component注解,这样才能被Spring容器进行管理,此时在getAdmin方法中加上PostConstruct注解后,此时对admin进行赋值,才其他方法中就能获取admin赋值的对象。
3.2 初始化
package com.zhouyu.service;

import org.springframework.aop.framework.AopContext;
import org.springframework.beans.factory.BeanNameAware;
import org.springframework.beans.factory.InitializingBean;
import org.springframework.beans.factory.annotation.Autowired;
import org.springframework.context.annotation.Bean;
import org.springframework.context.annotation.Lazy;
import org.springframework.context.annotation.Scope;
import org.springframework.jdbc.core.JdbcTemplate;
import org.springframework.scheduling.annotation.Scheduled;
import org.springframework.stereotype.Component;
import org.springframework.transaction.annotation.Propagation;
import org.springframework.transaction.annotation.Transactional;

import javax.annotation.PostConstruct;
import java.util.Date;

@Component
public class UserService implements InitializingBean{

    @Autowired
	private OrderService orderService;

	@Autowired
	private User user;


	public void test(){
       System.out.println(user);
	}


	@Override
	public void afterPropertiesSet() throws Exception {
		user.setPassword("123");
		user.setName("LiMing");
	}
}

说明:初始化时,查看方法是否实现了InitializingBean接口,假如实现了该方法,将会执行afterPropertiesSet方法。
3.3 初始化后实现AOP
ZhouyuAspect.java对象
package com.zhouyu.aspect;

import org.aspectj.lang.annotation.After;
import org.aspectj.lang.annotation.Aspect;
import org.aspectj.lang.annotation.Before;
import org.springframework.stereotype.Component;

@Aspect
@Component
public class ZhouyuAspect {

	@Before("execution(public void com.zhouyu.service.UserService.test())")
	public void a(){
        System.out.println("test Before");
	}

	@After("execution(public void com.zhouyu.service.UserService.test())")
	public void b(){
		System.out.println("test After");
	}


}
test.java对象
package com.zhouyu;


import com.zhouyu.service.UserService;
import org.springframework.context.annotation.AnnotationConfigApplicationContext;


import java.lang.reflect.InvocationTargetException;


public class Test {

	public static void main(String[] args) throws InvocationTargetException, IllegalAccessException {

		// 创建一个Spring容器
		AnnotationConfigApplicationContext applicationContext = new AnnotationConfigApplicationContext(AppConfig.class);


		UserService userService = (UserService) applicationContext.getBean("userService");
		userService.test();


	}
}
UserService.java对象
package com.zhouyu.service;

import org.springframework.beans.factory.InitializingBean;
import org.springframework.beans.factory.annotation.Autowired;
import org.springframework.stereotype.Component;

@Component
public class UserService implements InitializingBean{

    @Autowired
	private OrderService orderService;

	@Autowired
    private User admin;


	public void test(){
       System.out.println(admin.getName());
	}

	@Override
	public void afterPropertiesSet() throws Exception {
		admin.setName("LiMing123");
		admin.setPassword("123");
	}
}
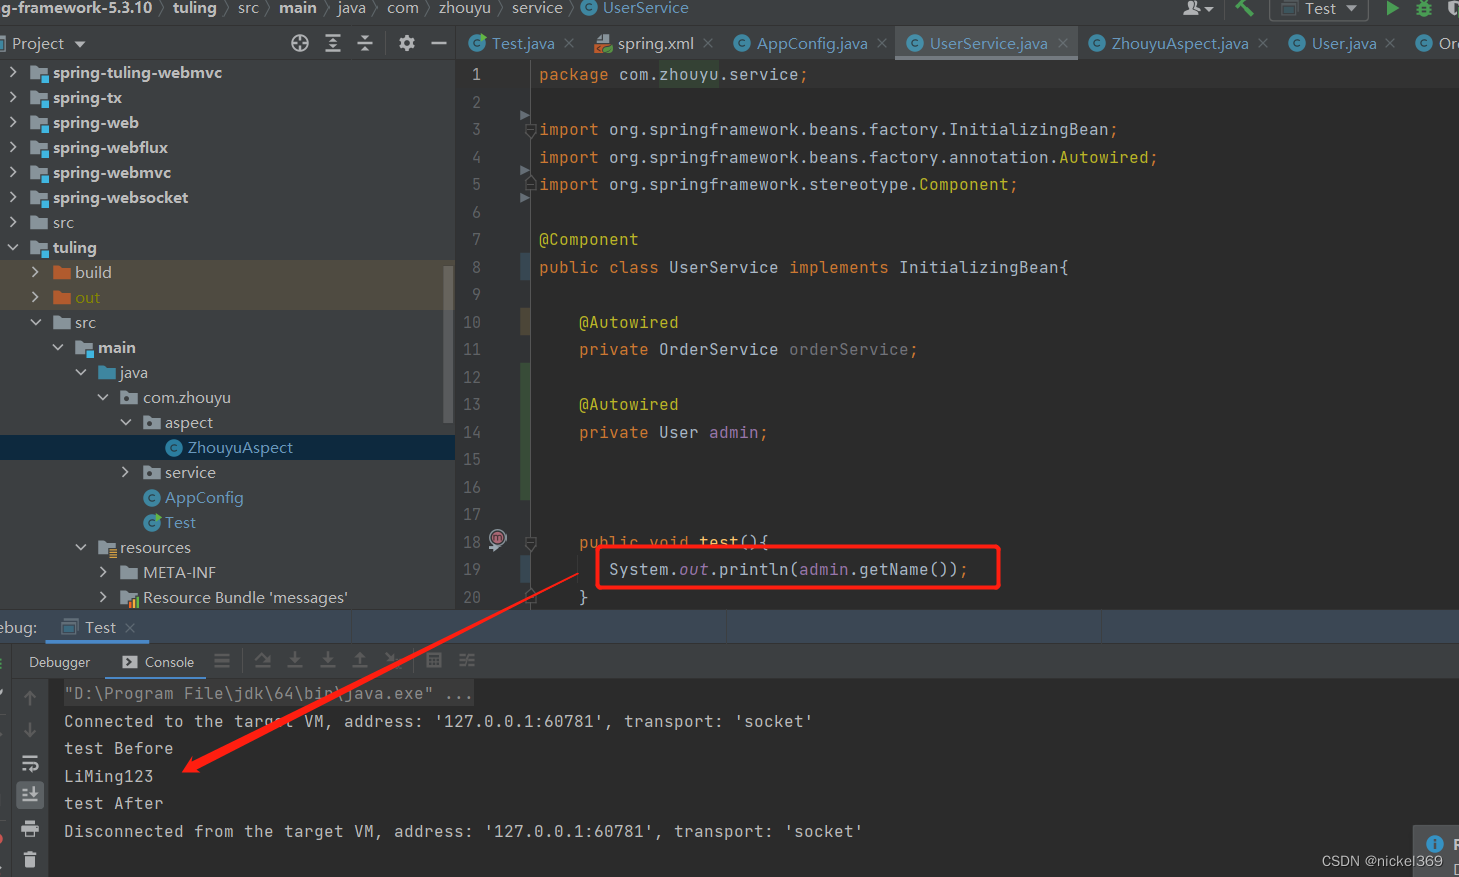
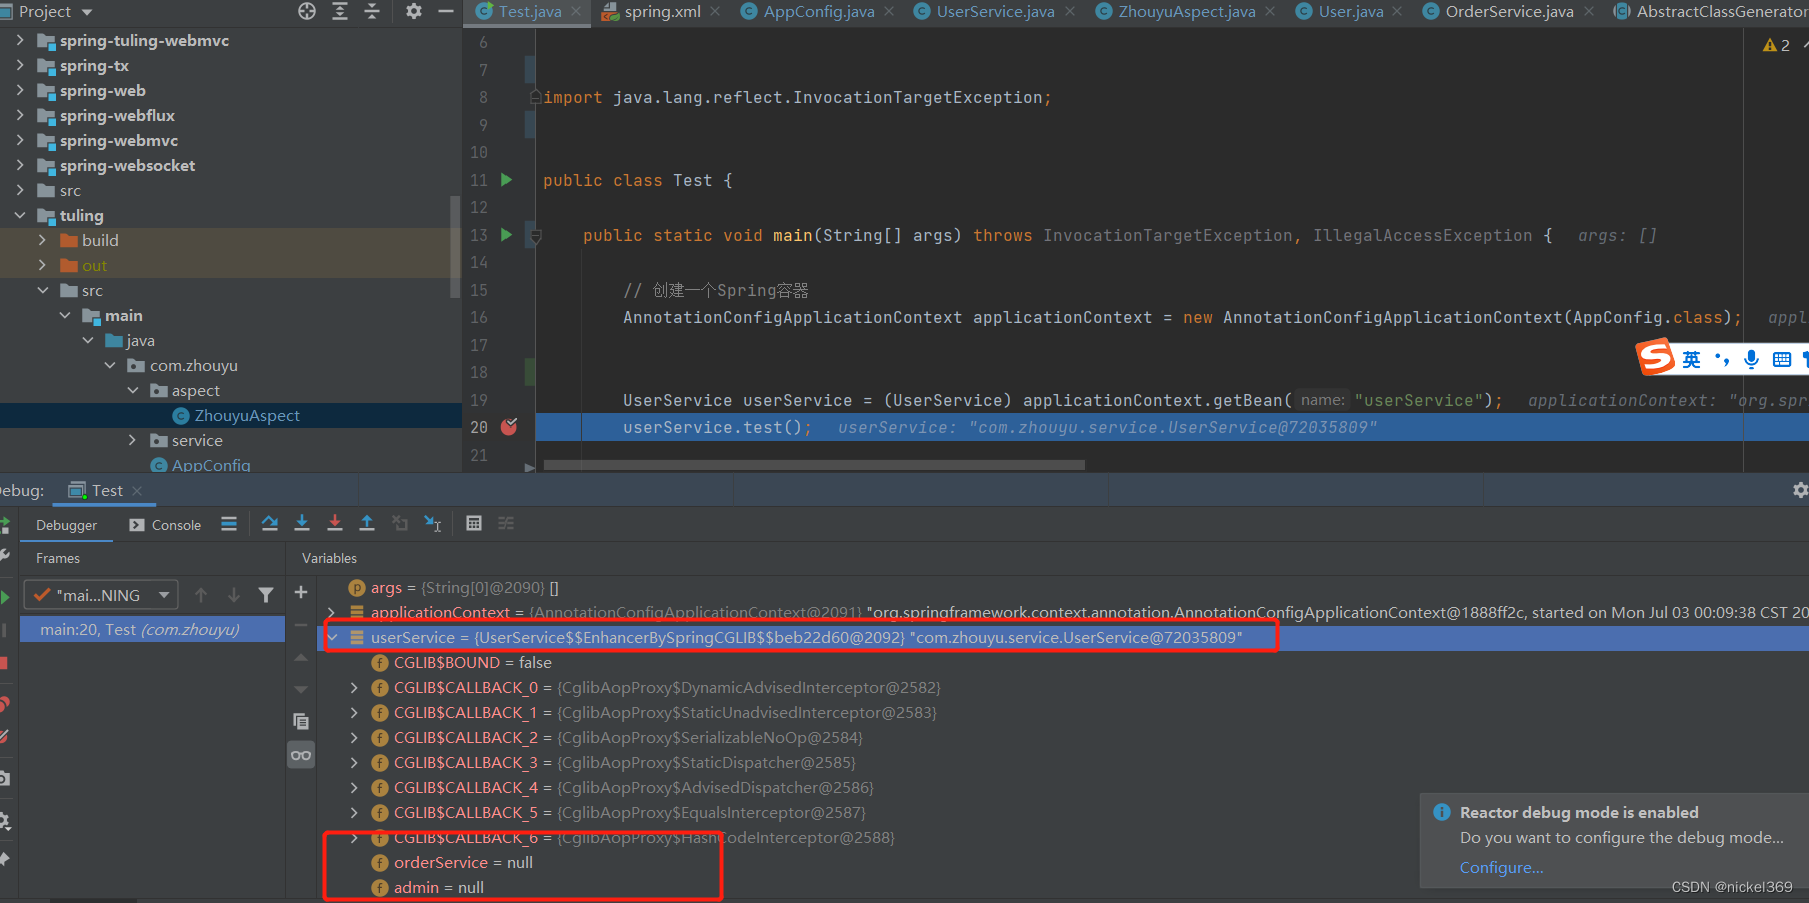
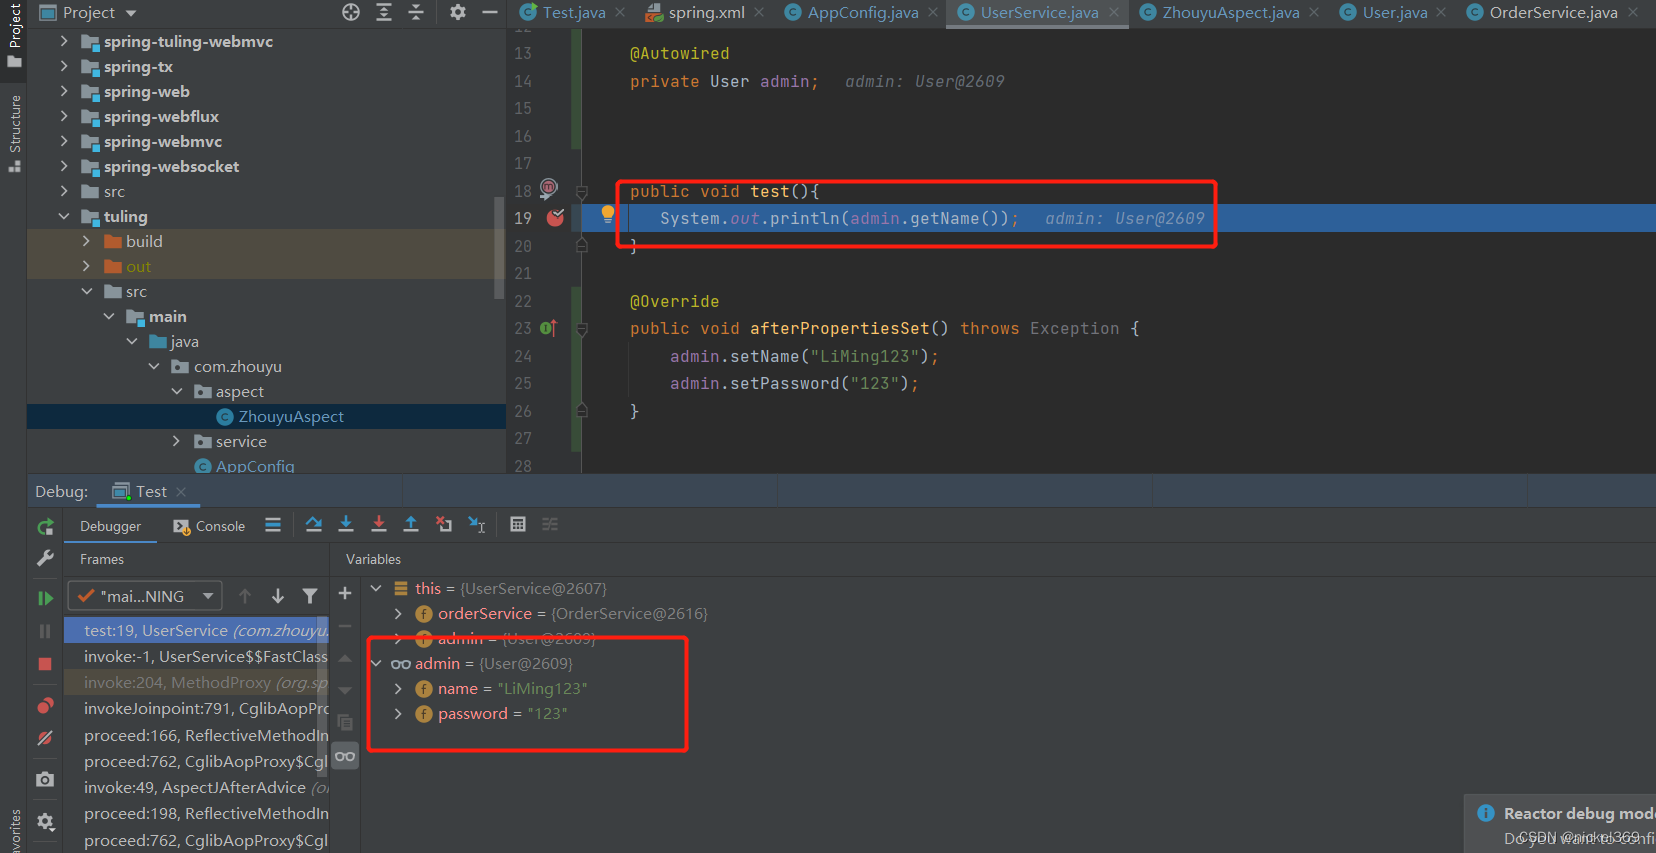
说明:当引用切面后,userService将会在底层生成一个userServiceProxy代理方法,代理对象此时也有test方法,在执行test方法之前执行切面@before方法,然后执行test方法,test方法将会调用父类里面test方法,所有当进去test方法里面时,此时属性又有值了。
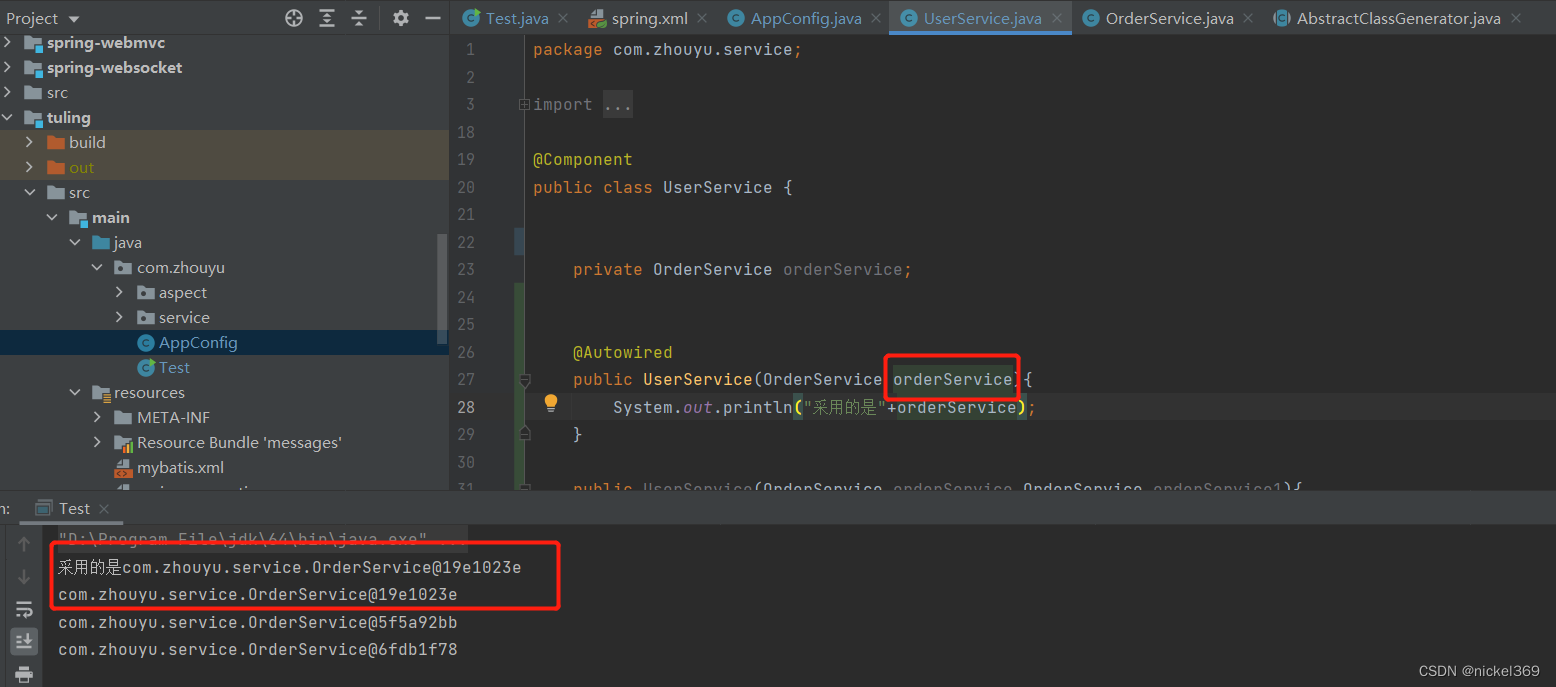
4.推断构造方法底层原理
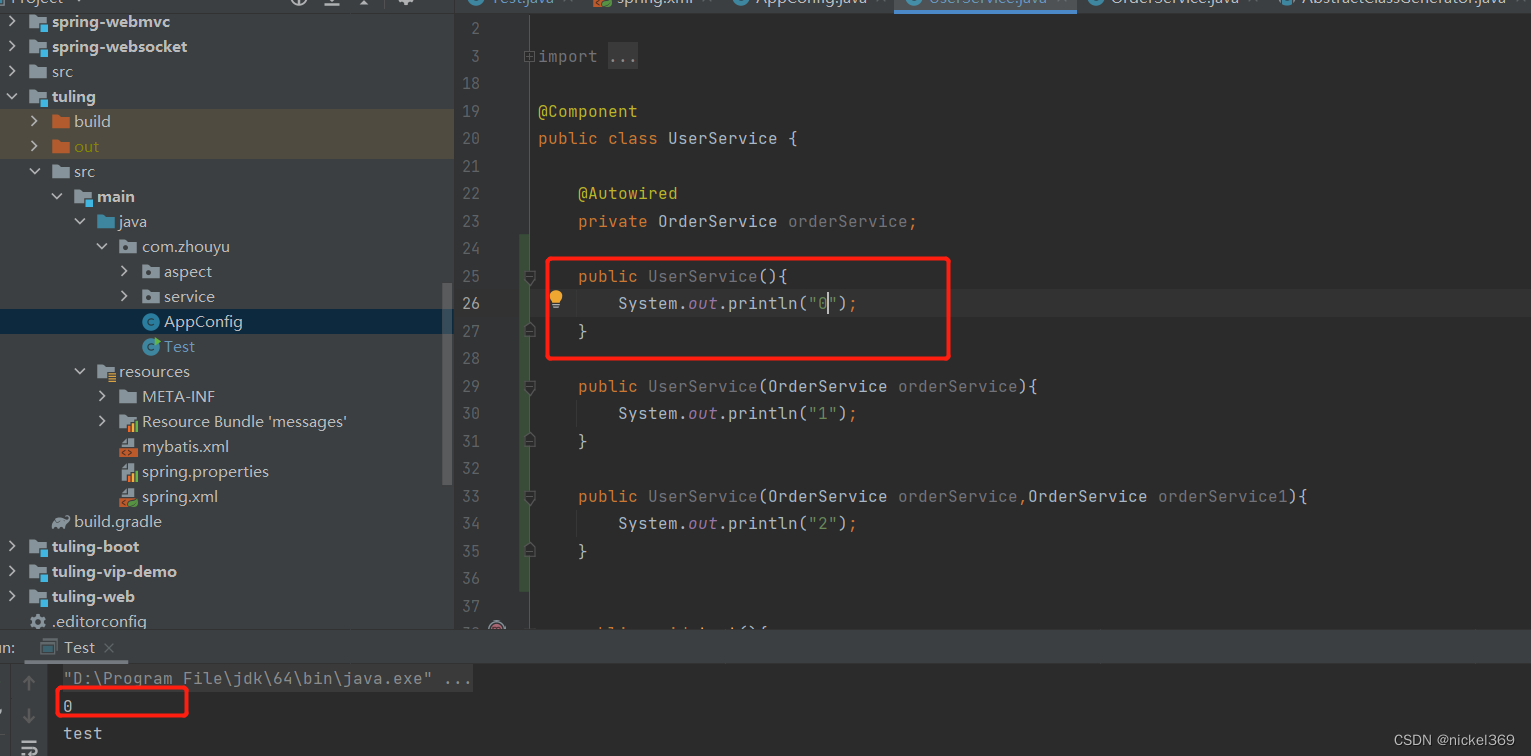
存在多个构造方法,其中一个是无参构造方法
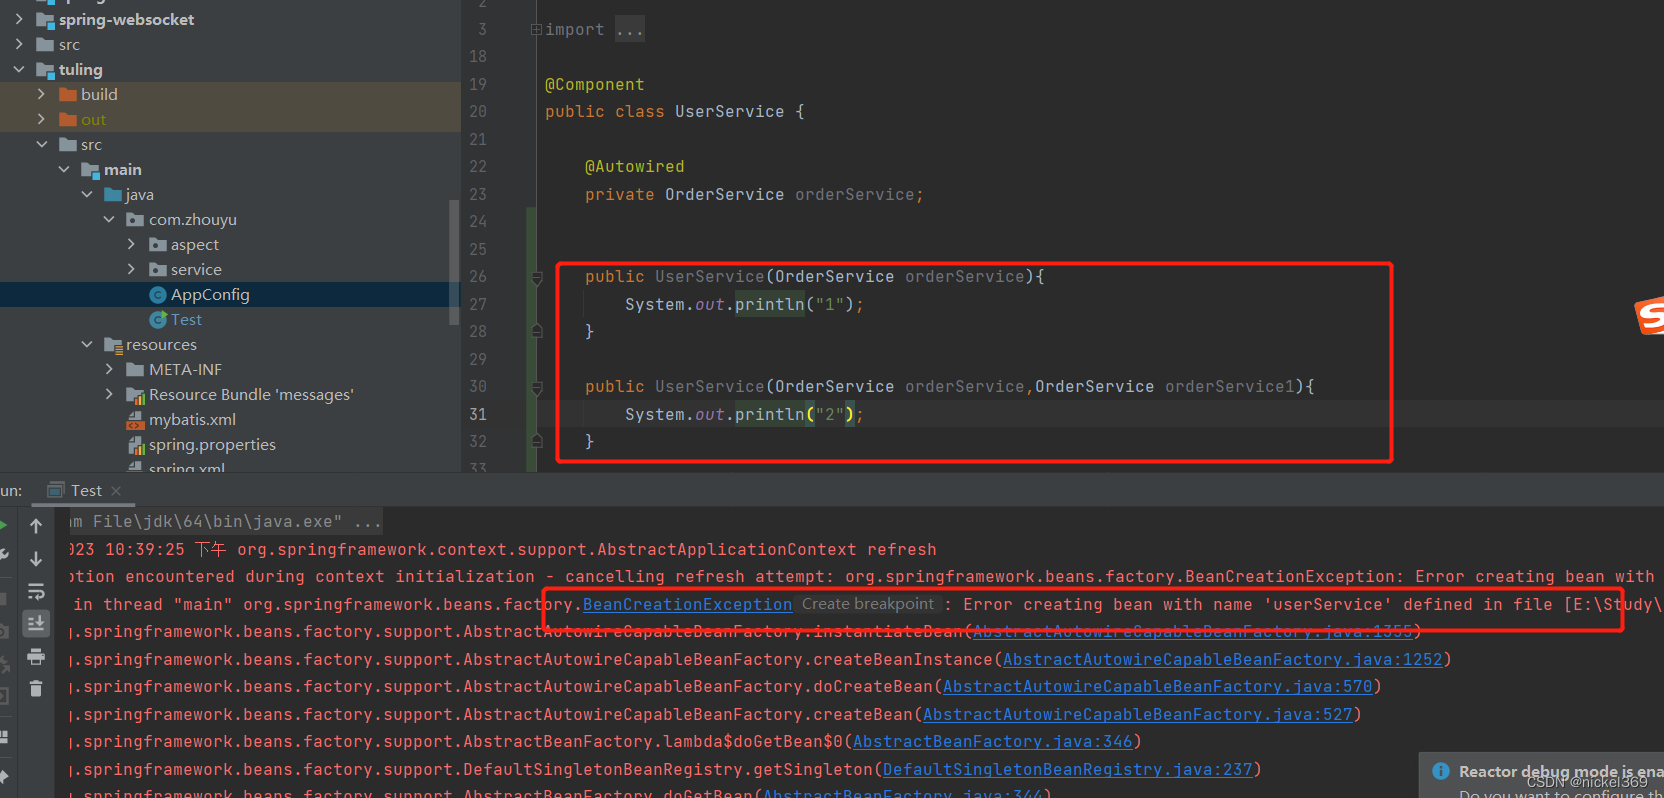
存在多个构造方法,无无参构造方法
存在多个构造方法,其中一个构造方法含有Autowired注解
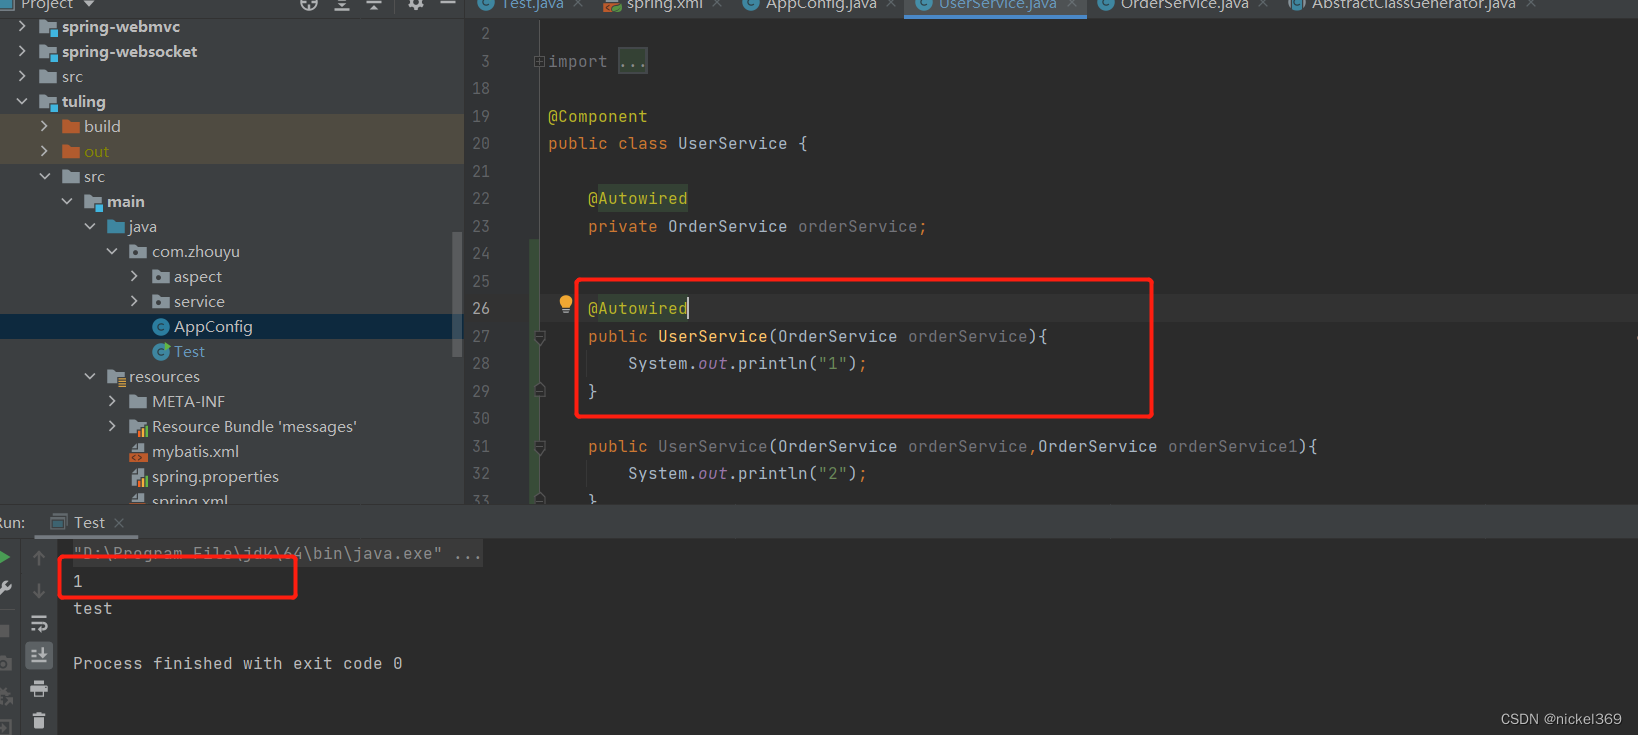
说明:创建对象时,通过该类的构造方法进行创建对象,假如该类只有一个构造方法时候,就采用这个构造方法,假如有多个构造方法,存在无参构造方法就用无参构造方法进行构造,假如不存在无参构造方法,存在多个有参构造方法就会报错,但是存在多个有参构造方法,其中一个构造方法有@Autowired,将会采用这个构造方法。同时也会判断是否有被Autowired注解的属性,有的话也会把属性找出来并由spring进行赋值。


 2036
2036

 被折叠的 条评论
为什么被折叠?
被折叠的 条评论
为什么被折叠?
 到【灌水乐园】发言


