


一.在EditText左侧添加图片
如
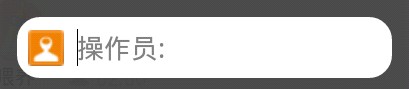
其原理就是在相对布局(RelativeLayout)的基础上用ImageView实现
代码如下:
<RelativeLayout>
				<EditText android:id="@+id/edt_operator_name" style="@style/syncEditText"
					android:hint="@string/hint_operator_name" />
				<ImageView android:id="@+id/syncOperatorImg" style="@style/syncImageView"
					android:layout_alignLeft="@+id/edt_operator_name"
					android:layout_alignTop="@+id/edt_operator_name"
					android:layout_alignBottom="@+id/edt_operator_name" android:src="@drawable/sync_operator" />
			</RelativeLayout>
让syncOperatorImag的左部,上部和下部与edt_operator_name对齐。
也可以直接使用 android:drawableLeft="@drawable/ic_launcher"来设置 EditText左边的图片
二.EditText圆角
首先定义一个圆角xml,路径:res/drawable/rounded_edittext.xml
<?xml version="1.0" encoding="utf-8"?>
<shape xmlns:android="http://schemas.android.com/apk/res/android"
	android:shape="rectangle" android:padding="10dp">
	<solid android:color="#FFFFFF" />
	<corners android:bottomRightRadius="15dp"
		android:bottomLeftRadius="15dp" android:topLeftRadius="15dp"
		android:topRightRadius="15dp" />
</shape>
也可以直接使用<corners android:radius="7dip" />来一次设置四个角的弧度
把EditText的background属性设置为刚刚建立的xml
显示控件的xml中
<EditText android:id="@+id/edt_operator_name" style="@style/syncEditText"
					android:hint="@string/hint_operator_name"
android:background="@drawable/rounded_edittext"
android:layout_width="250dip"
android:layout_height="wrap_content"
android:paddingTop="10dip"
android:paddingBottom="10dip"
android:gravity="center_vertical" />


 1312
1312


 被折叠的 条评论
为什么被折叠?
被折叠的 条评论
为什么被折叠?
 到【灌水乐园】发言


