


- 由于接口众多,并且细节复杂(需要考虑不同的HTTP请求类型、HTTP头部信息、HTTP请求内容等),高质量地创建这份文档本身就是件非常吃力的事,下游的抱怨声不绝于耳。
- 随着时间推移,不断修改接口实现的时候都必须同步修改接口文档,而文档与代码又处于两个不同的媒介,除非有严格的管理机制,不然很容易导致不一致现象。
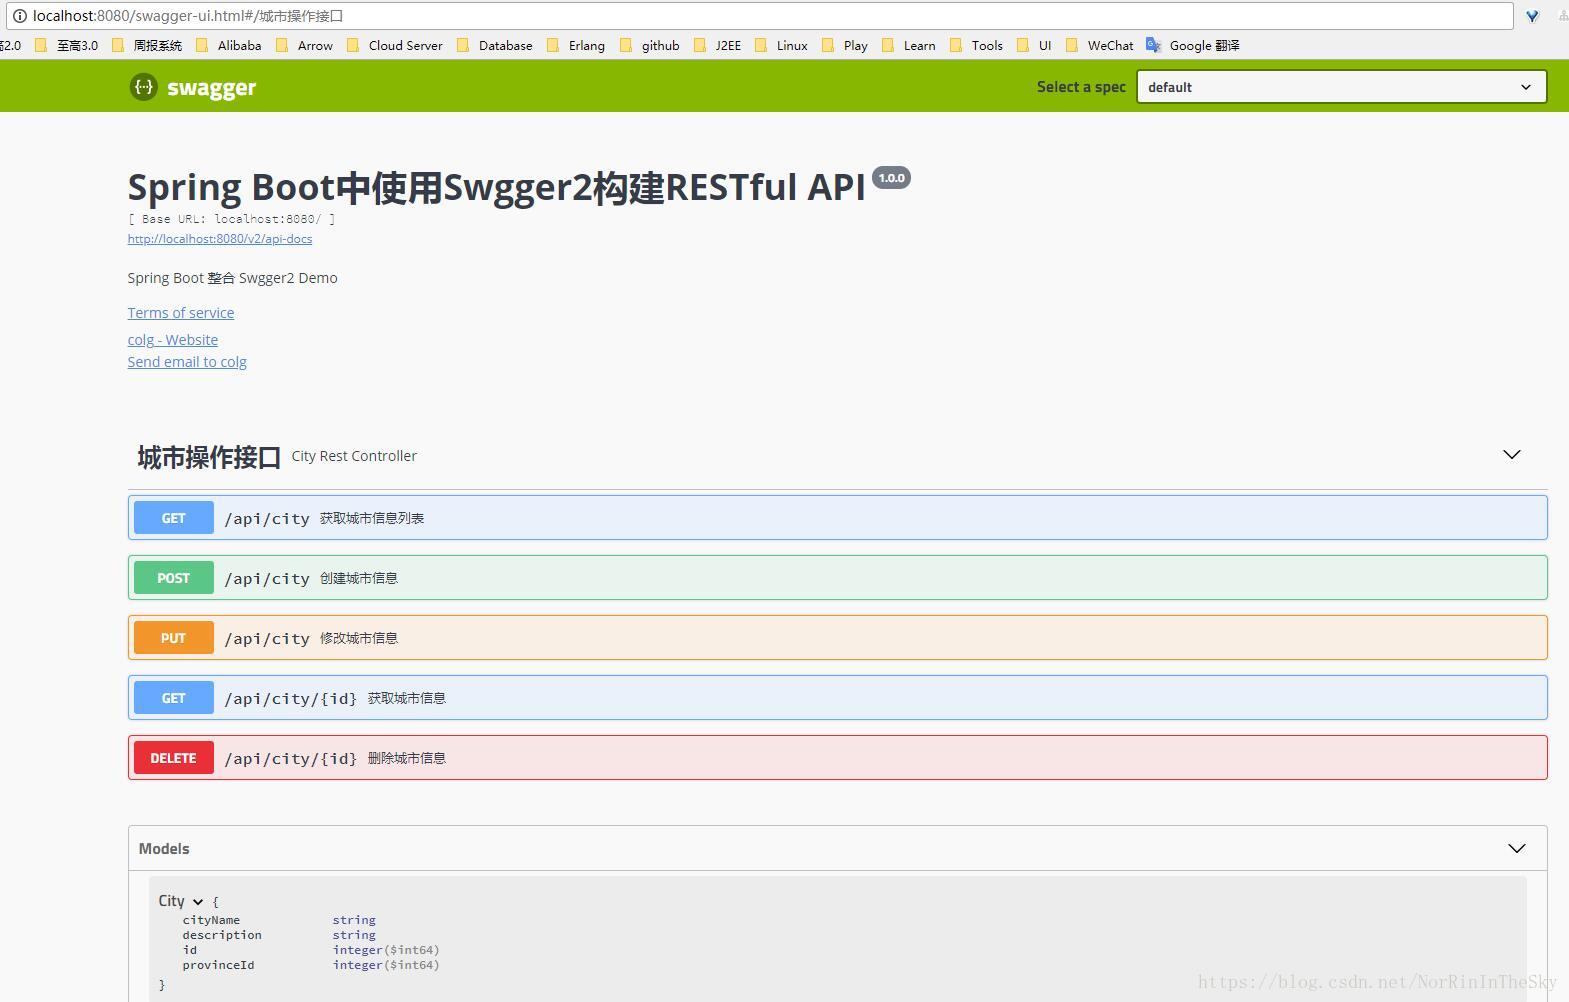
为了解决上面问题,可以使用spring boot集成swagger2。具体效果如下:
pom.xml
<project xmlns="http://maven.apache.org/POM/4.0.0" xmlns:xsi="http://www.w3.org/2001/XMLSchema-instance" xsi:schemaLocation="http://maven.apache.org/POM/4.0.0 http://maven.apache.org/xsd/maven-4.0.0.xsd">
    <modelVersion>4.0.0</modelVersion>

    <groupId>springboot-swagger2</groupId>
    <artifactId>springboot-swagger2</artifactId>
    <name>springboot-swagger2 ::  整合 Swagger2 Demo</name>

     <!-- Spring Boot 启动父依赖 -->
    <parent>
        <groupId>org.springframework.boot</groupId>
        <artifactId>spring-boot-starter-parent</artifactId>
        <version>1.5.10.RELEASE</version>
    </parent>

    <properties>
        <mybatis-spring-boot>1.2.0</mybatis-spring-boot>
        <swagger2.version>2.8.0</swagger2.version>
    </properties>

    <dependencies>
        <!-- Spring Boot Web 依赖 -->
        <dependency>
            <groupId>org.springframework.boot</groupId>
            <artifactId>spring-boot-starter-web</artifactId>
        </dependency>

        <!-- Spring Boot Test 依赖 -->
        <dependency>
            <groupId>org.springframework.boot</groupId>
            <artifactId>spring-boot-starter-test</artifactId>
            <scope>test</scope>
        </dependency>

        <!-- Spring Boot Mybatis 依赖 -->
        <dependency>
            <groupId>org.mybatis.spring.boot</groupId>
            <artifactId>mybatis-spring-boot-starter</artifactId>
            <version>${mybatis-spring-boot}</version>
        </dependency>

        <!-- MySQL 连接驱动依赖 -->
        <dependency>
            <groupId>mysql</groupId>
            <artifactId>mysql-connector-java</artifactId>
        </dependency>

        <!-- Swagger2 API文档-->
        <dependency>
            <groupId>io.springfox</groupId>
            <artifactId>springfox-swagger2</artifactId>
            <version>${swagger2.version}</version>
        </dependency>
        <dependency>
            <groupId>io.springfox</groupId>
            <artifactId>springfox-swagger-ui</artifactId>
            <version>${swagger2.version}</version>
        </dependency>

    </dependencies>
</project>
创建Swagger2配置类
package org.spring.springboot;

import org.springframework.context.annotation.Bean;
import org.springframework.context.annotation.Configuration;

import springfox.documentation.builders.ApiInfoBuilder;
import springfox.documentation.builders.PathSelectors;
import springfox.documentation.builders.RequestHandlerSelectors;
import springfox.documentation.service.ApiInfo;
import springfox.documentation.service.Contact;
import springfox.documentation.spi.DocumentationType;
import springfox.documentation.spring.web.plugins.Docket;
import springfox.documentation.swagger2.annotations.EnableSwagger2;

@Configuration
// 启用Swagger2
@EnableSwagger2
public class Swagger2 {

    @Bean
    public Docket docket() {
        return new Docket(DocumentationType.SWAGGER_2)
                    .apiInfo(apiInfo())
                    .select()
                    .apis(RequestHandlerSelectors.basePackage("org.spring.springboot.controller"))
                    .paths(PathSelectors.any())
                    .build();
    }

    /**
     * 设置api基本信息
     * @return
     */
    private ApiInfo apiInfo() {
        return new ApiInfoBuilder()
                    .title("Spring Boot中使用Swgger2构建RESTful API")
                    .description("Spring Boot 整合 Swgger2 Demo")
                    .termsOfServiceUrl("https://blog.csdn.net/NorRinInTheSky")
                    .contact(new Contact("colg", "https://blog.csdn.net/NorRinInTheSky", "121529654@qq.com"))
                    .version("1.0.0")
                    .build();
    }
}EnableSwagger2:启用Swagger2,需要和Application放在同级目录
Controller
package org.spring.springboot.controller;

import org.spring.springboot.domain.City;
import org.spring.springboot.service.CityService;
import org.springframework.beans.factory.annotation.Autowired;
import org.springframework.web.bind.annotation.*;

import io.swagger.annotations.Api;
import io.swagger.annotations.ApiImplicitParam;
import io.swagger.annotations.ApiOperation;

import java.util.List;

/**
 * 城市 Controller 实现 Restful HTTP 服务
 *
 * @author colg
 */
@Api(value = "城市 Controller 实现 Restful HTTP 服务", tags = {"城市操作接口"})
@RestController
public class CityRestController {

    @Autowired
    private CityService cityService;

    @ApiOperation(value = "获取城市信息", notes = "根据城市id获取城市信息")
    @ApiImplicitParam(name = "id", value = "城市id", required = true, dataType = "java.lang.Long", paramType = "path")
    @GetMapping("/api/city/{id}")
    public City findOneCity(@PathVariable("id") Long id) {
        return cityService.findCityById(id);
    }

    @ApiOperation(value = "获取城市信息列表", notes = "获取全部城市信息")
    @GetMapping("/api/city")
    public List<City> findAllCity() {
        return cityService.findAllCity();
    }

    @ApiOperation(value = "创建城市信息", notes = "根据City对象创建城市信息")
    @ApiImplicitParam(name = "city", value = "City对象", required = true, dataTypeClass = City.class, paramType = "body")
    @PostMapping("/api/city")
    public void createCity(@RequestBody City city) {
        cityService.saveCity(city);
    }

    @ApiOperation(value = "修改城市信息", notes = "根据City对象修改城市信息")
    @ApiImplicitParam(name = "city", value = "City对象", required = true, dataTypeClass = City.class, paramType = "body")
    @PutMapping("/api/city")
    public void modifyCity(@RequestBody City city) {
        cityService.updateCity(city);
    }

    @ApiOperation(value = "删除城市信息", notes = "根据城市id删除城市信息")
    @ApiImplicitParam(name = "id", value = "城市id", required = true, dataType = "java.lang.Long", paramType = "path")
    @DeleteMapping("/api/city/{id}")
    public void modifyCity(@PathVariable("id") Long id) {
        cityService.deleteCity(id);
    }
}


 3458
3458


 被折叠的 条评论
为什么被折叠?
被折叠的 条评论
为什么被折叠?
 到【灌水乐园】发言


