


1 准备素材
准备一张图片,如下

2 定义布局文件
<?xml version="1.0" encoding="utf-8"?>
<LinearLayout xmlns:android="http://schemas.android.com/apk/res/android"
              android:layout_width="match_parent"
              android:layout_height="match_parent"
              android:orientation="vertical">

    <ImageView
        android:layout_width="wrap_content"
        android:layout_height="wrap_content"
        android:layout_gravity="center_horizontal"
        android:layout_marginTop="40dp"
        android:src="@drawable/empty_notice_image"/>

    <TextView
        android:id="@+id/empty_hint_text"
        android:layout_width="match_parent"
        android:layout_height="wrap_content"
        android:layout_marginTop="35dp"
        android:gravity="center_horizontal"
        android:textColor="#55000000"
        android:textSize="18sp"/>
</LinearLayout>
3 自定义属性
先看下values目录下是否有attrs.xml文件,如果有,直接打开编写相应代码即可;如果没有,就手动创建一个;
我们这里只是需要动态的改变图片下面的提示文字,所以,需要自定义一个属性,名称为hintText ,该属性取值类型是string
代码如下:
<?xml version="1.0" encoding="utf-8"?>
<resources>
    <declare-styleable name="EmptyNoticeLayout">
        <attr name="hintText" format="string"/>
    </declare-styleable>
</resources>- declare-stylable 中的name , 表示自定义的类名
- attr 中的name ,表示 这个属性名称,format 表示该属性的取值类型
4 自定义类继承LinearLayout
代码如下:
package com.cnpeng.cnpeng_edittextfocus;

import android.content.Context;
import android.content.res.TypedArray;
import android.text.Layout;
import android.util.AttributeSet;
import android.view.LayoutInflater;
import android.widget.LinearLayout;
import android.widget.TextView;

/**
 * Created by developer on 2016/10/25.
 * 自定义网络请求为空时显示的界面
 */

public class EmptyNoticeLayout extends LinearLayout {

    //生成当前类的构造方法(以下三种都是)
    public EmptyNoticeLayout(Context context) {
        //        super(context);
        this(context, null); //调用两个参数的构造
    }

    public EmptyNoticeLayout(Context context, AttributeSet attrs) {
        //        super(context, attrs);
        this(context, attrs, 0);//调用三个参数的构造,在三个参数的构造中实现具体逻辑
    }

    public EmptyNoticeLayout(Context context, AttributeSet attrs, int defStyleAttr) {
        super(context, attrs, defStyleAttr);

        // 1 填充布局
 LayoutInflater.from(context).inflate(R.layout.empty_notice_layout, this);

        // 2 查找控件
      TextView  hintText = (TextView) findViewById(R.id.empty_hint_text);

        // 3 获取全部自定义属性值
        TypedArray ta = context.getTheme().obtainStyledAttributes(attrs, R.styleable.EmptyNoticeLayout, defStyleAttr, 0);

        // 4 获取hintText的属性值
        String hintTextValue = ta.getString(R.styleable.EmptyNoticeLayout_hintText);

        // 5 设置属性值给hintText
        hintText.setText(hintTextValue);

        // 6 回收TypeArray,释放资源
        ta.recycle();
    }
}- 注意:
- 一个参数的构造调用两个参数的构造时,以及两个参数的构造调用三个参数的构造时,必须使用 this( , , ) ; 否则在使用自定义控件的时候会出现不显示自定义控件的情况!!!
5 使用自定义控件
<?xml version="1.0" encoding="utf-8"?>
<LinearLayout
    android:id="@+id/activity_main"
    xmlns:android="http://schemas.android.com/apk/res/android"
    xmlns:app="http://schemas.android.com/apk/res-auto"
    android:layout_width="match_parent"
    android:layout_height="match_parent"
    android:background="#77f5ea05"
    android:orientation="vertical"  >

    <!--使用自定义控件-->
    <com.cnpeng.cnpeng_edittextfocus.EmptyNoticeLayout
        android:layout_height="match_parent"
        app:hintText="测试--网络不通或没有响应数据"
        android:layout_width="match_parent"/>
</LinearLayout>
注意:
- 使用自定义控件的时候,必须使用全路径名
- 使用自定义属性时,前面命名空间可以随意,系统会提示你生成,生成的时候,使用结尾是 res-auto的,如果不是res-auto结尾可能会出错;如上面的app:hintText属性,在跟布局文件中生成对应的命名空间为: xmlns:app=”http://schemas.android.com/apk/res-auto”
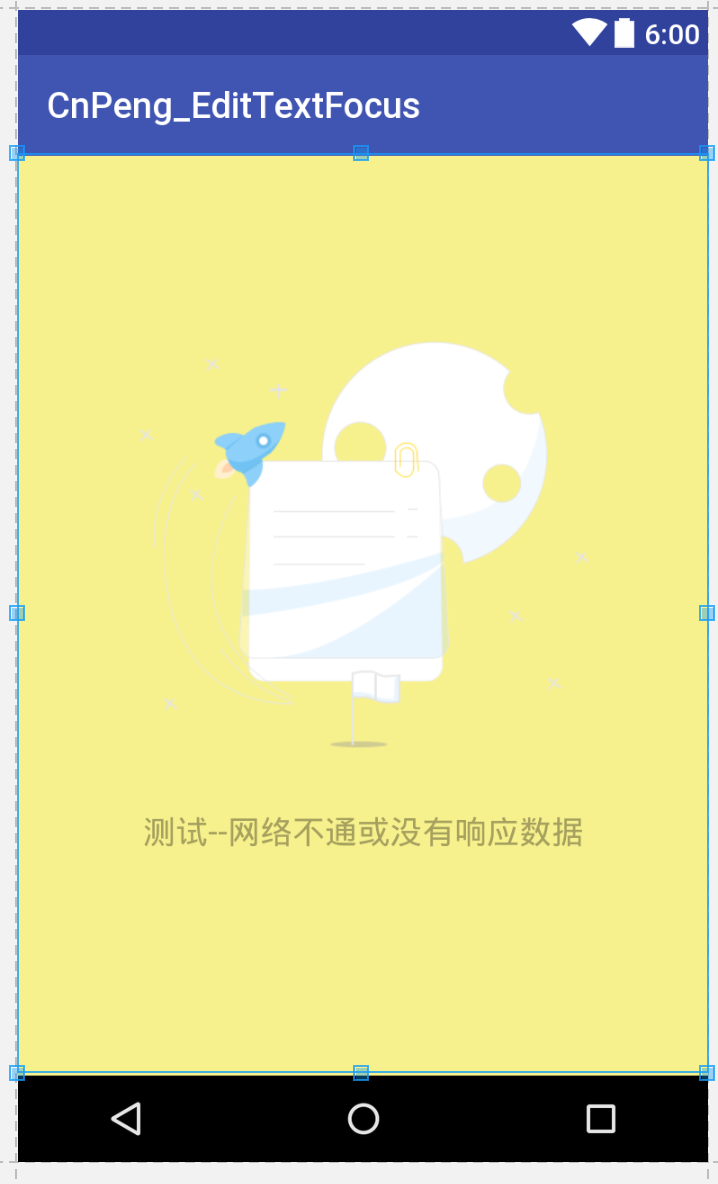
6 效果展示:
图片中的提示文字,就是我们在xml文件中,通过app:hintText设置的


 272
272

 被折叠的 条评论
为什么被折叠?
被折叠的 条评论
为什么被折叠?
 到【灌水乐园】发言


