


安装
我安装的是rabbitmq-server-3.7.4,安装完了之后,在开始菜单就能找到
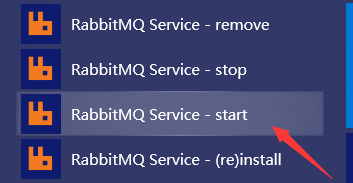
运行它就能开启服务
接着管理员身份运行 rabbitmq-plugins.bat 输入命令 enable rabbitmq_management

有些小伙伴会闪退
就在当前页面cmd输入以下命令也可以成功

这时候就能在浏览器输入localhost:15672 输入账号密码都为:guest就成功了

代码使用
首先引入依赖
<modules>
        <module>test-rabbitmq</module>
        <module>springboot-rabbitmq</module>
    </modules>
写工具类 ConnectionUtil
public class ConnectionUtil {
    public static Connection getConnection() throws Exception{
        //定义mq的连接工厂
        ConnectionFactory factory = new ConnectionFactory();
        //服务地址
        factory.setHost("127.0.0.1");
        //端口
        factory.setPort(5672);
        //设置账号信息
        factory.setVirtualHost("/");
        factory.setUsername("guest");
        factory.setPassword("guest");
        Connection connection = factory.newConnection();
        return  connection;
    }
}
写服务提供者
public class Producer {
    //队列名称
    private static  final String QUEUE = "Hello,World!";
    public static void main(String[] args) throws Exception {
        Connection connection = ConnectionUtil.getConnection();
        Channel channel = connection.createChannel();
        try {

            /**
             * param1:队列名称
             * param2:是否持久化
             * param3:队列是否独占此链接
             * param4:队列不再使用时是否删除
             * param5:队列参数
             */
            channel.queueDeclare(QUEUE,true,false,false,null);
            String Massage = "this is massage" + System.currentTimeMillis();
            /**
             * 消息发布方法
             * param1:Exchange的名称,如果没有指定,则使用Default Exchange
             * param2:routingKey(路由的key),消息的路由Key,是用于Exchange(交换机)将消息转发到指定的消息队列
             * param3:消息包含的属性
             * param4:消息体
             */
            /**
             * 这里没有指定交换机,消息将发送给默认交换机,每个队列也会绑定那个默认的交换机,但是不能显
             示绑定或解除绑定
             * 默认的交换机,routingKey等于队列名称
             */
            channel.basicPublish("", QUEUE, null, Massage.getBytes());
            System.out.println("Send Message is:'" + Massage + "'");
        } catch (Exception e) {
            e.printStackTrace();
        } finally {
            if (channel != null) {
                channel.close();
            }
            if (connection != null) {
                connection.close();
            }
        }
    }
}
写消费者
public class Consumer {
    private static final String QUEUE = "Hello,World!";
    public static void main(String[] args) throws Exception {
        Connection connection = ConnectionUtil.getConnection();
        Channel channel = connection.createChannel();
        try {
            //声明队列
            channel.queueDeclare(QUEUE, true, false, false, null);
            //定义消费方法
            Channel finalChannel = channel; //匿名内部类只能访问上一层
            DefaultConsumer consumer = new DefaultConsumer(finalChannel) {
                /**
                 * 消费者接收消息调用此方法
                 * @param consumerTag 消费者的标签,在channel.basicConsume()去指定
                 * @param envelope 消息包的内容,可从中获取消息id,消息routingkey,交换机,消息和重传标志
                (收到消息失败后是否需要重新发送)
                 * @param properties
                 * @param body
                 */
                @Override
                public void handleDelivery(String consumerTag,
                                           Envelope envelope,
                                           AMQP.BasicProperties properties,
                                           byte[] body)
                        throws IOException {
                    //交换机
                    String exchange = envelope.getExchange();
                    //路由key
                    String routingKey = envelope.getRoutingKey();
                    //消息id
                    long deliveryTag = envelope.getDeliveryTag();
                    //消息内容
                    String msg = new String(body, "utf8");
                    //int i= 1/0;  //不是自动回复没有丢失消息
                    System.out.println("receive message.." + msg);

                    //如果正常处理后需要做回复
                    finalChannel.basicAck(deliveryTag,false);
                }
            };
            /**
             * 监听队列:QUEUE 如果有消息来了,通过consumer来处理
             * 参数明细
             * 1、队列名称
             * 2、是否自动回复,设置为true为表示消息接收到自动向mq回复接收到了,mq接收到回复会删除消息,设置
             为false则需要手动回复
             * 3、消费消息的方法,消费者接收到消息后调用此方法
             */
            channel.basicConsume(QUEUE, false, consumer);

            //阻塞住,让他一直监听
            System.in.read();
        } catch (Exception e) {
            e.printStackTrace();
        } finally {
            if (channel != null) {
                channel.close();
            }
            if (connection != null) {
                connection.close();
            }
        }

    }
}
如果集成到springboot
pom
 <dependencies>
        <dependency>
            <groupId>org.springframework.boot</groupId>
            <artifactId>spring-boot-starter-web</artifactId>
        </dependency>
        <dependency>
            <groupId>org.springframework.boot</groupId>
            <artifactId>spring-boot-starter-test</artifactId>
        </dependency>

        <!--spirngboot集成rabbitmq-->
        <dependency>
            <groupId>org.springframework.boot</groupId>
            <artifactId>spring-boot-starter-amqp</artifactId>
        </dependency>
    </dependencies>
application.yml
server:
  port: 44000
spring:
  application:
    name: test‐rabbitmq
rabbitmq:
  host: 127.0.0.1
  port: 5672
  username: guest
  password: guest
  virtualHost: /
入口类
public class App {
    public static void main(String[] args) {
        SpringApplication.run(App.class, args);
    }
}
设置队列和交换机
@Configuration
public class RabbitMqConfig {
    //两个队列
    public static final String QUEUE_INFORM_EMAIL = "queue_inform_email";
    public static final String QUEUE_INFORM_SMS = "queue_inform_sms";
    //交换机名字
    public static final String EXCHANGE_TOPICS_INFORM = "exchange_topics_inform";


    /**
     * 交换机配置
     * ExchangeBuilder提供了fanout、direct、topic、header交换机类型的配置
     *
     * @return the exchange
     */
    @Bean(EXCHANGE_TOPICS_INFORM) //spring中bean
    public Exchange EXCHANGE_TOPICS_INFORM() {
        //durable(true)持久化,消息队列重启后交换机仍然存在
        return ExchangeBuilder.topicExchange(EXCHANGE_TOPICS_INFORM).durable(true).build();
    }


    //声明队列
    @Bean(QUEUE_INFORM_SMS)
    public Queue QUEUE_INFORM_SMS() {
        Queue queue = new Queue(QUEUE_INFORM_SMS);
        return queue;
    }

    //声明队列
    @Bean(QUEUE_INFORM_EMAIL)
    public Queue QUEUE_INFORM_EMAIL() {
        Queue queue = new Queue(QUEUE_INFORM_EMAIL);
        return queue;
    }


    /**
     * channel.queueBind(INFORM_QUEUE_SMS,"inform_exchange_topic","inform.#.sms.#");
     * 绑定队列到交换机 .
     *
     * @param queue    the queue
     * @param exchange the exchange
     * @return the binding
     */
    @Bean
    public Binding BINDING_QUEUE_INFORM_SMS(@Qualifier(QUEUE_INFORM_SMS) Queue queue, //通过名字从spring获取bean
                                            @Qualifier(EXCHANGE_TOPICS_INFORM) Exchange exchange) {
        return BindingBuilder.bind(queue).to(exchange).with("inform.#.sms.#").noargs();
    }

    @Bean
    public Binding BINDING_QUEUE_INFORM_EMAIL(@Qualifier(QUEUE_INFORM_EMAIL) Queue queue,
                                              @Qualifier(EXCHANGE_TOPICS_INFORM) Exchange exchange) {
        return BindingBuilder.bind(queue).to(exchange).with("inform.#.email.#").noargs();
    }
}
给两个队列绑定方法
@Component
public class MessageHandler {

    //绑定sms队列的方法

    @RabbitListener(queues = {RabbitMqConfig.QUEUE_INFORM_SMS})
    public void xxx(String msg, Message message, Channel channel){

        System.out.println("sms message:"+msg);
    }

    //绑定email队列方法
    @RabbitListener(queues = {RabbitMqConfig.QUEUE_INFORM_EMAIL})
    public void yyy(String msg, Message message, Channel channel)
    {
        System.out.println("email message:"+msg);
    }
}


 1万+
1万+


 被折叠的 条评论
为什么被折叠?
被折叠的 条评论
为什么被折叠?
 到【灌水乐园】发言


