


获取开源代码的网站
- https://code.google.com/
- https://github.com/
- 在github搜索smart-image-view
- 下载开源项目smart-image-view
-
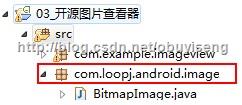
使用自定义组件时,标签名字要写包名
<com.loopj.android.image.SmartImageView/> -
SmartImageView的使用
SmartImageView siv = (SmartImageView) findViewById(R.id.siv);
siv.setImageUrl("http://192.168.1.102:8080/dd.jpg");
1、将android-smart-image-view-master解压后拷贝到我们新建的项目中
2、在布局文件中使用自定义控件,要注意使用自定义控件的话,需要使用全路径
<LinearLayout xmlns:android="http://schemas.android.com/apk/res/android"
    xmlns:tools="http://schemas.android.com/tools"
    android:layout_width="match_parent"
    android:layout_height="match_parent"
    android:orientation="vertical" >
    <Button
        android:layout_width="wrap_content"
        android:layout_height="wrap_content"
        android:text="@string/hello_world"
        android:onClick="click"/>

    <!-- 使用框架中的控件    使用自定义控件的话 要使用全路径-->
    <com.loopj.android.image.SmartImageView
        android:id="@+id/iv"
        android:layout_width="wrap_content"
        android:layout_height="wrap_content"
        android:src="@drawable/ic_launcher"
        />
</LinearLayout>
3、在代码中进行下载图片
import com.loopj.android.image.SmartImageView;
import android.os.Bundle;
import android.app.Activity;
import android.view.Menu;
import android.view.View;
public class MainActivity extends Activity {
	@Override
	protected void onCreate(Bundle savedInstanceState) {
		super.onCreate(savedInstanceState);
		setContentView(R.layout.activity_main);
	}
	public void click(View v){
		//下载图片
		//1.确定网址
		String path = "http://192.168.13.13:8080/dd.jpg";
		//2.找到智能图片查看器对象
		SmartImageView siv = (SmartImageView) findViewById(R.id.iv);
		//3.下载并显示图片  在该方法中进行了封装
		siv.setImageUrl(path);
	}
}
4、添加权限
<uses-permission android:name="android.permission.INTERNET"/> 


 1542
1542


 被折叠的 条评论
为什么被折叠?
被折叠的 条评论
为什么被折叠?
 到【灌水乐园】发言


