


一)Hystrix断路器简介
Hystrix是一个库,在分布式系统对服务之间调用进行控制,提供了服务之间的延迟或容错等。
作用:
防止系统故障,对服务进行监控警告,服务正常降级,服务延迟等处理。
二)Hystrix断路器前期准备
第一步:引入Hystrix的jar
<!-- hystrix断路器 jar -->
<dependency>
    <groupId>org.springframework.cloud</groupId>
    <artifactId>spring-cloud-starter-netflix-hystrix</artifactId>
</dependency>pom.xml内容:
<project xmlns="http://maven.apache.org/POM/4.0.0" xmlns:xsi="http://www.w3.org/2001/XMLSchema-instance" xsi:schemaLocation="http://maven.apache.org/POM/4.0.0 http://maven.apache.org/xsd/maven-4.0.0.xsd">
    <modelVersion>4.0.0</modelVersion>
    <groupId>com.oysept</groupId>
    <artifactId>my_hystrix</artifactId>
    <version>0.0.1-SNAPSHOT</version>
    <packaging>jar</packaging>

    <!-- properties声明一些公共配置,该节点配置了自定义属性即可在任意地方使用,通过${}访问,形式如${java.version} -->
    <properties>
        <java.version>1.8</java.version>
    </properties>

    <!-- springboot版本信息 -->
    <parent>
        <groupId>org.springframework.boot</groupId>
        <artifactId>spring-boot-starter-parent</artifactId>
        <version>2.1.4.RELEASE</version>
    </parent>

     <!-- dependencyManagement的作用其实相当于一个对所依赖jar包进行版本管理的管理器 -->
    <!--
        说明1:如果dependencies里的dependency自己没有声明version元素,那么maven就会倒dependencyManagement里面去找有没有对该artifactId和groupId进行过版本声明,
              如果有,就继承它,如果没有就会报错,告诉你必须为dependency声明一个version
        说明2:如果dependencies中的dependency声明了version,那么无论dependencyManagement中有无对该jar的version声明,都以dependency里的version为准。
    -->
    <dependencyManagement>
        <dependencies>
            <dependency>
                <groupId>org.springframework.cloud</groupId>
                <artifactId>spring-cloud-dependencies</artifactId>
                <version>Greenwich.SR5</version>
                <type>pom</type>
                <scope>import</scope>
            </dependency>
        </dependencies>
    </dependencyManagement>

    <dependencies>
        <dependency>
            <groupId>org.springframework.boot</groupId>
            <artifactId>spring-boot-starter-web</artifactId>
        </dependency>

        <!-- 引入springcloud client jar -->
        <dependency>
            <groupId>org.springframework.cloud</groupId>
            <artifactId>spring-cloud-starter-netflix-eureka-client</artifactId>
        </dependency>

        <!-- hystrix断路器 jar -->
        <dependency>
            <groupId>org.springframework.cloud</groupId>
            <artifactId>spring-cloud-starter-netflix-hystrix</artifactId>
        </dependency>
    </dependencies>

    <!-- maven打包插件,在cmd命令窗口执行,如: mvn install -U -->
    <build>
        <plugins>
            <plugin>
                <groupId>org.springframework.boot</groupId>
                <artifactId>spring-boot-maven-plugin</artifactId>
            </plugin>
        </plugins>
    </build>
</project>
第二步:创建application.yml文件,添加应用配置
application.yml配置:
注:spring.application.name应用名称中不能包含下划线,否则容易报Request URI does not contain a valid hostname:http://xxx错误。
server:
    port: 8763

spring:
    application:
        name: my-hystrix-ouyangjun

eureka:
  instance:
    hostname: localhost
  client:
    serviceUrl:
      # 表示需要把服务注册到Eureka注册中心上, 这里是Eureka注册中心的地址
      defaultZone: http://localhost:8761/eureka/
第三步:在MyHystrixApplication启动类中,添加Hystrix断路器支持,使用@EnableHystrix注解
package com.oysept;

import org.springframework.boot.SpringApplication;
import org.springframework.boot.autoconfigure.SpringBootApplication;
import org.springframework.cloud.client.discovery.EnableDiscoveryClient;
import org.springframework.cloud.netflix.hystrix.EnableHystrix;

/**
 * @author ouyangjun
 */
@SpringBootApplication
@EnableDiscoveryClient
@EnableHystrix
public class MyHystrixApplication {

    public static void main(String[] args) {
        SpringApplication.run(MyHystrixApplication.class, args);
    }
}
三)单个Hystrix断路器
给每一个服务方法,添加一个Hystrix fallback
package com.oysept.controller;

import org.springframework.web.bind.annotation.RequestMapping;
import org.springframework.web.bind.annotation.RestController;

import com.netflix.hystrix.contrib.javanica.annotation.HystrixCommand;

@RestController
@RequestMapping("/myhystrix")
public class MyHystrixController {

    // 访问地址: http://localhost:8763/myhystrix/getMsg?msg=
    @RequestMapping("/getMsg")
    @HystrixCommand(fallbackMethod = "defaultMsg")
    public String getMsg(String msg) {
        if (msg == null || "".equals(msg)) {
            throw new NullPointerException(); // 抛异常, 表示服务需要降级处理
        }
        return msg + " success message!";
    }

    // 服务降级方法, 需要保持同类型参数
    public String defaultMsg(String msg) {
        return "error message!";
    }
}
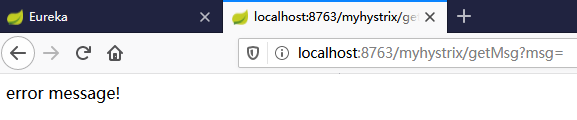
需先启动Eureka注册中心,然后再启动MyHystrixApplication中的main方法
在浏览器中输入:http://localhost:8763/myhystrix/getMsg?msg=
再在浏览器输入:http://localhost:8763/myhystrix/getMsg?msg=112233

四)全局Hystrix断路器
所有的服务共用一个Hystrix fallback,通过@DefaultProperties注解实现
package com.oysept.controller;

import org.springframework.web.bind.annotation.RequestMapping;
import org.springframework.web.bind.annotation.RestController;

import com.netflix.hystrix.contrib.javanica.annotation.DefaultProperties;
import com.netflix.hystrix.contrib.javanica.annotation.HystrixCommand;

/**
 * @DefaultProperties: 设置全局服务降级方法
 * @author ouyangjun
 */
@RestController
@RequestMapping("/defaulthystrix")
@DefaultProperties(defaultFallback = "defaultMsg")
public class DefaultHystrixController {

    // 访问地址: http://localhost:8763/defaulthystrix/getFirstMsg?firstMsg=
    @RequestMapping("/getFirstMsg")
    @HystrixCommand
    public String getFirstMsg(String firstMsg) {
        if (firstMsg == null || "".equals(firstMsg)) {
            throw new NullPointerException(); // 抛异常, 表示服务需要降级处理
        }
        return firstMsg + " success message!";
    }

    // 访问地址: http://localhost:8763/defaulthystrix/getSecondMsg?secondMsg=
    @RequestMapping("/getSecondMsg")
    @HystrixCommand
    public String getSecondMsg(String secondMsg) {
        if (secondMsg == null || "".equals(secondMsg)) {
            throw new NullPointerException(); // 抛异常, 表示服务需要降级处理
        }
        return secondMsg + " success message!";
    }

    // 全局服务降级方法, 不需要入参
    public String defaultMsg() {
        return "error message!";
    }
}重启MyHystrixApplication中的main方法,在浏览器输入访问地址查看效果。
五)Feign Hystrix断路器
该方式适合分布式系统中,微服务之间的服务交互
第一步:先添加Feign的jar
<!-- openfeign jar -->
<dependency>
    <groupId>org.springframework.cloud</groupId>
    <artifactId>spring-cloud-starter-openfeign</artifactId>
</dependency>
第二步:创建一个Api
@FeignClient:将Http请求抽象化为一个Interface客户端,可以调用接口的形式来执行Http请求。
value:微服务应用名称,和application.yml中spring.application.name配置一致。
fallback:断路器服务降级回调函数
package com.oysept.api;

import org.springframework.cloud.openfeign.FeignClient;
import org.springframework.web.bind.annotation.RequestMapping;
import org.springframework.web.bind.annotation.RequestMethod;

import com.oysept.api.fallback.DemoApiFallBack;

@FeignClient(
		value = "my-hystrix-ouyangjun",
		fallback = DemoApiFallBack.class
		)
public interface IDemoApi {

    @RequestMapping(value = "/demo/hello", method = RequestMethod.GET)
    String hello(String msg);
}
第三步:创建一个Api fallback服务正常降级回调函数
@Component:该注解声明为配置类
package com.oysept.api.fallback;

import org.springframework.stereotype.Component;

import com.oysept.api.IDemoApi;

@Component
public class DemoApiFallBack implements IDemoApi {

    @Override
    public String hello(String msg) {
        return "demo fallback!";
    }
}
第四步:创建一个Controller测试Feign Hystrix断路器
package com.oysept.controller;

import org.springframework.beans.factory.annotation.Autowired;
import org.springframework.web.bind.annotation.RequestMapping;
import org.springframework.web.bind.annotation.RequestMethod;
import org.springframework.web.bind.annotation.RestController;

import com.oysept.api.IDemoApi;

@RestController
@RequestMapping("/feign")
public class FeignHystrixController {

    // 注入其它微服务Api
    @Autowired
    private IDemoApi iDemoApi;

    // 访问地址: http://localhost:8763/feign/test?msg=
    @RequestMapping(value = "test", method = RequestMethod.GET)
    public String test(String msg) {
        return iDemoApi.hello(msg);
    }
}重启MyHystrixApplication中的main方法
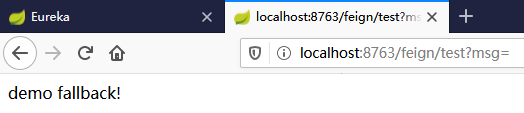
在浏览器输入:http://localhost:8763/feign/test?msg=
六)Hystrix Dashboard仪表盘
在pom.xml引入jar
<dependency>
    <groupId>org.springframework.cloud</groupId>
    <artifactId>spring-cloud-starter-netflix-hystrix-dashboard</artifactId>
</dependency>
在MyHystrixApplication启动类中添加@EnableHystrixDashboard注解,表示启用Hystrix Dashboard仪表盘
package com.oysept;

import org.springframework.boot.SpringApplication;
import org.springframework.boot.autoconfigure.SpringBootApplication;
import org.springframework.cloud.client.discovery.EnableDiscoveryClient;
import org.springframework.cloud.netflix.hystrix.EnableHystrix;
import org.springframework.cloud.netflix.hystrix.dashboard.EnableHystrixDashboard;

/**
 * @author ouyangjun
 */
@SpringBootApplication
@EnableDiscoveryClient
@EnableHystrix
@EnableHystrixDashboard
public class MyHystrixApplication {

    public static void main(String[] args) {
        SpringApplication.run(MyHystrixApplication.class, args);
    }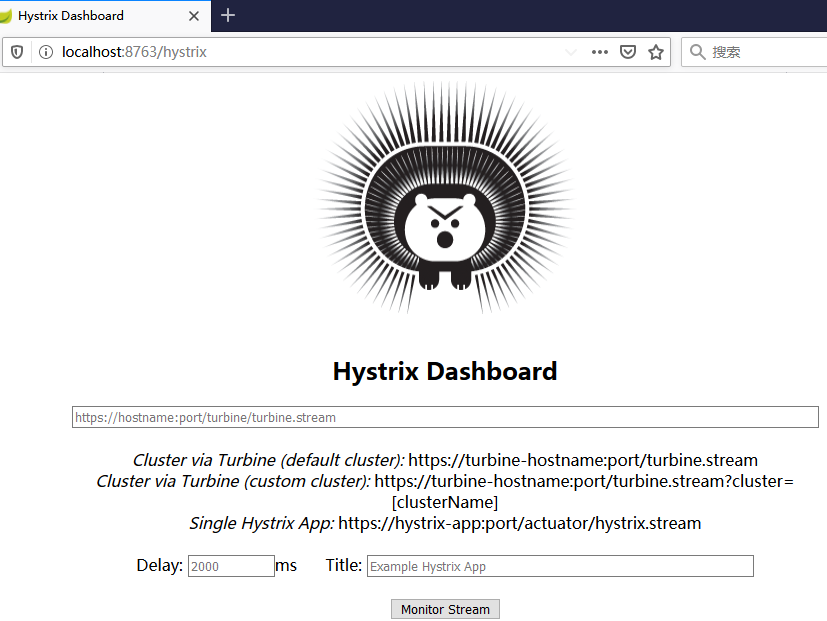
}重启MyHystrixApplication中的main方法
在浏览器输入:http://localhost:8763/hystrix
识别二维码关注个人微信公众号

本章完结,待续,欢迎转载!
本文说明:该文章属于原创,如需转载,请标明文章转载来源!


 73
73


 被折叠的 条评论
为什么被折叠?
被折叠的 条评论
为什么被折叠?
 到【灌水乐园】发言


