


这篇文章不具体讲一些细的概念东西,如要了解cygwin和hadoop可以去参考其他的文章,该文阐述从下载cygwin到搭建hadoop环境,里面的图片部门来自网上资料,因为本人当时部署时没有保存自己运行图片,但是步骤是一样的。
对于hadoop是个庞大的生态系统,里面光一些技术要点多达几十种,但所谓千里之行,始于足下,对于我这样的技术小白来说,如果想弄一个完全分布式的hadoop环境无异天方夜谭,首先我不懂linux,再说也没那么多机器搭建完全分布式环境。但是cygwin的出现可以让我不用在我本机装linux环境,cygwin就是一款在windows环境下模拟linux。接下来开始进入cygwin的下载,这个可以在官网下载
一:安装Cygwin
点击exe文件

点击下一步
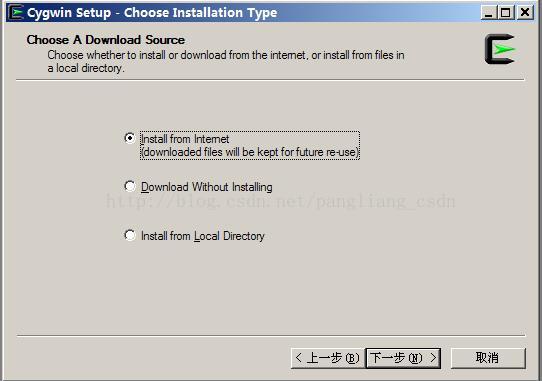
这里的区别是直接是在线下载然后安装,其他的是下载到本地但不安装,推荐默认的就是第一个,点击下一步
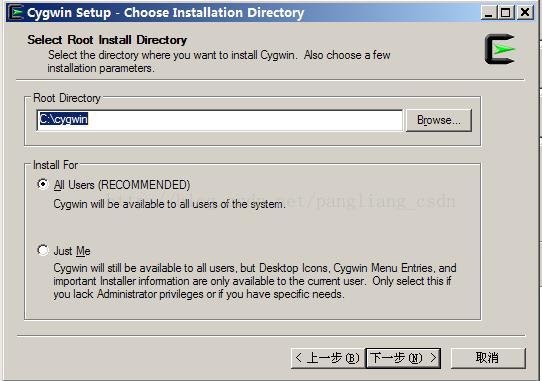
这个默认是放在C盘,也可以放其他地方,点击下一步
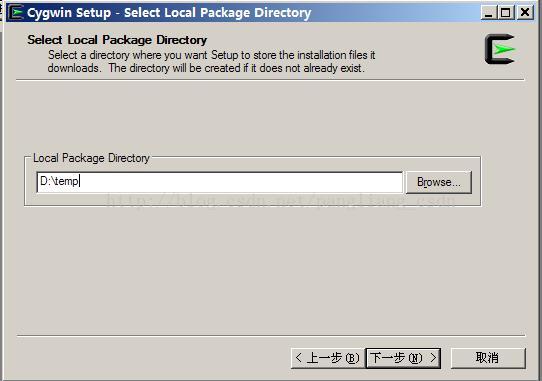
这个是下载内容,另外指定一个盘放,点击下一步
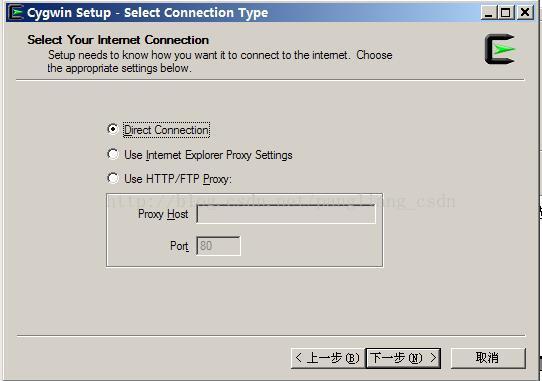
默认选择第一个,点击下一步
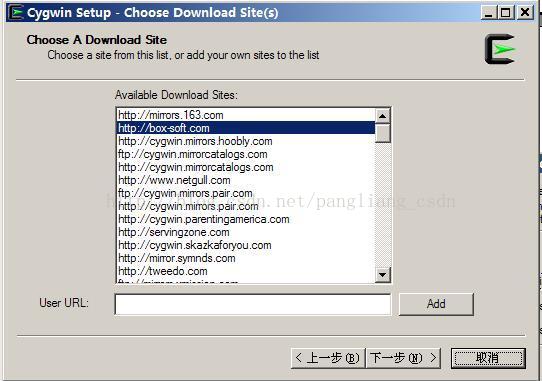
这里选择下载的服务器地址,用默认的也可以但是非常慢,有可能半天一天具体视网络情况,推荐一个http://mirrors.163.com这是我用的最快的,里面没有的话点击Add按钮添加进去,然后选择它,点击下一步
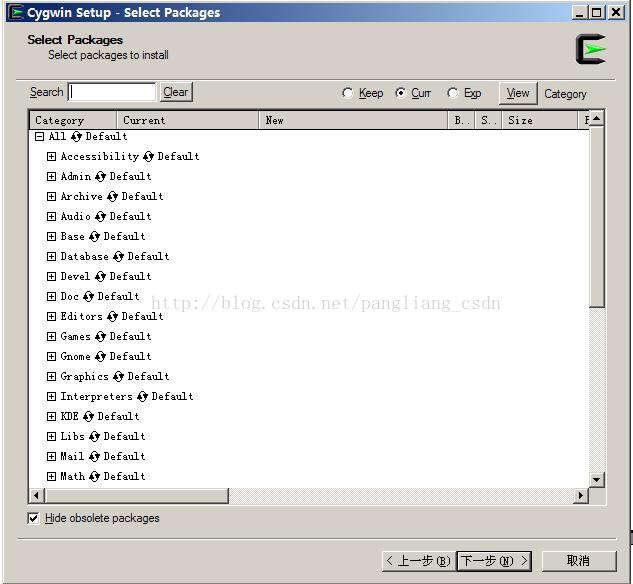
这里选择具体的组件具体点击前面的skip就会出现目前的版本,代表你已经选中,我下了有:
Devel里面的binutils、gcc-core、gcc-g++、gcc-mingw-core、gcc-ming-g++、gdb
Net的openssh和openssl组件,用于hadoop需要的ssh访问,操作方法同上
Base的sed,用于eclipse连接hadoop开发
还可以下载一些vim等,这个根据自己的需要,还有就算这次没有选中,安装以后还是可以增加组件包的,最好选择第一次下载的网址,选择别的我没试过不知道有没有问题,完成这些后点击下一步就开始下载了,我用那个163的地址下载时间不超过10分钟。
安装完成以后桌面生成一个快捷方式,点击图标
执行cygwin的ssh-host-config
然后按照提示一步一步来
*** Info: Generating missing SSH host keys
ssh-keygen: generating new host keys: RSA1 RSA DSA ECDSA ED25519
*** Info: Creating default /etc/ssh_config file
*** Info: Creating default /etc/sshd_config file

*** Info: StrictModes is set to 'yes' by default.
*** Info: This is the recommended setting, but it requires that the POSIX
*** Info: permissions of the user's home directory, the user's .ssh
*** Info: directory, and the user's ssh key files are tight so that
*** Info: only the user has write permissions.
*** Info: On the other hand, StrictModes don't work well with default
*** Info: Windows permissions of a home directory mounted with the
*** Info: 'noacl' option, and they don't work at all if the home
*** Info: directory is on a FAT or FAT32 partition.
*** Query: Should StrictModes be used? (yes/no) no

*** Info: Privilege separation is set to 'sandbox' by default since
*** Info: OpenSSH 6.1.  This is unsupported by Cygwin and has to be set
*** Info: to 'yes' or 'no'.
*** Info: However, using privilege separation requires a non-privileged account
*** Info: called 'sshd'.
*** Info: For more info on privilege separation read /usr/share/doc/openssh/README.privsep.
*** Query: Should privilege separation be used? (yes/no) no
*** Info: Updating /etc/sshd_config file

*** Query: Do you want to install sshd as a service?
*** Query: (Say "no" if it is already installed as a service) (yes/no) yes
*** Query: Enter the value of CYGWIN for the daemon: []
*** Info: On Windows Server 2003, Windows Vista, and above, the
*** Info: SYSTEM account cannot setuid to other users -- a capability
*** Info: sshd requires.  You need to have or to create a privileged
*** Info: account.  This script will help you do so.

*** Info: You appear to be running Windows XP 64bit, Windows 2003 Server,
*** Info: or later.  On these systems, it's not possible to use the LocalSystem
*** Info: account for services that can change the user id without an
*** Info: explicit password (such as passwordless logins [e.g. public key
*** Info: authentication] via sshd).

*** Info: If you want to enable that functionality, it's required to create
*** Info: a new account with special privileges (unless a similar account
*** Info: already exists). This account is then used to run these special
*** Info: servers.

*** Info: Note that creating a new user requires that the current account
*** Info: have Administrator privileges itself.

*** Info: No privileged account could be found.

*** Info: This script plans to use 'cyg_server'.
*** Info: 'cyg_server' will only be used by registered services.
*** Query: Do you want to use a different name? (yes/no) no
*** Query: Create new privileged user account 'cyg_server'? (yes/no) yes
*** Info: Please enter a password for new user cyg_server.  Please be sure
*** Info: that this password matches the password rules given on your system.
*** Info: Entering no password will exit the configuration.
*** Query: Please enter the password:
*** Query: Reenter:

*** Info: User 'cyg_server' has been created with password 'cyg_server'.
*** Info: If you change the password, please remember also to change the
*** Info: password for the installed services which use (or will soon use)
*** Info: the 'cyg_server' account.

*** Info: Also keep in mind that the user 'cyg_server' needs read permissions
*** Info: on all users' relevant files for the services running as 'cyg_server'.
*** Info: In particular, for the sshd server all users' .ssh/authorized_keys
*** Info: files must have appropriate permissions to allow public key
*** Info: authentication. (Re-)running ssh-user-config for each user will set
*** Info: these permissions correctly. [Similar restrictions apply, for
*** Info: instance, for .rhosts files if the rshd server is running, etc].


*** Info: The sshd service has been installed under the 'cyg_server'
*** Info: account.  To start the service now, call `net start sshd' or
*** Info: `cygrunsrv -S sshd'.  Otherwise, it will start automatically
*** Info: after the next reboot.

*** Info: Host configuration finished. Have fun!
上面会提示创建一个用户cyg_server,并提示你输入该用户的密码,我们这里输入和用户名一样的密码cyg_server,后面会用到。
请注意cyg_server用户的创建是强制的,没有这个用户即使sshd装好也不行的,后面使用的时候会出现Connection closed的错误,本人就在这里栽了跟头,浪费了好多时间。
好了到服务里看一下,会多出来一个CYGWIN sshd,可以把它设置成手动启动,然后我们启动它

回到cygwin环境,执行 ssh localhost命令。

在第一步询问中输入yes,在第二步要求输入密码时,输入用户密码,密码上面已经设置了
在cygwin中输入ssh-keygen,一路回车即可

然后在cygwin下依次执行如下命令:
cd ~/.ssh
cp id_rsa.pub authorized_keys
完成后一路exit退出cygwin环境,再打开cygwin环境,执行ssh localhost,发现如下图不需要密码即可进入,就代表成功了。
二:部署hadoop
我这里用的是hadoop第一代产品,就是简单的namenode,datanode,jobstracker,taskstracker,secondenamenode。我这里提供一个下载好了的0.20.2版本,具体的也可以去apache hadooop官网下载
解压后把hadoop包放入Cygwin的目录下

配置一些信息,首先jdk是必须的,这里要提前说一个重点,一般我们的jdk是放C盘的Program Files里面这里就会设置到空格,这样后面就会有错误。网上说加引号,建立软链接,什么反斜杠等等,我都试了读不好使,在此我建议干脆一点直接把以前jdk拿出Program Files文件夹单独一个文件夹,这里就不能再用空格的名字了。
jdk的环境变量配置我就不说了,在path中添加,这个根据自己安装目录
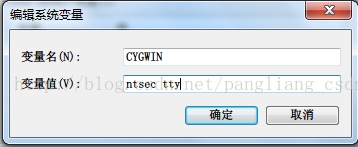
;C:\cygwin64\bin;C:\cygwin64\usr\sbin;环境变量中-->新建变量-->CYGWIN-->对应的值为:ntsec tty
修改hadoop的一些配置文件:
hadoop-env.sh,把前面的#号去掉
export JAVA_HOME=/java/jdk1.7.0_45core-site.xml
<configuration>
<property>
<name>fs.default.name</name>
<value>hdfs://localhost:9000</value>
</property>
</configuration>
hdfs-site.xml
<configuration>
<property>
<name>dfs.replication</name>
<value>1</value>
</property>
</configuration>
mapred-site.xml
<configuration>
<property>
<name>mapred.job.tracker</name>
<value>localhost:9001</value>
</property>
</configuration>
再次打开cygwin图标,这时切换到hadoop命令行
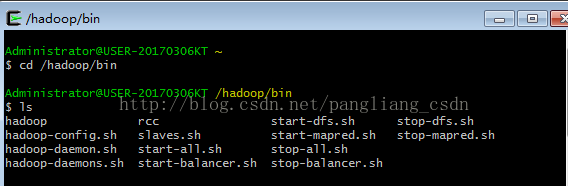
输入hadoop namenode -format 这是格式化hdfs系统,再启动所有start-all.sh

我这里启动出现了问题,namenode没起来,只有mr起来了,访问地址也访问不了,这里有个日志可以看,在hadoop/logs里面有专门的namenode日志
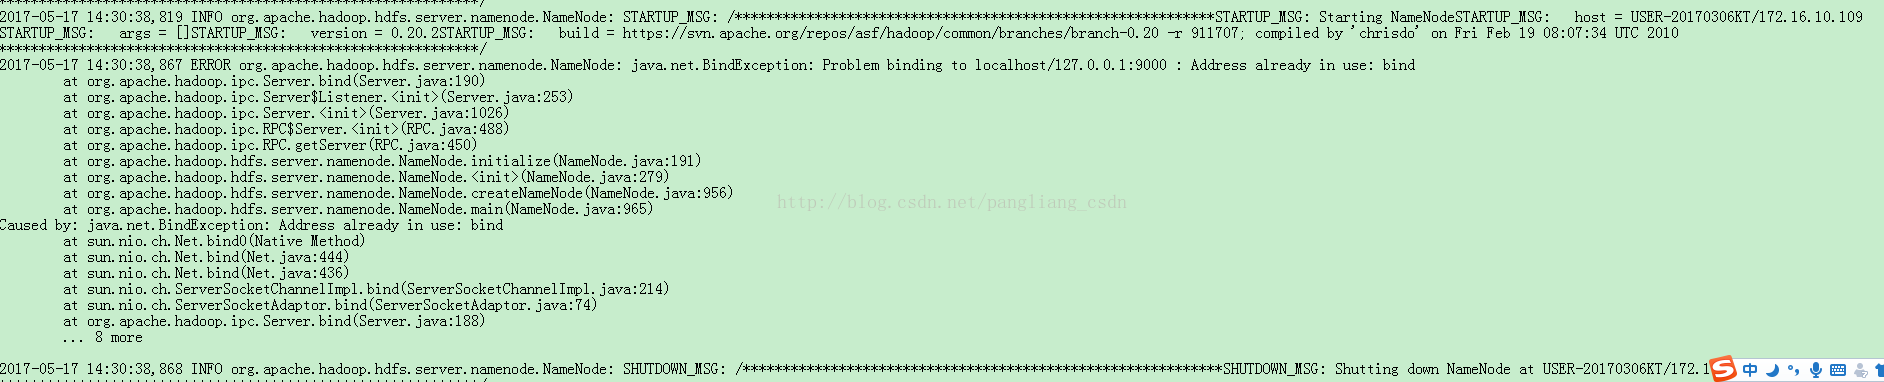
里面提示,我的9000端口已经被使用,我打开超级管理员界面执行netstat -aon|findstr "9000" 发现有个ppap的进程占用了端口9000,打开任务管理器直接找到这个进程,原来是pptv的一个进程,然后结束这个进程。当然我遇到的这种情况大家不一定会遇到,但如果出现某个节点起不来第一时间看日志,出现端口占用一定提前结束进程。
再次启动
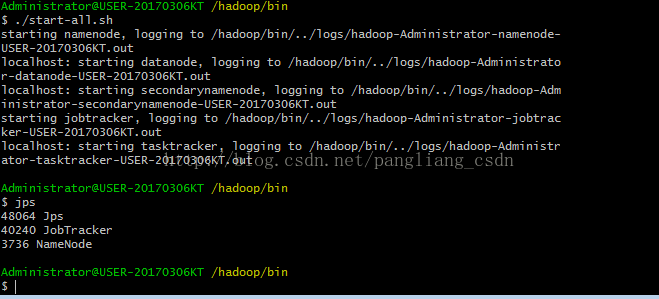
这次namenode起来了,以此在浏览器输入访问地址http://localhost:50070 http://localhost:50030可以分别访问hdfs和mr
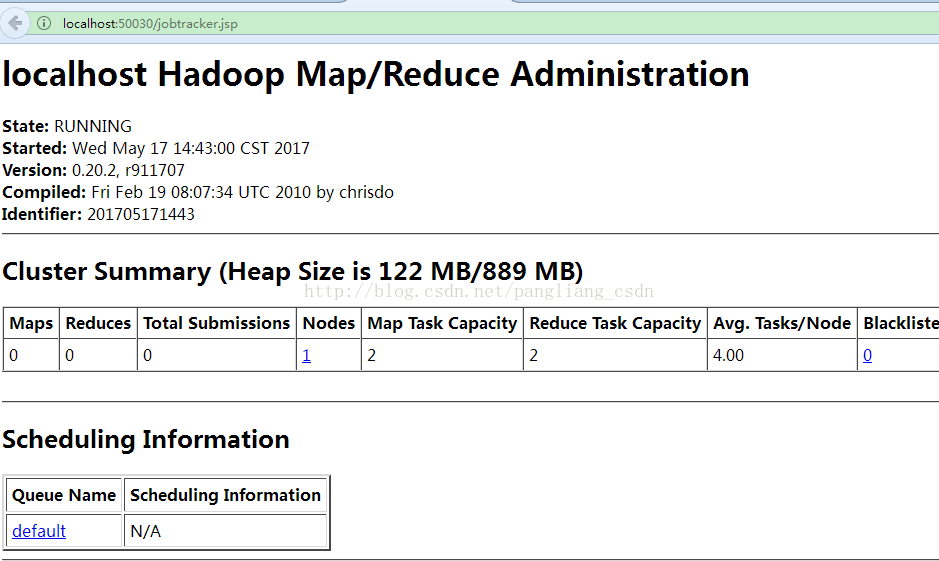
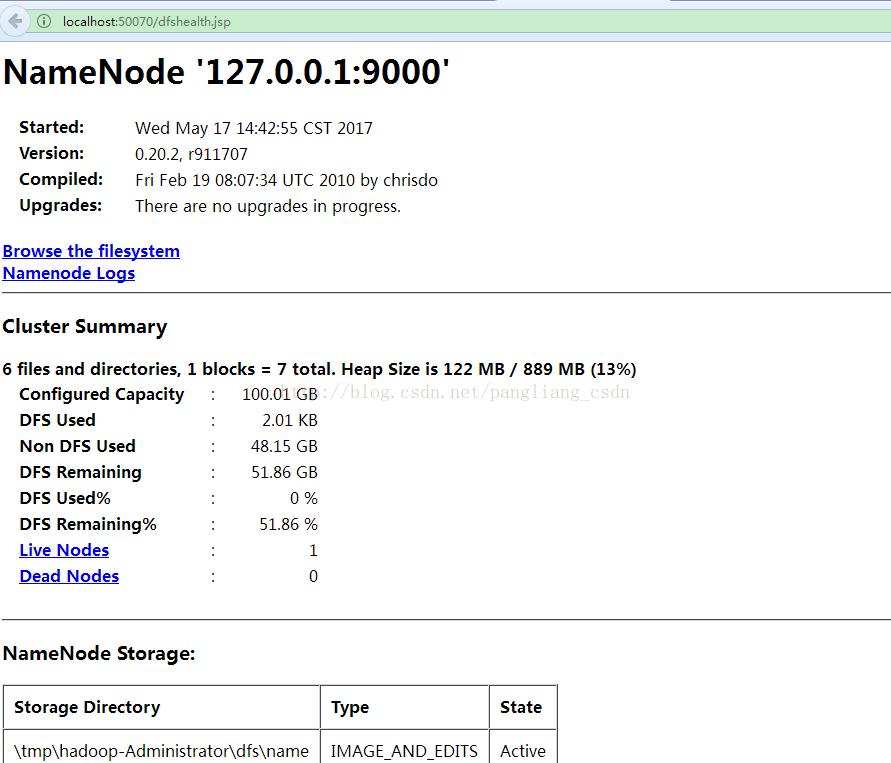
到这里一个简单的hadoop环境搭建完毕,对于自己这样的小白弄完这一步,可以给自己鼓个掌!


 429
429


 被折叠的 条评论
为什么被折叠?
被折叠的 条评论
为什么被折叠?
 到【灌水乐园】发言


