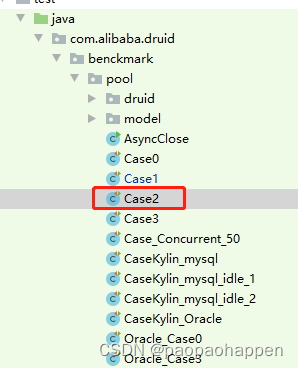
多线程下对druid的测试
今天继续Case2, 和之前的Case0相比呢,是继续比较多个线程池的性能对比。这次不同的是,用100个线程并发去执行25000个数据库的连接并释放。我们今天不研究他们不同线程池的性能对比,研究下这个测试用例用到的多线程,并发相关的东西,看懂这段代码。

可以看到下面的代码是druid连接池的测试方法,核心方式是p0
   public void test_0() throws Exception {
        DruidDataSource dataSource = new DruidDataSource();

        dataSource.setInitialSize(initialSize);
        dataSource.setMaxActive(maxActive);
        dataSource.setMinIdle(minPoolSize);
        dataSource.setMaxIdle(maxPoolSize);
        dataSource.setPoolPreparedStatements(true);
        dataSource.setDriverClassName(driverClass);
        dataSource.setUrl(jdbcUrl);
        dataSource.setPoolPreparedStatements(true);
        dataSource.setUsername(user);
        dataSource.setPassword(password);
        dataSource.setValidationQuery(validationQuery);
        dataSource.setTestOnBorrow(testOnBorrow);

        for (int i = 0; i < executeCount; ++i) {
            p0(dataSource, "druid", threadCount);
        }
        System.out.println();
    }
AtomicLong & CountDownLatch
在p0中,看到定义了几个并发相关的类,原子类AtomicLong,并发工具类CountDownLatch,看到这两个熟悉又陌生的类差点给我送走,仔细回忆了下。
AtomicLong
AtomicLong是一个线程安全的计数器,不会受多线程的影响。
CountDownLatch
CountDownLatch是,初始一个数量这里面是100,每一次调用CountDown数量都会减1,
调用它的await方法,就会阻塞主线程,等待100归0后,才会继续执行。
如下面的代码中的startLatch,每个子线程的主方法体中,startLatch.await()就是在等待CountDown=0时,所有的子线程一起开始执行方法体的内容。
    private void p0(final DataSource dataSource, String name, int threadCount) throws Exception {

        final CountDownLatch startLatch = new CountDownLatch(1);
        final CountDownLatch endLatch = new CountDownLatch(threadCount);
        final AtomicLong blockedStat = new AtomicLong();
        final AtomicLong waitedStat = new AtomicLong();

        for (int i = 0; i < threadCount; ++i) {
            Thread thread = new Thread() {

                public void run() {
                    try {
                    //每个子线程在等待,统一开始
                        startLatch.await();

                        long threadId = Thread.currentThread().getId();

                        long startBlockedCount, startWaitedCount;
                        {
                            ThreadInfo threadInfo = ManagementFactory.getThreadMXBean().getThreadInfo(threadId);
                            startBlockedCount = threadInfo.getBlockedCount();
                            startWaitedCount = threadInfo.getWaitedCount();
                        }
                        for (int i = 0; i < LOOP_COUNT; ++i) {
                            Connection conn = dataSource.getConnection();
                            conn.close();
                        }

                        ThreadInfo threadInfo = ManagementFactory.getThreadMXBean().getThreadInfo(threadId);
                        long blockedCount = threadInfo.getBlockedCount() - startBlockedCount;
                        long waitedCount = threadInfo.getWaitedCount() - startWaitedCount;

                        blockedStat.addAndGet(blockedCount);
                        waitedStat.addAndGet(waitedCount);
                    } catch (Exception ex) {
                        ex.printStackTrace();
                    }
                    //每个子线程执行完后,都会-1
                    endLatch.countDown();
                }
            };
            thread.start();
        }
        long startMillis = System.currentTimeMillis();
        long startYGC = TestUtil.getYoungGC();
        long startFullGC = TestUtil.getFullGC();
           //start归0后,所有的子线程开始跑。
        startLatch.countDown();
     //end开始等待。
        endLatch.await();
//等所有子线程跑完每个线程的25000个连接释放,就会回到主线程。继续往下走。
        long millis = System.currentTimeMillis() - startMillis;
        long ygc = TestUtil.getYoungGC() - startYGC;
        long fullGC = TestUtil.getFullGC() - startFullGC;

        System.out.println("thread " + threadCount + " " + name + " millis : "
                           + NumberFormat.getInstance().format(millis) + ", YGC " + ygc + " FGC " + fullGC
                           + " blockedCount " + blockedStat.get() + " waitedCount " + waitedStat.get());
    }
测试指标
blockedCount
这blockedCount是什么意思呢,我去看了下源码中的注释
(被阻止进入锁的次数) Number of times blocked to enter a lock
waitedCount
(等待锁的次数)Number of times waited on a lock
google翻译有点不太清楚。我理解就是blcokedCount是线程阻塞的次数总和。
waitedCount是等待获取锁的次数总和。这两个数值越少,代表数据库连接池的性能越高。
测试结果
可以明显发现druid的blcokedCount才是0或者1,性能非常高。
由于为了弄清楚blockedCount和waitedCount的含义,下次去复习下Thread的状态,和各个状态之间的转换。


 488
488


 被折叠的 条评论
为什么被折叠?


