 Spring属性注入详解:@Value与@Autowired解析流程


 本文深入剖析了Spring中属性注入的实现过程,包括@Value和@Autowired注解的解析。首先,通过@PropertySource加载配置文件并保存到环境变量的资源列表中。接着,当实例化bean时,Spring会查找所有标注了@Autowired或@Value的属性,通过环境变量的资源列表查找属性值或实例化bean对象。整个过程涉及函数型接口的使用,以及属性值的解析和注入。文章还介绍了属性值的获取逻辑,展示了从配置文件到属性注入的完整流程。
目录
embeddedValueResolvers 什么时候初始化以及解析 @Value 的函数型接口什么时候放入列表中的?
刚刚我们遍历的资源文件列表,跟我们前面存进去的资源列表是同一个吗?
前言
本文需要一些前置知识,可以观看先观看什么是 BeanDefinition? 以及 Spring 怎么创建一个 bean以及Bean工厂后置处理器之 ConfigurationClassPostProcessor- Spring 到底怎么扫描到它所需要管理的bean的?通过这两篇文章之后大概就知道 Spring 的 bean 是怎么创建出来的了,只有bean被创建出来了,才能对其进行属性赋值。
本文首先将 Spring 实现属性注入的核心代码给抽离出来做一个小 demo,简化其过程,主要先了解一下 Spring 注入属性的各个主要流程,然后等熟悉了主要流程之后再去看源码就会简单一些了。因为源码里用到了很多函数型接口,所以开始之前先介绍一下函数型接口。
函数型接口
顾名思义,函数型接口首先是一个接口,那么什么是函数型接口呢,就是在接口上加一个@FunctionalInterface 注解,该接口有且只有一个抽象方法,我们知道,通常函数间调用都需要传参,参数类型可以是Integer, String 或者各种自定义的 Object 的类型,但是其实参数不仅可以传Object 的类型,还可以传接口。以此可以实现对方法的抽象。
首先定义一个函数型接口
@FunctionalInterface
public interface MyFunction<Integer> {

    Integer getResult(Integer param);
}
测试方法
public class testFunction {

    public static Integer doubleInteger(Integer integer, MyFunction<Integer> myFunction) {
        return myFunction.getResult(integer);
    }

    public static void main(String[] args) {
        //实例化函数型接口,重写函数型接口的抽象方法
        MyFunction<Integer> myFunction = new MyFunction<Integer>() {
            @Override
            public Integer getResult(Integer param) {
                return param * 2;
            }
        };
        Integer doubleNum1 = doubleInteger(3, myFunction);

        //定义 lamda 表达式
        Integer doubleNum2 = doubleInteger(3, num -> num * 2);

        System.out.println(doubleNum1);
        System.out.println(doubleNum2);
        //执行结果一样,都是6
    }
}
由上可以看出,doubleInteger 的第二个参数为函数型接口类型,main 函数调用的时候,会传入一个函数型接口类型的参数,简单的话也可以传入 lamda 表达式, 传入的方法为函数型接口调用其抽象方法时真正会调用的实例方法。
属性注入样例
public class PropertyMain {

    public static final Log logger = LogFactory.getLog(PropertyMain.class);

    public static void main(String[] args) throws IllegalAccessException, InstantiationException, InvocationTargetException {
        //获取 Spring 上下文, Spring 项目启动的入口
        AnnotationConfigApplicationContext context = new AnnotationConfigApplicationContext(TestProperty.class);

        //第一部分,获取 @PropertySource, 并拿到注解配置的一些主要信息,如文件路径,编码格式等。

        //通过类信息,获取元数据,转化为元数据之后,能够更方便的访问类基本信息,类涉及的注解信息。
        AnnotationMetadata metadata = AnnotationMetadata.introspect((Class<?>) TestProperty.class);
        //获取 @PropertySource 注解的内容
        Map<String, Object> attributeMap = metadata.getAnnotationAttributes(PropertySource.class.getName(), false);
        AnnotationAttributes currentPropertySource = new AnnotationAttributes(attributeMap);
        //获取配置文件的路径
        String[] locations = currentPropertySource.getStringArray("value");
        System.out.println(Arrays.toString(locations));

        //获取资源管理器工厂类, 默认为PropertySourceFactory.class,可以通过该工厂指定文件路径,实例化文件 Spring 中对应的资源文件对象
        Class<? extends PropertySourceFactory> factoryClass = currentPropertySource.getClass("factory");
        //获取资源工厂实例
        PropertySourceFactory factory = (factoryClass == PropertySourceFactory.class ?
            new DefaultPropertySourceFactory() : BeanUtils.instantiateClass(factoryClass));
        //获取指定文件的名称,默认为空
        String name = currentPropertySource.getString("name");
        //获取文件的编码规则,默认为空
        String encoding = currentPropertySource.getString("encoding");
        if (!StringUtils.hasLength(encoding)) {
            encoding = null;
        }
        if (!StringUtils.hasLength(name)) {
            name = null;
        }

        //第二部分,实例化资源文件,加入 Spring 内部的资源列表中保存

        //获取当前配置环境实例
        ConfigurableEnvironment environment = context.getEnvironment();
        //获取配置文件在 Spring 中对应的对象列表
        MutablePropertySources propertySources = environment.getPropertySources();
        //自定义资源加载器
        ResourceLoader resourceLoader = new DefaultResourceLoader();
        for (String location : locations) {
            //获取文件路径
            String resolvedLocation = environment.resolveRequiredPlaceholders(location);
            //加载资源文件
            Resource resource = resourceLoader.getResource(resolvedLocation);
            try {
                //通过工厂的方式创建资源对象
                org.springframework.core.env.PropertySource<?> propertySource1 = factory.createPropertySource(name, new EncodedResource(resource, encoding));
                //将新加载到的资源,加入到资源列表 propertySourceList 中,Spring内部,就是靠这个列表来保存资源文件的。
                propertySources.addLast(propertySource1);
            } catch (IOException e) {
                e.printStackTrace();
            }
        }

        //第三部分,实例化 bean,doGetBean的前部分

        //首先实例化 bean, 即先实例化bean定义,再根据bean定义,最后通过构造器反射获取对象,这一部分简过,前序文章已经讲过
        RootBeanDefinition beanDefinition = new RootBeanDefinition(PropertyBean.class);
        //构造器反射获取实例 candidate.newInstance();
        Constructor<?>[] candidates = PropertyBean.class.getDeclaredConstructors();
        PropertyBean propertyBean = (PropertyBean) candidates[0].newInstance();
        System.out.println(propertyBean);
        //第四部分,并对其进行属性赋值

        //至此已经拿到了一个实例化的bean,但是还没有进行属性赋值,接下来就要做这件事,首先拿到所有标注了@Autowired, @Value或者@Inject注解的属性信息保存到fields列表里。
        List<Field> fields = new ArrayList<>();
        //通过反射工具类,遍历所有属性, 这里第二个参数就用到了函数型接口
        //在doWithLocalFields方法中调用fc.doWith(field)时,就会进入传入的lamda表达式函数里,
        ReflectionUtils.doWithLocalFields(PropertyBean.class, field -> {
            //findAutowiredAnnotation 用来判断,属性上是否标注了@Autowired, @Value或者@Inject注解
            MergedAnnotation<?> ann = findAutowiredAnnotation(field);
            if (ann != null) {
                //符合条件的参数,保存到 fields 中
                fields.add(field);
            }
        });
        //至此拿到了所有需要注入信息的属性
        for (Field field : fields) {

            //通过属性信息,实例化属性描述文件,用于更好的访问属性信息
            DependencyDescriptor desc = new DependencyDescriptor(field, false);
            //获取 @Value 引用的值,有兴趣可以看下 getSuggestedValue, 它指定获取 Value.class 类型的属性,就获取配置的值,如 ${test.name}
            Object value = new ContextAnnotationAutowireCandidateResolver().getSuggestedValue(desc);
            System.out.println("value:" + value);

            if (value != null) {
                if (value instanceof String) {
                    //先去除掉 ${}
                    String strValue = resolveEmbeddedValue(value);
                    //从环境中获取属性文件信息
                    //MutablePropertySources propertySources = context.getEnvironment().getPropertySources();
                    //遍历所有的资源文件,寻找属性值
                    for (org.springframework.core.env.PropertySource<?> currentSource : propertySources) {
                        //这里就相当于从 map 里面取值,获取属性值
                        Object realValue = currentSource.getProperty(strValue);
                        if (realValue != null) {
                            System.out.println("realValue:" + realValue);
                            value = realValue;
                        }
                    }
                }
            } else {
                //这个样例项目,我只配置了@Value 和 @Autowired ,所以这里就是需要注入 bean 属性了。
                ConfigurableListableBeanFactory beanFactory = context.getBeanFactory();
                //获取属性类型,即该属性 bean 是哪个类型的
                Class<?> dependencyType = desc.getDependencyType();
                //在容器里查询该类型的 bean,因为同一个类型,可能实例化多个不同的 bean,所以用数组接收
                String[] candidateBeans = beanFactory.getBeanNamesForType(dependencyType);
                System.out.println(Arrays.toString(candidateBeans));
                //这里我们简化一下,假设只有一个候选 bean,当然实际情况确实会有多个,如果有多个的化,就获取@Qualifier指定优先获取的那个
                String beanName = candidateBeans[0];
                //获取到bean名称之后,就可以调用容器的getBean方法,来创建bean实例
                Object beanObj = beanFactory.getBean(beanName);
                value = beanObj;
            }

            //属性赋值
            if (value != null) {
                ReflectionUtils.makeAccessible(field);
                field.set(propertyBean, value);
            }
        }

        System.out.println(propertyBean);
        //至此。属性赋值过程结束。属性也都赋值成功了。
    }

    //获取 @Value 的值,简化版
    private static String resolveEmbeddedValue(Object value) {
        String newValue = (String) value;
        newValue = newValue.replace("${", "");
        newValue = newValue.replace("}", "");
        return newValue;
    }


    //判断属性上面是否标注了 @Autowired, @Value 或 @Inject
    private static MergedAnnotation<?> findAutowiredAnnotation(AccessibleObject ao) {
        //把三种类型放入列表中
        Set<Class<? extends Annotation>> autowiredAnnotationTypes = new LinkedHashSet<>(4);
        autowiredAnnotationTypes.add(Autowired.class);
        autowiredAnnotationTypes.add(Value.class);
        try {
            autowiredAnnotationTypes.add((Class<? extends Annotation>)
                ClassUtils.forName("javax.inject.Inject", AutowiredAnnotationBeanPostProcessor.class.getClassLoader()));
            logger.trace("JSR-330 'javax.inject.Inject' annotation found and supported for autowiring");
        }
        catch (ClassNotFoundException ex) {
            logger.info(ex);
            // JSR-330 API not available - simply skip.
        }

        //获取属性上的所有注解
        MergedAnnotations annotations = MergedAnnotations.from(ao);
        //遍历刚刚填入三种了类型的列表。看看属性的注解是否包含这三个属性之一
        for (Class<? extends Annotation> type : autowiredAnnotationTypes) {
            MergedAnnotation<?> annotation = annotations.get(type);
            if (annotation.isPresent()) {
                return annotation;
            }
        }
        return null;
    }

}
//配置类
@Configuration
@ComponentScan("com.bean")
@PropertySource(value = "test.properties", name = "testProperty")
public class TestProperty {
}@Component
public class PropertyBean {
@Value("${test.name}")
private String name;
@Inject
private PropertyBeanA propertyBeanA;
public String getName() {
return name;
}
public void setName(String name) {
this.name = name;
}
@Override
public String toString() {
return "PropertyBean{" +
"name='" + name + '\'' +
", propertyBeanA=" + propertyBeanA +
'}';
}
}@Service
public class PropertyBeanA {
}以上代码注释已经很清楚了,非常建议大家自己多跑几次,自己观察观察效果,本人引用的依赖包为 5.2.9 的 Spring 依赖包,不过各个版本应该差距不大。我这里把 maven 依赖也都贴出来
<dependencies>
        <!-- https://mvnrepository.com/artifact/org.springframework/spring-core -->
        <dependency>
            <groupId>org.springframework</groupId>
            <artifactId>spring-core</artifactId>
            <version>5.2.9.RELEASE</version>
        </dependency>

        <!-- https://mvnrepository.com/artifact/org.springframework/spring-context -->
        <dependency>
            <groupId>org.springframework</groupId>
            <artifactId>spring-context</artifactId>
            <version>5.2.9.RELEASE</version>
        </dependency>

        <!-- https://mvnrepository.com/artifact/javax.inject/javax.inject -->
        <dependency>
            <groupId>javax.inject</groupId>
            <artifactId>javax.inject</artifactId>
            <version>1</version>
        </dependency>


    </dependencies>
此外,为了测试,还需要加一个配置文件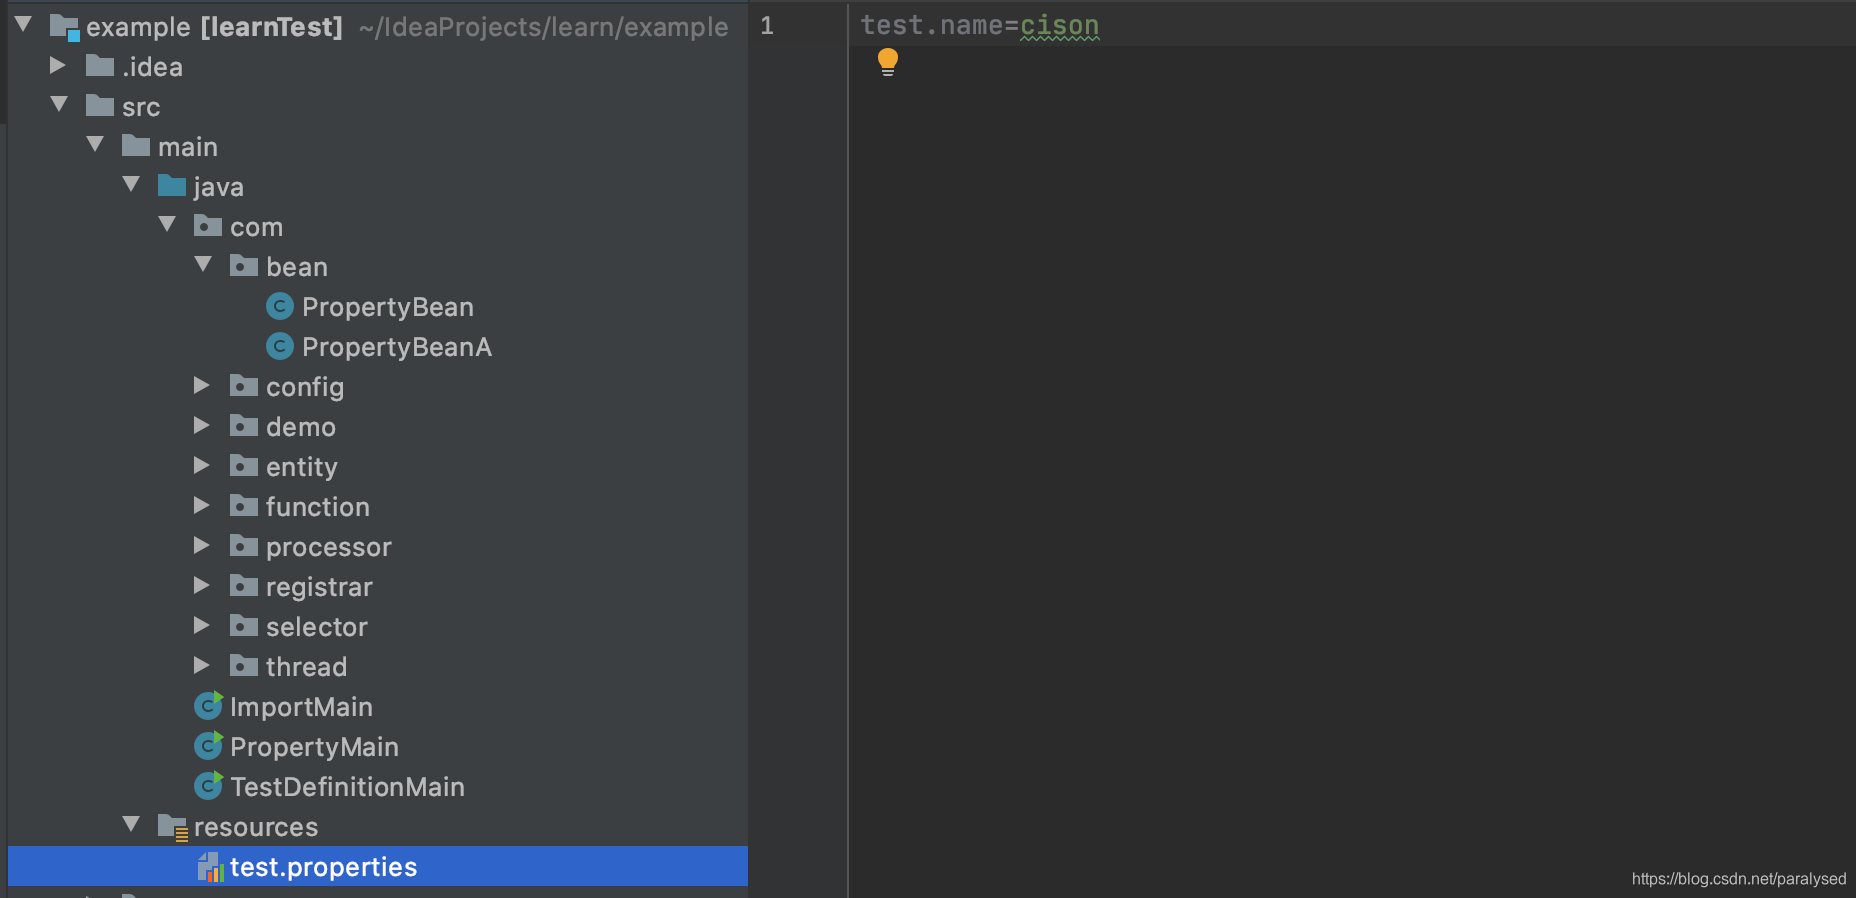
这里简单总结一下,以上代码共分为如下几个部分
- 通过配置类,扫描到 @PropertySource 注解,获取到配置文件的信息,如配置文件路径,编码格式等。
- 加载资源文件实例化,放入 Spring 环境变量中的资源文件列表中保存。
- 实例化bean,不是本文的重点,所以简单提了一下
- 获取类信息需要注入属性值的属性值,如果是字符串类型,则去Spring环境变量的资源文件列表中遍历查询,看是否有文件包含这个属性。如果是对象类型的属性,则通过容器的getBean方法,获取到一个实例对象。获取到属性值之后,直接对属性进行赋值。
资源环境和资源列表的实例化,资源的扫描保存
扫描配置文件,实例化资源文件
从上面我们已经知道了,通过解析 @PropertySource 属性可以获得配置文件的一些关键信息,那么 Spring 是什么时候解析的呢?相信看了前面链接文章的同学已经知道了,那就是解析配置文件的时候解析的,我把解析配置文件的方法再次拿过来
protected final SourceClass doProcessConfigurationClass(
			ConfigurationClass configClass, SourceClass sourceClass, Predicate<String> filter)
			throws IOException {

		if (configClass.getMetadata().isAnnotated(Component.class.getName())) {
			// Recursively process any member (nested) classes first
			processMemberClasses(configClass, sourceClass, filter);
		}

		// Process any @PropertySource annotations
		for (AnnotationAttributes propertySource : AnnotationConfigUtils.attributesForRepeatable(
				sourceClass.getMetadata(), PropertySources.class,
				org.springframework.context.annotation.PropertySource.class)) {
			if (this.environment instanceof ConfigurableEnvironment) {
				processPropertySource(propertySource);
			}
			else {
				logger.info("Ignoring @PropertySource annotation on [" + sourceClass.getMetadata().getClassName() +
						"]. Reason: Environment must implement ConfigurableEnvironment");
			}
		}

		// Process any @ComponentScan annotations
		Set<AnnotationAttributes> componentScans = AnnotationConfigUtils.attributesForRepeatable(
				sourceClass.getMetadata(), ComponentScans.class, ComponentScan.class);
		if (!componentScans.isEmpty() &&
				!this.conditionEvaluator.shouldSkip(sourceClass.getMetadata(), ConfigurationPhase.REGISTER_BEAN)) {
			for (AnnotationAttributes componentScan : componentScans) {
				// The config class is annotated with @ComponentScan -> perform the scan immediately
				Set<BeanDefinitionHolder> scannedBeanDefinitions =
						this.componentScanParser.parse(componentScan, sourceClass.getMetadata().getClassName());
				// Check the set of scanned definitions for any further config classes and parse recursively if needed
				for (BeanDefinitionHolder holder : scannedBeanDefinitions) {
					BeanDefinition bdCand = holder.getBeanDefinition().getOriginatingBeanDefinition();
					if (bdCand == null) {
						bdCand = holder.getBeanDefinition();
					}
					if (ConfigurationClassUtils.checkConfigurationClassCandidate(bdCand, this.metadataReaderFactory)) {
						parse(bdCand.getBeanClassName(), holder.getBeanName());
					}
				}
			}
		}

		// Process any @Import annotations
		processImports(configClass, sourceClass, getImports(sourceClass), filter, true);

		// Process any @ImportResource annotations
		AnnotationAttributes importResource =
				AnnotationConfigUtils.attributesFor(sourceClass.getMetadata(), ImportResource.class);
		if (importResource != null) {
			String[] resources = importResource.getStringArray("locations");
			Class<? extends BeanDefinitionReader> readerClass = importResource.getClass("reader");
			for (String resource : resources) {
				String resolvedResource = this.environment.resolveRequiredPlaceholders(resource);
				configClass.addImportedResource(resolvedResource, readerClass);
			}
		}

		// Process individual @Bean methods
		Set<MethodMetadata> beanMethods = retrieveBeanMethodMetadata(sourceClass);
		for (MethodMetadata methodMetadata : beanMethods) {
			configClass.addBeanMethod(new BeanMethod(methodMetadata, configClass));
		}

		// Process default methods on interfaces
		processInterfaces(configClass, sourceClass);

		// Process superclass, if any
		if (sourceClass.getMetadata().hasSuperClass()) {
			String superclass = sourceClass.getMetadata().getSuperClassName();
			if (superclass != null && !superclass.startsWith("java") &&
					!this.knownSuperclasses.containsKey(superclass)) {
				this.knownSuperclasses.put(superclass, configClass);
				// Superclass found, return its annotation metadata and recurse
				return sourceClass.getSuperClass();
			}
		}

		// No superclass -> processing is complete
		return null;
	}
通过注解我们可以发现,以下这段逻辑是处理 @PropertySource 注解的
// Process any @PropertySource annotations
		for (AnnotationAttributes propertySource : AnnotationConfigUtils.attributesForRepeatable(
				sourceClass.getMetadata(), PropertySources.class,
				org.springframework.context.annotation.PropertySource.class)) {
			if (this.environment instanceof ConfigurableEnvironment) {
				processPropertySource(propertySource);
			}
			else {
				logger.info("Ignoring @PropertySource annotation on [" + sourceClass.getMetadata().getClassName() +
						"]. Reason: Environment must implement ConfigurableEnvironment");
			}
		}
可以看到,首先会获取配置文件列表,然后逐个处理对应的配置文件,首先跟踪一下获取配置文件列表的方法 AnnotationConfigUtils.attributesForRepeatable(sourceClass.getMetadata(), PropertySources.class,org.springframework.context.annotation.PropertySource.class)
static Set<AnnotationAttributes> attributesForRepeatable(AnnotationMetadata metadata,
			Class<?> containerClass, Class<?> annotationClass) {

		return attributesForRepeatable(metadata, containerClass.getName(), annotationClass.getName());
	}
可以看到,返回结果是 Set 类型,但是该方法没有什么处理逻辑,而是调用了另外一个方法
static Set<AnnotationAttributes> attributesForRepeatable(
			AnnotationMetadata metadata, String containerClassName, String annotationClassName) {

		Set<AnnotationAttributes> result = new LinkedHashSet<>();

		// Direct annotation present?
        //这里第二个参数是不是很眼熟?我们在样例代码中,就是这么获取注解属性的
		addAttributesIfNotNull(result, metadata.getAnnotationAttributes(annotationClassName, false));

		// Container annotation present?
		Map<String, Object> container = metadata.getAnnotationAttributes(containerClassName, false);
		if (container != null && container.containsKey("value")) {
			for (Map<String, Object> containedAttributes : (Map<String, Object>[]) container.get("value")) {
				addAttributesIfNotNull(result, containedAttributes);
			}
		}

		// Return merged result
		return Collections.unmodifiableSet(result);
	}
这里我们注意到 addAttributesIfNotNull 方法的第二个参数,就是我们在样例代码中获取属性注解的方法,所以这里我们可以知道,第二个参数获取到的文件属性,会存入到第一个参数result集合里,最终返回。这里我们拿到了 @PropertySource 注解的属性信息集合,然后回到解析注解属性的方法 processPropertySource(propertySource)
private void processPropertySource(AnnotationAttributes propertySource) throws IOException {
		String name = propertySource.getString("name");
		if (!StringUtils.hasLength(name)) {
			name = null;
		}
		String encoding = propertySource.getString("encoding");
		if (!StringUtils.hasLength(encoding)) {
			encoding = null;
		}
		String[] locations = propertySource.getStringArray("value");
		Assert.isTrue(locations.length > 0, "At least one @PropertySource(value) location is required");
		boolean ignoreResourceNotFound = propertySource.getBoolean("ignoreResourceNotFound");

		Class<? extends PropertySourceFactory> factoryClass = propertySource.getClass("factory");
		PropertySourceFactory factory = (factoryClass == PropertySourceFactory.class ?
				DEFAULT_PROPERTY_SOURCE_FACTORY : BeanUtils.instantiateClass(factoryClass));

		for (String location : locations) {
			try {
				String resolvedLocation = this.environment.resolveRequiredPlaceholders(location);
				Resource resource = this.resourceLoader.getResource(resolvedLocation);
				addPropertySource(factory.createPropertySource(name, new EncodedResource(resource, encoding)));
			}
			catch (IllegalArgumentException | FileNotFoundException | UnknownHostException | SocketException ex) {
				// Placeholders not resolvable or resource not found when trying to open it
				if (ignoreResourceNotFound) {
					if (logger.isInfoEnabled()) {
						logger.info("Properties location [" + location + "] not resolvable: " + ex.getMessage());
					}
				}
				else {
					throw ex;
				}
			}
		}
	}
相信大家看到这里,更是眼熟了,跟样例代码可以说是一毛一样,都是获取到文件的名称,编码格式,路径信息等,因为样例代码都已经加注释了,所以这里就不写注释了。然后也可以注意到,最后会遍历一个个路径,加载并实例化资源文件。那么就进入到下一步了,资源文件实例化完成之后会放入到哪里去了?可以看到调用了 addPropertySource 方法,它就是保存资源实例对象的方法。
将资源实例保存到环境变量的资源文件中
private void addPropertySource(PropertySource<?> propertySource) {
		String name = propertySource.getName();
        //跟样例代码一样,获取环境的资源文件列表
		MutablePropertySources propertySources = ((ConfigurableEnvironment) this.environment).getPropertySources();
        //判断是否已经加载过
		if (this.propertySourceNames.contains(name)) {
			// We've already added a version, we need to extend it
			PropertySource<?> existing = propertySources.get(name);
			if (existing != null) {
				PropertySource<?> newSource = (propertySource instanceof ResourcePropertySource ?
						((ResourcePropertySource) propertySource).withResourceName() : propertySource);
				if (existing instanceof CompositePropertySource) {
					((CompositePropertySource) existing).addFirstPropertySource(newSource);
				}
				else {
					if (existing instanceof ResourcePropertySource) {
						existing = ((ResourcePropertySource) existing).withResourceName();
					}
					CompositePropertySource composite = new CompositePropertySource(name);
					composite.addPropertySource(newSource);
					composite.addPropertySource(existing);
					propertySources.replace(name, composite);
				}
				return;
			}
		}
        //调用addLast,或者addBefore方法,将当前扫描到的资源文件实例放入资源列表中
		if (this.propertySourceNames.isEmpty()) {
			propertySources.addLast(propertySource);
		}
		else {
			String firstProcessed = this.propertySourceNames.get(this.propertySourceNames.size() - 1);
			propertySources.addBefore(firstProcessed, propertySource);
		}
		this.propertySourceNames.add(name);
	}
看到这里,我们就完成了资源文件的扫描,实例化,和保存操作了。后续就可以通过遍历资源文件列表,来寻找@Value需要的属性,是否在文件里面能找到了。可是这里又有一个问题,这个保存方法,直接是从当前环境中获取到了资源文件列表,那么环境什么时候实例化的,资源文件列表又是什么时候初始化的呢?
环境及资源文件列表的初始化
大家如果还有印象的话,实例化 Spring 上下文的时候,会调用其构造方法
public AnnotationConfigApplicationContext(Class<?>... componentClasses) {
		this();
		register(componentClasses);
		refresh();
	}
其实,环境及资源列表的初始化,就是在 this 里面完成的
public AnnotationConfigApplicationContext() {
		this.reader = new AnnotatedBeanDefinitionReader(this);
		this.scanner = new ClassPathBeanDefinitionScanner(this);
	}
再点进去reader的构造方法
public AnnotatedBeanDefinitionReader(BeanDefinitionRegistry registry) {
		this(registry, getOrCreateEnvironment(registry));
	}
这里就看到初始化环境资源的方法了
private static Environment getOrCreateEnvironment(BeanDefinitionRegistry registry) {
		Assert.notNull(registry, "BeanDefinitionRegistry must not be null");
		if (registry instanceof EnvironmentCapable) {
			return ((EnvironmentCapable) registry).getEnvironment();
		}
		return new StandardEnvironment();
	}
这里会默认返回 StandardEnvironment 实例,这里环境资源实例化好了,那么资源列表一定在这个实例的内部,我们继续进入 StandardEnvironment
public class StandardEnvironment extends AbstractEnvironment {
    public static final String SYSTEM_ENVIRONMENT_PROPERTY_SOURCE_NAME = "systemEnvironment";
    public static final String SYSTEM_PROPERTIES_PROPERTY_SOURCE_NAME = "systemProperties";

    public StandardEnvironment() {
    }

    protected void customizePropertySources(MutablePropertySources propertySources) {
        propertySources.addLast(new PropertiesPropertySource("systemProperties", this.getSystemProperties()));
        propertySources.addLast(new SystemEnvironmentPropertySource("systemEnvironment", this.getSystemEnvironment()));
    }
}
可以看到,customizePropertySources 方法,也是调用 addLast 方法,保存进去了两个系统资源文件,那么 customizePropertySources 方法什么时候调用的呢?一定是他的父类,继续往上跟,果然在 AbstractEnvironment 类中看到了下面这一行实例化资源文件列表的方法。
private final MutablePropertySources propertySources = new MutablePropertySources();然后看下父类的构造方法,它调用了 customizePropertySources 方法
public AbstractEnvironment() {
		customizePropertySources(this.propertySources);
	}
至此为止,环境也实例化好了,资源文件列表也实例化好了,所以它才可以在解析配置文件的时候直接使用。
通过上面的介绍,我们知道怎么加载配置文件,也知道配置文件怎么保存和保存的位置了,下面正式介绍下 @Value 是怎么注入的。因为之前的文章已经讲了 doGetBean 到获取实例对象的方法,所以接下来假设当前对象已经实例化好了。就等着属性注入了。
属性注入-populateBean
@Value 和 @Autowired 是怎么解析的?
protected void populateBean(String beanName, RootBeanDefinition mbd, @Nullable BeanWrapper bw) {
		if (bw == null) {
			if (mbd.hasPropertyValues()) {
				throw new BeanCreationException(
						mbd.getResourceDescription(), beanName, "Cannot apply property values to null instance");
			}
			else {
				// Skip property population phase for null instance.
				return;
			}
		}

		// Give any InstantiationAwareBeanPostProcessors the opportunity to modify the
		// state of the bean before properties are set. This can be used, for example,
		// to support styles of field injection.
        //这里是 Spring 给用户开了一个后门,让用户自己进行属性赋值,只需要实现InstantiationAwareBeanPostProcessor 接口,并重写postProcessAfterInstantiation方法,如果该方法返回 false, 就不会在进行下面的属性赋值操作了
		if (!mbd.isSynthetic() && hasInstantiationAwareBeanPostProcessors()) {
			for (BeanPostProcessor bp : getBeanPostProcessors()) {
				if (bp instanceof InstantiationAwareBeanPostProcessor) {
					InstantiationAwareBeanPostProcessor ibp = (InstantiationAwareBeanPostProcessor) bp;
					if (!ibp.postProcessAfterInstantiation(bw.getWrappedInstance(), beanName)) {
						return;
					}
				}
			}
		}

		PropertyValues pvs = (mbd.hasPropertyValues() ? mbd.getPropertyValues() : null);

		int resolvedAutowireMode = mbd.getResolvedAutowireMode();
        //在写@Autowired注解的时候,可以指定是按照name还是按照type 进行属性注入
		if (resolvedAutowireMode == AUTOWIRE_BY_NAME || resolvedAutowireMode == AUTOWIRE_BY_TYPE) {
			MutablePropertyValues newPvs = new MutablePropertyValues(pvs);
			// Add property values based on autowire by name if applicable.
			if (resolvedAutowireMode == AUTOWIRE_BY_NAME) {
				autowireByName(beanName, mbd, bw, newPvs);
			}
			// Add property values based on autowire by type if applicable.
			if (resolvedAutowireMode == AUTOWIRE_BY_TYPE) {
				autowireByType(beanName, mbd, bw, newPvs);
			}
			pvs = newPvs;
		}

		boolean hasInstAwareBpps = hasInstantiationAwareBeanPostProcessors();
		boolean needsDepCheck = (mbd.getDependencyCheck() != AbstractBeanDefinition.DEPENDENCY_CHECK_NONE);

		PropertyDescriptor[] filteredPds = null;
		if (hasInstAwareBpps) {
			if (pvs == null) {
				pvs = mbd.getPropertyValues();
			}
			for (BeanPostProcessor bp : getBeanPostProcessors()) {
				if (bp instanceof InstantiationAwareBeanPostProcessor) {
					InstantiationAwareBeanPostProcessor ibp = (InstantiationAwareBeanPostProcessor) bp;
                    //调用后置处理器的方法来进行属性注入
					PropertyValues pvsToUse = ibp.postProcessProperties(pvs, bw.getWrappedInstance(), beanName);
					if (pvsToUse == null) {
						if (filteredPds == null) {
							filteredPds = filterPropertyDescriptorsForDependencyCheck(bw, mbd.allowCaching);
						}
						pvsToUse = ibp.postProcessPropertyValues(pvs, filteredPds, bw.getWrappedInstance(), beanName);
						if (pvsToUse == null) {
							return;
						}
					}
					pvs = pvsToUse;
				}
			}
		}
		if (needsDepCheck) {
			if (filteredPds == null) {
				filteredPds = filterPropertyDescriptorsForDependencyCheck(bw, mbd.allowCaching);
			}
			checkDependencies(beanName, mbd, filteredPds, pvs);
		}

		if (pvs != null) {
			applyPropertyValues(beanName, mbd, bw, pvs);
		}
	}
从上面的分析来看,一般情况下是调用后置处理器的 postProcessProperties 方法来进行属性解析注入的。而我们本文的重点是解析@Value 和 @Autowired,那么着眼点就在AutowiredAnnotationBeanPostProcessor 这个后置处理器。那么就看下这个后置处理器解析属性的方法
public PropertyValues postProcessProperties(PropertyValues pvs, Object bean, String beanName) {
        //获取注入元数据
		InjectionMetadata metadata = findAutowiringMetadata(beanName, bean.getClass(), pvs);
		try {
            //调用注入方法来实现属性注入
			metadata.inject(bean, beanName, pvs);
		}
		catch (BeanCreationException ex) {
			throw ex;
		}
		catch (Throwable ex) {
			throw new BeanCreationException(beanName, "Injection of autowired dependencies failed", ex);
		}
		return pvs;
	}
这个方法有两个重要方法,一是获取注入元数据,还记得文章开头的样例代码吗?属性注入,首先要获取到所有满足条件的属性信息,比如标注了@Autowired, @Value, @Inject 的注解,那么获取 InjectionMetadata 就是获取所有满足要求的属性信息列表,然后把它包装在InjectionMetadata 中,metadata.inject 就是相当于遍历属性信息,分别获取属性的属性值,然后注入该属性中。我们分别分析下这两个方法。首先看第一个方法,如何获取所有需要注入的属性信息。
private InjectionMetadata findAutowiringMetadata(String beanName, Class<?> clazz, @Nullable PropertyValues pvs) {
		// Fall back to class name as cache key, for backwards compatibility with custom callers.
		String cacheKey = (StringUtils.hasLength(beanName) ? beanName : clazz.getName());
		// Quick check on the concurrent map first, with minimal locking.
        //尝试获取缓存,减少重复解析所耗费的时间
		InjectionMetadata metadata = this.injectionMetadataCache.get(cacheKey);
        // needsRefresh 方法,为了判断是否已经解析过了这个 beanName 对应的元数据
        // 此外,如果 beanName 相同,但是类信息不同,也要重新解析
		if (InjectionMetadata.needsRefresh(metadata, clazz)) {
			synchronized (this.injectionMetadataCache) {
				metadata = this.injectionMetadataCache.get(cacheKey);
				if (InjectionMetadata.needsRefresh(metadata, clazz)) {
					if (metadata != null) {
						metadata.clear(pvs);
					}
                    //第一次解析时,从缓存中肯定是获取不到的,所以会调用这个方法获取元数据
					metadata = buildAutowiringMetadata(clazz);
                    //放入缓存
					this.injectionMetadataCache.put(cacheKey, metadata);
				}
			}
		}
		return metadata;
	}
private InjectionMetadata buildAutowiringMetadata(final Class<?> clazz) {
if (!AnnotationUtils.isCandidateClass(clazz, this.autowiredAnnotationTypes)) {
return InjectionMetadata.EMPTY;
}
//初始化属性列表,包括本类和父类的属性和方法
List<InjectionMetadata.InjectedElement> elements = new ArrayList<>();
Class<?> targetClass = clazz;
do {
//保存属性和方法列表,只包含本类的信息
final List<InjectionMetadata.InjectedElement> currElements = new ArrayList<>();
//亲爱的,告诉我看到这个你眼熟吗?
ReflectionUtils.doWithLocalFields(targetClass, field -> {
MergedAnnotation<?> ann = findAutowiredAnnotation(field);
if (ann != null) {
if (Modifier.isStatic(field.getModifiers())) {
if (logger.isInfoEnabled()) {
logger.info("Autowired annotation is not supported on static fields: " + field);
}
return;
}
boolean required = determineRequiredStatus(ann);
currElements.add(new AutowiredFieldElement(field, required));
}
});
ReflectionUtils.doWithLocalMethods(targetClass, method -> {
Method bridgedMethod = BridgeMethodResolver.findBridgedMethod(method);
if (!BridgeMethodResolver.isVisibilityBridgeMethodPair(method, bridgedMethod)) {
return;
}
MergedAnnotation<?> ann = findAutowiredAnnotation(bridgedMethod);
if (ann != null && method.equals(ClassUtils.getMostSpecificMethod(method, clazz))) {
if (Modifier.isStatic(method.getModifiers())) {
if (logger.isInfoEnabled()) {
logger.info("Autowired annotation is not supported on static methods: " + method);
}
return;
}
if (method.getParameterCount() == 0) {
if (logger.isInfoEnabled()) {
logger.info("Autowired annotation should only be used on methods with parameters: " +
method);
}
}
boolean required = determineRequiredStatus(ann);
PropertyDescriptor pd = BeanUtils.findPropertyForMethod(bridgedMethod, clazz);
currElements.add(new AutowiredMethodElement(method, required, pd));
}
});
elements.addAll(0, currElements);
targetClass = targetClass.getSuperclass();
}
while (targetClass != null && targetClass != Object.class);
//实例化一个包装实例,本质上还是属性列表 elements
return InjectionMetadata.forElements(elements, clazz);
}相信大家看了样例代码之后,也就能很容易理解这一段了,它解析了需要自动注入的属性和方法,最终放入到数组 elements 中,并实例化一个包装类实例。至此,已经拿到了所有需要自动注入的属性信息(方法的本篇文章暂时掠过)
拿到属性信息之后,就要进入第二阶段了,解析属性值,并将属性的值符给属性。这里跟一下 第二个方法 metadata.inject(bean, beanName, pvs)。
public void inject(Object target, @Nullable String beanName, @Nullable PropertyValues pvs) throws Throwable {
		Collection<InjectedElement> checkedElements = this.checkedElements;
		Collection<InjectedElement> elementsToIterate =
				(checkedElements != null ? checkedElements : this.injectedElements);
		if (!elementsToIterate.isEmpty()) {
            //这里就是遍历刚刚第一步得到的数组信息
			for (InjectedElement element : elementsToIterate) {
				if (logger.isTraceEnabled()) {
					logger.trace("Processing injected element of bean '" + beanName + "': " + element);
				}
                //如果是属性则调用属性的解析方法,如果数需要注入的方法,则调用方法实例对应的inject方法。分别对应 AutowiredFieldElement 和 AutowiredMethodElement
				element.inject(target, beanName, pvs);
			}
		}
	}
这里我们跟一下 AutowiredFieldElement 的 inject 方法
protected void inject(Object bean, @Nullable String beanName, @Nullable PropertyValues pvs) throws Throwable {
			Field field = (Field) this.member;
			Object value;
			if (this.cached) {
				value = resolvedCachedArgument(beanName, this.cachedFieldValue);
			}
			else {
				DependencyDescriptor desc = new DependencyDescriptor(field, this.required);
				desc.setContainingClass(bean.getClass());
				Set<String> autowiredBeanNames = new LinkedHashSet<>(1);
				Assert.state(beanFactory != null, "No BeanFactory available");
				TypeConverter typeConverter = beanFactory.getTypeConverter();
				try {
                    //解析获取属性值
					value = beanFactory.resolveDependency(desc, beanName, autowiredBeanNames, typeConverter);
				}
				catch (BeansException ex) {
					throw new UnsatisfiedDependencyException(null, beanName, new InjectionPoint(field), ex);
				}
				synchronized (this) {
					if (!this.cached) {
						if (value != null || this.required) {
							this.cachedFieldValue = desc;
                            //如果有标注@DependOn注解的,则先实例化前置bean
							registerDependentBeans(beanName, autowiredBeanNames);
							if (autowiredBeanNames.size() == 1) {
								String autowiredBeanName = autowiredBeanNames.iterator().next();
								if (beanFactory.containsBean(autowiredBeanName) &&
										beanFactory.isTypeMatch(autowiredBeanName, field.getType())) {
									this.cachedFieldValue = new ShortcutDependencyDescriptor(
											desc, autowiredBeanName, field.getType());
								}
							}
						}
						else {
							this.cachedFieldValue = null;
						}
						this.cached = true;
					}
				}
			}
            //通过反射,将该bean的field属性,赋值为 value
			if (value != null) {
				ReflectionUtils.makeAccessible(field);
				field.set(bean, value);
			}
		}
	}
这个方法的开始和结束,我们都在样例中看到了,所以应该很熟悉了,所以重点在于解析获取到 value 的那一步 beanFactory.resolveDependency
public Object resolveDependency(DependencyDescriptor descriptor, @Nullable String requestingBeanName,
			@Nullable Set<String> autowiredBeanNames, @Nullable TypeConverter typeConverter) throws BeansException {

		descriptor.initParameterNameDiscovery(getParameterNameDiscoverer());
		if (Optional.class == descriptor.getDependencyType()) {
			return createOptionalDependency(descriptor, requestingBeanName);
		}
		else if (ObjectFactory.class == descriptor.getDependencyType() ||
				ObjectProvider.class == descriptor.getDependencyType()) {
			return new DependencyObjectProvider(descriptor, requestingBeanName);
		}
		else if (javaxInjectProviderClass == descriptor.getDependencyType()) {
			return new Jsr330Factory().createDependencyProvider(descriptor, requestingBeanName);
		}
		else {
            // 判断是否懒加载
			Object result = getAutowireCandidateResolver().getLazyResolutionProxyIfNecessary(
					descriptor, requestingBeanName);
			if (result == null) {
                //普通属性注入逻辑
				result = doResolveDependency(descriptor, requestingBeanName, autowiredBeanNames, typeConverter);
			}
			return result;
		}
	}
继续跟进
public Object doResolveDependency(DependencyDescriptor descriptor, @Nullable String beanName,
			@Nullable Set<String> autowiredBeanNames, @Nullable TypeConverter typeConverter) throws BeansException {

		InjectionPoint previousInjectionPoint = ConstructorResolver.setCurrentInjectionPoint(descriptor);
		try {
			Object shortcut = descriptor.resolveShortcut(this);
			if (shortcut != null) {
				return shortcut;
			}

			Class<?> type = descriptor.getDependencyType();
            //这里解析@Value,获取带有${}的值
			Object value = getAutowireCandidateResolver().getSuggestedValue(descriptor);
			if (value != null) {
				if (value instanceof String) {
                    //获取字符串类型属性的属性值
					String strVal = resolveEmbeddedValue((String) value);
					BeanDefinition bd = (beanName != null && containsBean(beanName) ?
							getMergedBeanDefinition(beanName) : null);


					value = evaluateBeanDefinitionString(strVal, bd);
				}
				TypeConverter converter = (typeConverter != null ? typeConverter : getTypeConverter());
				try {
					return converter.convertIfNecessary(value, type, descriptor.getTypeDescriptor());
				}
				catch (UnsupportedOperationException ex) {
					// A custom TypeConverter which does not support TypeDescriptor resolution...
					return (descriptor.getField() != null ?
							converter.convertIfNecessary(value, type, descriptor.getField()) :
							converter.convertIfNecessary(value, type, descriptor.getMethodParameter()));
				}
			}
            //如果需要注入的属性是集合
			Object multipleBeans = resolveMultipleBeans(descriptor, beanName, autowiredBeanNames, typeConverter);
			if (multipleBeans != null) {
				return multipleBeans;
			}
            //解析符合 @Autowired 属性的类型
			Map<String, Object> matchingBeans = findAutowireCandidates(beanName, type, descriptor);
			if (matchingBeans.isEmpty()) {
				if (isRequired(descriptor)) {
					raiseNoMatchingBeanFound(type, descriptor.getResolvableType(), descriptor);
				}
				return null;
			}

			String autowiredBeanName;
			Object instanceCandidate;

			if (matchingBeans.size() > 1) {
                //当有多个类型匹配的时候,需要获取优先级最高的类型
				autowiredBeanName = determineAutowireCandidate(matchingBeans, descriptor);
				if (autowiredBeanName == null) {
					if (isRequired(descriptor) || !indicatesMultipleBeans(type)) {
						return descriptor.resolveNotUnique(descriptor.getResolvableType(), matchingBeans);
					}
					else {
						// In case of an optional Collection/Map, silently ignore a non-unique case:
						// possibly it was meant to be an empty collection of multiple regular beans
						// (before 4.3 in particular when we didn't even look for collection beans).
						return null;
					}
				}
				instanceCandidate = matchingBeans.get(autowiredBeanName);
			}
			else {
				// We have exactly one match.
				Map.Entry<String, Object> entry = matchingBeans.entrySet().iterator().next();
                //如果只有一个匹配,那么获取匹配的类的 beanName
				autowiredBeanName = entry.getKey();
				instanceCandidate = entry.getValue();
			}

			if (autowiredBeanNames != null) {
				autowiredBeanNames.add(autowiredBeanName);
			}
			if (instanceCandidate instanceof Class) {
                //如果是 Class 类型,调用该方法,该方法其实 beanFactory.getBean(beanName); 如此我们便获取到了自动注入对象类型的属性值了。
				instanceCandidate = descriptor.resolveCandidate(autowiredBeanName, type, this);
			}
			Object result = instanceCandidate;
			if (result instanceof NullBean) {
				if (isRequired(descriptor)) {
					raiseNoMatchingBeanFound(type, descriptor.getResolvableType(), descriptor);
				}
				result = null;
			}
			if (!ClassUtils.isAssignableValue(type, result)) {
				throw new BeanNotOfRequiredTypeException(autowiredBeanName, type, instanceCandidate.getClass());
			}
			return result;
		}
		finally {
			ConstructorResolver.setCurrentInjectionPoint(previousInjectionPoint);
		}
	}
从上面的代码,我们很容易就知道如果是 Class 类型的属性,是通过descriptor.resolveCandidate(autowiredBeanName, type, this) 来获取属性值,而该方法进去之后我们可以发现它其实就是调用getBean方法,去获取bean实例。至此 @Autowired 的属性值我们获取到了。
public Object resolveCandidate(String beanName, Class<?> requiredType, BeanFactory beanFactory)
			throws BeansException {

		return beanFactory.getBean(beanName);
	}
现在还查查询字符串类型的属性值没有看了,我们继续跟进 resolveEmbeddedValue 方法
public String resolveEmbeddedValue(@Nullable String value) {
		if (value == null) {
			return null;
		}
		String result = value;
		for (StringValueResolver resolver : this.embeddedValueResolvers) {
			result = resolver.resolveStringValue(result);
			if (result == null) {
				return null;
			}
		}
		return result;
}这里我们看到是遍历一个数组,且是函数型接口类型的数组,那么现在就有两个问题,1是这个数组的内容什么时候被添加进去的。2是当调用函数型接口的抽象方法resolver.resolveStringValue(result) 时,它真正执行的是哪个方法。
embeddedValueResolvers 什么时候初始化以及解析 @Value 的函数型接口什么时候放入列表中的?
首先实例化很简单,实例化bean工厂时,DefaultListableBeanFactory 的父类 AbstractBeanFactory 中的对该属性在声明时直接就初始化了,如下
/** String resolvers to apply e.g. to annotation attribute values. */
	private final List<StringValueResolver> embeddedValueResolvers = new CopyOnWriteArrayList<>();
解析@Value 的函数型接口什么时候放进来的呢?先看一下 refresh 方法
public void refresh() throws BeansException, IllegalStateException {
		synchronized (this.startupShutdownMonitor) {
			// Prepare this context for refreshing.
			prepareRefresh();

			// Tell the subclass to refresh the internal bean factory.
			ConfigurableListableBeanFactory beanFactory = obtainFreshBeanFactory();

			// Prepare the bean factory for use in this context.
			prepareBeanFactory(beanFactory);

			try {
				// Allows post-processing of the bean factory in context subclasses.
				postProcessBeanFactory(beanFactory);

				// Invoke factory processors registered as beans in the context.
				invokeBeanFactoryPostProcessors(beanFactory);

				// Register bean processors that intercept bean creation.
				registerBeanPostProcessors(beanFactory);

				// Initialize message source for this context.
				initMessageSource();

				// Initialize event multicaster for this context.
				initApplicationEventMulticaster();

				// Initialize other special beans in specific context subclasses.
				onRefresh();

				// Check for listener beans and register them.
				registerListeners();

				// Instantiate all remaining (non-lazy-init) singletons.
                //实例化所有还没被实例化的bean,一般我们自定义的bean都是在这里初始化
				finishBeanFactoryInitialization(beanFactory);

				// Last step: publish corresponding event.
				finishRefresh();
			}

			catch (BeansException ex) {
				if (logger.isWarnEnabled()) {
					logger.warn("Exception encountered during context initialization - " +
							"cancelling refresh attempt: " + ex);
				}

				// Destroy already created singletons to avoid dangling resources.
				destroyBeans();

				// Reset 'active' flag.
				cancelRefresh(ex);

				// Propagate exception to caller.
				throw ex;
			}

			finally {
				// Reset common introspection caches in Spring's core, since we
				// might not ever need metadata for singleton beans anymore...
				resetCommonCaches();
			}
		}
	}
我们跟进实例化 bean 的 finishBeanFactoryInitialization 方法
protected void finishBeanFactoryInitialization(ConfigurableListableBeanFactory beanFactory) {
		// Initialize conversion service for this context.
		if (beanFactory.containsBean(CONVERSION_SERVICE_BEAN_NAME) &&
				beanFactory.isTypeMatch(CONVERSION_SERVICE_BEAN_NAME, ConversionService.class)) {
			beanFactory.setConversionService(
					beanFactory.getBean(CONVERSION_SERVICE_BEAN_NAME, ConversionService.class));
		}

		// Register a default embedded value resolver if no bean post-processor
		// (such as a PropertyPlaceholderConfigurer bean) registered any before:
		// at this point, primarily for resolution in annotation attribute values.
        //看看看,就在这里
		if (!beanFactory.hasEmbeddedValueResolver()) {
			beanFactory.addEmbeddedValueResolver(strVal -> getEnvironment().resolvePlaceholders(strVal));
		}

		// Initialize LoadTimeWeaverAware beans early to allow for registering their transformers early.
		String[] weaverAwareNames = beanFactory.getBeanNamesForType(LoadTimeWeaverAware.class, false, false);
		for (String weaverAwareName : weaverAwareNames) {
			getBean(weaverAwareName);
		}

		// Stop using the temporary ClassLoader for type matching.
		beanFactory.setTempClassLoader(null);

		// Allow for caching all bean definition metadata, not expecting further changes.
		beanFactory.freezeConfiguration();

		// Instantiate all remaining (non-lazy-init) singletons.
		beanFactory.preInstantiateSingletons();
	}
如上所示,beanFactory.addEmbeddedValueResolver(strVal -> getEnvironment().resolvePlaceholders(strVal)); 这一行代码,就把解析@Value 的函数型接口放进列表里了,当然,刚刚获取 @Value 属性值的时候,也是调用这个lamda表达式的方法getEnvironment().resolvePlaceholders(strVal) ,这里其实可以猜到了,因为前面我们把资源文件实例放入到环境的资源列表里了,而这里又把当前拿到了,调用了当前环境的方法,相比就是拿到当前环境的资源列表了。我们看一下这个方法
public String resolvePlaceholders(String text) {
		return this.propertyResolver.resolvePlaceholders(text);
	}
没什么逻辑,继续往下走
public String resolvePlaceholders(String text) {
		if (this.nonStrictHelper == null) {
			this.nonStrictHelper = createPlaceholderHelper(true);
		}
		return doResolvePlaceholders(text, this.nonStrictHelper);
	}
还是没什么处理逻辑,继续往下走
private String doResolvePlaceholders(String text, PropertyPlaceholderHelper helper) {
		return helper.replacePlaceholders(text, this::getPropertyAsRawString);
	}
这里没什么处理逻辑,但是传入了一个函数型接口,说明等会调用这个函数型接口的抽象方法的时候,会调用 getPropertyAsRawString() 方法。我们先继续往下走
public String replacePlaceholders(String value, PlaceholderResolver placeholderResolver) {
		Assert.notNull(value, "'value' must not be null");
		return parseStringValue(value, placeholderResolver, null);
	}
还是没处理逻辑,继续走
protected String parseStringValue(
			String value, PlaceholderResolver placeholderResolver, @Nullable Set<String> visitedPlaceholders) {

		int startIndex = value.indexOf(this.placeholderPrefix);
		if (startIndex == -1) {
			return value;
		}
        这里的value还是带${}的,比如 ${test.name}
		StringBuilder result = new StringBuilder(value);
		while (startIndex != -1) {
			int endIndex = findPlaceholderEndIndex(result, startIndex);
			if (endIndex != -1) {
				String placeholder = result.substring(startIndex + this.placeholderPrefix.length(), endIndex);
				String originalPlaceholder = placeholder;
				if (visitedPlaceholders == null) {
					visitedPlaceholders = new HashSet<>(4);
				}
				if (!visitedPlaceholders.add(originalPlaceholder)) {
					throw new IllegalArgumentException(
							"Circular placeholder reference '" + originalPlaceholder + "' in property definitions");
				}
				// Recursive invocation, parsing placeholders contained in the placeholder key.

				placeholder = parseStringValue(placeholder, placeholderResolver, visitedPlaceholders);
				// Now obtain the value for the fully resolved key...
                //前面通过字符串处理操作,去掉了${},现在只剩下了 test.name, 这里调用了函数型接口的抽象方法,还记得刚刚说的 getPropertyAsRawString 方法吗?现在该去那里看看了
				String propVal = placeholderResolver.resolvePlaceholder(placeholder);
				if (propVal == null && this.valueSeparator != null) {
					int separatorIndex = placeholder.indexOf(this.valueSeparator);
					if (separatorIndex != -1) {
						String actualPlaceholder = placeholder.substring(0, separatorIndex);
						String defaultValue = placeholder.substring(separatorIndex + this.valueSeparator.length());
						propVal = placeholderResolver.resolvePlaceholder(actualPlaceholder);
						if (propVal == null) {
							propVal = defaultValue;
						}
					}
				}
				if (propVal != null) {
					// Recursive invocation, parsing placeholders contained in the
					// previously resolved placeholder value.
					propVal = parseStringValue(propVal, placeholderResolver, visitedPlaceholders);
					result.replace(startIndex, endIndex + this.placeholderSuffix.length(), propVal);
					if (logger.isTraceEnabled()) {
						logger.trace("Resolved placeholder '" + placeholder + "'");
					}
					startIndex = result.indexOf(this.placeholderPrefix, startIndex + propVal.length());
				}
				else if (this.ignoreUnresolvablePlaceholders) {
					// Proceed with unprocessed value.
					startIndex = result.indexOf(this.placeholderPrefix, endIndex + this.placeholderSuffix.length());
				}
				else {
					throw new IllegalArgumentException("Could not resolve placeholder '" +
							placeholder + "'" + " in value \"" + value + "\"");
				}
				visitedPlaceholders.remove(originalPlaceholder);
			}
			else {
				startIndex = -1;
			}
		}
		return result.toString();
	}
看了注释之后,我们知道目前已经拿到了去除${}符号的属性值,并且现在要调用回调函数getPropertyAsRawString 了
protected <T> T getProperty(String key, Class<T> targetValueType, boolean resolveNestedPlaceholders) {
		if (this.propertySources != null) {
            //遍历资源文件,如果包含key,则返回对应的属性值
			for (PropertySource<?> propertySource : this.propertySources) {
				if (logger.isTraceEnabled()) {
					logger.trace("Searching for key '" + key + "' in PropertySource '" +
							propertySource.getName() + "'");
				}
                //我们就在这里获取到了真正的属性值,这里就类似map的取值操作
				Object value = propertySource.getProperty(key);
				if (value != null) {
					if (resolveNestedPlaceholders && value instanceof String) {
						value = resolveNestedPlaceholders((String) value);
					}
					logKeyFound(key, propertySource, value);
					return convertValueIfNecessary(value, targetValueType);
				}
			}
		}
		if (logger.isTraceEnabled()) {
			logger.trace("Could not find key '" + key + "' in any property source");
		}
		return null;
	}
至此为止,我们遍历所有的资源文件,然后找到匹配key,返回对应的属性值,至此为止,@Value 注解获取属性值的逻辑也结束了。
刚刚我们遍历的资源文件列表,跟我们前面存进去的资源列表是同一个吗?
刚刚遍历查询属性值的时候,我们看到了 propertySources 属性,但是它好像跟前面我们初始化时候的列表不是同一个呢,我们对比一下
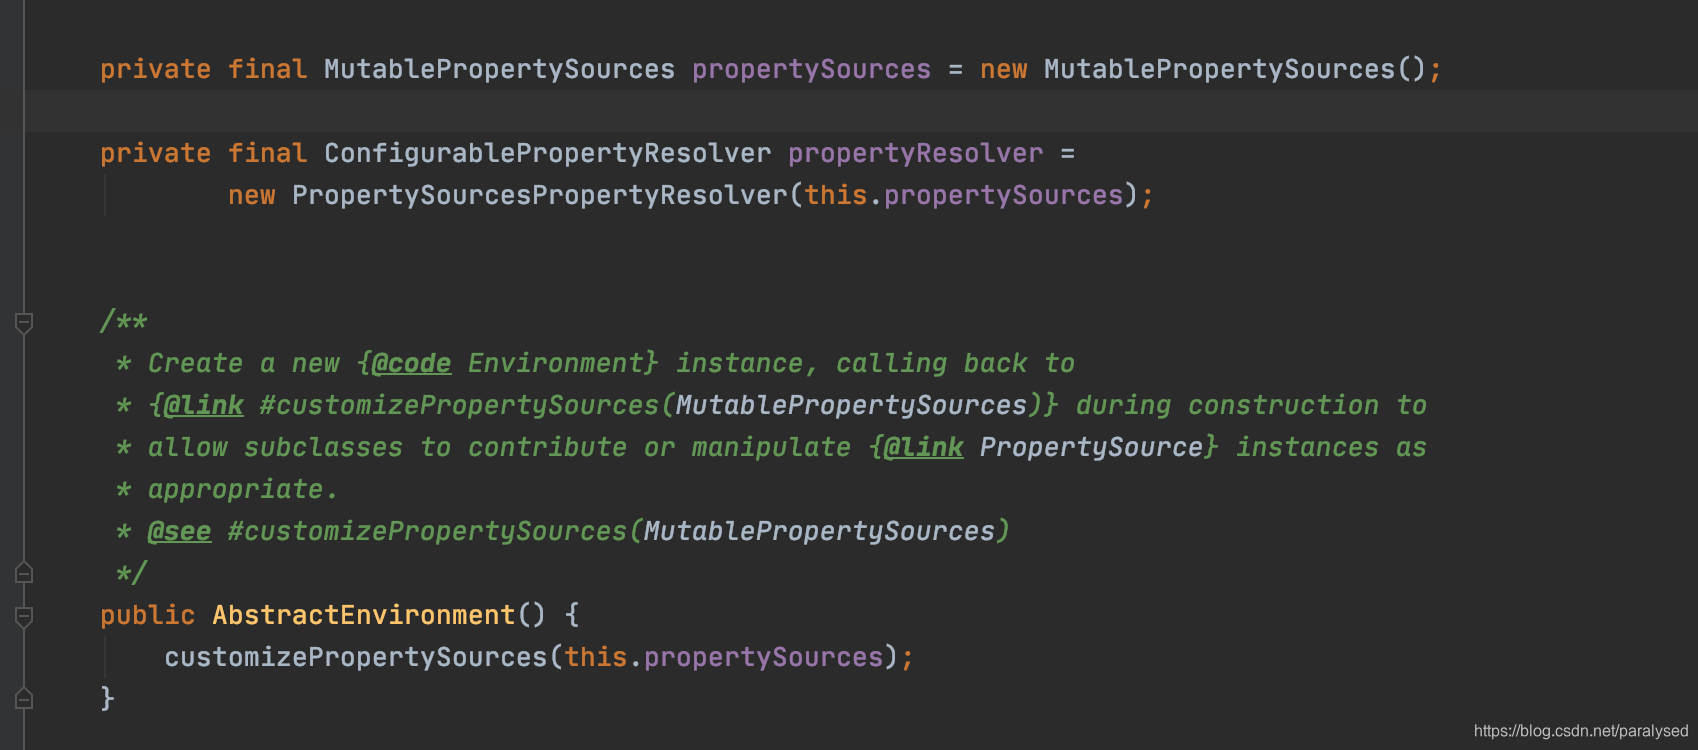
由上可以看到,前者是遍历资源文件时用到的列表,后者是初始化和保存资源文件时的列表,他们类型都不一样,直觉上他们并不是同一个列表。
那么问题来了,如果他们俩不是同一个,那么前者 PropertySources 是从哪里来的呢?它什么时候实例化的?为什么能通过环境直接获取到?
好巧不巧,就在上面这一张图上,环境初始化 propertySources 之后,立刻初始化了 propertyResolver 而且,调用后者初始化方法的时候,把刚刚初始化好的 propertySources 给穿进去了,那么我们跟进去它的构造方法去看一下。
public class PropertySourcesPropertyResolver extends AbstractPropertyResolver {

	@Nullable
	private final PropertySources propertySources;


	/**
	 * Create a new resolver against the given property sources.
	 * @param propertySources the set of {@link PropertySource} objects to use
	 */
	public PropertySourcesPropertyResolver(@Nullable PropertySources propertySources) {
		this.propertySources = propertySources;
	}
看到这里,大家都应该明白了,调用构造方法之后,propertyResolver 的 propertySources 变量直接指向了构造方法传过来了 propertySources, 说明这两个变量指向的地址是一样的,到此问题,我们的问题也就迎刃而解了。


 1186
1186

 被折叠的 条评论
为什么被折叠?
被折叠的 条评论
为什么被折叠?
 到【灌水乐园】发言


