


文章目录
前言
这系列文章详细记录在Fiori应用中如何在前端和后端之间使用文件进行交互。
这篇的主要内容有:
- 后端RAP的开发(S4HANA On-Premise)
- 前端(UI5)读取Excel文件并保存到后端
一、RAP的开发
1. 创建表格
@EndUserText.label : 'Student List'
@AbapCatalog.enhancement.category : #NOT_EXTENSIBLE
@AbapCatalog.tableCategory : #TRANSPARENT
@AbapCatalog.deliveryClass : #A
@AbapCatalog.dataMaintenance : #RESTRICTED
define table ymoon_t010 {
  key client : abap.clnt not null;
  key uuid   : sysuuid_x16 not null;
  name       : abap.char(40);
  age        : abap.int1;
  gender     : abap.char(10);
  city       : abap.char(40);

}
2. 创建CDS Entity
@AccessControl.authorizationCheck: #NOT_REQUIRED
@EndUserText.label: 'Student List CSD'
define root view entity ymoon_i_010
  as select from ymoon_t010
{
  key uuid   as Uuid,
      name   as Name,
      age    as Age,
      gender as Gender,
      city   as City
}
3. 创建BDEF
这里使用managed 类型减少二次开发
managed implementation in class zbp_moon_i_010 unique;
strict ( 2 );

define behavior for ymoon_i_010 alias Student
persistent table YMOON_T010
early numbering
lock master
authorization master ( instance )
//etag master <field_name>
{
  create;
  update;
  delete;

}
4. 创建implementation class
因为使用了early numbering,所以在类中实现具体的方法
class lhc_student definition inheriting from cl_abap_behavior_handler.
  private section.

    methods get_instance_authorizations for instance authorization
      importing keys request requested_authorizations for student result result.

    methods earlynumbering_create for numbering
      importing entities for create student.

endclass.

class lhc_student implementation.

  method get_instance_authorizations.
  endmethod.

  method earlynumbering_create.
    loop at entities into data(entity).

      data(uuid) = cl_system_uuid=>create_uuid_x16_static( ).

      append value #(
          %cid      = entity-%cid
          %key      = entity-%key
          uuid     = uuid
        ) to mapped-student .
    endloop.

  endmethod.

endclass.
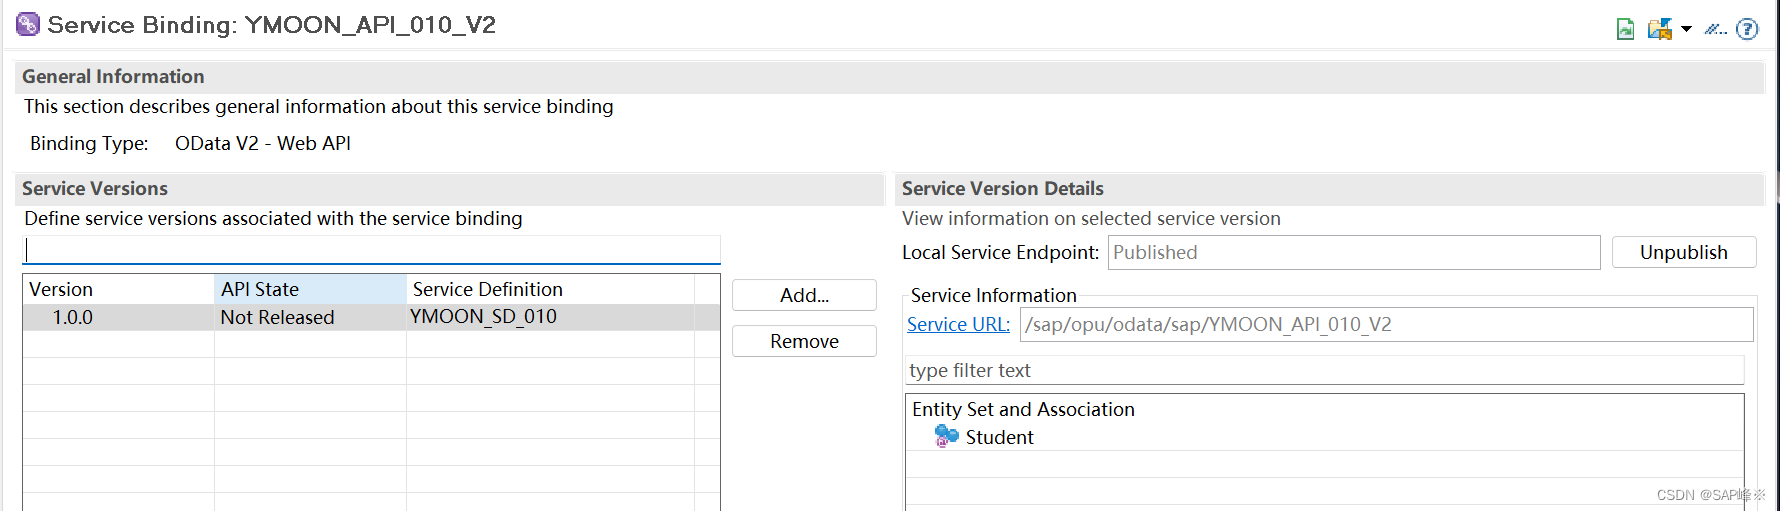
5. 创建Service Definition和Binding
@EndUserText.label: 'Student List SD'
define service YMOON_SD_010 {
  expose ymoon_i_010 as Student;
}
6. 测试API

二、创建UI5 Project
1. 使用Basic模板创建
Service选择我们刚才创建的API

2. 创建View
我们使用Table和FileUploader组件创建页面
- 当点击Upload时会触发onUploadButton事件
<mvc:View
    controllerName="ikdproject901.controller.Main"
    xmlns:mvc="sap.ui.core.mvc"
    displayBlock="true"
    xmlns="sap.m"
    xmlns:u="sap.ui.unified"
>
    <Page
        id="page"
        title="{i18n>title}"
    >
        <VBox
            width="auto"
            class="sapUiLargeMargin"
        >
            <Table items="{/Student}">
                <headerToolbar>
                    <OverflowToolbar id="_IDGenOverflowToolbar1">
                        <content>
                            <Title
                                id="salesTableTitle"
                                text="Excel Upload Demo"
                                level="H2"
                            />

                            <ToolbarSpacer id="_IDGenToolbarSpacer1" />
                            <u:FileUploader
                                id="fileUploader"
                                name="myFileUpload"
                                tooltip="Upload your file to the server"
                            />
                            <Button
                                id="_IDGenButton3"
                                press="onUploadButton"
                                icon="sap-icon://create"
                                text="Upload"
                                type="Emphasized"
                                class="sapUiLargeMarginBegin"
                            />
                        </content>
                    </OverflowToolbar>
                </headerToolbar>
                <columns>
                    <Column>
                        <Text text="姓名" />
                    </Column>
                    <Column>
                        <Text text="年龄" />
                    </Column>
                    <Column>
                        <Text text="性别" />
                    </Column>
                    <Column>
                        <Text text="城市" />
                    </Column>
                </columns>
                <items>
                    <ColumnListItem>
                        <cells>
                            <Text text="{Name}" />
                            <Text text="{Age}" />
                            <Text text="{Gender}" />
                            <Text text="{City}" />
                        </cells>
                    </ColumnListItem>
                </items>
            </Table>
        </VBox>
    </Page>
</mvc:View>
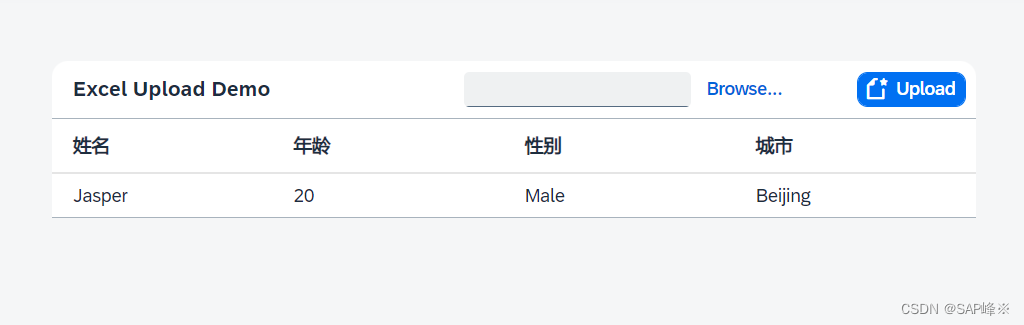
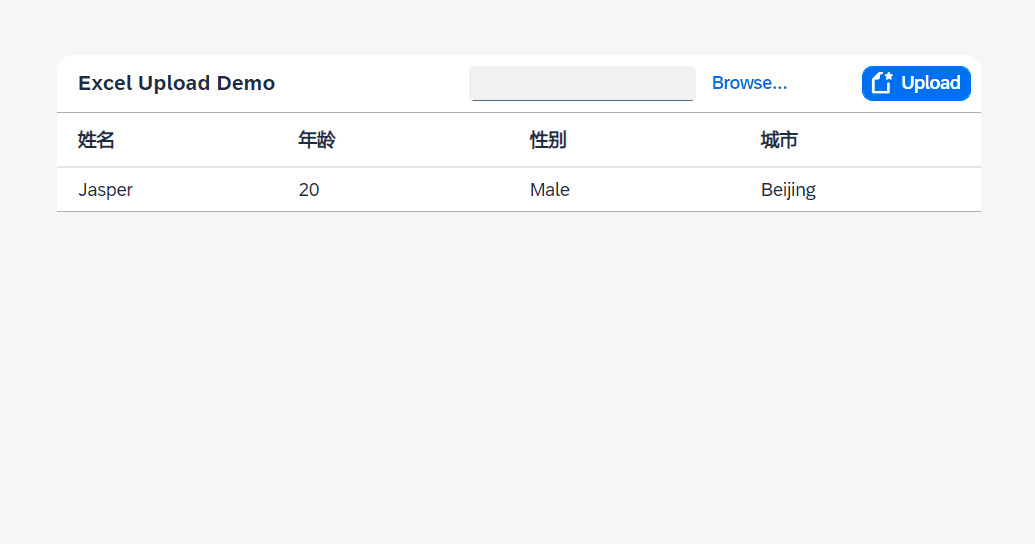
3. 测试页面及绑定的oData数据是否正确
有一条数据显示,和后端是一致的
- 页面
- 后端

4. 创建Controller
sap.ui.define([
    "sap/ui/core/mvc/Controller",
    "sap/ui/model/json/JSONModel",
    "sap/m/MessageToast",
],
    /**
     * @param {typeof sap.ui.core.mvc.Controller} Controller
     */
    function (Controller, JSONModel, MessageToast) {
        "use strict";

        return Controller.extend("ikdproject901.controller.Main", {
            onInit: function () {

            },
            onUploadButton: function () {
                var that = this
                var oModel = this.getView().getModel();
                var oFileUploader = this.byId("fileUploader");
                var file = oFileUploader.oFileUpload.files[0];
                var reader = new FileReader();

                reader.onload = function (evt) {
                    // get file data
                    var vContent = evt.currentTarget.result;

                    //read xlsx
                    var workbook = XLSX.read(vContent, {
                        type: 'binary'
                    });
                    workbook.SheetNames.forEach(function (sheetName) {
                        // Here is your object for every sheet in workbook
                        var excelData = XLSX.utils.sheet_to_row_object_array(workbook.Sheets[sheetName]);
                        console.log(excelData)
                        // Convert to internal Data
                        var newData = excelData.map(function (entry) {
                            return {
                                "Name": entry["姓名"],
                                "Age": parseInt(entry["年龄"]),
                                "Gender": entry["性别"],
                                "City": entry["城市"]
                            };
                        });
                        //Create Model
                        var lines = 0
                        newData.forEach(function (oData) {
                            oModel.create("/Student", oData,
                                {
                                    success: function (rData, oResponse) {
                                        lines += 1
                                        if (lines === newData.length) {
                                            MessageToast.show(lines + "条数据导入成功");
                                        }
                                    }
                                    , error: function (oError) {
                                        MessageToast.show("数据导入失败");
                                    }
                                }
                            )
                        })
                    });
                }
                reader.readAsBinaryString(file);
            }
        });
    });
5. 导入外部包(重要)
将如下包的导入写在index.html中
    <script src="https://cdnjs.cloudflare.com/ajax/libs/xlsx/0.10.0/jszip.js"></script>
    <script src="https://cdnjs.cloudflare.com/ajax/libs/xlsx/0.10.0/xlsx.js"></script>
6. 测试
- 后端
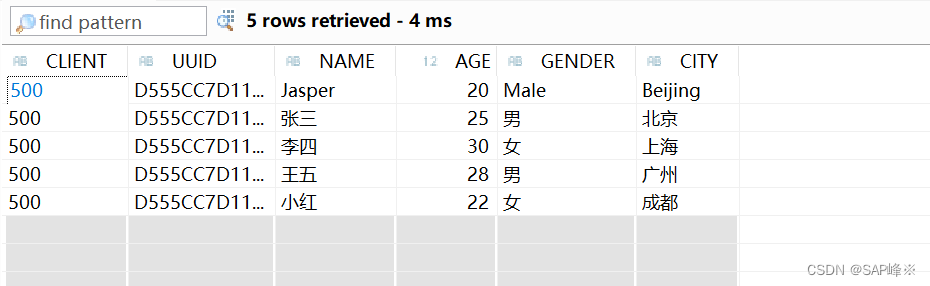
这篇文章是在前端解析excel数据的,后续介绍如何在后端解析数据


 689
689

 被折叠的 条评论
为什么被折叠?
被折叠的 条评论
为什么被折叠?
 到【灌水乐园】发言


