


idea2021不使用原型创建maven的web项目
1.创建项目
- 新建项目

- 选择maven,在java版本位置选择java1.8(其他版本也可以,看个人需要)

- 点击工作坐标左侧的小箭头,在GroupId的位置填写组织名,在ArtifactId的位置填写项目名

- 此时我们创建项目完毕
2.补全项目
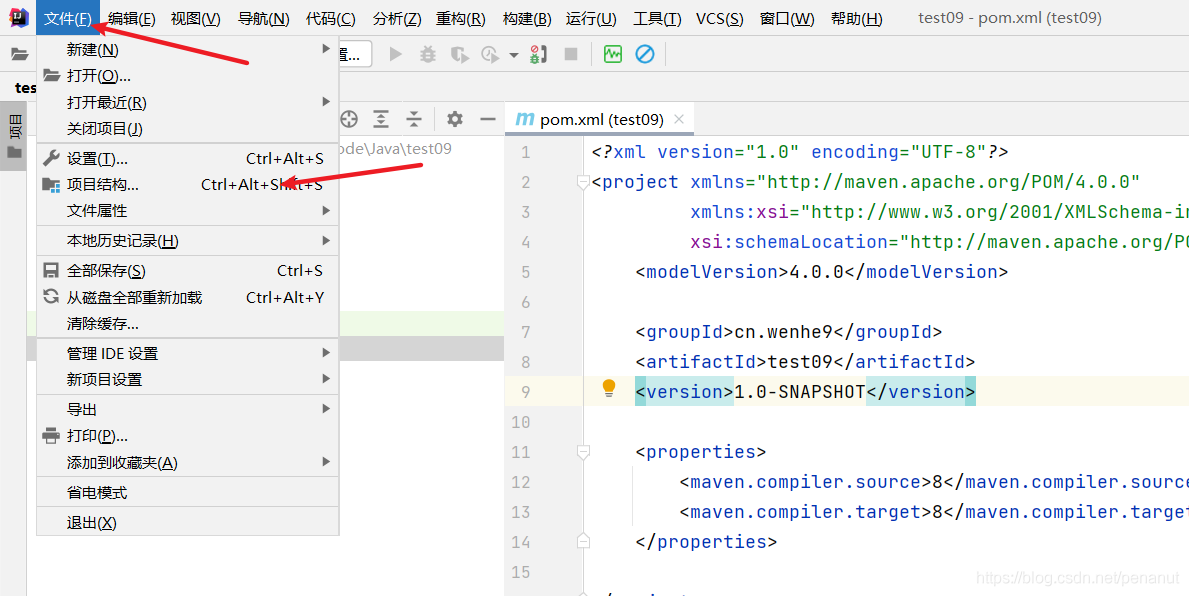
- 点击文件,点击下方的项目结构
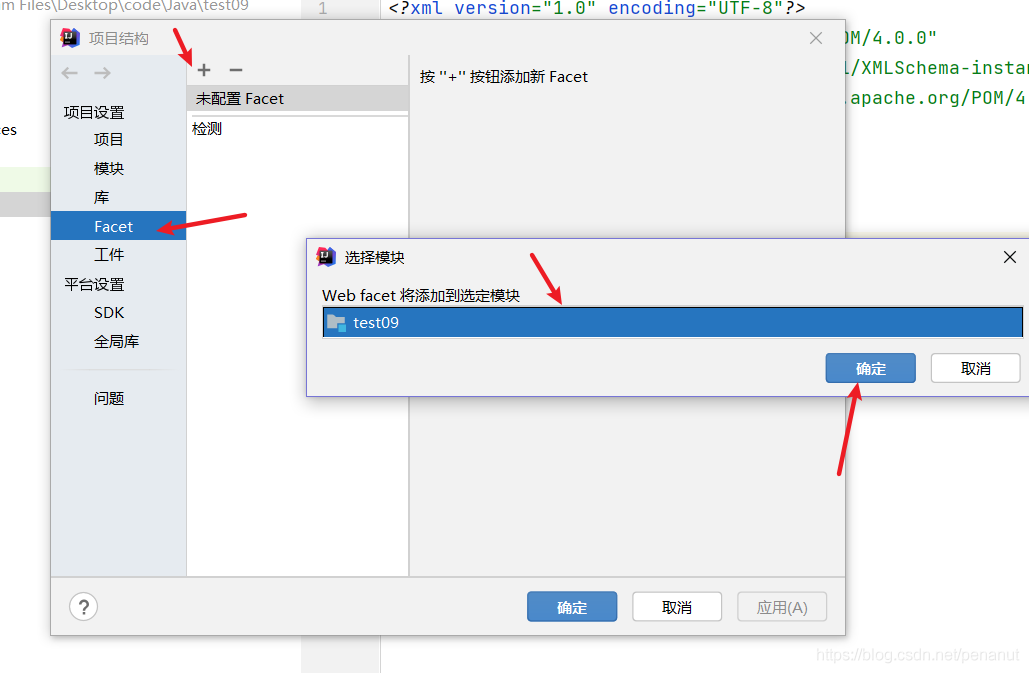
- 选择Facet,点击加号,选择我们当前这个项目模块,这一步的目的是给我们的项目添加web框架支持,当然也可以直接点击项目名右键添加框架支持,但是之后仍需要进入这里更改路径,所以我建议使用这种方法
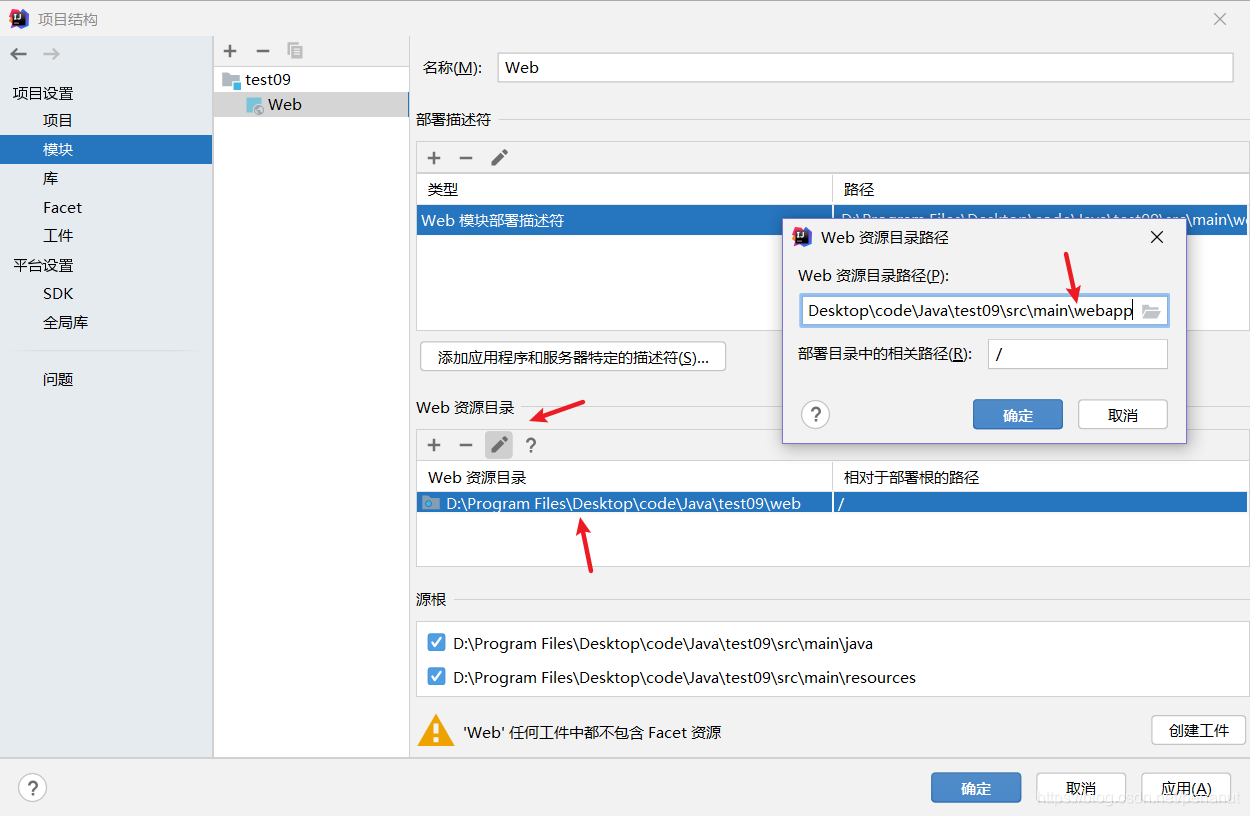
- 选中第一个框框的路径,然后点击笔的图标,对web.xml的路径进行修改
- 将其web修改为
src\main\webapp
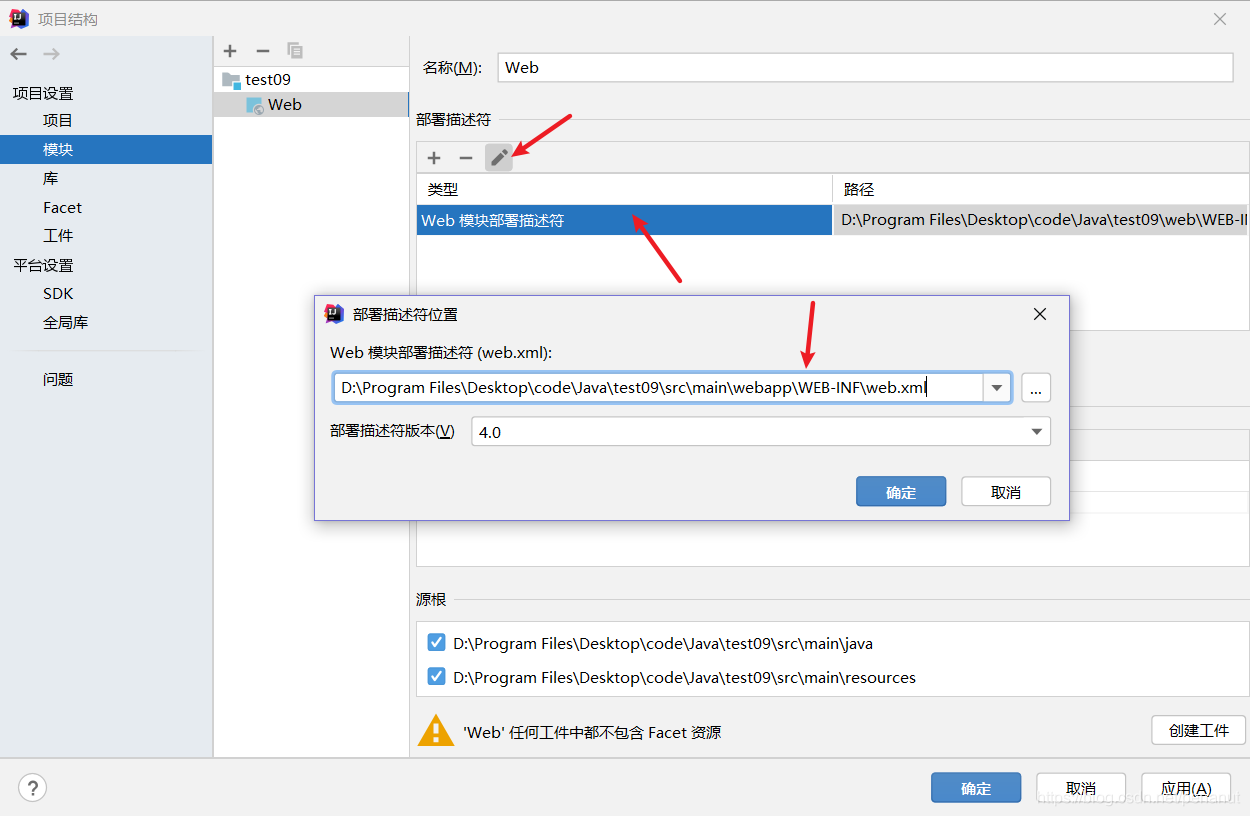
- 同理,我们还要修改下面的Web资源目录的路径,将web修改为
src\main\webapp
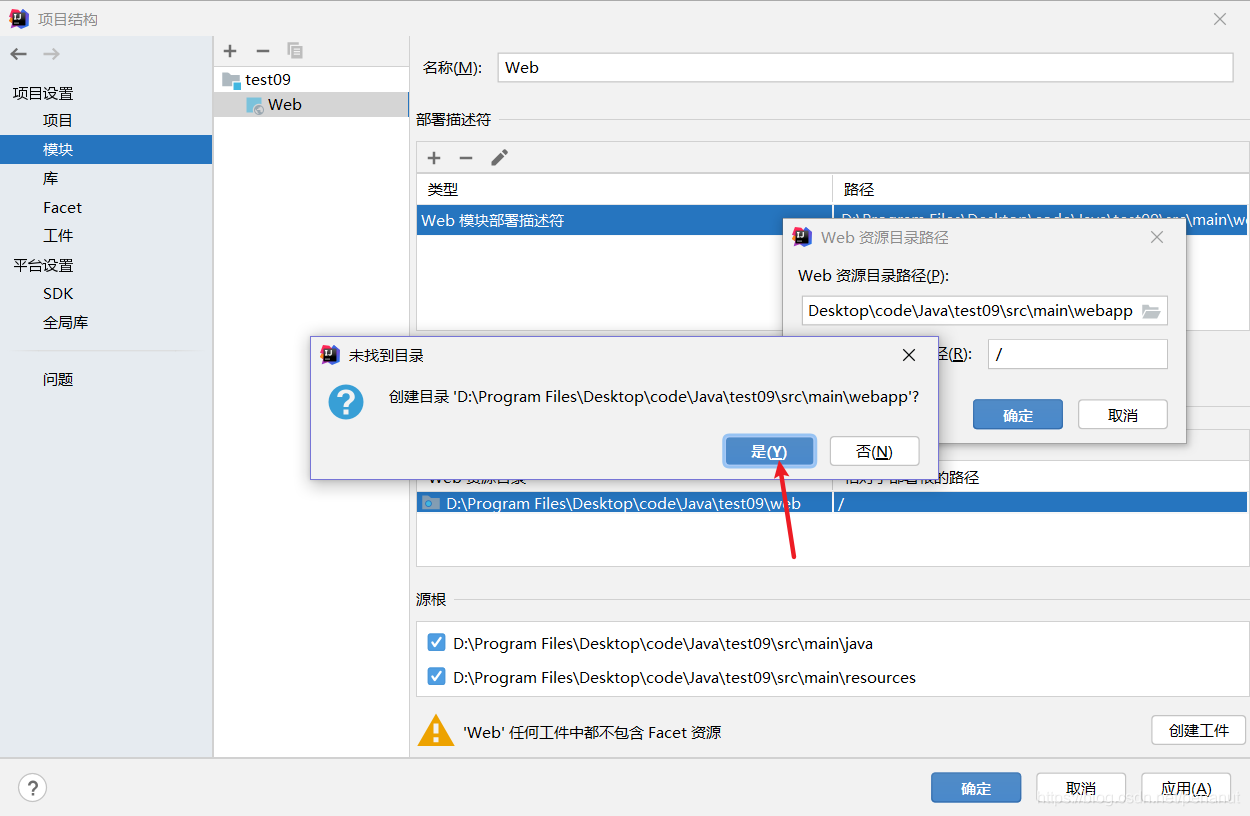
- 点击确定,它会提示我们没有该目录,是否创建,我们选择,是
- 最后点击右下角的创建工件,点击确定,这时我们看到出现了webapp和他下属目录的web.xml,此时我们就可以在这里新建html等文件了
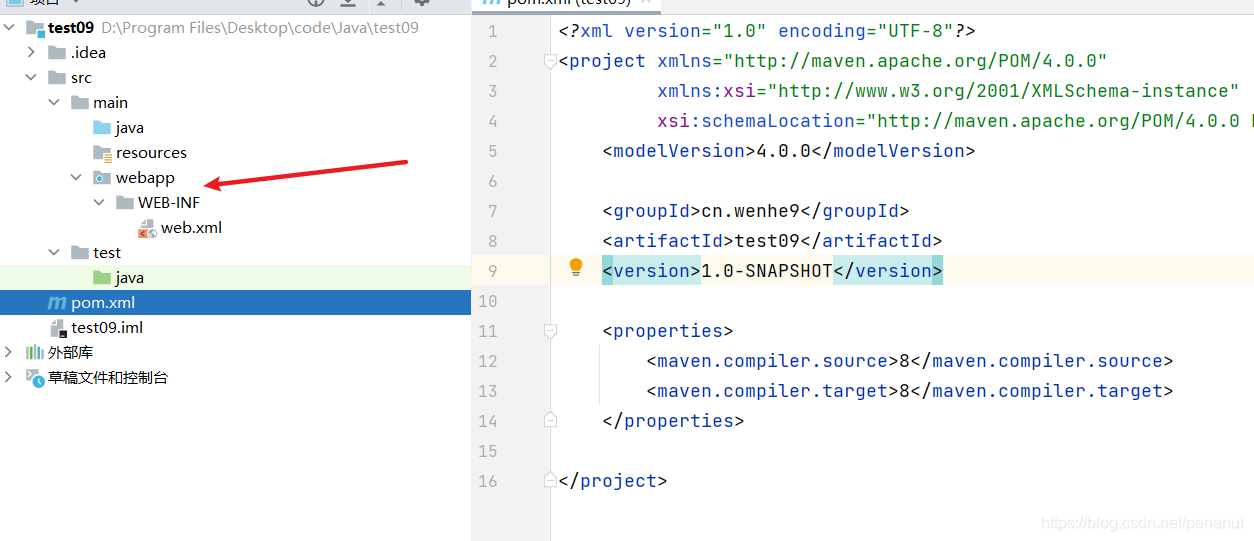
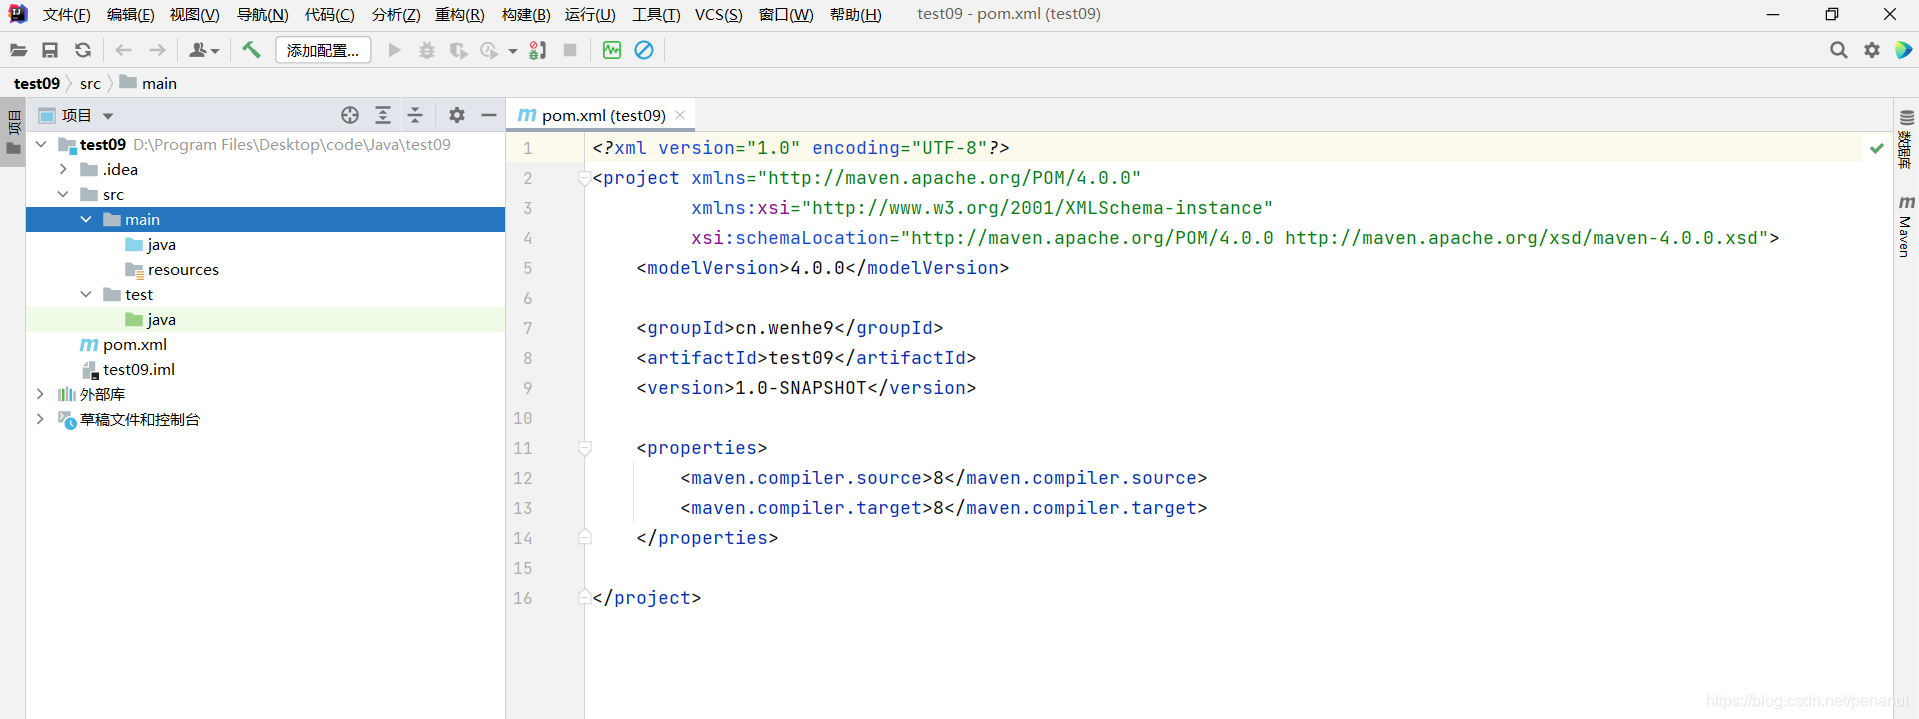
对pom.xml文件的补充
- 我们创建的只是一个普通的maven项目,所以在pom.xml中是没有关于web项目的配置的,为了使项目可以按web的形式跑起来,我们还需要对pom最如下补充
<?xml version="1.0" encoding="UTF-8"?>
<project xmlns="http://maven.apache.org/POM/4.0.0"
         xmlns:xsi="http://www.w3.org/2001/XMLSchema-instance"
         xsi:schemaLocation="http://maven.apache.org/POM/4.0.0 http://maven.apache.org/xsd/maven-4.0.0.xsd">
    <modelVersion>4.0.0</modelVersion>

    <groupId>cn.wenhe9</groupId>
    <artifactId>test09</artifactId>
    <version>1.0-SNAPSHOT</version>
    <packaging>war</packaging>

    <properties>
        <maven.compiler.source>8</maven.compiler.source>
        <maven.compiler.target>8</maven.compiler.target>
        <project.build.sourceEncoding>utf-8</project.build.sourceEncoding>
    </properties>

    <dependencies>
        <dependency>
            <groupId>javax.servlet</groupId>
            <artifactId>javax.servlet-api</artifactId>
            <version>4.0.1</version>
            <scope>provided</scope>
        </dependency>
    </dependencies>

    <build>
        <finalName>test09</finalName>
        <plugins>
            <plugin>
                <groupId>org.apache.maven.plugins</groupId>
                <artifactId>maven-compiler-plugin</artifactId>
                <version>3.8.1</version>
                <configuration>
                    <source>1.8</source>
                    <target>1.8</target>
                    <encoding>utf-8</encoding>
                </configuration>
            </plugin>
            <plugin>
                <groupId>org.apache.tomcat.maven</groupId>
                <artifactId>tomcat7-maven-plugin</artifactId>
                <version>2.2</version>
                <configuration>
                    <port>8080</port>
                    <path>/test09</path>
                </configuration>
            </plugin>
        </plugins>
    </build>

</project>
- 其中,
<packaging>war</packaging>声明当前的打包方式为war包,默认为jar包,我们所知tomcat会自动将war包解压,所以这里是通过maven将此项目打包为war包,再交由tomcat解压并运行 - 另外,
<project.build.sourceEncoding>utf-8</project.build.sourceEncoding>是指定我们的项目编译时的编码格式,如果不指定的话会报错 - 至于dependences中的
servlet-api依赖是为了之后演示时所导入的,当然真正的web项目,他是必不可少的,注意:这里的servelt-api以及以后写项目时导入的jsp的scope需要指定为provide,因为tomcat会为了我们提供了这两个包,但是tomcat所提供的jar包只有在运行时才会起作用,所以我们需要为项目导入这两个jar包,但是如果我们不设置他门的作用范围的话,当tomcat运行时,他就会发现两个servlet-api,从而发生冲突 - 还有build,他先是指定了项目名,后面则是,引入了两个插件,一个是java1.8的编译环境,一个是tomcat7插件,编译环境可以不写,这里只是为了防止编译环境冲突故而设置为1.8,tomcat7则是在maven中央仓库中直接能找到的,至于其他版本的使用则在后面讲解
运行测试
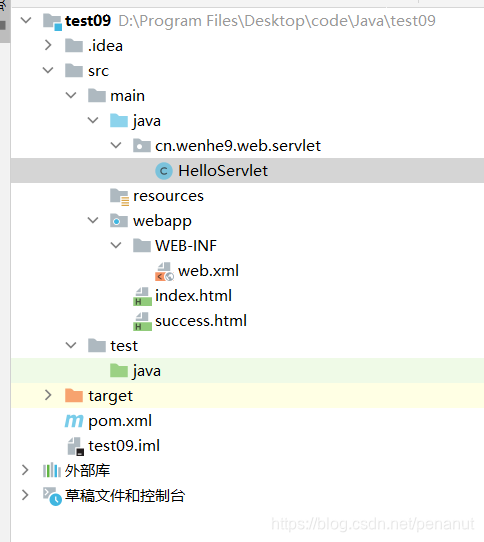
- 我们创建两个页面,及一个servlet
index.html
<!DOCTYPE html>
<html lang="en">
<head>
    <meta charset="UTF-8">
    <title>Title</title>
</head>
<body>
  <a href="helloServlet">hello world</a>
</body>
</html>
success.html
<!DOCTYPE html>
<html lang="en">
<head>
    <meta charset="UTF-8">
    <title>Title</title>
</head>
<body>
  <h2>success!</h2>
</body>
</html>
HelloServlet
package cn.wenhe9.web.servlet;

import javax.servlet.*;
import javax.servlet.http.*;
import javax.servlet.annotation.*;
import java.io.IOException;

@WebServlet("/helloServlet")
public class HelloServlet extends HttpServlet {
    @Override
    protected void doGet(HttpServletRequest request, HttpServletResponse response) throws ServletException, IOException {
        this.doPost(request, response);
    }

    @Override
    protected void doPost(HttpServletRequest request, HttpServletResponse response) throws ServletException, IOException {
        response.sendRedirect(request.getContextPath()+"/success.html");
    }
}
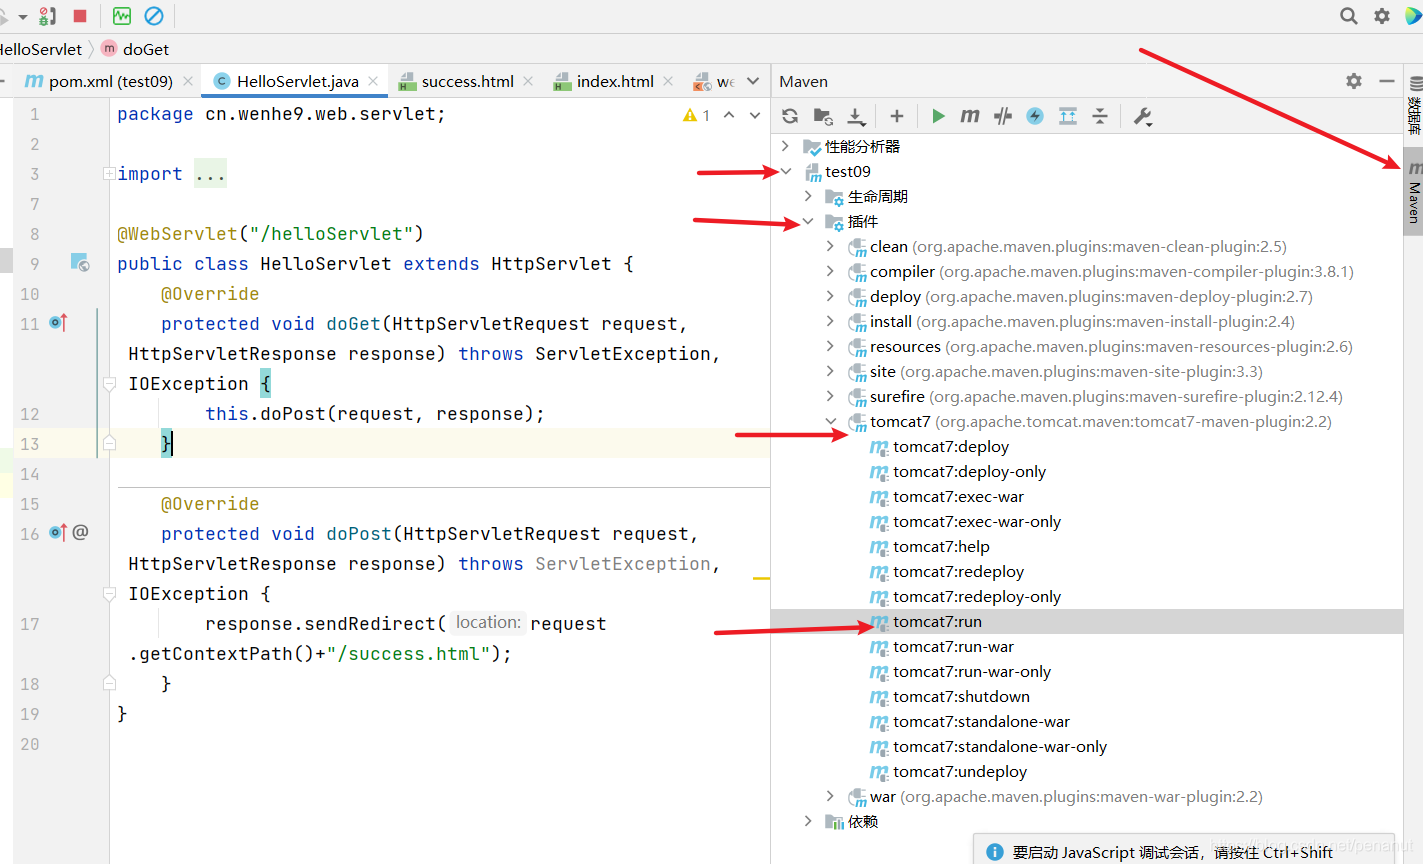
-
结构为
-
运行及结果
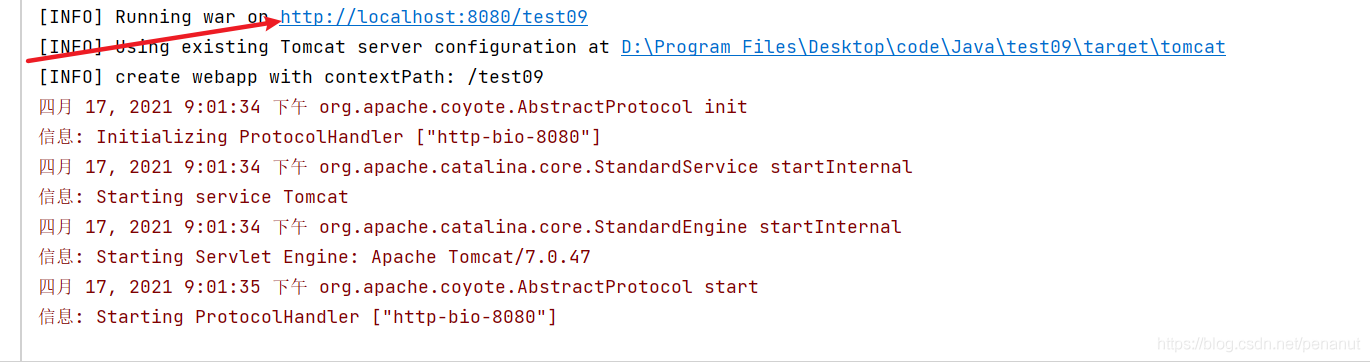
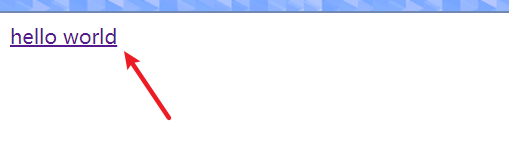

-
内容我就不做讲解了,相信你们能看懂


 494
494


 被折叠的 条评论
为什么被折叠?
被折叠的 条评论
为什么被折叠?
 到【灌水乐园】发言


