


搭建源码安装的lamp环境,排版比较简陋,主要是记录这个过程以备忘,同时也给需要的朋友一些参考!
1.安装准备的系统环境和lamp源码包,以apache、mysql、php的顺序安装,这个过程还会安装其他插件
系统:centos 6.5
源码包:

1. 我的系统是最小化安装,你可以先检查你的系统有没有安装httpd、mysql、php如果有则删除,方法如下:
2.1. 检查系统是有安装httpd:
rpm -qa | grep -i httpd

2.2如果有则删除:
rpm -e httpd-2.2.15-29.el6.centos.x86_64 -nodeps
rpm -e httpd-tools-2.2.15-29.el6.centos.x86_64 -nodeps
2.3检查是否有安装mysql
rpm -qa | grep -i mysql

2.4如果有则删除:
rpm -e mysql-libs-5.1.71-1.el6.x86_64 -nodeps
2.4检查是否安装了php,有则删除
rpm -qa | grep -i php
2. 检查你的系统是否有安装编译器gcc、gcc-c++
rpm –qa | grep gcc
rpm –qa | grep gcc-c++
没有则安装:
yum -y install gcc gcc-c++
3. 安装apache、php所需要的扩展插件
4.1 安装libxml2
tar -zxvf libxml2-2.9.0.tar.gz
cd libxml2-2.9.0
./configure --prefix=/usr/local/libxml2
make && make install
4.2安装libmcrypt
tar -zxvf libmcrypt-2.5.8.tar.gz
cd libmcrypt-2.5.8
./configure--prefix=/usr/local/libmcrypt
make && make install
4.3安装freetype
tar -zxvf freetype-2.4.10.tar.gz
cd freetype-2.4.10
./configure --prefix=/usr/local/freetype
make && make install
4.4安装zlib
tar -zxvf zlib-1.2.7.tar.gz
cd zlib-1.2.7
./configure --prefix=/usr/local/zlib
make && make install
4.5安装autoconf
tar -zxvf autoconf-2.69.tar.gz
cd autoconf-2.69
./configure
make && make install
4.6安装pcre
unzip -o pcre-8.32.zip
cd pcre-8.32
./configure --prefix=/usr/local/pcre
make && make install
4.6安装libpng
tar -zxvf libpng-1.5.14.tar.gz
cd libpng-1.5.14
./configure --prefix=/usr/local/libpng--with-zlib-prefix=/usr/local/zlib/
make && make install
4.7安装jpegsrc
tar -zxvf jpegsrc.v8b.tar.gz
cd jpeg-8b/
./configure --prefix=/usr/local/jpeg8
make && make install
4.7安装gd
tar -zxvf gd-2.0.35.tar.gz
cd gd-2.0.35
./configure --prefix=/usr/local/gd \
--with-png=/usr/local/libpng/\
--with-jpeg=/usr/local/jpeg8/\
--with-freetype=/usr/local/freetype/
make && make install
4.8安装apr
tar -zxvf apr-1.4.6.tar.gz
cd apr-1.4.6
./configure --prefix=/usr/local/apr-http
make && make install
4.9安装apr-util
tar -zxvf apr-util-1.3.12.tar.gz
cd apr-util-1.3.12
./configure--prefix=/usr/local/apr-util-http --with-apr=/usr/local/apr-http/
make && make install
4. 安装apache
5.1安装
tar -zxvf httpd-2.4.3.tar.gz
cd httpd-2.4.3
./configure--prefix=/usr/local/apache243 \
--enable-mods-shared=all \
--enable-deflate \
--enable-speling \
--enable-cache\
--enable-file-cache \
--enable-disk-cache \
--enable-mem-cache \
--enable-so \
--enable-expires=shared \
--enable-rewrite=shared \
--enable-static-support \
--sysconfdir=/etc/httpd \
--with-z=/usr/local/zlib/ \
--with-apr=/usr/local/apr-httpd/ \
--with-apr-util=/usr/local/apr-util-httpd/\
--with-pcre=/usr/local/pcre/ \
--disable-userdir \
--with-mpm=prefork
make && make install
5.2检查apache是否安装成功
/usr/local/apache243/bin/apachectl start
报错:httpd: Couldnot reliably determine the server's fully qualified domain name, using127.0.0.1. Set the 'ServerName' directive globally to suppress this message
查看/etc/httpd/httpd.conf找到#ServerName www.example.com:80将其改成
ServerName localhost:80 并去掉前面的#
再次启动:
/usr/local/apache243/bin/apachectl start
netstat -tnl | grep 80
tcp 0 0 :::80 :::* LISTEN
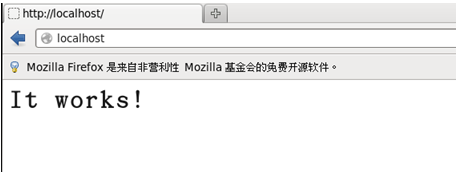
在浏览器中输入localhost若出现it works!代表安装成功
5.3将apache加入开机自动启动
方法1:echo /usr/local/apache243/bin/apachectl start >> /etc/rc.d/rc.local
方法2:加入服务和开机自动启动
cp /usr/local/apache243/bin/apachectl/etc/init.d/httpd
vim /etc/init.d/httpd
找到#!/bin/sh,在它的下面添加
# chkconfig:345 85 15
# description:Start and stop the ApacheHTTP Server
chkconfig --add httpd
chkconfig --list httpd

然后可以这样启动或关闭apache服务器:
service httpd start
service httpd stop
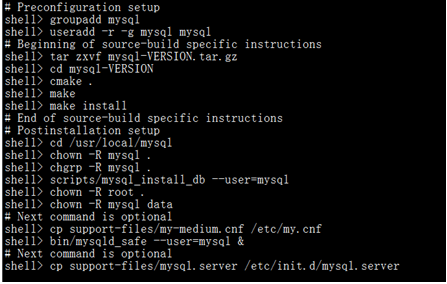
5. 安装mysql。5.5以上需要cmake安装
tar -zxvf mysql-5.5.20.tar.gz
cd mysql-5.5.20
vim INSTALL-SOURCE
安装cmake
yum -y install cmake
cmake .
出现错误:
CMake Error at cmake/readline.cmake:83(MESSAGE):
Curses library not found. Pleaseinstall appropriate package,
remove CMakeCache.txt and rerun cmake.On Debian/Ubuntu, package name islibncurses5-dev, on Redhat and derivates it is ncurses-devel.
Call Stack (most recent call first):
cmake/readline.cmake:127 (FIND_CURSES)
cmake/readline.cmake:217 (MYSQL_USE_BUNDLED_LIBEDIT)
CMakeLists.txt:257 (MYSQL_CHECK_READLINE)
首先删除再下载
rm –if CMakeCache.txt
yum -y install ncurses-devel
cmake .
配置安装参数
ccmake
make && make install
[root@lamp02 mysql]# chmod a+x/etc/init.d/mysqld
报错:
[root@lamp02 mysql]# 150725 23:36:06mysqld_safe Logging to '/usr/local/mysql/data/lamp02.err'.
150725 23:36:07 mysqld_safe Startingmysqld daemon with databases from /usr/local/mysql/data
150725 23:36:08 mysqld_safe mysqld frompid file /usr/local/mysql/data/lamp02.pid ended
解决方法:
[root@lamp02 mysql]# chown -R mysql:mysql data
[root@lamp02 mysql]# chmod -R 755 data
[root@lamp02 mysql]#scripts/mysql_install_db --user=mysql
[root@lamp02 mysql]#bin/mysqld_safe--user=mysql &
再次查看是否启动成功
netstat –tnl | grep 3306
将mysql加入系统服务和开机自动启动
[root@lamp02 mysql]# chkconfig --addmysqld
[root@lamp02 mysql]# chkconfig --level345 mysqld on
[root@lamp02 mysql]# chkconfig --listmysqld
mysqld 0:关闭 1:关闭 2:启用 3:启用 4:启用 5:启用 6:关闭
设置数据库root用户密码
[root@lamp02 mysql]# bin/mysql -uroot –p
mysql> set password for'root'@'localhost'=password('123456');
删除用户名为空的用户
mysql> show databases;
mysql> use mysql;
mysql> delete from user whereUser='';
授权root用户远程登录
mysql> grant all on *.* to 'root'@'%'identified by '123456';
刷新权限,使之前的删除用户,授权操作生效,否则需要下次启动时才会生效
mysql> flush privileges;
6. 安装php 注意5.3以上版本安装mysql时建议使用mysqlnd
./configure --prefix=/usr/local/php \
--with-config-file-path=/usr/local/php/etc \
--with-apxs2=/usr/local/apache243/bin/apxs \
--with-mysql=mysqlnd \
--with-mysqli=mysqlnd \
--with-pdo-mysql=mysqlnd \
--with-libxml-dir=/usr/local/libxml2/ \
--with-png-dir=/usr/local/libpng/ \
--with-jpeg-dir=/usr/local/jpeg8/\
--with-freetype-dir=/usr/local/freetype/ \
--with-gd=/usr/local/gd/\
--with-zlib-dir=/usr/local/zlib/ \
--with-mcrypt=/usr/local/libmcrypt/\
--enable-soap \
--enable-mbstring=all \
--enable-sockets \
--enable-ftp
报错:configure:error: Unable to find gd.h anywhere under /usr/local/gd/
解决方法:
vim /usr/local/gd/include/gd_io.h
gdIOCtx结构中增加void (*data);
格式如下
typedef structgdIOCtx
{
int (*getC)(struct gdIOCtx *);
int (*getBuf)(struct gdIOCtx *, void *, int);
void (*putC)(struct gdIOCtx *, int);
int (*putBuf)(struct gdIOCtx *, const void *, int);
/* seek mustreturn 1 on SUCCESS, 0 on FAILURE. Unlike fseek! */
int (*seek)(struct gdIOCtx *, const int);
long (*tell)(struct gdIOCtx *);
void (*gd_free)(struct gdIOCtx *);
void (*data);
}
cpphp.ini-development /usr/local/php/etc/php.ini
找到date.timezone设置为PRC并去掉;
date.timezone=”PRC”;
设置apache的httpd.conf
在httpd.conf中添加
<FilesMatch\.php$>
SetHandler application/x-httpd-php
</FilesMatch>
<FilesMatch "\.ph(p[2-6]?|tml)$">
SetHandler application/x-httpd-php
</FilesMatch>
<FilesMatch "\.phps$">
SetHandler application/x-httpd-php-source
</FilesMatch>
找到
<IfModuledir_module>
DirectoryIndex index.html
</IfModule>
改为
<IfModuledir_module>
DirectoryIndex index.php index.html
</IfModule>
重启apache
service httpdrestart
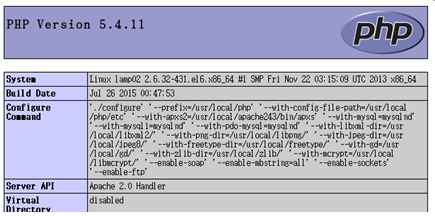
测试php是否安装成功
建立info.php文件
echo"<?php phpinfo();?>" > /usr/local/apache243/htdocs/info.php
访问localhost/info.php,出现下图则说明成功
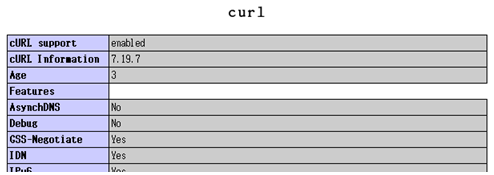
7. 安装curl扩展
进入php源码目录
cd ext/curl
/usr/local/php/bin/phpize
./configure--with-php-config=/usr/local/php/bin/php-config
报错:
error: Please reinstall the libcurldistribution -
easy.h should bein <curl-dir>/include/curl/
解决方法:
yum -y installlibcurl libcurl-devel
./configure--with-php-config=/usr/local/php/bin/php-config
make && make install
将php.ini文件中的extension_dir=”./”改成
extension_dir=”/usr/local/php/lib/php/extensions/no-debug-non-zts-20100525/”
并在文件最后加入
extension=curl.so
重启apache然后访问浏览器localhost/info.php查看是否curl扩展已安装上
8. 安装memcache
9.1安装memcache扩展要先在服务器上安装memcached服务器
先要安装libevent 、libevent-devel
yum -y install libevent libevent-devel
tar -zxvf memcached-1.4.18.tar.gz
cd memcached-1.4.18
./configure --prefix=/usr/local/memcached
make && make install
将memcached加入开机自动启动
echo /usr/local/memcached/bin/memcached-d -u nobody -m 200 127.0.0.1 -p 11211 -c 5120 -t 8 >> /etc/rc.d/rc.local
9.2安装php的memcache扩展
tar -zxvf memcache-2.2.7.tgz
cd memcache-2.2.7
/usr/local/php/bin/phpize
./configure--with-php-config=/usr/local/php/bin/php-config
make && make install
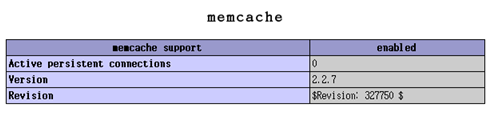
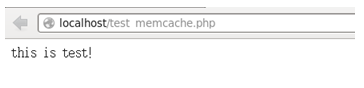
在php.ini文件添加extension=memcache.so ,重启apache并查看memcache 扩展是否安装成功, 创建测试文件test_memcache.php访问
<?php
$memcache=newmemcache;
$memcache->connect('localhost',11211);
$memcache->set('test','thisis test!');
$test=$memcache->get('test');
echo $test;
?>
9. 安装ZendLoadGuard 只有apache的mpm模式为prefork模式才能加载成功
tar -zxvfZendGuardLoader-70429-PHP-5.4-linux-glibc23-x86_64.tar.gz
cd/usr/src/LAMP.tar.gz/ZendGuardLoader-70429-PHP-5.4-linux-glibc23-x86_64
cpZendGuardLoader.so /usr/local/php/lib/php/extensions/no-debug-non-zts-20100525/
在php.ini文件中添加
zend_extension=/usr/local/php/lib/php/extensions/no-debug-non-zts-20100525/ZendGuardLoader.so
zend_loader.enable=1
zend_loader.disable_licensing=0
zend_loader.obfuscation_level_support=3
zend_loader.license_path=
重启apache,查看info.php,如果有下图则说明安装成功

10.安装phpMyadmin
tar -zxvf phpMyAdmin-3.5.6-all-languages.tar.gz
查看安装方法:
cd phpMyAdmin-3.5.6-all-languages
vim Documentation.txt
安装方式
cp -a phpMyAdmin-3.5.6-all-languages /usr/local/apache243/htdocs/
cd /usr/local/apache243/htdocs/
mv phpMyAdmin-3.5.6-all-languages/ phpMyAdmin
cd phpMyAdmin/
cp config.sample.inc.php config.inc.php
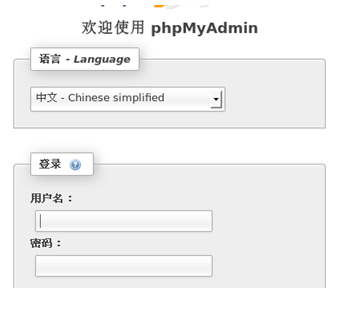
浏览器中输入localhost/phpMyAdmin访问查看是否成功。


 1496
1496

 被折叠的 条评论
为什么被折叠?
被折叠的 条评论
为什么被折叠?
 到【灌水乐园】发言


