


1、SpringBoot项目
主类:
package com.nginx.demo;

import org.springframework.boot.SpringApplication;
import org.springframework.boot.autoconfigure.SpringBootApplication;

@SpringBootApplication

public class DemoApplication {


    public static void main(String[] args) {
        SpringApplication.run(DemoApplication.class, args);
    }

}
在配置文件中设置端口号:
server.port= 9999实现Controller层,其中 @Value("${server.port}")注解会把配置文件中的server.port注入给port变量。注意的是:如果该变量是static静态变量,则无法注入,因为类属性是优先加载的,无法注入。
package com.nginx.demo;

import org.springframework.beans.factory.annotation.Value;
import org.springframework.web.bind.annotation.RequestMapping;
import org.springframework.web.bind.annotation.ResponseBody;
import org.springframework.web.bind.annotation.RestController;

@RestController
@RequestMapping
public class HiController {

    @Value("${server.port}")
    private String port;

    @RequestMapping("hi")
    @ResponseBody
    public  String sayHi(){
        return "Hi,My port is "+ port;
    }

}
启动该项目。
修改端口号:8888,再次启动一个项目。
Tips:如果是Idea开发环境,默认为单例模式,可以取消勾选。取消后,修改端口后,可直接启动多个同一项目不同端口。
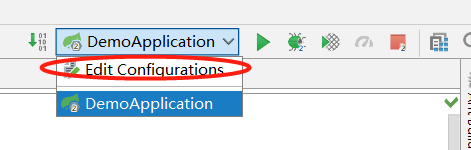
取消勾选

至此,SpringBoot项目结束。
2、Nginx安装部署
安装过程自行百度,Windows版解压即可
打开安装目录下conf目录下的配置文件nginx.conf
#user  nobody;
worker_processes  1;

#error_log  logs/error.log;
#error_log  logs/error.log  notice;
#error_log  logs/error.log  info;

#pid        logs/nginx.pid;


events {
    worker_connections  1024;
}


http {
    include       mime.types;
    default_type  application/octet-stream;

    #log_format  main  '$remote_addr - $remote_user [$time_local] "$request" '
    #                  '$status $body_bytes_sent "$http_referer" '
    #                  '"$http_user_agent" "$http_x_forwarded_for"';

    #access_log  logs/access.log  main;

    sendfile        on;
    #tcp_nopush     on;

    #keepalive_timeout  0;
    keepalive_timeout  65;

    #服务器集群
    upstream tomcat {
        server 127.0.0.1:9999 weight=10;
        server 127.0.0.1:8888 weight=10;#可以在这里加权重
	}
    #gzip  on;

    server {
        listen       80;
        server_name  localhost;

        #charset koi8-r;

        #access_log  logs/host.access.log  main;

        location / {
            #root   html;
            #index  index.html index.htm;
			proxy_pass http://tomcat;
			proxy_redirect default;
        }

        #error_page  404              /404.html;

        # redirect server error pages to the static page /50x.html
        #
        error_page   500 502 503 504  /50x.html;
        location = /50x.html {
            root   html;
        }

        # proxy the PHP scripts to Apache listening on 127.0.0.1:80
        #
        #location ~ \.php$ {
        #    proxy_pass   http://127.0.0.1;
        #}

        # pass the PHP scripts to FastCGI server listening on 127.0.0.1:9000
        #
        #location ~ \.php$ {
        #    root           html;
        #    fastcgi_pass   127.0.0.1:9000;
        #    fastcgi_index  index.php;
        #    fastcgi_param  SCRIPT_FILENAME  /scripts$fastcgi_script_name;
        #    include        fastcgi_params;
        #}

        # deny access to .htaccess files, if Apache's document root
        # concurs with nginx's one
        #
        #location ~ /\.ht {
        #    deny  all;
        #}
    }


    # another virtual host using mix of IP-, name-, and port-based configuration
    #
    #server {
    #    listen       8000;
    #    listen       somename:8080;
    #    server_name  somename  alias  another.alias;

    #    location / {
    #        root   html;
    #        index  index.html index.htm;
    #    }
    #}


    # HTTPS server
    #
    #server {
    #    listen       443 ssl;
    #    server_name  localhost;

    #    ssl_certificate      cert.pem;
    #    ssl_certificate_key  cert.key;

    #    ssl_session_cache    shared:SSL:1m;
    #    ssl_session_timeout  5m;

    #    ssl_ciphers  HIGH:!aNULL:!MD5;
    #    ssl_prefer_server_ciphers  on;

    #    location / {
    #        root   html;
    #        index  index.html index.htm;
    #    }
    #}

}
其中集群名称和代理路径需要保持一致:

在Nginx安装的目录下
启动Nginx:
start nginx
其他命令
停止Nginx:
nginx -s stop(直接停止) 或者 nginx -s quit(有序停止)
重新载入Nginx:
配置修改后,需要重新载入,nginx -s reload
至此,Nginx配置玩成。
3、测试
打开浏览器,输入http://localhost/hi
发现交替出现以下页面:
![]()
![]()
表明:Nginx负载均衡服务分发成功。


 1201
1201


 被折叠的 条评论
为什么被折叠?
被折叠的 条评论
为什么被折叠?
 到【灌水乐园】发言


