


悬浮框实现拖拽
<!DOCTYPE html>
<html lang="en">

<head>
  <meta charset="UTF-8">
  <meta name="viewport" content="width=device-width, initial-scale=1.0">
  <title>Document</title>
  <style>
    #draggable {
      position: absolute;
    }
  </style>
</head>

<body>
  <div id="draggable" style="width:300px;height:150px;background-color:red;cursor:pointer;position: relative;display: block;">Drag me </div>

  <script>
    var pos = { top: 0, left: 0 };
    document.getElementById('draggable').onmousedown = function (e) {
  console.log(e);
      e = e || window.event;
      pos = {
        top: this.offsetTop,
        left: this.offsetLeft
      };
      document.onmousemove = function (e) {
        e = e || window.event;
        console.log(e.clientX,"======",pos.left);
        var left = pos.left + (e.clientX - pos.left)-135;
        var top = pos.top + (e.clientY - pos.top)-59;
        document.getElementById('draggable').style.position = 'absolute';
        document.getElementById('draggable').style.left = left + 'px';
        document.getElementById('draggable').style.top = top + 'px';
      };
      return false;
    };
    document.onmouseup = function () {
      document.onmousemove = null;
      document.onclick = null;
    };
  </script>
</body>

</html>
优化:使用自定义指令
export default{
    mounted(el, bingding){
        const mousedown = (e) => {
          let X = e.clientX - el.offsetLeft
          let Y = e.clientY - el.offsetTop
          const move = (e) => {
            console.log(e);
            el.style.left = e.clientX - X + 'px'
            el.style.top = e.clientY - Y + 'px'
          }
          document.addEventListener('mousemove', move)
          document.addEventListener('mouseup', () => {
            document.removeEventListener('mousemove', move)
          })
        }
        el.addEventListener('mousedown', mousedown)
      }
}
<template>
  <div><button>哈哈哈阿萨是</button></div>
  <div  v-drag class="box">
    <div class="header"></div>
    <div>
      内容

      <el-date-picker
        v-model="value2"
        type="date"
        placeholder="Pick a day"
  :editable='false'

        :size="size"
      />

      <el-select v-model="value" filterable placeholder="Select">
    <el-option
      v-for="item in options"
      :key="item.value"
      :label="item.label"
      :value="item.value"
    />
  </el-select>
    </div>
    <div>
     {{msg}}
    </div>
  </div>
</template>

<script setup>
import { Directive, DirectiveBinding,ref,onMounted } from "vue";
const msg=ref('wlasaksmmd')
const value2=ref('')
const value = ref('')
const options = [
  {
    value: 'Option1',
    label: 'Option1',
  },
  {
    value: 'Option2',
    label: 'Option2',
  },
  {
    value: 'Option3',
    label: 'Option3',
  },
  {
    value: 'Option4',
    label: 'Option4',
  },
  {
    value: 'Option5',
    label: 'Option5',
  },
]


</script>

<style>
.box {
  position:absolute;
  left: 50%;
  top: 50%;
  transform: translate(-50%, -50%);
  width: 200px;
  height: 200px;
  border: 2px solid #000;
}

.header {
  height: 20px;
  background: #000;

}
</style>
获取一天288个时间点
  <script>
    // 获取当前时间
    const timestamps = []; // 创建一个空数组来存储时间戳

// 获取当前日期并设置时间为午夜
const now = new Date();
now.setHours(0);
now.setMinutes(0);
now.setSeconds(0);
now.setMilliseconds(0);

// 在整个一天的时间段内每五分钟生成一个时间点
for (let i = 0; i <= 2; i++) { // 288 * 5 = 1440 (total number of minutes in a day)
  const nextTimestamp = new Date(now);
  nextTimestamp.setMinutes(nextTimestamp.getMinutes() + (i * 5)); // add the interval to the current time

  // Format the time as "xx:xx"
  const formattedTime = `'${nextTimestamp.getHours().toString().padStart(2, '0')}:${nextTimestamp.getMinutes().toString().padStart(2, '0')}',`;

  timestamps.push(formattedTime);
}

console.log(...timestamps);

  </script>
实现文件上传
<!DOCTYPE html>
<html lang="en">
<head>
<meta charset="UTF-8">
<meta name="viewport" content="width=device-width, initial-scale=1.0">
<title>Document</title>
<style>
</style>
</head>
<!-- 文件上传 -->
<body>
<!-- 多文件上传 -->
<input type="file" multiple />
<!-- 上传文件夹---通过几个布尔值 webkit内核 Mozilla内核 opera内核 但是ie实现不了这个 -->
<input type="file" webkitdirectory mozdirectory odirectory>
<br />
<!-- 拖拽文件和文件夹 -->
<div style="height: 150px ;border: 1px solid #000;" class="container"></div>
</body>
<script>
// 拖拽文件逻辑
// 绑定拖拽事件
const div = document.querySelector('.container')
div.ondragenter = (e) => {
e.preventDefault();//阻止是因为默认情况下div是无法对文件执行拖拽的,得先阻止默认行为,然后自定义拖拽
}
div.ondragover = (e) => {
e.preventDefault();
}
div.ondrop = (e) => {
e.preventDefault();
console.log(e.dataTransfer.items.length);//拖拽的文件个数
for (const item of e.dataTransfer.items) {
// console.log(item);
const entry = item.webkitGetAsEntry()//可以展开每一层文件的信息,没有兼容性问题
// console.log(entry);
if (entry.isDirectory) {
//如果是目录,需要拿到目录下的文件,需要创建一个目录读取器createReader
const reader = entry.createReader()
reader.readEntries((entries) => {
console.log(entries);
})//异步读取的!!!,把读到的结果传递给一个回调函数
} else {
//文件
// 一般拿到文件是要拿到他的files对象,在原型的file中
// 而这里file是异步读取的!!!
entry.file((f) => {
console.log(f);
})
}
}
}
</script>
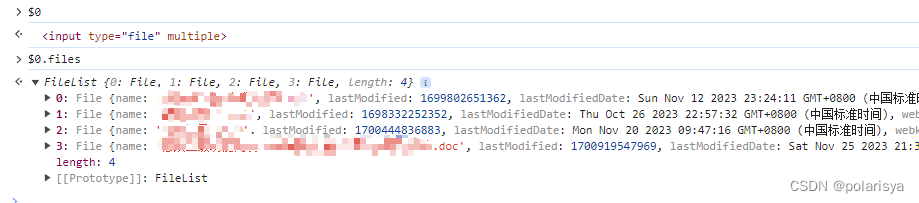
</html>如何点击上传多个文件?
在控制台可以看到浏览器本身就是支持多文件数据上传的,所以就可以通过ajax把files对象文件上传到服务器
如何点击上传文件夹?
会列出文件夹中的所有文件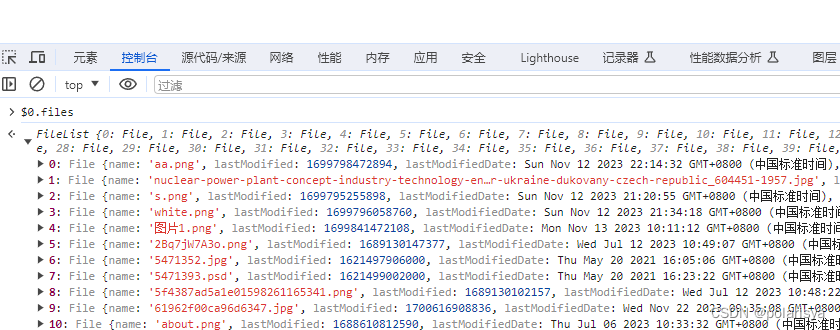
文件上传1
import * as XLSX from 'xlsx';
export default {
  methods: {
    handleFileUpload(event) {
      // 获取用户选择的文件
      const file = event.target.files[0];

      // 创建一个FileReader实例来读取文件内容
      const reader = new FileReader();

      // 定义FileReader的onload事件处理函数,当文件读取完成后执行
      reader.onload = (e) => {
        // 将读取到的文件内容转换为Uint8Array格式
        const data = new Uint8Array(e.target.result);

        // 使用xlsx库的read方法解析文件内容,得到workbook对象
        const workbook = XLSX.read(data, { type: 'array' });

        // 获取workbook中的第一个工作表名称
        const worksheetName = workbook.SheetNames[0];

        // 根据工作表名称获取对应的工作表对象
        const worksheet = workbook.Sheets[worksheetName];

        // 使用xlsx库的sheet_to_json方法将工作表对象转换为JSON对象数组
        const jsonData = XLSX.utils.sheet_to_json(worksheet, { defval: "" });

        // 将解析后的JSON数据赋值给组件的excelData属性,供后续使用
        this.excelData = jsonData;
      };

      // 调用FileReader的readAsArrayBuffer方法开始读取文件内容
      reader.readAsArrayBuffer(file);
    }
  },
  data() {
    return {
      // 定义一个数据属性excelData来存储解析后的Excel数据
      excelData: [] // 存储解析后的Excel数据
    };
  }
};
new FormData()
JS部分
var btn = document.querySelector('[type=button]');
btn.onclick = function () {
    // 文件元素
    var file = document.querySelector('[type=file]');
    // 通过FormData将文件转成二进制数据
    var formData = new FormData();
    // 将文件转二进制
    *****注意2******
    formData.append('upload', file.files[0]);
    *****注意1******
    var xhr = new XMLHttpRequest;
    xhr.open('post', 'file.php');
    // 监听上传进度
    xhr.upload.onprogress = function (ev) {
    // 事件对象
    // console.log(ev);
        var percent = (ev.loaded / ev.total) * 100 + '%';
        console.log(percent);
        progress.style.width = percent;
    }

    xhr.send(formData);
    xhr.onreadystatechange = function () {
            if(xhr.readyState == 4 && xhr.status == 200) {
                    //
            }
    }
}


 389
389


 被折叠的 条评论
为什么被折叠?
被折叠的 条评论
为什么被折叠?
 到【灌水乐园】发言


