


如果要统计ios开发代码,包括头文件的,终端命令进入项目目录下,命令如下
- find . -name "*.m" -or -name "*.h" -or -name "*.xib" -or -name "*.c" |xargs wc -l
列出每个文件的行数
- find . -name "*.m" -or -name "*.h" -or -name "*.xib" -or -name "*.c" |xargs grep -v "^$"|wc -l
列出代码行数总和
-
grep -v "^$"是去掉空行 - 注释也统计在代码量之内,毕竟也一个字一个字码出来的
http://blog.csdn.net/yiyaaixuexi/article/details/18402001

IOS(http几种请求)
ios有几种请求比如最常用的post,get等。get的参数会在URL地址里看到,假如存在用户名和密码会被大家看到这就非常不安全。这是可以选择post的方式。虽然他们都可以放一些请求参数。请求可能要设置一些参数什么的,以下举个例子是发送图片的。其他一些delete,put请求都是类似的。网上也有一些开源的类库是封装了一些网络请求的。比如asihttp这个类库封装的一些和网络交互的方便的请求。缺点是用别人的类库一旦别人升级改动你也得自己跟着改。
//分界线的标识符
NSString *TWITTERFON_FORM_BOUNDARY = @"AaB03x";
//根据url初始化request
NSMutableURLRequest* request = [NSMutableURLRequest requestWithURL:[NSURL URLWithString:url]
cachePolicy:NSURLRequestReloadIgnoringLocalCacheData
timeoutInterval:10];
//分界线 --AaB03x
NSString *MPboundary=[[NSString alloc]initWithFormat:@"--%@",TWITTERFON_FORM_BOUNDARY];
//结束符 AaB03x--
NSString *endMPboundary=[[NSString alloc]initWithFormat:@"%@--",MPboundary];
//要上传的图片
UIImage *image=[params objectForKey:@"pic"];
//得到图片的data
NSData* data = UIImagePNGRepresentation(image);
//http body的字符串
NSMutableString *body=[[NSMutableString alloc]init];
//参数的集合的所有key的集合
NSArray *keys= [params allKeys];
//遍历keys
for(int i=0;i<[keys count];i++)
{
//得到当前key
NSString *key=[keys objectAtIndex:i];
//如果key不是pic,说明value是字符类型,比如name:Boris
if(![key isEqualToString:@"pic"])
{
//添加分界线,换行
[body appendFormat:@"%@\r\n",MPboundary];
//添加字段名称,换2行
[body appendFormat:@"Content-Disposition: form-data; name=\"%@\"\r\n\r\n",key];
//添加字段的值
[body appendFormat:@"%@\r\n",[params objectForKey:key]];
}
}
添加分界线,换行
[body appendFormat:@"%@\r\n",MPboundary];
//声明pic字段,文件名为boris.png
[body appendFormat:@"Content-Disposition: form-data; name=\"pic\"; filename=\"boris.png\"\r\n"];
//声明上传文件的格式
[body appendFormat:@"Content-Type: image/png\r\n\r\n"];
//声明结束符:--AaB03x--
NSString *end=[[NSString alloc]initWithFormat:@"\r\n%@",endMPboundary];
//声明myRequestData,用来放入http body
NSMutableData *myRequestData=[NSMutableData data];
//将body字符串转化为UTF8格式的二进制
[myRequestData appendData:[body dataUsingEncoding:NSUTF8StringEncoding]];
//将image的data加入
[myRequestData appendData:data];
//加入结束符--AaB03x--
[myRequestData appendData:[end dataUsingEncoding:NSUTF8StringEncoding]];
//设置HTTPHeader中Content-Type的值
NSString *content=[[NSString alloc]initWithFormat:@"multipart/form-data; boundary=%@",TWITTERFON_FORM_BOUNDARY];
//设置HTTPHeader
[request setValue:content forHTTPHeaderField:@"Content-Type"];
//设置Content-Length
[request setValue:[NSString stringWithFormat:@"%d", [myRequestData length]] forHTTPHeaderField:@"Content-Length"];
//设置http body
[request setHTTPBody:myRequestData];
//http method
[request setHTTPMethod:@"POST"];
//建立连接,设置代理
NSURLConnection *conn = [[NSURLConnection alloc] initWithRequest:request delegate:self];
//设置接受resp*****e的data
if (conn) {
mResp*****eData = [[NSMutableData data] retain];
}
时区日期处理及定时 (NSDate,NSCalendar,NSTimer,NSTimeZone)
NSDate存储的是世界标准时(UTC),输出时需要根据时区转换为本地时间
Dates
NSDate类提供了创建date,比较date以及计算两个date之间间隔的功能。Date对象是不可改变的。
如果你要创建date对象并表示当前日期,你可以alloc一个NSDate对象并调用init初始化:
- NSDate *now = [[NSDate alloc] init];
或者使用NSDate的date类方法来创建一个日期对象。如果你需要与当前日期不同的日期,你可以使用NSDate的initWithTimeInterval...或dateWithTimeInterval...方法,你也可以使用更复杂的calendar或date components对象。
创建一定时间间隔的NSDate对象:
- NSTimeInterval secondsPerDay = 24 * 60 * 60;
- NSDate *tomorrow = [[NSDate alloc] initWithTimeIntervalSinceNow:secondsPerDay];
- NSDate *yesterday = [[NSDate alloc] initWithTimeIntervalSinceNow:-secondsPerDay];
- [tomorrow release];
- [yesterday release];
使用增加时间间隔的方式来生成NSDate对象:
- NSTimeInterval secondsPerDay = 24 * 60 * 60;
- NSDate *today = [[NSDate alloc] init];
- NSDate *tomorrow, *yesterday;
- tomorrow = [today dateByAddingTimeInterval: secondsPerDay];
- yesterday = [today dateByAddingTimeInterval: -secondsPerDay];
- [today release];
如果要对NSDate对象进行比较,可以使用isEqualToDate:, compare:, laterDate:和 earlierDate:方法。这些方法都进行精确比较,也就是说这些方法会一直精确比较到NSDate对象中秒一级。例如,你可能比较两个日期,如果他们之间的间隔在一分钟之内则认为这两个日期是相等的。在这种情况下使用,timeIntervalSinceDate:方法来对两个日期进行比较。下面的代码进行了示例:
- if (fabs([date2 timeIntervalSinceDate:date1]) < 60) ...
NSCalendar & NSDateComponents
日历对象封装了对系统日期的计算,包括这一年开始,总天数以及划分。你将使用日历对象对绝对日期与date components(包括年,月,日,时,分,秒)进行转换。
NSCalendar定义了不同的日历,包括佛教历,格里高利历等(这些都与系统提供的本地化设置相关)。NSCalendar与NSDateComponents对象紧密相关。
你可以通过NSCalendar对象的currentCalendar方法来获得当前系统用户设置的日历。
- NSCalendar *currentCalendar = [NSCalendar currentCalendar];
- NSCalendar *japaneseCalendar = [[NSCalendar alloc] initWithCalendarIdentifier:NSJapaneseCalendar];
- NSCalendar *usersCalendar = [[NSLocale currentLocale] objectForKey:NSLocaleCalendar];
usersCalendar和currentCalendar对象是相等的,尽管他们是不同的对象。
你可以使用NSDateComponents对象来表示一个日期对象的组件——例如年,月,日和小时。如果要使一个NSDateComponents对象有意义,你必须将其与一个日历对象相关联。下面的代码示例了如何创建一个NSDateComponents对象:
- NSDateComponents *components = [[NSDateComponents alloc] init];
- [components setDay:6];
- [components setMonth:5];
- [components setYear:2004];
- NSInteger weekday = [components weekday]; // Undefined (== NSUndefinedDateComponent)
要将一个日期对象解析到相应的date components,你可以使用NSCalendar的components:fromDate:方法。此外日期本身,你需要指定NSDateComponents对象返回组件。
- NSDate *today = [NSDate date];
- NSCalendar *gregorian = [[NSCalendar alloc] initWithCalendarIdentifier:NSGregorianCalendar];
- NSDateComponents *weekdayComponents = [gregorian components:(NSDayCalendarUnit | NSWeekdayCalendarUnit) fromDate:today];
- NSInteger day = [weekdayComponents day];
- NSInteger weekday = [weekdayComponents weekday];
同样你也可以从NSDateComponents对象来创建NSDate对象:
- NSDateComponents *components = [[NSDateComponents alloc] init];
- [components setWeekday:2]; // Monday
- [components setWeekdayOrdinal:1]; // The first Monday in the month
- [components setMonth:5]; // May
- [components setYear:2008];
- NSCalendar *gregorian = [[NSCalendar alloc] initWithCalendarIdentifier:NSGregorianCalendar];
- NSDate *date = [gregorian dateFromComponents:components];
为了保证正确的行为,您必须确保使用的组件在日历上是有意义的。指定“出界”日历组件,如一个-6或2月30日在公历中的日期值产生未定义的行为。
你也可以创建一个不带年份的NSDate对象,这样的操作系统会自动生成一个年份,但在后面的代码中不会使用其自动生成的年份。
- NSDateComponents *components = [[NSDateComponents alloc] init];
- [components setMonth:11];
- [components setDay:7];
- NSCalendar *gregorian = [[NSCalendar alloc] initWithCalendarIdentifier:NSGregorianCalendar];
- NSDate *birthday = [gregorian dateFromComponents:components];
下面的示例显示了如何从一个日历置换到另一个日历:
- NSDateComponents *comps = [[NSDateComponents alloc] init];
- [comps setDay:6];
- [comps setMonth:5];
- [comps setYear:2004];
- NSCalendar *gregorian = [[NSCalendar alloc] initWithCalendarIdentifier:NSGregorianCalendar];
- NSDate *date = [gregorian dateFromComponents:comps];
- [comps release];
- [gregorian release];
- NSCalendar *hebrew = [[NSCalendar alloc] initWithCalendarIdentifier:NSHebrewCalendar];
- NSUInteger unitFlags = NSDayCalendarUnit | NSMonthCalendarUnit | NSYearCalendarUnit;
- NSDateComponents *components = [hebrew components:unitFlags fromDate:date];
- NSInteger day = [components day]; // 15
- NSInteger month = [components month]; // 9
- NSInteger year = [components year]; // 5764
历法计算
在当前时间加上一个半小时:
- NSDate *today = [[NSDate alloc] init];
- NSCalendar *gregorian = [[NSCalendar alloc] initWithCalendarIdentifier:NSGregorianCalendar];
- NSDateComponents *offsetComponents = [[NSDateComponents alloc] init];
- [offsetComponents setHour:1];
- [offsetComponents setMinute:30];
- // Calculate when, according to Tom Lehrer, World War III will end
- NSDate *endOfWorldWar3 = [gregorian dateByAddingComponents:offsetComponents toDate:today options:0];
获得当前星期中的星期天(使用格里高利历):
- NSDate *today = [[NSDate alloc] init];
- NSCalendar *gregorian = [[NSCalendar alloc] initWithCalendarIdentifier:NSGregorianCalendar];
- // Get the weekday component of the current date
- NSDateComponents *weekdayComponents = [gregorian components:NSWeekdayCalendarUnit fromDate:today];
- /*
- Create a date components to represent the number of days to subtract from the current date.
- The weekday value for Sunday in the Gregorian calendar is 1, so subtract 1 from the number of days to subtract from the date in question. (If today is Sunday, subtract 0 days.)
- */
- NSDateComponents *componentsToSubtract = [[NSDateComponents alloc] init];
- [componentsToSubtract setDay: 0 - ([weekdayComponents weekday] - 1)];
- NSDate *beginningOfWeek = [gregorian dateByAddingComponents:componentsToSubtract toDate:today options:0];
- /*
- Optional step:
- beginningOfWeek now has the same hour, minute, and second as the original date (today).
- To normalize to midnight, extract the year, month, and day components and create a new date from those components.
- */
- NSDateComponents *components = [gregorian components:(NSYearCalendarUnit | NSMonthCalendarUnit | NSDayCalendarUnit) fromDate: beginningOfWeek];
- beginningOfWeek = [gregorian dateFromComponents:components];
如何可以计算出一周的第一天(根据系统的日历设置):
- NSDate *today = [[NSDate alloc] init];
- NSDate *beginningOfWeek = nil;
- BOOL ok = [gregorian rangeOfUnit:NSWeekCalendarUnit startDate:&beginningOfWeek interval:NULL forDate: today];
获得两个日期之间的间隔:
- NSDate *startDate = ...;
- NSDate *endDate = ...;
- NSCalendar *gregorian = [[NSCalendar alloc] initWithCalendarIdentifier:NSGregorianCalendar];
- NSUInteger unitFlags = NSMonthCalendarUnit | NSDayCalendarUnit;
- NSDateComponents *components = [gregorian components:unitFlags fromDate:startDate toDate:endDate options:0];
- NSInteger months = [components month];
- NSInteger days = [components day];
使用Category来计算同一时代(AD|BC)两个日期午夜之间的天数:
- @implementation NSCalendar (MySpecialCalculations)
- -(NSInteger)daysWithinEraFromDate:(NSDate *) startDate toDate:(NSDate *) endDate {
- NSInteger startDay=[self ordinalityOfUnit:NSDayCalendarUnit inUnit: NSEraCalendarUnit forDate:startDate];
- NSInteger endDay=[self ordinalityOfUnit:NSDayCalendarUnit inUnit: NSEraCalendarUnit forDate:endDate];
- return endDay-startDay;
- }
- @end
使用Category来计算不同时代(AD|BC)两个日期的天数:
- @implementation NSCalendar (MyOtherMethod)
- -(NSInteger) daysFromDate:(NSDate *) startDate toDate:(NSDate *) endDate {
- NSCalendarUnit units=NSEraCalendarUnit | NSYearCalendarUnit | NSMonthCalendarUnit | NSDayCalendarUnit;
- NSDateComponents *comp1=[self components:units fromDate:startDate];
- NSDateComponents *comp2=[self components:units fromDate endDate];
- [comp1 setHour:12];
- [comp2 setHour:12];
- NSDate *date1=[self dateFromComponents: comp1];
- NSDate *date2=[self dateFromComponents: comp2];
- return [[self components:NSDayCalendarUnit fromDate:date1 toDate:date2 options:0] day];
- }
- @end
判断一个日期是否在当前一周内(使用格里高利历):
- -(BOOL)isDateThisWeek:(NSDate *)date {
- NSDate *start;
- NSTimeInterval extends;
- NSCalendar *cal=[NSCalendar autoupdatingCurrentCalendar];
- NSDate *today=[NSDate date];
- BOOL success= [cal rangeOfUnit:NSWeekCalendarUnit startDate:&start interval: &extends forDate:today];
- if(!success)
- return NO;
- NSTimeInterval dateInSecs = [date timeIntervalSinceReferenceDate];
- NSTimeInterval dayStartInSecs= [start timeIntervalSinceReferenceDate];
- if(dateInSecs > dayStartInSecs && dateInSecs < (dayStartInSecs+extends)){
- return YES;
- }
- else {
- return NO;
- }
- }
1、获取当前时间
- NSDateFormatter*formatter = [[NSDateFormatteralloc] init];
- [formatter setDateFormat:@"yyyy-MM-dd hh:mm:ss"];
- NSString *locationString=[formatter stringFromDate: [NSDate date]];
另外的方法:
- -(NSString *)getDate
- {
- NSDateFormatter*formatter = [[NSDateFormatteralloc] init];
- [formatter setDateFormat:@"yyyy-MM-dd EEEE HH:mm:ss a"];
- NSString *locationString=[formatter stringFromDate: [NSDate date]];
- [formatter release];
- return locationString;
- }
//大写的H日期格式将默认为24小时制,小写的h日期格式将默认为12小时
//不需要特别设置,只需要在dataFormat里设置类似"yyyy-MMM-dd"这样的格式就可以了
日期格式如下:
y 年 Year 1996; 96
M 年中的月份 Month July; Jul; 07
w 年中的周数 Number 27
W 月份中的周数 Number 2
D 年中的天数 Number 189
d 月份中的天数 Number 10
F 月份中的星期 Number 2
E 星期中的天数 Text Tuesday; Tue
a Am/pm 标记 Text PM
H 一天中的小时数(0-23) Number 0
k 一天中的小时数(1-24) Number 24
K am/pm 中的小时数(0-11) Number 0
h am/pm 中的小时数(1-12) Number 12
m 小时中的分钟数 Number 30
s 分钟中的秒数 Number 55
S 毫秒数 Number 978
z 时区 General time zone Pacific Standard Time; PST; GMT-08:00
Z 时区 RFC 822 time zone -0800
2、NSTimer定时器的基本操作方式
NSTimer是Cocoa中比较常用的定时器类,基本操作如下:
handleTimer方法可以自行定义。在需要的地方创建timer即可,handleTimer就可以每0.5秒执行一次。
- - (void) handleTimer: (NSTimer *) timer
- {
- //在这里进行处理
- }
- NSTimer *timer;
- timer = [NSTimer scheduledTimerWithTimeInterval: 0.5 target: self selector: @selector(handleTimer:)userInfo: nil repeats: YES];
3、定时器
设置定时器下面显示的定时器将在一秒钟后触发,并一直重复直到定时器被禁用。定时器每次激活时,就会调用发送选择器消息的目标来进行初始化。回调方法带有一个参数,就是定时器本身.要禁用一个定时器,给它发送invalidate消息,这将释放定时器对象并把它从当前运行循环中删除。
- NSTime *timer ;
- timer = [NSTimer scheduledTimerWithTimeInterval:1.0target:self selector:@selector(handlTimer:) userInfo:nilrepeats:YES];
- - (void)handleTimer:(NSTimer *)timer{
- printf("timer count: %d", count++);
- if(count > 3)
- {
- [timer invalidate];
- }
1. 使用 NSTimeZone 取得世界各地时间的方法
下列程式码将示范,如何利用 NSTimeZone 取得世界上已知的时区名称,并且透过这些名称来获得当地时间,如果在系统时间的取得上有任何疑问,可以参考取得 iOS 系统日期与星期的方法一文,其程式码如下。
- //取得目前已知的所有地里名称
- NSArray *timeZoneNames = [NSTimeZone knownTimeZoneNames];
- //取得本地目前时间
- NSDate *date = [NSDate date];
- for(NSString *name in timeZoneNames) {
- NSTimeZone *timezone = [[NSTimeZone alloc] initWithName:name];
- NSDateFormatter *formatter = [[NSDateFormatter alloc] init];
- //设定时间格式
- [formatter setDateFormat:@"YYYY-MM-d HH:mm:ss"];
- //设定时区
- [formatter setTimeZone:timezone];
- //时间格式正规化并做时区校正
- NSString *correctDate = [formatter stringFromDate:date];
- NSLog(@"地点:%@ 当地时间:%@",[timezone name], correctDate);
- [formatter release];
- [timezone release];
- }
由于能取得的地点相当多,下图只是部份的执行结果。
2. 取得 iOS 系统日期与星期的方法

在之前的文章中已经说明如何取得 Device 里的 iOS 系统时间,在此将在示范如何使用 NSDate 取得系统的日期与星期,请看以下程式码。
- NSDateFormatter *formatter = [[NSDateFormatter alloc] init];
- NSDate *date = [NSDate date];
- //正规化的格式设定
- [formatter setDateFormat:@"YYYY-MM-dd' 'EEEE"];
- //正规化取得的系统时间并显示
- dateLabel.text = [formatter stringFromDate:date];
当然 NSFormatter 能正规化的格式不只这些,想知道其他的参数可以参考关于 NSDateFormatter 的二三事一文。
3. 取得 iOS 系统时间的方法
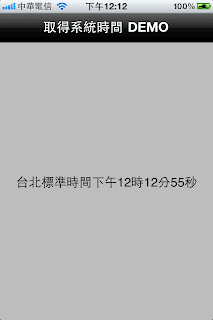
如何取得 Device 里的 iOS 系统时间,可以参考以下程式码。
- NSDateFormatter *formatter = [[NSDateFormatter alloc] init];
- NSDate *date = [NSDate date];
- //正规化的格式设定
- [formatter setTimeStyle:NSDateFormatterFullStyle];
- //正规化取得的系统时间并显示
- timeLabel.text = [formatter stringFromDate:date];
- [formatter release];
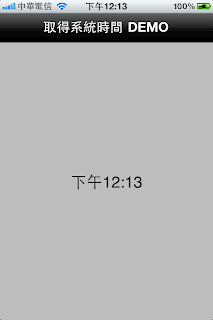
在时间格式正规化的部份也有多种样式可供选择,其样式如下。
- [formatter setTimeStyle:NSDateFormatterFullStyle];
- [formatter setTimeStyle:NSDateFormatterLongStyle];
- [formatter setTimeStyle:NSDateFormatterMediumStyle];
- [formatter setTimeStyle:NSDateFormatterShortStyle];
最后,如果要让时间与现实时间同步可以考虑实做计时器 Timer 来解决此问题,详细的设定方式可参阅 Timer / 计时器的基本使用方法。
4. Timer / 计时器的基本使用方法
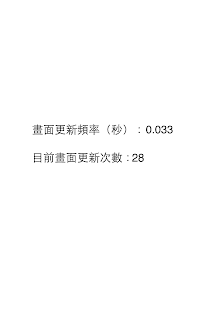
这里介绍 Timer 的基本使用方法,首先设定 Timer 的相关的参数,程式码如下。(View-based Template)
- //自行定义的函式,用来设定使用Timer/计时器的相关参数
- -(void)initializeTimer {
- //设定Timer触发的频率,每秒30次
- float theInterval = 1.0/30.0;
- fpsLabel.text = [NSString stringWithFormat:@"%0.3f", theInterval];
- //正式启用Timer,selector是设定Timer触发时所要呼叫的函式
- [NSTimer scheduledTimerWithTimeInterval:theInterval
- target:self
- selector:@selector(countTotalFrames:)
- userInfo:nil
- repeats:YES];
- }
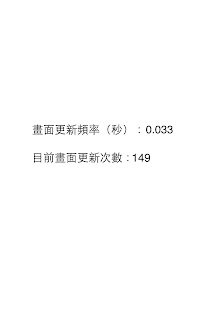
上述程式码,已经完成 Timer 的基本设定,而下列程式码则是 Timer 触发时所呼叫的函式写法。
- -(void)countTotalFrames:(NSTimer *)theTimer {
- frameCount ++;
- framesLabel.text = [NSString stringWithFormat:@"%d", frameCount];
- }
最后,别忘记在程式进入点这边要呼叫自行定义的 initializeTimer 函式,才能让 Timer 运作。
IOS中的WebView
IOS系统提供了 UIWebView 控件,从而可以方便地集成与网页相关的多种应用,该控件内置浏览器控件,可以用来浏览网页、打开文档等等。
一、UIWebView 可以加载和显示某个URL的网页,也可以显示基于HTML的本地网页或部分网页:
a. 加载 URL
- WebView
= [[UIWebView alloc] initWithFrame:CGRectMake(0, 44, 320, 400)]; - NSString
*path = @"http://www.baidu.com"; - NSURL
*url = [NSURL URLWithString:path]; - [WebView
loadRequest:[NSURLRequest requestWithURL:url]];
b. 加载 HTML
NSString *resPath = [bundle resourcePath];
NSString *filePath = [resPath stringByAppendingPathCom
[webView loadHTMLString:[NSString stringWithContentsOfFile
二、使用网页加载指示,加载完成后再显示网页出来
- -
(void) webViewDidStartLoad:(UIWebView *)webView - {
-
//创建UIActivityIndicatorView背底半透明View -
UIView *view = [[UIView alloc] initWithFrame:CGRectMake(0, 0, 320, 480)]; -
[view setTag:108]; -
[view setBackgroundColor:[UIColor blackColor]]; -
[view setAlpha:0.5]; -
[self.view addSubview:view]; -
-
activityIndicator = [[UIActivityIndicatorView alloc] initWithFrame:CGRectMake(0.0f, 0.0f, 32.0f, 32.0f)]; -
[activityIndicator setCenter:view.center]; -
[activityIndicator setActivityIndicatorView Style:UIActivityIndicatorViewS tyleWhite]; -
[view addSubview:activityIndicator]; -
-
[activityIndicator startAnimating]; - }
- -
(void) webViewDidFinishLoad:(UIWebView *)webView - {
-
[activityIndicator stopAnimating]; -
UIView *view = (UIView*)[self.view viewWithTag:108]; -
[view removeFromSuperview]; -
NSLog(@"webViewDidFinishLoad"); - }
三、UIWebView还可以通过 stringByEvaluatingJavaSc
NSString *theTitle=[webView stringByEvaluatingJavaSc
NSString *currentURL = [webView stringByEvaluatingJavaSc
NSString *js_result = [webView stringByEvaluatingJavaSc
四、综合运用以上方法,还可以实现部分网页的显示,基本思路如下:
iOS 中字典与json格式的相互转换
最近做一个项目,需要跟服务器连接,所有传出的数据都是json格式的,就需要进行相互之间的转换。在网上找了好多例子,功能都实现了,但都是运用第三方库。有一个特别奇怪的地方就是,在将json格式的数据转换为字典时,导入了一个json包。在向服务器提交数据时,需要将字典封装为json格式,需要导入另外一个包。这就导致问题产生了,两个都是json包,一样的名字,功能却不一样,在同一个工程中就会报错,编译通不过。最后只好另辟蹊径,还好找到了两个相当简单的例子,在这里给大家分享咯:
首先将从服务器获得的json格式的数据转换为nsdictionary,上一篇已经说过,是ios5自带的NSJSon方法,在这里再重复一下:
iOS 5加入了NSJSONSerialization类,可以将JSON和Foundation objects相互转换。来看一段图片的代码示例:{"taken": "2011/07/13","width": "3072","height": "2304","latitude": "39.52","longitude": "-106.05","url": "http://beyond.com/12345.png"}解析起来很简单,代码示例:NSError *error = nil;NSData *data = http://www.beyond.cn/operating-system/[NSData dataWithContentsOfURL:webServiceURL];NSDictionary *photo = [NSJSONSerializationJSONObjectWithData:dataoptions:NSJSONReadingMutableLeaveserror:&error];NSNumber *width = [photo objectForKey:@"width"];NSNumber *height = [photo objectForKey:@"height"];
搞定,现在你就可以对其进行解析了,而不需要任何的第三方库。
接着看怎么把NSDictionary类型的数据转换为json,这个目前没找到ios自带方法,引用了第三方库JSONKit,就两个文件,json.h+.m.导入工程即可
下面就是代码了,仔细看哦,一晃就过了啊
NSString *returnString=[dic JSONString];
//dic就是你将要转换成字典,而returnString就是齐刷刷的json数据了当然得导入头文件
#import "JSONKit.h"
JSON 到 NSObject 互相转换
日期处理
iOS-NSDateFormatter 格式说明
格式化参数如下:
G: 公元时代,例如AD公元
yy: 年的后2位
yyyy: 完整年
MM: 月,显示为1-12
MMM: 月,显示为英文月份简写,如 Jan
MMMM: 月,显示为英文月份全称,如 Janualy
dd: 日,2位数表示,如02
d: 日,1-2位显示,如 2
EEE: 简写星期几,如Sun
EEEE: 全写星期几,如Sunday
aa: 上下午,AM/PM
H: 时,24小时制,0-23
K:时,12小时制,0-11
m: 分,1-2位
mm: 分,2位
s: 秒,1-2位
ss: 秒,2位
S: 毫秒
常用日期结构:
yyyy-MM-dd HH:mm:ss.SSS
yyyy-MM-dd HH:mm:ss
yyyy-MM-dd
MM dd yyyy
NSDecimalNumber
原始数据
| float a = 0.01; int b = 99999999; double c = 0.0; |
1:使用浮点运算,
| c = a*b; NSLog(@"%f",c); NSLog(@"%.2f",c); |
使用double类型存储没有触及问题的实质,完全不能解决。
| 1000000.000000 1000000.00 |
2:使用类型转换,提高精度
| c = a*(double)b; NSLog(@"%f",c); NSLog(@"%.2f",c); |
Double运算的精度是提高了,可是浮点数的数值早已经出现了精度的不准确,即使存储空间足够,同样还是不准确的数值。
| 999999.967648 999999.97 |
3:通过和NSString的转换,将计算的原始数据转换为纯粹的double类型的数据,这样的计算精度就可以达到要求了。
| NSString *objA = [NSString stringWithFormat:@"%.2f", a]; NSString *objB = [NSString stringWithFormat:@"%.2f", (double)b]; c = [objA doubleValue] * [objB doubleValue]; NSLog(@"%.2f",c); |
计算的结果还是比较准确的,不过需要做格式化输入和格式化输出的处理。同时使用NSString来转换,这样的写法看起来比较奇怪。
| 999999.99 |
4:个人还是比较喜欢使用系统提供的类型来进行计算。通过NSDecimalNumber提供的计算方式,可以很好的计算出准确的精度的数据,同时不需要使用格式化输出等。
其计算的精度是比较高,这是官方建议的货币计算的API,对乘除等计算都有单独的API接口来提供。
| NSString *decimalNumberMutiplyWithString(NSString *multiplierValue,NSString*multiplicandValue) { NSDecimalNumber *multiplierNumber = [NSDecimalNumberdecimalNumberWithString:multiplierValue]; NSDecimalNumber *multiplicandNumber = [NSDecimalNumberdecimalNumberWithString:multiplicandValue]; NSDecimalNumber *product = [multiplicandNumberdecimalNumberByMultiplyingBy:multiplierNumber]; return [product stringValue]; }
NSLog(@"%@",decimalNumberMutiplyWithString([NSStringstringWithFormat:@"%f",a], [NSString stringWithFormat:@"%d",b])); |
| 999999.99 |


JS和OC交互
UIWebView与JavaScript的交互
UIWebView是IOS SDK中渲染网面的控件,在显示网页的时候,我们可以hack网页然后显示想显示的内容。其中就要用到javascript的知识,而UIWebView与javascript交互的方法就是stringByEvaluatingJavaSc
有了这个方法我们可以通过objc调用javascript,可以注入javascript。
首先我们来看一下,如何调用javascript:
- [webView
stringByEvaluatingJavaSc riptFromString:@"myFunction();"];
备注: stringByEvaluatingJavaSc
如果stringByEvaluatingJavaSc
message = [message stringByReplacingOccurre
NSString *jsMethod
还有一个地方, 这2种写法看似一样, 实质不同, 如果是采用'引号, 如果message带有', 消息则传不过去! 所以最好采用"
NSString *jsMethod
再来看看入何注入javascript,我们先写一个需要注入的javascript:
- function
showAlert() { -
alert('in show alert'); - }
保存为test.js,然后拖到xcode 的resource分组下。再用代码在初始化的时候注入这个js(如在viewDidLoad方法里)。
- NSString
*filePath = [[NSBundle mainBundle] pathForResource:@"test" ofType:@"js"]; - NSString
*jsString = [[NSString alloc] initWithContentsOfFile:filePath]; - [webView
stringByEvaluatingJavaSc riptFromString:jsString];
这样就注入了上面的js,那么我们可以随时调用js的方法,如何调用,上面有介绍。
那 么我们能不能通过js来调用objc的方法呢。 当然可以,原理就是利用UIWebView重定向请求,利用shouldStartLoadWithReque
首先我们写一个javascript 方法如下:
- function
sendCommand(cmd,param){ -
var url="testapp:"+cmd+":"+param; -
document.location = url; - }
- function
clickLink(){ -
sendCommand("alert","你好吗?"); - }
testapp是自己定义的一个协议, 只要不和http, https等国际通用协议头冲突都可以, 名字随便取;
cmd是要调用的oc的方法;
param是调用的参数
然后利用document.location来达到目的!
document.location="MyCustomProtocolName:functionName?param1=value1¶m2=value2...".
js里面怎么定义都可以, 怎么方便怎么来!
然后在你的html里调用这个js方法 如:
- "button"
value="Click me!" οnclick="clickLink()" /> - js文件里面 如果传出中文。要用到 js里面的 方法encodeURI 来处理一下。否则 xcode 中用
NSString* rurl=[[[request URL]
absoluteString]stringByReplacingPercent EscapesUsingEncoding:NSUTF8StringEncoding ]; 无法取得中文 var url="protocol://"+encodeURI($("#textarea").val());
url中含有中文,出现中文乱码(在oc代码中)
//传输的时候这样写
NSString *rateCardsName_CN=[[NSString stringWithFormat:@"%@",rateCardsName]stringByAddingPercentEsc apesUsingEncoding:NSUTF8StringEncoding];
//获取的时候这样写
NSString *urlStr = [[request.URL absoluteString]stringByReplacingPercentEscapesUsingEncoding:NSUTF8StringEncoding];
最后我们在UIWebVew中截获这个重定向请求:
- #pragma
mark -- - #pragma
mark UIWebViewDelegate -
- -
(BOOL)webView:(UIWebView *)webView shouldStartLoadWithReque st:(NSURLRequest *)request navigationType:(UIWebViewNavigationType)navigationType { -
-
NSString *requestString = [[[request URL] absoluteString]stringByReplacingPercent EscapesUsingEncoding:NSUTF8StringEncoding ];
- if
([rurl hasPrefix:@"testapp://"]) { -
//如果是自己定义的协议, 再截取协议中的方法和参数, 判断无误后在这里手动调用oc方法 -
}
-
return YES; - }
看了代码是不是清楚得不能再清楚了呀?
http://code.google.com/p/jsbridge-to-cocoa/
还有两个相关工程
WebViewJavascriptBridge 与

除了可以动态插入一行statusCell 实现【暂停】、【修改】、【删除】之外,还可以使用更简单的方法实现
那就是在点击cell时响应下面的方法


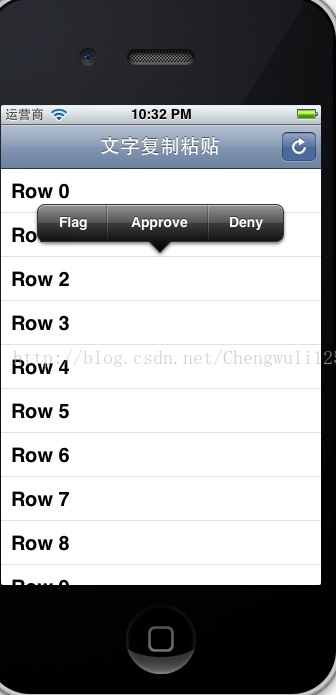
自定义剪贴板的使用
其实自定义剪贴板也非常简单,无非是放开响应时间,通过UIMenuController自定义剪贴板,然后就是最关键的实现你所用的copy方法拉。
为了方便实用,我给cell添加了长按事件,看代码---
UILongPressGestureRecognizer *recognizer = [[UILongPressGestureRecognizer alloc] initWithTarget:self action:@selector(longPress:)];
[cell addGestureRecognizer:recognizer];
好,事件加上了,剩下的点击就是实现自定义剪贴板了,上代码:
- (void)longPress:(UILongPressGestureRecognizer *)recognizer{
if (recognizer.state == UIGestureRecognizerStateBegan) {
CopyCell *cell = (CopyCell *)recognizer.view;
[cell becomeFirstResponder];
UIMenuItem *flag = [[UIMenuItem alloc] initWithTitle:@"Flag"action:@selector(flag:)];
UIMenuItem *approve = [[UIMenuItem alloc] initWithTitle:@"Approve"action:@selector(approve:)];
UIMenuItem *deny = [[UIMenuItem alloc] initWithTitle:@"Deny"action:@selector(deny:)];
UIMenuController *menu = [UIMenuController sharedMenuController];
[menu setMenuItems:[NSArray arrayWithObjects:flag, approve, deny, nil]];
NSLog(@".....%@",NSStringFromCGRect(cell.frame));
[menu setTargetRect:cell.frame inView:cell.superview];
[menu setMenuVisible:YES animated:YES];
}
}
通过上面这段代码,自定义剪贴板成功搞定,运行,你猛然会发现,操,怎么剪贴板没有出来,我猜你已经想到为什么了,因为- (BOOL)canBecomeFirstResponder{
return YES;
}
这么重要的一句话没有加,OK,下面就是你所要使用的方法了
- (void)flag:(id)sender {
NSLog(@"Cell was flagged");
}
- (void)approve:(id)sender {
NSLog(@"Cell was approved");
}
- (void)deny:(id)sender {
NSLog(@"Cell was denied");
}
与服务器交互 JSON格式
请求参数:字典,字典里面的Value可以是NSString、NSNumber、字典数组、图片进行base64编码后的string数组、模型经toDictionary方法转换后的字典
请求时,再将参数字典 经jsonString方法转成 json字符串,发送给服务器
可异步加载图片的按钮,根据宽高自动裁剪
@interface UIButton (AsyncImage)

//size by point
- (void)setImageFromURL:(NSString *)urlString adjustToSize:(CGSize)size completion:(void (^)(void))completion logo:(UIImage *)logoImage;

@end


@implementation UIButton (AsyncImage)

- (void)setImageFromURL:(NSString *)urlString adjustToSize:(CGSize)size completion:(void (^)(void))completion logo:(UIImage *)logoImage
{
    dispatch_async(dispatch_get_global_queue(DISPATCH_QUEUE_PRIORITY_DEFAULT, 0), ^{
        UIImage *image = nil;
        NSURL *url = [NSURL URLWithString:urlString];
        NSData *data = [NSData dataWithContentsOfURL:url];
        image = [UIImage imageWithData:data];

        if (image) {
            if (!CGSizeEqualToSize(size, CGSizeZero)) {
                image = [UIImage imageWithCGImage:image.CGImage scale:[self scaleImage:image adjustToSize:size] orientation:image.imageOrientation];
            }
            if (logoImage) {
                image = [self addLogoImage:logoImage toImage:image];
            }

            dispatch_async(dispatch_get_main_queue(), ^{
                [self setImage:image forState:UIControlStateNormal];
                completion();
            });
        }
        else {
            NSLog(@"async load error.");
        }
    });
}

// 缩放图片以适应按钮大小
- (CGFloat)scaleImage:(UIImage *)image adjustToSize:(CGSize)size
{
    CGFloat xScale = size.width / image.size.width;
    CGFloat yScale = size.height / image.size.height;

    return 1.0 / MIN(xScale, yScale);
}

- (UIImage *)addLogoImage:(UIImage *)logo toImage:(UIImage *)img
{
    //get image width and height
    CGFloat scale = [UIScreen mainScreen].scale;
    int w = scale * img.size.width;
    int h = scale * img.size.height;
    int logoWidth = logo.scale * logo.size.width;
    int logoHeight = logo.scale * logo.size.height;
    CGColorSpaceRef colorSpace = CGColorSpaceCreateDeviceRGB();

    //create a graphic context with CGBitmapContextCreate
    CGContextRef context = CGBitmapContextCreate(NULL, w, h, 8, 4 * w, colorSpace, kCGImageAlphaPremultipliedFirst);
    CGContextDrawImage(context, CGRectMake(0, 0, w, h), img.CGImage);
    CGContextDrawImage(context, CGRectMake(w - logoWidth, 0, logoWidth, logoHeight), [logo CGImage]);
    CGImageRef imageMasked = CGBitmapContextCreateImage(context);
    CGContextRelease(context);
    CGColorSpaceRelease(colorSpace);

    return [UIImage imageWithCGImage:imageMasked scale:scale orientation:img.imageOrientation];
}

@end
剪贴板,复制东东到剪贴板,复制链接,复制URL


计算两个date的时间差

IOS 将图片转换为圆角图
UIImage+wiRoundedRectImage.h

复制代码
#import <UIKit/UIKit.h>

@interface UIImage (wiRoundedRectImage)

+ (id)createRoundedRectImage:(UIImage*)image size:(CGSize)size radius:(NSInteger)r;

@end
复制代码


UIImage+wiRoundedRectImage.m

复制代码
#import "UIImage+wiRoundedRectImage.h"

@implementation UIImage (wiRoundedRectImage)

static void addRoundedRectToPath(CGContextRef context, CGRect rect, float ovalWidth,
                                 float ovalHeight)
{
    float fw, fh;

    if (ovalWidth == 0 || ovalHeight == 0)
    {
        CGContextAddRect(context, rect);
        return;
    }

    CGContextSaveGState(context);
    CGContextTranslateCTM(context, CGRectGetMinX(rect), CGRectGetMinY(rect));
    CGContextScaleCTM(context, ovalWidth, ovalHeight);
    fw = CGRectGetWidth(rect) / ovalWidth;
    fh = CGRectGetHeight(rect) / ovalHeight;

    CGContextMoveToPoint(context, fw, fh/2);  // Start at lower right corner
    CGContextAddArcToPoint(context, fw, fh, fw/2, fh, 1);  // Top right corner
    CGContextAddArcToPoint(context, 0, fh, 0, fh/2, 1); // Top left corner
    CGContextAddArcToPoint(context, 0, 0, fw/2, 0, 1); // Lower left corner
    CGContextAddArcToPoint(context, fw, 0, fw, fh/2, 1); // Back to lower right

    CGContextClosePath(context);
    CGContextRestoreGState(context);
}

+ (id)createRoundedRectImage:(UIImage*)image size:(CGSize)size radius:(NSInteger)r
{
    // the size of CGContextRef
    int w = size.width;
    int h = size.height;

    UIImage *img = image;
    CGColorSpaceRef colorSpace = CGColorSpaceCreateDeviceRGB();
    CGContextRef context = CGBitmapContextCreate(NULL, w, h, 8, 4 * w, colorSpace, kCGImageAlphaPremultipliedFirst);
    CGRect rect = CGRectMake(0, 0, w, h);

    CGContextBeginPath(context);
    addRoundedRectToPath(context, rect, r, r);
    CGContextClosePath(context);
    CGContextClip(context);
    CGContextDrawImage(context, CGRectMake(0, 0, w, h), img.CGImage);
    CGImageRef imageMasked = CGBitmapContextCreateImage(context);
    img = [UIImage imageWithCGImage:imageMasked];

    CGContextRelease(context);
    CGColorSpaceRelease(colorSpace);
    CGImageRelease(imageMasked);

    return img;
}

@end
复制代码


调用方法:

    UIImage * image = [UIImageimageNamed:@"123.jpg"];  // 设置原图

    CGSize size = CGSizeMake(100,100);  // 设置尺寸

    _pImgV.image = [UIImagecreateRoundedRectImage:image size:size radius:10];   // 设置radius
ios6.1中,cell的继承结构图


如何 创建一个 有圆角背景的UITextView

iOS对象数组排序之: 使用比较器


根据颜色值,创建一个UIImage

如何 改变 控制器的view的大小,以下做法虽然 可行,但不推荐,
最好的办法是 中间加一个contentView

根据标题长度,计算标题的宽度, 已经做了ios6 和ios7的适配

画一个三角形

画一个 大于号 >

画一条线

画三角形

画图片

画文字

代码控制 输入框只能输入数字

cancelsTouchesInView, 解除view上绑定的其他手势;前提是 当前手势 被成功捕捉和识别

修改导航栏上的 标题颜色 和字体大小

必须在 主线程中 【修改数据源 并且 同时 更新表格】


UIImage从网络上加载图片


快速创建CGRect 并且 适配iOS 6 iOS7的宏
// 非常好用的,快速创建rect并且适配的宏
#define IsIOS7 ([[[[UIDevice currentDevice] systemVersion] substringToIndex:1] intValue]>=7)
#define CGRECT_NO_NAV(x,y,w,h) CGRectMake((x), (y+(IsIOS7?20:0)), (w), (h))
#define CGRECT_HAVE_NAV(x,y,w,h) CGRectMake((x), (y+(IsIOS7?64:0)), (w), (h))


#define IS_IOS7 [[[UIDevice currentDevice] systemVersion] floatValue] >= 7.0
tableView背景1_用图片做tableView的背景

tableView背景2_先加图片作为背景,再将tableView背景透明

tableView的分类方法,滚动到底部和滚动到顶部

输入框,正则,只能输入数字


code signing is required的解决办法


ShadowsocksX-1.0.9.dmg
licecap123.dmg

对画布截图,并保存图片到相册,及其回调方法

录音机参数

锁屏显示歌词
#import <MediaPlayer/MediaPlayer.h>


此时要打文件图片所在的文件夹,找到Contents.json,
手动添加 【2x】和【retinaR4】对应的图片:
【Default@2x.png】和【Default-568h@2x.png】
{
  "images" : [
    {
      "orientation" : "portrait",
      "idiom" : "iphone",
      "extent" : "full-screen",
      "minimum-system-version" : "7.0",
      "filename" : "Default@2x.png",
      "scale" : "2x"
    },
    {
      "orientation" : "portrait",
      "idiom" : "iphone",
      "extent" : "full-screen",
      "minimum-system-version" : "7.0",
      "filename" : "Default-568h@2x.png",
      "subtype" : "retina4",
      "scale" : "2x"
    },
    {
      "orientation" : "portrait",
      "idiom" : "iphone",
      "extent" : "full-screen",
      "filename" : "Default.png",
      "scale" : "1x"
    },
    {
      "orientation" : "portrait",
      "idiom" : "iphone",
      "extent" : "full-screen",
      "filename" : "Default@2x.png",
      "scale" : "2x"
    },
    {
      "orientation" : "portrait",
      "idiom" : "iphone",
      "extent" : "full-screen",
      "filename" : "Default-568h@2x.png",
      "subtype" : "retina4",
      "scale" : "2x"
    }
  ],
  "info" : {
    "version" : 1,
    "author" : "xcode"
  }
}
结果如下:

给图片加一个圆的框
// 类方法,在图片外边 加个圆的框,参数:图片名,线宽,线颜色,
+ (instancetype)circleImageWithName:(NSString *)name borderWidth:(CGFloat)borderWidth borderColor:(UIColor *)borderColor
{
    // 1.加载原图
    UIImage *oldImage = [UIImage imageNamed:name];


    CGFloat imageW = oldImage.size.width + 2 * borderWidth;
    CGFloat imageH = oldImage.size.height + 2 * borderWidth;
    CGSize imageSize = CGSizeMake(imageW, imageH);
    // 2.开启上下文(后两个参数是opaque size)
    UIGraphicsBeginImageContextWithOptions(imageSize, NO, 0.0);

    // 3.取得当前的上下文 (刚才开启的)
    CGContextRef ctx = UIGraphicsGetCurrentContext();

    // 4.画边框(大圆)
    [borderColor set];  // 设置线颜色
    CGFloat bigRadius = imageW * 0.5; // 大圆半径
    CGFloat centerX = bigRadius; // 圆心
    CGFloat centerY = bigRadius;

    CGContextAddArc(ctx, centerX, centerY, bigRadius, 0, M_PI * 2, 0);
    CGContextFillPath(ctx); // fill的形式画圆

    // 5.画边框(小圆)
    CGFloat smallRadius = bigRadius - borderWidth;
    CGContextAddArc(ctx, centerX, centerY, smallRadius, 0, M_PI * 2, 0);
    // 重要~~~先裁剪(在此之后,画的东西才会受裁剪的影响)
    CGContextClip(ctx);

    // 6.画图
    [oldImage drawInRect:CGRectMake(borderWidth, borderWidth, oldImage.size.width, oldImage.size.height)];

    // 7.取图
    UIImage *newImage = UIGraphicsGetImageFromCurrentImageContext();

    // 8.结束上下文
    UIGraphicsEndImageContext();

    return newImage;
}
cocos2d坐标转换

cocos2d模板文件 路径


GET请求参数 中文编码

一边看图片,一边搭建界面

模拟延时dispatch_after

关键帧动画,仿QQ窗口抖动

转场动画

简易弹簧效果

点击退出登录,回到登录控制器,即创建Main.storyboard里面的初始控制器

不小心修改了Xcode自带的头文件,
进入/Users/beyond/Library/Developer/Xcode文件夹,
方式1.将DerivedData文件夹全部删掉
方式2.进入DerivedData文件夹,找到Xcode提示出错的项目所在的路径,
把里面的编译文件全部删掉然后重新运行就OK了

资源访问
注意:如果css js代码不在同一目录时,需选择 Create folder ...
并且,这种情况下,在mainBundle中访问css js 等文件时,需加上文件夹名称


tips0:
Mac快键键_Command+Option_Esc_弹出任务管理器:


tips1:
当tableView所在的控制器每次出现的时候,
控制器内部的tableView的最右侧的滚动条也会自动闪一下,然后消失,
只要覆盖控制器的父类的viewDidAppear方法就可以达到屏蔽上述效果

tips2:
当长按Cell的时候,Cell处于高亮状态,并且会将其内部的所有子控件也处所于高亮状态
只要覆盖父类的setHighlighted方法和setSelected方法,并且递归取消cell内部那些继承了UIControl的子控件的高亮状态即可达到屏蔽上述效果

tips3:
默认情况下cell的宽度固定是320,而且cell之间固定之间是没有margin间距,
只要覆盖cell的setFrame方法,就可以自定义cell的宽度(cell与屏幕的距离),
并且自定义cell之间的间距

tips4:
[tableView numberOfRowsInSection:indexPath.section]方法 可以返回section对应的总行数
tips5:
tableView的allowsSelection属性一旦设置为NO,意味所有的cell都不能选中,也不以再调用代理的didSelectRowAtIndexPath方法
_tableView.allowsSelection = NO;
tips6:
默认cell点击后,背景会变色,如果不想cell被人选中后变色 ,只需要设置如下属性
cell.selectionStyle = UITableViewCellSelectionStyleNone;
tips7:
将NSNumber对象转成字符串的方法:description
[JSON[@"next_cursor"] description]
tips8:
block造成内存泄露的解决办法:

tips9:
将微博服务器返回的英文的格林威治时间 转成 友好的中文时间显示

tips10:
TableView代理方法和数据源方法的调用顺序

tips11:
在iPad开发中,控制器初始化时默认就是portrait,宽768,高1024,不管程序启动的时候是横屏还是竖屏
在iPad开发中,控制器初始化时的宽度W一定是【小的那个,如768】,高度一定是【大的那个,如1024】,不管屏幕是处于横屏还是竖屏,只有在viewWillAppear时,控制器才算好自己的实际宽高
tips12:
Json文件转成Plist文件

tips13:
i18N,将按钮上的英文本地化成中文

tips14:
显示符合人们阅读习惯的价格

tips15:
XIB里面的ImageView是不能添加子控件的,只能通过代码添加子控件
tips16:
一般出现如下错误时,大多是xib或storyboard与代码进行连线时出现错误

tips17:
使用JS三句话取出网页源代码:

使用WebView加载一个网页,并且对网页源码进行输出,利用网页的id节点,执行JS代码,截取想要的内容,掐头去尾去广告

tips18:
将文本分割后,转成数组,再转成plist保存

tips19:
绘制圆角背景图片

1 Byte 字节 =====8个二进制位(bit)

tips20:
活动指示器UIActivityIndicatorView

tips21:
按钮文字有多长,背景图片就有多长


tips22:
Pan手势监听,并实现弹簧效果

tips23:
自适应高度的cell和cellFrame的标准封装步骤

tips24:
Pan判断是不是iPhone5的屏幕,判断是不是iOS7以上的系统
快速创建颜色的宏
快速读入json的宏
将宏的参数 通过#加上双引号

tips25:
自定义日志输出的宏


tips26:
圆角头像

tips27:
iOS7中,让tableView每一组的间距都是一样的

tips28:
iOS事件机制的二大方法


 1846
1846

 被折叠的 条评论
为什么被折叠?
被折叠的 条评论
为什么被折叠?
 到【灌水乐园】发言


