


手打不易,如果转摘,请注明出处!
注明原文:http://zhangxiaofan.blog.csdn.net/article/details/145289750
目录
前言
有时候想开发一款自己的idea插件,但是无从下手,这篇文章就是教你如何入门!
官方
官方文档
IntelliJ Platform SDK | IntelliJ Platform Plugin SDK
代码示例
GitHub - JetBrains/intellij-sdk-code-samples: Mirror of the IntelliJ SDK Docs Code Samples
开发前必读
Intellij、Gradle、JDK 版本关系
环境搭建第一步先确认好自己的Intellij IDEA和Gradle之间的版本关系,找到对应的版本才能保证不出现冲突报错。
通过gradle开发idea插件,环境版本适配_idea 指定gradle版本-CSDN博客
plugin.xml 配置介绍
<idea-plugin>
    <!-- 插件的id,id全局唯一 -->
    <id>com.example.zhang</id>

    <!-- 插件的名称和版本, 会在idea插件界面显示 -->
    <name>example</name>
    <version>1.0</version>

    <!-- 作者信息 -->
    <vendor email="zhang@qq.com" url="http://www.zhang.com">www.zhang.com</vendor>

    <!-- 插件描述,要大于40个字符-->
    <description>
        This is my ABCDEFGHIJKLMNOPQRSTUVWXYZ plugins, it is convenient for us to...
    </description>

    <!-- 插件版本更新记录 -->
    <change-notes>
        <![CDATA[
        <ul>
            <li><b>Version 1.0.1</b> Convert to ABCDEFGHIJKLMNOPQRSTUVWXYZ plugin</li>
            <li><b>Version 1.0.0</b> Release 2020 and earlier.</li>
        </ul>
        ]]>
    </change-notes>

    <!-- 兼容的idea版本 -->
    <idea-version since-build="191.0"/>

    <!-- 依赖模块 -->
    <depends>com.intellij.modules.platform</depends>

    <!-- 插件扩展 -->
    <extensions defaultExtensionNs="com.intellij">
        <!-- 例如 toolWindow、executor 都可以在这里定义 -->
        <!-- 插件定义的自定义操作,例如菜单项、工具栏按钮等。每个操作都有一个唯一的 id,一个实现类 class,以及可选的快捷键定义 -->
    </extensions>

    <!-- 插件具备哪些动作按钮 -->
    <actions>
        <!-- 例如 各种action 都可以在这里定义 -->
        <!-- 插件定义的自定义操作,例如菜单项、工具栏按钮等。每个操作都有一个唯一的 id,一个实现类 class,以及可选的快捷键定义 -->
    </actions>

    <!-- 定义一些初始化 Component,高版本已弃用 -->
    <project-components>
        <!-- Component -->
    </project-components>
</idea-plugin>
开发第一个插件
初始化项目工程
前提是需要把JDK、Gradle、IDEA都安装好,网上有多教程,这里不再赘述。
打开IntelliJ IDEA,新建一个IDE Plugin工程。

整体目录结构大致如下,冗余的配置可以删掉

先修改 gradle-wrapper.properties 中的gradle版本,例如:
idea、jdk、gradle用什么版本,之前已经提到了,参考:
通过gradle开发idea插件,环境版本适配_idea 指定gradle版本-CSDN博客
distributionBase=GRADLE_USER_HOME
distributionPath=wrapper/dists
zipStoreBase=GRADLE_USER_HOME
zipStorePath=wrapper/dists

# online
#distributionUrl=https\://services.gradle.org/distributions/gradle-xx-bin.zip
# local(windows)
distributionUrl=file\:///E:/gradle/gradle-8.12.1/wrapper/gradle-xx-bin.zip
# local(mac)
#distributionUrl=file:/Users/xx/gradle/gradle-xx.zip
修改 build.gradle 文件(如果不存在就新建)
一般 gradle 中的 repositories 是必须修改的,否则网络不通。
dependencies 依赖包和 intellij 的version根据自己的实际情况选择。
buildscript {
repositories {
maven {
allowInsecureProtocol = true
// 内网maven库地址,下载依赖的第三方库
url 'http://xxxx.com/artifactory/maven-public/'
}
maven {
allowInsecureProtocol = true
// 内网JetBrains仓库,下载依赖的IDE和jdk等,用于编译和运行插件
url 'http://xxxx.com/artifactory/jetbrains-public/'
}
}
dependencies {
// gradle-intellij-plugin用于构建JetBrains插件, 请确保始终升级到最新版本
classpath "org.jetbrains.intellij.plugins:gradle-intellij-plugin:1.17.0"
}
}
plugins {
id 'java'
id 'org.jetbrains.intellij' version '1.17.0'
// id "org.jetbrains.kotlin.jvm" version "1.3.41"
}
group 'com.zhang'
version '5.0.0'
repositories {
maven {
allowInsecureProtocol = true
url 'http://xxxx.com/artifactory/maven-public/'
}
}
dependencies {
implementation 'com.alibaba:druid:1.2.8'
implementation 'dom4j:dom4j:1.6.1'
// slf4j 高版本的ideaIC已经自带实现,不需要额外引用,否则会因为冲突导致报错.
// implementation 'org.slf4j:slf4j-api:2.0.0-alpha1'
// implementation 'org.slf4j:slf4j-jdk14:2.0.0-alpha1'
// 加载本地依赖
implementation fileTree(dir:'src/main/resources/libs',includes:['*.jar'])
// 系统
testImplementation 'org.junit.jupiter:junit-jupiter-api:5.6.0'
testRuntimeOnly 'org.junit.jupiter:junit-jupiter-engine'
}
configurations.configureEach {
// 排除,否则dom4j会冲突报错:org.xml.sax.XMLReader is in unnamed module of loader com.intellij.ide.plugins.cl.PluginClassLoader
exclude group: 'xml-apis', module: 'xml-apis'
}
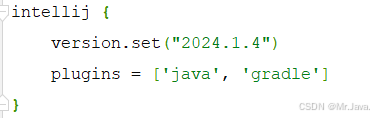
// See https://github.com/JetBrains/gradle-intellij-plugin/
intellij {
version.set("2024.1.4")
plugins = ['java', 'gradle']
}
java {
sourceCompatibility = JavaVersion.VERSION_17
}
apply {
"java"
"terminal"
"ant"
}
test {
useJUnitPlatform()
}
sourceSets {
main {
java {
// 忽略所有的 src/main/java/test目录
exclude 'test/**'
}
resources {
// 打包忽略目录和文件
exclude 'img/**'
exclude 'libs/**'
exclude 'libsource/**'
exclude 'icons/mybatis/**'
exclude 'icons/scanner.vsdx'
}
}
}
tasks.withType(JavaCompile) {
options.encoding = "UTF-8"
}
buildPlugin {
buildSearchableOptions.enabled = false
}修改plugin.xml 的配置内容
注意 idea-version since-build 兼容版本,可以不写,也可以根据你现在开发的版本来指定。
例如,build.gradle 中,我指定的2024版本开发的.
假如我用的是2019版本,我们去查询官网版本信息:
Other Versions - IntelliJ IDEA

内容如下:
<!-- Plugin Configuration File. Read more: https://plugins.jetbrains.com/docs/intellij/plugin-configuration-file.html -->
<idea-plugin>
    <!-- 插件的id,id全局唯一 -->
    <id>com.example.myFirstIdeaPlugin</id>

    <!-- 插件的名称和版本, 会在idea插件界面显示 -->
    <name>MY_FIRST_IDEA_PLUGIN</name>
    <version>1.0</version>

    <!-- 作者信息 -->
    <vendor email="zhang@qq.com" url="http://www.zhang.com">www.zhang.com</vendor>

    <!-- 插件描述,要大于40个字符-->
    <description>
        This is my ABCDEFGHIJKLMNOPQRSTUVWXYZ plugins, it is convenient for us to...
    </description>

    <!-- 插件版本更新记录 -->
    <change-notes>
        <![CDATA[
        <ul>
            <li><b>Version 1.0.1</b> Convert to ABCDEFGHIJKLMNOPQRSTUVWXYZ plugin</li>
            <li><b>Version 1.0.0</b> Release 2020 and earlier.</li>
        </ul>
        ]]>
    </change-notes>

    <!-- 兼容的idea版本 -->
    <idea-version since-build="193.7288.26"/>

    <!-- 依赖模块 -->
    <depends>com.intellij.modules.platform</depends>
</idea-plugin>
对应实际发布后的插件关系如下:

idea的的gradle setting配置如下:

配置完成后,建议重新打开IDEA,或者重新初始化一下gradle,如果IDEA未能找到gradle项目,按照下面的方法区添加。

到这里,我们就完成了项目工程的创建和初始化。
创建ToolWindow
我们参考官方教程,来做一个日历插件:
这里可能比官方教程稍微详细一点。
我们先创建好2个目录:

创建ToolWindow其实就是把面板界面和交互实现,IDEA有个快速创建UI的方法,对目录右键:

弹框后直接输入名字,并选择绑定class

idea会创建好form和对应的class,我们只需要在这个上面编辑我们要的组件即可。

最终我们添加了3个JLabel和2个JButton,注意组件需要填写对应的file name,以便在class类中添加成员属性。

我们看下自动创建好的类 MyCalendarForm.class
package com.example.myfirstideaplugin.calendar.ui;

import javax.swing.JButton;
import javax.swing.JLabel;
import javax.swing.JPanel;

public class MyCalendarForm {
    private JPanel panel;
    private JButton refreshButton;
    private JButton hideButton;
    private JLabel timeZone;
    private JLabel time;
    private JLabel date;
}
需要实现一个方法来获取时间,同时对刷新按钮和隐藏按钮添加监听器,图标可以通过 setIcon() 来设置。
![]()
最终代码如下:
package com.example.myfirstideaplugin.calendar.ui;

import com.intellij.openapi.wm.ToolWindow;

import java.awt.event.ActionEvent;
import java.awt.event.ActionListener;
import java.util.Calendar;
import java.util.Objects;

import javax.swing.ImageIcon;
import javax.swing.JButton;
import javax.swing.JLabel;
import javax.swing.JPanel;

public class MyCalendarForm {
    private JPanel panel;
    private JButton refreshButton;
    private JButton hideButton;
    private JLabel timeZone;
    private JLabel time;
    private JLabel date;


    public MyCalendarForm(ToolWindow toolWindow) {
        // 隐藏按钮 监听器
        hideButton.addActionListener(new ActionListener() {
            @Override
            public void actionPerformed(ActionEvent e) {
                toolWindow.hide(null);
            }
        });
        // 刷新按钮 监听器
        refreshButton.addActionListener(new ActionListener() {
            @Override
            public void actionPerformed(ActionEvent e) {
                timeTime();
            }
        });

        // 初始化调用
        this.timeTime();
    }

    public void timeTime() {
        // 获取年月日, 并设置 icon
        Calendar instance = Calendar.getInstance();
        int day = instance.get(Calendar.DAY_OF_MONTH);
        int month = instance.get(Calendar.MONTH) + 1;
        int year = instance.get(Calendar.YEAR);
        time.setText(day + "/" + month + "/" + year);
        time.setIcon(new ImageIcon(Objects.requireNonNull(getClass().getResource("/icon/calendar/Calendar-icon.png"))));

        // 获取时分, 并设置 icon
        int minute = instance.get(Calendar.MINUTE);
        int hour = instance.get(Calendar.HOUR_OF_DAY);
        int second = instance.get(Calendar.SECOND);
        String min = (minute < 10) ? "0" + minute : String.valueOf(minute);
        String sec = (second < 10) ? "0" + second : String.valueOf(second);
        date.setText(hour + ":" + min + ":" + sec);
        date.setIcon(new ImageIcon(Objects.requireNonNull(getClass().getResource("/icon/calendar/Time-icon.png"))));

        // 获取时区
        long gmtOffset = instance.get(Calendar.ZONE_OFFSET); // offset from GMT in milliseconds
        String strGmtOffset = String.valueOf(gmtOffset / 3600000);
        String temp = (gmtOffset > 0) ? "GMT + " + strGmtOffset : "GMT - " + strGmtOffset;
        timeZone.setText(temp);
        timeZone.setIcon(new ImageIcon(Objects.requireNonNull(getClass().getResource("/icon/calendar/Time-zone-icon.png"))));
    }

    public JPanel getContent() {
        return panel;
    }

}
到这里,我们把UI和交互写好了,接下来我们要实现 ToolWindowFactory 方法,来定义一个ToolWindow。
package com.example.myfirstideaplugin.calendar.factory;

import com.example.myfirstideaplugin.calendar.ui.MyCalendarForm;
import com.intellij.openapi.project.Project;
import com.intellij.openapi.wm.ToolWindow;
import com.intellij.openapi.wm.ToolWindowFactory;
import com.intellij.ui.content.Content;
import com.intellij.ui.content.ContentFactory;

import org.jetbrains.annotations.NotNull;

public class CalendarToolWindowFactory implements ToolWindowFactory {

    /**
     * Create the tool window content.
     *
     * @param project    current project
     * @param toolWindow current tool window
     */
    @Override
    public void createToolWindowContent(@NotNull Project project, @NotNull ToolWindow toolWindow) {
        MyCalendarForm MyCalendarForm = new MyCalendarForm(toolWindow);
        ContentFactory contentFactory = ContentFactory.SERVICE.getInstance();
        // createContent()参数一定是 JComponent 的子类
        Content content = contentFactory.createContent(MyCalendarForm.getContent(), "我的日历", false);
        toolWindow.getContentManager().addContent(content);
    }
}
至此,一个日历ToolWindow就写好了。接下来只需要注册就可以使用。
注册ToolWindow
注册ToolWindow,其实就是去plugin.xml绑定一下ToolWindow,包括id、icon、位置等信息。
在 plugin.xml 中添加如下代码
    <!-- 插件扩展 -->
    <extensions defaultExtensionNs="com.intellij">
        <!-- — — — — — — — — — 示例:日历toolWindow BEGIN— — — — — — — — — -->
        <!-- 参考官方demo:https://github.com/JetBrains/intellij-sdk-code-samples/tree/main/tool_window -->
        <!-- canCloseContents 是否允许用户关闭 -->
        <toolWindow id="我的calendar" icon="/icon/calendar/Calendar-icon.png"
                    anchor="bottom" canCloseContents="true"
                    factoryClass="com.example.myfirstideaplugin.calendar.factory.CalendarToolWindowFactory">
        </toolWindow>
</extensions>id是该ToolWindow的唯一键,icon是指定图标,anchor表示我们想显示在哪个位置。
运行和调试
调试运行的方式如下:

可以看到,我们的插件生效了.

每次点击刷新,可以刷新时间

打包和发布
打包只需要执行buildPlugin即可

打包后的目录和包在这里:

这个zip文件就是我们要的插件安装包,直接安装到IntelliJ IDEA,重启就可以使用了,

如果想要发布到官方的IntelliJ IDEA插件,直接去官方上传,审核通过后就可以发布全网。

修改开源插件Restful-Toolkit
GitHub - EzioL/plugin-restful-toolkit: 一个Restful IDEA 插件,扫Spring Web 和Feign 生成 可视化的 API Tree ,方便调用。
有时候项目很老,没有yaml去定义各个API接口,只有Controller。
因此我们希望有个插件,能帮助我们一键导出项目所有的API接口。

新增导出工具类
package com.ezio.plugin.utils;


import com.ezio.plugin.navigator.pojo.ApiInModule;
import com.ezio.plugin.navigator.pojo.ApiInfo;

import java.io.BufferedWriter;
import java.io.File;
import java.io.FileWriter;
import java.io.IOException;
import java.io.UnsupportedEncodingException;
import java.net.URLDecoder;
import java.util.List;

public enum FileUtl {
    ;

    public static String getCurResourcePath(Class<?> cls) {
        String currPath = "";
        try {
            currPath = URLDecoder.decode(cls.getResource("").getPath(), "UTF-8");
        } catch (UnsupportedEncodingException e) {
            e.printStackTrace();
        }
        String str = "file:/";
        currPath = currPath.substring(str.length());
        return currPath.substring(0, currPath.indexOf("build"));
    }

    public static void writeStr(String filePath, List<ApiInModule> apiInModuleList) {
        File logFile = new File(filePath);
        // 先判断日志目录是否存在,不存在则先创建
        if (!logFile.getParentFile().exists()) {
            boolean mkdirFlag = logFile.getParentFile().mkdirs();
            if (!mkdirFlag) {
                throw new RuntimeException("创建文件失败:" + logFile.getParentFile());
            }
        }

        try (BufferedWriter bw = new BufferedWriter(new FileWriter(logFile))) {
            bw.write("");
            for (ApiInModule apiInModule : apiInModuleList) {
                List<ApiInfo> apiInfoList = apiInModule.getApiInfoList();
                for (ApiInfo apiInfo : apiInfoList) {
                    String fullUrl = apiInfo.getFullUrl();
                    bw.append(fullUrl).append("\n");
                }
            }
        } catch (IOException e) {
            System.out.println("error:" + e);
        }
    }
}
创建一个导出按钮

代码如下:
package com.ezio.plugin.utils;


import com.ezio.plugin.navigator.pojo.ApiInModule;
import com.ezio.plugin.navigator.pojo.ApiInfo;

import java.io.BufferedWriter;
import java.io.File;
import java.io.FileWriter;
import java.io.IOException;
import java.io.UnsupportedEncodingException;
import java.net.URLDecoder;
import java.util.List;

public enum FileUtl {
    ;

    public static String getCurResourcePath(Class<?> cls) {
        String currPath = "";
        try {
            currPath = URLDecoder.decode(cls.getResource("").getPath(), "UTF-8");
        } catch (UnsupportedEncodingException e) {
            e.printStackTrace();
        }
        String str = "file:/";
        currPath = currPath.substring(str.length());
        return currPath.substring(0, currPath.indexOf("build"));
    }

    public static void writeStr(String filePath, List<ApiInModule> apiInModuleList) {
        File logFile = new File(filePath);
        // 先判断日志目录是否存在,不存在则先创建
        if (!logFile.getParentFile().exists()) {
            boolean mkdirFlag = logFile.getParentFile().mkdirs();
            if (!mkdirFlag) {
                throw new RuntimeException("创建文件失败:" + logFile.getParentFile());
            }
        }

        try (BufferedWriter bw = new BufferedWriter(new FileWriter(logFile))) {
            bw.write("");
            for (ApiInModule apiInModule : apiInModuleList) {
                List<ApiInfo> apiInfoList = apiInModule.getApiInfoList();
                for (ApiInfo apiInfo : apiInfoList) {
                    String fullUrl = apiInfo.getFullUrl();
                    bw.append(fullUrl).append("\n");
                }
            }
        } catch (IOException e) {
            System.out.println("error:" + e);
        }
    }
}
TreePanelWindow添加按钮
在com.ezio.plugin.toolwindow.TreePanelWindow 类下面添加Action,
actionGroup.add(new ExportToolBar());
public class TreePanelWindow extends SimpleToolWindowPanel implements DataProvider {

    private SimpleTree myTree;

    public TreePanelWindow(SimpleTree tree) {
        super(true, true);
        this.myTree = tree;

        // 设置 tree 线条
        JBColor color = new JBColor(
                new Color(11, 6, 39),
                new Color(36, 38, 39)
        );
        myTree.setBorder(BorderFactory.createLineBorder(color));

        // 设置 scrollPane 线条
        JScrollPane scrollPane = ScrollPaneFactory.createScrollPane(myTree);
        scrollPane.setBorder(BorderFactory.createLineBorder(JBColor.RED));
        setContent(scrollPane);

        final ActionManager actionManager = ActionManager.getInstance();
        // 设置 toolbar action, 添加一个刷新按钮
        // createActionToolbar(String place, ActionGroup group, boolean horizontal)
        DefaultActionGroup actionGroup = new DefaultActionGroup();
        actionGroup.add(actionManager.getAction("zhang.group.refresh"));
        actionGroup.add(new ExportToolBar());
        ActionToolbar actionToolbar = actionManager.createActionToolbar("myPlace", actionGroup, false);
        setToolbar(actionToolbar.getComponent());

        myTree.addMouseListener(new TreePanelWindowListener());
    }
}
常用API
获取plugin.xml里面配置的类
ServiceManager.getService(XXXX.class);
获取选择的文件夹和项目
IdeView ideView = (IdeView)anActionEvent.getRequiredData(LangDataKeys.IDE_VIEW);
//选择的文件夹
this.psiDirectory = ideView.getOrChooseDirectory();
//选择的项目
this.project = this.psiDirectory.getProject();
获取选中的类名
//  e为 AnActionEvent
PsiFile psiFile = e.getData(CommonDataKeys.PSI_FILE);
//获取选中的类名
String name = psiFile.getVirtualFile().getName();
获取鼠标所在的元素
PsiElement psiElement = e.getData(PlatformDataKeys.PSI_ELEMENT);获取方法的参数
PsiParameter[] psiParameters = ((PsiMethodImpl) psiElement).getParameterList().getParameters();获取指定文件名的文件
PsiFile[] psiFiles = FilenameIndex.getFilesByName(project, name, GlobalSearchScope.projectScope(project));踩坑问题
问题:Cannot start compilation: the output path is not specified for module "zj-idea-plugin-gradle-run-test".
Specify the output path in the Project Structure dialog.
运行代码的时候报错如下:

解决:

如图所示,再Project Structure里面的Modules修改Paths,路径为当前目录\target\classes和\target\test-classes
相关文章推荐
idea plugin插件开发1——idea底部窗口(带按钮)_idea下方工具窗口 开发-CSDN博客
idea plugin插件开发2——预览代码(多窗口)_idea预览代码-CSDN博客
idea plugin插件开发3——可编辑表单_idea 插件开发filechooserfactory-CSDN博客
推荐10款高频插件
- Rainbow Brackets
功能:为代码中的括号(如圆括号、方括号、花括号)添加彩色高亮,帮助开发者更清晰地识别嵌套结构。
适用场景:适用于任何需要清晰识别括号嵌套的编程语言,特别适合嵌套较深的代码。
官网:Rainbow Brackets - IntelliJ IDEs Plugin | Marketplace
- Generate All Getter And Setter
功能:快速为POJO类生成所有getter和setter方法,支持带默认值和不带默认值的setter方法。
适用场景:适用于需要快速生成Java类的getter和setter方法的场景。
官网:Generate All Getter And Setter - IntelliJ IDEs Plugin | Marketplace
- Gsonformat
功能:将JSON字符串格式化为Gson格式的Java类,支持自定义类名和包名。
适用场景:适用于需要将JSON数据快速转换为Java类的场景。
官网:Gsonformat - IntelliJ IDEs Plugin | Marketplace
- MyBatisCodeHelperPro
功能:为MyBatis框架提供代码生成和辅助功能,包括SQL语句生成、Mapper接口生成等。
适用场景:适用于使用MyBatis框架的Java项目。
官网:MyBatisCodeHelperPro - IntelliJ IDEs Plugin | Marketplace
- Statistic
功能:提供代码统计功能,包括行数、单词数、字符数等统计信息。
适用场景:适用于需要快速统计代码量的场景。
官网:Statistic - IntelliJ IDEs Plugin | Marketplace
- RESTFul-Tool
功能:提供RESTful API的测试和调试工具,支持HTTP请求发送、响应查看等。
适用场景:适用于开发和调试RESTful API。
官网:RESTFul-Tool - IntelliJ IDEs Plugin | Marketplace
- Maven Helper
功能:增强Maven项目的管理功能,支持依赖分析、依赖树查看、依赖冲突解决等。
适用场景:适用于使用Maven构建的Java项目。
官网:Maven Helper - IntelliJ IDEs Plugin | Marketplace
- Java Mybatis SQL Scanner
功能:扫描MyBatis的SQL语句,检测潜在的错误和问题,支持自定义规则。
适用场景:适用于使用MyBatis框架的Java项目,特别是需要对SQL语句进行静态分析的场景。
官网:Java Mybatis SQL Scanner - IntelliJ IDEs Plugin | Marketplace
- Power Mode II (酷炫风)
功能:为IDEA添加动态效果,如代码输入时的震动、闪光等,增加编程的乐趣。
适用场景:适用于任何需要增加编程乐趣的场景。
官网:Power Mode II - IntelliJ IDEs Plugin | Marketplace
- Arthas Idea
功能:集成Arthas(一个Java诊断工具)到IntelliJ IDEA中,支持在线调试、监控和诊断Java应用。
适用场景:适用于需要在线调试和监控Java应用的场景。
官网:arthas idea - IntelliJ IDEs Plugin | Marketplace
这些插件可以帮助你更高效地进行Java开发,提升代码质量和开发体验。根据你的具体需求,选择合适的插件进行安装和使用。


 1871
1871

 被折叠的 条评论
为什么被折叠?
被折叠的 条评论
为什么被折叠?
 到【灌水乐园】发言


