


一、背景:
物理机服务器,具备ipv6网卡,ubuntu22.04操作系统,dynv6配置的ddns域名,在nginx应用的ssl证书
思路:
使用certbot创建证书,在dyndns添加txt记录,certbot+crontab自动续签证书,用腾讯云的dns api密钥验证证书,最后reload nginx
二、安装依赖
apt update
apt install certbot
apt install python3-pip
pip3 install certbot-dns-tencentcloud
三、创建证书并配置
1.生成证书
certbot certonly \
  --manual \
  --preferred-challenges dns \
  -d 域名 \
  --email 邮箱 \
  --agree-tos \
  --server https://acme-v02.api.letsencrypt.org/directory
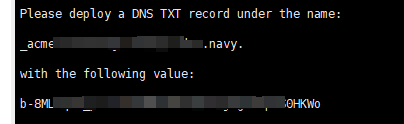
注意收集它的txt name和value
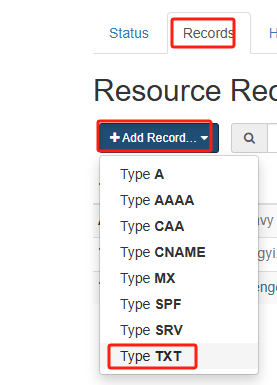
2.进入dyndns 的records,添加一个txt类型
3. 填入1.收集到的name和value
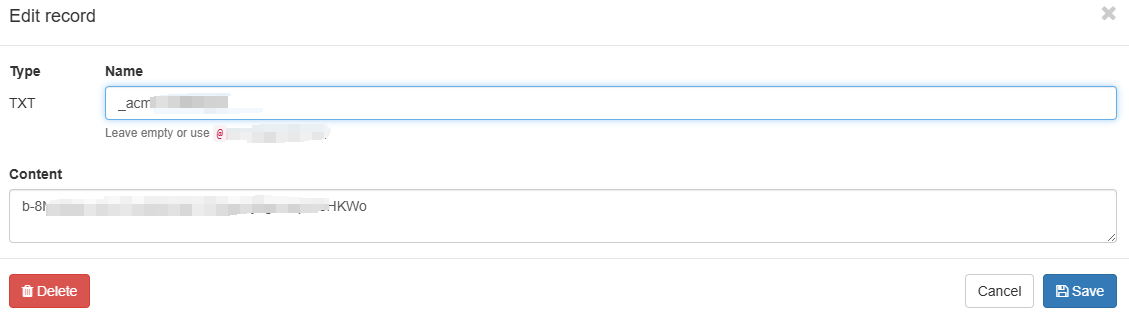
注:这里不用填域名本身,比如你的name是_ace-cha.example.dns.navy,而你的域名是example.dns.navy,那这里你只需填_ace-cha
4. 等待1-5分钟,回到服务器终端敲下回车,successfully表示成功
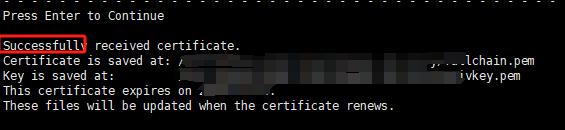
记录Certificate和Key,配置到nginx并reload,验证是否生效。
四、 配置腾讯云dns api密钥
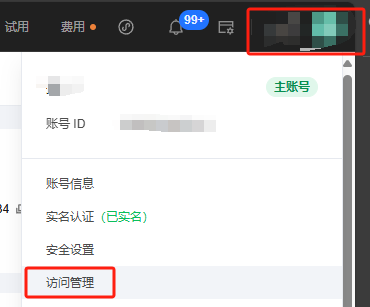
1. 登录腾讯云,右上角点击账号图标,选择访问管理
2. 访问密钥,api密钥管理,新建密钥
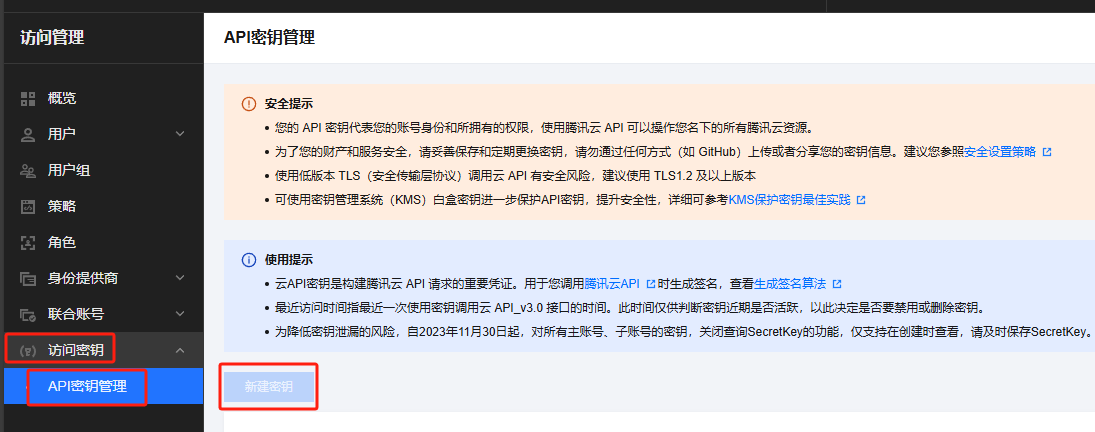
保存记录好SecretId和SecretKey,SecretKey只会出现一次
3. 返回服务器终端生成密钥文件
tee /etc/letsencrypt/tencent.ini <<EOF
dns_tencentcloud_secret_id = 你的SecretId
dns_tencentcloud_secret_key = 你的SecretKey
EOF

chmod 600 /etc/letsencrypt/tencent.ini
五、配置自动续期
1. 先手动申请一次证书
certbot certonly \
  -a dns-tencentcloud \
  --dns-tencentcloud-credentials /etc/letsencrypt/tencent.ini \
  -d 域名 \
  --email 邮箱 \
  --agree-tos \
  --non-interactive \
  --preferred-challenges dns
2. 验证自动续期命令
/usr/bin/certbot renew --quiet -a dns-tencentcloud --dns-tencentcloud-credentials /etc/letsencrypt/tencent.ini --deploy-hook "/data/nginx/sbin/nginx -s reload" >> /var/log/certbot-renew.log 2>&1
注:验证没问题后放上去crontab任务计划。


 8903
8903

 被折叠的 条评论
为什么被折叠?
被折叠的 条评论
为什么被折叠?
 到【灌水乐园】发言


