


初步了解了Vue之后,尝试着做了这样一个购物车的项目,此项目直接在html中引入vue.js进行开发,未考虑前端构建、模块化、ES6等部分知识。专注学习基本语法,只是把vue当作一个模版引擎来用而已。
项目涉及到了列表展示、分类筛选、条件排序、购物车等电商项目常用的功能,覆盖到了Vue基础部分的知识点(模板语法、计算属性、样式绑定、条件渲染、列表渲染、事件处理)。
做项目才发现学会和应用是两码事,遇到了很多坑,总结一下教训和学到知识。
一. 当生成vue实例后,当再次给数据赋值时,有时候并不会自动更新到视图上去,参考:https://blog.csdn.net/sinat_17775997/article/details/72840980。
<!DOCTYPE html>
<html>
<head>
<meta charset="utf-8">
<title>vue $set</title>
<script src="https://static.runoob.com/assets/vue/1.0.11/vue.min.js"></script>
</head>
<body>
<div id="app">
  姓名:{{ name }}<br>
    年龄:{{age}}<br>
    性别:{{sex}}<br>
    说明:{{info.content}}
</div>
<!-- JavaScript 代码需要放在尾部(指定的HTML元素之后) -->
<script>
var data = {
    name: "简书",
    age: '3',
    info: {
        content: 'my name is test'
    }
}
var key = 'content';
var vm = new Vue({
    el:'#app',
    data: data,
    ready: function(){
        //Vue.set(data,'sex', '男')
        //this.$set('info.'+key, 'what is this?');
    }
});
data.sex = '男';
</script>
</body>
</html>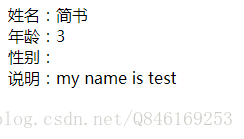
解决方法:
1.通过Vue.set方法设置data属性
Vue.set(data,'sex', '男')2.用 vm.$set实例方法,这也是全局 Vue.set方法的别名,如:
 Changeq:function(isadd,item){
              var num=item.quantity,
                  stock=item.stock;
             if(isadd&&num<stock){
                this.$set(item,'quantity',++num);
             }
             else if(!isadd&&num>1){
                this.$set(item,'quantity',--num);
             }
             this.$set(item,'subtotal',(item.price*num).toFixed(1));
        }
二. 还是this的问题,javaScript 中 this 的值是动态绑定的,这样做是为了进入新的作用域之后可以使用上层作用域中的 this。有时候要将this赋值给一个变量。如:
        //全选
        checkAll:function(){
             var self=this;
            //全选状态值取反
             this.checkAllflag=!this.checkAllflag;
             this.cart.forEach(function(item){
                  if(self.checkAllflag){
                    item.checked=true;
                     self.selectednum=self.cart.length;
                  }else{
                    item.checked=false;
                    self.selectednum=0;
                  }
             });
},另外 Vue中:All lifecycle hooks are called with their 'this' context pointing to the Vue instance invoking it.
意思是:在Vue所有的生命周期钩子方法(如created,mounted, updated以及destroyed)里使用this,this指向调用它的Vue实例。
三.Vue 生命周期钩子

Vue.nextTick
在下次 DOM 更新循环结束之后执行延迟回调。在修改数据之后立即使用这个方法,获取更新后的 DOM
Vue.nextTick(function () {
  // DOM 更新了
})
官方还提供了一种写法,vm.$nextTick,用 this 自动绑定到调用它的实例上
created() {
    setTimeout(() => {
          this.number = 100
          this.$nextTick(() => {
            console.log('nextTick', document.getElementsByTagName('p')[0])
          })
    },100)
}
生命周期钩子的一些使用方法:什么时候需要用到Vue.nextTick
在 Vue 生命周期的 created() 钩子函数进行的 DOM 操作一定要放在 Vue.nextTick() 的回调函数中。原因是什么呢,原因是
在 created() 钩子函数执行的时候 DOM 其实并未进行任何渲染,而此时进行 DOM 操作无异于徒劳,所以此处一定要将 DOM 操作的 js 代码放进 Vue.nextTick() 的回调函数中。与之对应的就是 mounted 钩子函数,因为该钩子函数执行时所有的 DOM 挂载和渲染都已完成,此时在该钩子函数中进行任何DOM操作都不会有问题 。在数据变化后要执行的某个操作,而这个操作需要使用随数据改变而改变的 DOM 结构的时候,这个操作都应该放进 Vue.nextTick() 的回调函数中。
beforecreate : 可以在这加个loading事件,在加载实例时触发
created : 初始化完成时的事件写在这里,如在这结束loading事件,异步请求也适宜在这里调用
mounted : 挂载元素,获取到DOM节点
updated : 如果对数据统一处理,在这里写上相应函数
beforeDestroy : 可以做一个确认停止事件的确认框
nextTick : 更新数据后立即操作dom
<!DOCTYPE html>
<html>
<head>
    <title></title>
    <script type="text/javascript" src="https://cdn.jsdelivr.net/vue/2.1.3/vue.js"></script>
</head>
<body>

<div id="app">
     <p>{{ message }}</p>
</div>

<script type="text/javascript">

  var app = new Vue({
      el: '#app',
      data: {
          message : "xuxiao is boy"
      },
       beforeCreate: function () {
                console.group('beforeCreate 创建前状态===============》');
               console.log("%c%s", "color:red" , "el     : " + this.$el); //undefined
               console.log("%c%s", "color:red","data   : " + this.$data); //undefined
               console.log("%c%s", "color:red","message: " + this.message)
        },
        created: function () {
            console.group('created 创建完毕状态===============》');
            console.log("%c%s", "color:red","el     : " + this.$el); //undefined
               console.log("%c%s", "color:red","data   : " + this.$data); //已被初始化
               console.log("%c%s", "color:red","message: " + this.message); //已被初始化
        },
        beforeMount: function () {
            console.group('beforeMount 挂载前状态===============》');
            console.log("%c%s", "color:red","el     : " + (this.$el)); //已被初始化
            console.log(this.$el);
               console.log("%c%s", "color:red","data   : " + this.$data); //已被初始化
               console.log("%c%s", "color:red","message: " + this.message); //已被初始化
        },
        mounted: function () {
            console.group('mounted 挂载结束状态===============》');
            console.log("%c%s", "color:red","el     : " + this.$el); //已被初始化
            console.log(this.$el);
               console.log("%c%s", "color:red","data   : " + this.$data); //已被初始化
               console.log("%c%s", "color:red","message: " + this.message); //已被初始化
        },
        beforeUpdate: function () {
            console.group('beforeUpdate 更新前状态===============》');
            console.log("%c%s", "color:red","el     : " + this.$el);
            console.log(this.$el);
               console.log("%c%s", "color:red","data   : " + this.$data);
               console.log("%c%s", "color:red","message: " + this.message);
        },
        updated: function () {
            console.group('updated 更新完成状态===============》');
            console.log("%c%s", "color:red","el     : " + this.$el);
            console.log(this.$el);
               console.log("%c%s", "color:red","data   : " + this.$data);
               console.log("%c%s", "color:red","message: " + this.message);
        },
        beforeDestroy: function () {
            console.group('beforeDestroy 销毁前状态===============》');
            console.log("%c%s", "color:red","el     : " + this.$el);
            console.log(this.$el);
               console.log("%c%s", "color:red","data   : " + this.$data);
               console.log("%c%s", "color:red","message: " + this.message);
        },
        destroyed: function () {
            console.group('destroyed 销毁完成状态===============》');
            console.log("%c%s", "color:red","el     : " + this.$el);
            console.log(this.$el);
               console.log("%c%s", "color:red","data   : " + this.$data);
               console.log("%c%s", "color:red","message: " + this.message)
        }
    })
</script>
</body>
</html>
通过上述代码可以观察到钩子的执行结果
咱们在chrome浏览器里打开,F12看console就能发现
beforecreated:el 和 data 并未初始化
created:完成了 data 数据的初始化,el没有
beforeMount:完成了 el 和 data 初始化
mounted:完成挂载
钩子应用:(怎么灵活的用钩子是关键 目前接触的较少所以对这方面的疑问还不能完全解答)
生命周期过程中对数据的操作都不会作出相应,当dom树挂载完对数据watch会有用
beforecreate : 可以在这加个loading事件,在加载实例时触发
created : 初始化完成时的事件写在这里,如在这结束loading事件,异步请求也适宜在这里调用
mounted : 挂载元素,获取到DOM节点
updated : 如果对数据统一处理,在这里写上相应函数
beforeDestroy : 可以做一个确认停止事件的确认框
nextTick : 更新数据后立即操作dom
注意:生命周期过程中对数据的操作都不会作出相应,当dom树挂载完对数据watch会有用
关于生命周期钩子参考链接:https://segmentfault.com/a/1190000008010666
https://segmentfault.com/a/1190000008771768?_ea=1739750
https://www.cnblogs.com/smilexumu/p/8073845.html


 8161
8161


 被折叠的 条评论
为什么被折叠?
被折叠的 条评论
为什么被折叠?
 到【灌水乐园】发言


