


前言:在web开发中,文件上传是必不可少的一部分。比如头像上传,添加商品、上传图片等等需求…就是把文件上传保存到服务器的过程。
单文件上传
实现步骤
01、搭建项目
搭建一个SpringBoot项目
<?xml version="1.0" encoding="UTF-8"?>
<project xmlns="http://maven.apache.org/POM/4.0.0" xmlns:xsi="http://www.w3.org/2001/XMLSchema-instance"
         xsi:schemaLocation="http://maven.apache.org/POM/4.0.0 https://maven.apache.org/xsd/maven-4.0.0.xsd">
    <modelVersion>4.0.0</modelVersion>
    <parent>
        <groupId>org.springframework.boot</groupId>
        <artifactId>spring-boot-starter-parent</artifactId>
        <version>2.6.0</version>
        <relativePath/> <!-- lookup parent from repository -->
    </parent>
    <groupId>com.qd</groupId>
    <artifactId>uploadDemo</artifactId>
    <version>0.0.1-SNAPSHOT</version>
    <name>uploadDemo</name>
    <description>文件上传demo</description>
    <properties>
        <java.version>1.8</java.version>
    </properties>
    <dependencies>
        <dependency>
            <groupId>org.springframework.boot</groupId>
            <artifactId>spring-boot-starter-freemarker</artifactId>
        </dependency>
        <dependency>
            <groupId>org.springframework.boot</groupId>
            <artifactId>spring-boot-starter-web</artifactId>
        </dependency>

        <dependency>
            <groupId>org.springframework.boot</groupId>
            <artifactId>spring-boot-starter-test</artifactId>
            <scope>test</scope>
        </dependency>
    </dependencies>

    <build>
        <plugins>
            <plugin>
                <groupId>org.springframework.boot</groupId>
                <artifactId>spring-boot-maven-plugin</artifactId>
            </plugin>
        </plugins>
    </build>
</project>
server:
  port: 8082 # 应用端口

spring:
  # freemarker
  freemarker:
    suffix: .html
    cache: false
  # 文件上传配置
  servlet:
    multipart:
      # 是否开启http上传处理
      enabled: true
      # 单个文件最大长度
      max-file-size: 2MB
      # 最大请求文件的大小
      max-request-size: 10MB
      # 设置临时目录
      # location: F://data//temp
02、准备文件上传页面
在resources/templates/新增upload.html页面
package com.qd.controller;

import org.springframework.stereotype.Controller;
import org.springframework.web.bind.annotation.GetMapping;

/**
 * Create by IntelliJ IDEA
 *
 * @Author: qiandu
 * @Blog: https://www.cnblogs.com/qd666
 * @Date: 2021/11/21 21:01
 */
@Controller
public class UploadController {

    @GetMapping("/upload")
    public String toUpload() {
        return "upload";
    }
}
03、后台实现
UploadService
package com.qd.service;
import org.springframework.stereotype.Service;
import org.springframework.web.multipart.MultipartFile;
import java.io.File;
import java.io.IOException;
/**
* 文件上传
*
* @Author: qiandu
* @Blog: https://www.cnblogs.com/qd666
* @Date: 2021/11/21 21:20
*/
@Service
public class UploadService {
/**
* MultipartFile 对象是springMVC提供的文件上传接收的类
* 文件上传底层原理 request.getInpuStream()
*
* @param multipartFile
* @param dir
* @return
*/
public String uploadImg(MultipartFile multipartFile, String dir) {
// 1:指定文件上传的目录
File targetFile = new File("D:\\tmp\\" + dir);
try {
// 2:如果targetFile不存在,则创建
if (!targetFile.exists()) targetFile.mkdirs();
// 3: 指定文件上传后的目录
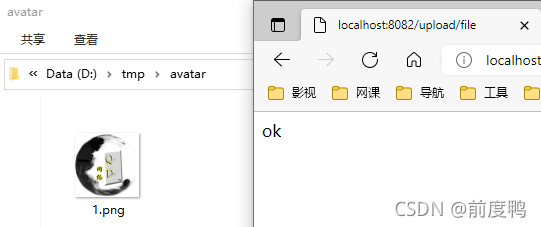
File targetFileName = new File(targetFile, "1.png"); // 先写死
// 4:文件上传到指定的目录
multipartFile.transferTo(targetFileName);
return "ok";
} catch (IOException e) {
e.printStackTrace();
return "fail";
}
}
}
UploadController
package com.qd.controller;

import com.qd.service.UploadService;
import org.springframework.beans.factory.annotation.Autowired;
import org.springframework.stereotype.Controller;
import org.springframework.web.bind.annotation.GetMapping;
import org.springframework.web.bind.annotation.PostMapping;
import org.springframework.web.bind.annotation.RequestParam;
import org.springframework.web.bind.annotation.ResponseBody;
import org.springframework.web.multipart.MultipartFile;

import javax.servlet.http.HttpServletRequest;

/**
 * Create by IntelliJ IDEA
 *
 * @Author: qiandu
 * @Blog: https://www.cnblogs.com/qd666
 * @Date: 2021/11/21 21:01
 */
@Controller
public class UploadController {

    @Autowired
    private UploadService uploadService;


    @GetMapping("/upload")
    public String toUpload() {
        return "upload";
    }

    @PostMapping("/upload/file")
    @ResponseBody
    public String upload(@RequestParam("file") MultipartFile multipartFile, HttpServletRequest request) {

        // 1:空判断
        if (multipartFile.isEmpty()) {
            return "文件为空!!!";
        }

        multipartFile.getSize();//得到大小
        multipartFile.getOriginalFilename();//得到文件名
        String contentType = multipartFile.getContentType();//得到文件类型

        // 2:判断文件是否符合
        if (!"image/png".equals(contentType) || !"image/jpg".equals(contentType)) {
            return "文件格式不符合";
        }

        // 3:获取用户指定的文件夹
        // 目的:作隔离,不同业务、不同文件放入到不同的目录中
        String dir = request.getParameter("dir");
        return uploadService.uploadImg(multipartFile, dir);
    }
}
web页面
    <h2>文件上传</h2>
    <form action="/upload/file" method="post" enctype="multipart/form-data">
        <input type="text" name="dir" value="avatar" hidden>
        <input type="file" name="file" accept="image/png,image/jpg">
        <input type="submit" value="点我上传">
    </form>
结果
04、后台改进
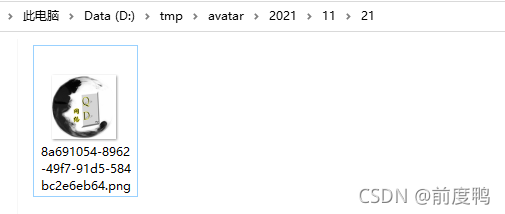
上面的还有问题的,比如上传后的文件名称被写死,目录页应该按照年月日层级划分
package com.qd.service;

import org.springframework.stereotype.Service;
import org.springframework.web.multipart.MultipartFile;

import java.io.File;
import java.io.IOException;
import java.text.SimpleDateFormat;
import java.util.Date;
import java.util.UUID;

/**
 * 文件上传
 *
 * @Author: qiandu
 * @Blog: https://www.cnblogs.com/qd666
 * @Date: 2021/11/21 21:20
 */
@Service
public class UploadService {

    /**
     * MultipartFile 对象是springMVC提供的文件上传接收的类
     * 文件上传底层原理 request.getInpuStream()
     *
     * @param multipartFile
     * @param dir
     * @return
     */
    public String uploadImg(MultipartFile multipartFile, String dir) {

        try {
            // 1:真实的文件名称
            String originalFilename = multipartFile.getOriginalFilename(); // 上传的文件aa.jpg
            // 2:截取后的文件名称 .jpg
            String imgSuffix = originalFilename.substring(originalFilename.lastIndexOf(".")); // 得到.jpg
            // 3:生成唯一的文件名称
            String newFileName = UUID.randomUUID().toString() + imgSuffix;  // 随机生成如:dfasf42432.jpg
            // 4:日期作为目录隔离文件
            SimpleDateFormat dateFormat = new SimpleDateFormat("yyyy/MM/dd");
            String datePath = dateFormat.format(new Date()); // 日期目录:2021/11/21
            // 5:最终文件的上传目录
            File targetFile = new File("D:\\tmp\\" + dir, datePath); // 生成的最终目录; D://tmp/avatar/2021/11/21
            // 6:如果dirFile不存在,则创建
            if (!targetFile.exists()) targetFile.mkdirs();
            // 7: 指定文件上传后完整的文件名
            File dirFileName = new File(targetFile, newFileName); // 文件在服务器的最终路径是:D://tmp/avatar/2021/11/21/dfasf42432.jpg
            // 8:文件上传
            multipartFile.transferTo(dirFileName);
            return "ok";
        } catch (IOException e) {
            e.printStackTrace();
            return "fail";
        }
    }
}
结果
05、前台改进
目前,前端需要先选择上传的图片,然后需要点击上传按钮,方能上传。那能不能改进才只要选中图片即可自动上传呢?
    <h2>文件上传</h2>
    <form action="/upload/file" id="uploadform" method="post" enctype="multipart/form-data">
        <input type="text" name="dir" value="avatar" hidden>
        <input type="file" name="file" accept="image/png,image/jpg" onchange="upload()">
        <!--<input type="submit" value="点我上传">-->
    </form>

    <script>
        function upload() {
            console.log("选择图片即可上传~")
            document.getElementById("uploadform").submit();
        }
    </script>
ok~到这里本地的单文件上传就学习的差不多了,随之我们又遇到了另外一个问题:怎么获取上传的图片呢? 那么接下来将解决这个问题。
获取文件
文件可访问路径:http://localhost:8082/avatar/2021/11/21/dfasf42432.jpg
	// 9:可访问的路径 http://localhost:8082/avatar/2021/11/21/dfasf42432.jpg
	String fileName = dir + "/" + datePath + "/" + newFileName;
	return fileName;

但是此时仍然无法访问,怎么解决呢?———上传至服务器目录 即当前tomcat服务器下webapps/目录
SpringBoot如何指定任意目录为资源的访问目录呢?
我们知道SpringBoot有一个目录static 在这个目录下的文件可以是直接通过http请求访问到的,但是程序会被打成jar包,文件无法写入,所以SpringBoot提供一个资源目录映射的机制。接下来我们尝试一下。
01、新建配置类
package com.qd.config;

import org.springframework.context.annotation.Configuration;
import org.springframework.web.servlet.config.annotation.ResourceHandlerRegistry;
import org.springframework.web.servlet.config.annotation.WebMvcConfigurer;

/**
 * 静态资源映射配置类
 *
 * @Author: qiandu
 * @Blog: https://www.cnblogs.com/qd666
 * @Date: 2021/11/22 5:50
 */
@Configuration
public class WebMvcConfiguration implements WebMvcConfigurer {

    // 配置文件上传的额外的静态资源配置
    @Override
    public void addResourceHandlers(ResourceHandlerRegistry registry) {
        //  registry.addResourceHandler("/资源的访问路径").addResourceLocations("映射目录");
        registry.addResourceHandler("/uploadImg/**").addResourceLocations("file:D://tmp//");
    }
}
分析:如果你将文件上传到了D://tmp目录 可以通过http://localhost:8082/uploadImg/aa.jpg访问。访问测试

ok,到了这一步还是有问题的,在前面我们将 addResourceLocations("file:D://tmp//")写死了,细想一下,它如果是linux系统呢?是不是还要继续改进。
02、改进
WebMvcConfiguration 配置类改进
package com.qd.config;

import org.springframework.beans.factory.annotation.Value;
import org.springframework.context.annotation.Configuration;
import org.springframework.web.servlet.config.annotation.ResourceHandlerRegistry;
import org.springframework.web.servlet.config.annotation.WebMvcConfigurer;

/**
 * 静态资源映射配置类
 *
 * @Author: qiandu
 * @Blog: https://www.cnblogs.com/qd666
 * @Date: 2021/11/22 5:50
 */
@Configuration
public class WebMvcConfiguration implements WebMvcConfigurer {

    @Value("${file.staticPatterPath}")
    private String staticPatterPath;
    @Value("${file.uploadFolder}")
    private String uploadFolder;

    // 配置文件上传的额外的静态资源配置
    @Override
    public void addResourceHandlers(ResourceHandlerRegistry registry) {
        //  registry.addResourceHandler("/资源的访问路径").addResourceLocations("映射目录");
        registry.addResourceHandler(staticPatterPath + "**").addResourceLocations("file:" + uploadFolder);
    }
}
新建yml文件作环境隔离
# 本机配置
file:
  rootPath: http://localhost:8082
  staticPatterPath: /uploadImg/
  uploadFolder: D:/tmp/


# 服务器配置
file:
  rootPath: https://www.xxx.com
  staticPatterPath: /uploadImg/
  uploadFolder: /www/upload/
改进service
package com.qd.service;

import org.springframework.beans.factory.annotation.Value;
import org.springframework.stereotype.Service;
import org.springframework.web.multipart.MultipartFile;

import java.io.File;
import java.io.IOException;
import java.text.SimpleDateFormat;
import java.util.Date;
import java.util.UUID;

/**
 * 文件上传
 *
 * @Author: qiandu
 * @Blog: https://www.cnblogs.com/qd666
 * @Date: 2021/11/21 21:20
 */
@Service
public class UploadService {

    // 根路径
    @Value("${file.rootPath}")
    private String rootPath;
    // 映射目录
    @Value("${file.uploadFolder}")
    private String uploadFolder;
    // 资源的访问路径
    @Value("${file.staticPatterPath}")
    private String staticPatterPath;

    /**
     * MultipartFile 对象是springMVC提供的文件上传接收的类
     * 文件上传底层原理 request.getInpuStream()
     *
     * @param multipartFile
     * @param dir
     * @return
     */
    public String uploadImg(MultipartFile multipartFile, String dir) {

        try {
            // 1:真实的文件名称
            String originalFilename = multipartFile.getOriginalFilename(); // 上传的文件aa.jpg
            // 2:截取后的文件名称 .jpg
            String imgSuffix = originalFilename.substring(originalFilename.lastIndexOf(".")); // 得到.jpg
            // 3:生成唯一的文件名称
            String newFileName = UUID.randomUUID().toString() + imgSuffix;  // 随机生成如:dfasf42432.jpg
            // 4:日期作为目录隔离文件
            SimpleDateFormat dateFormat = new SimpleDateFormat("yyyy/MM/dd");
            String datePath = dateFormat.format(new Date()); // 日期目录:2021/11/21
            // 5:最终文件的上传目录
            File targetFile = new File(uploadFolder + dir, datePath); // 生成的最终目录; D://tmp/avatar/2021/11/21
            // 6:如果dirFile不存在,则创建
            if (!targetFile.exists()) targetFile.mkdirs();
            // 7: 指定文件上传后完整的文件名
            File dirFileName = new File(targetFile, newFileName); // 文件在服务器的最终路径是:D://tmp/avatar/2021/11/21/dfasf42432.jpg
            // 8:文件上传
            multipartFile.transferTo(dirFileName);

            // 9:可访问的路径 http://localhost:8082/avatar/2021/11/21/dfasf42432.jpg
            String fileName = dir + "/" + datePath + "/" + newFileName;
            return rootPath +staticPatterPath+ fileName;
        } catch (IOException e) {
            e.printStackTrace();
            return "fail";
        }
    }
}
03、获取文件多个信息
返回map即可
UploadService
package com.qd.service;

import org.springframework.beans.factory.annotation.Value;
import org.springframework.stereotype.Service;
import org.springframework.web.multipart.MultipartFile;

import java.io.File;
import java.io.IOException;
import java.io.StringReader;
import java.text.SimpleDateFormat;
import java.util.*;

/**
 * 文件上传
 *
 * @Author: qiandu
 * @Blog: https://www.cnblogs.com/qd666
 * @Date: 2021/11/21 21:20
 */
@Service
public class UploadService {

    // 根路径
    @Value("${file.rootPath}")
    private String rootPath;
    // 映射目录
    @Value("${file.uploadFolder}")
    private String uploadFolder;
    // 资源的访问路径
    @Value("${file.staticPatterPath}")
    private String staticPatterPath;

    /**
     * MultipartFile 对象是springMVC提供的文件上传接收的类
     * 文件上传底层原理 request.getInpuStream()
     *
     * @param multipartFile
     * @param dir
     * @return
     */
    public Map<String, Object> uploadImgMap(MultipartFile multipartFile, String dir) {

        try {
            // 1:真实的文件名称
            String originalFilename = multipartFile.getOriginalFilename(); // 上传的文件aa.jpg
            // 2:截取后的文件名称 .jpg
            String imgSuffix = originalFilename.substring(originalFilename.lastIndexOf(".")); // 得到.jpg
            // 3:生成唯一的文件名称
            String newFileName = UUID.randomUUID().toString() + imgSuffix;  // 随机生成如:dfasf42432.jpg
            // 4:日期作为目录隔离文件
            SimpleDateFormat dateFormat = new SimpleDateFormat("yyyy/MM/dd");
            String datePath = dateFormat.format(new Date()); // 日期目录:2021/11/21
            // 5:最终文件的上传目录
            File targetFile = new File(uploadFolder + dir, datePath); // 生成的最终目录; D://tmp/avatar/2021/11/21
            // 6:如果dirFile不存在,则创建
            if (!targetFile.exists()) targetFile.mkdirs();
            // 7: 指定文件上传后完整的文件名
            File dirFileName = new File(targetFile, newFileName); // 文件在服务器的最终路径是:D://tmp/avatar/2021/11/21/dfasf42432.jpg
            // 8:文件上传
            multipartFile.transferTo(dirFileName);

            // 9:可访问的路径 http://localhost:8082/avatar/2021/11/21/dfasf42432.jpg
            String fileName = dir + "/" + datePath + "/" + newFileName;
            Map<String, Object> map = new HashMap<>();
            map.put("url", rootPath + staticPatterPath + fileName); // url
            map.put("size", multipartFile.getSize());// 大小
            map.put("fileName", originalFilename);// 真实文件名称
            map.put("ext", imgSuffix);// 后缀名
            return map;
        } catch (IOException e) {
            e.printStackTrace();
            return null;
        }
    }
}
UploadController
package com.qd.controller;

import com.qd.service.UploadService;
import org.springframework.beans.factory.annotation.Autowired;
import org.springframework.stereotype.Controller;
import org.springframework.web.bind.annotation.GetMapping;
import org.springframework.web.bind.annotation.PostMapping;
import org.springframework.web.bind.annotation.RequestParam;
import org.springframework.web.bind.annotation.ResponseBody;
import org.springframework.web.multipart.MultipartFile;

import javax.servlet.http.HttpServletRequest;
import java.util.Map;

/**
 * Create by IntelliJ IDEA
 *
 * @Author: qiandu
 * @Blog: https://www.cnblogs.com/qd666
 * @Date: 2021/11/21 21:01
 */
@Controller
public class UploadController {

    @Autowired
    private UploadService uploadService;

    @GetMapping("/upload")
    public String toUpload() {
        return "upload";
    }

    @PostMapping("/upload/file2")
    @ResponseBody
    public Map<String, Object> uploadMap(@RequestParam("file") MultipartFile multipartFile, HttpServletRequest request) {

        // 1:空判断
        if (multipartFile.isEmpty()) {
            return null;
        }

        // 2:判断文件是否符合
        //String contentType = multipartFile.getContentType();//得到文件类型
        //if (!"image/png".equals(contentType) || !"image/jpg".equals(contentType)) {
        //    return "文件格式不符合";
        //}

        // 3:获取用户指定的文件夹
        // 目的:作隔离,不同业务、不同文件放入到不同的目录中
        String dir = request.getParameter("dir");
        return uploadService.uploadImgMap(multipartFile, dir);
    }
}
前端
    <h2>文件上传</h2>
    <form action="/upload/file2" id="uploadform" method="post" enctype="multipart/form-data">
        <input type="text" name="dir" value="avatar" hidden>
        <input type="file" name="file" accept="image/png,image/jpg" onchange="upload()">
        <!--<input type="submit" value="点我上传">-->
    </form>

    <script>
        function upload() {
            console.log("选择图片即可上传~")
            document.getElementById("uploadform").submit();
        }
    </script>
结果

多文件上传
方法一
01、controller层多文件上传接口方法
    /**
     * 多文件按上传
     *
     * @param multipartFiles
     * @param request
     * @return
     */
    @PostMapping("/upload/batchUpload")
    @ResponseBody
    public List<Map<String, Object>> batchUpload(@RequestParam("file") MultipartFile[] multipartFiles, HttpServletRequest request) {
        if (multipartFiles.length < 0) {
            return new ArrayList<>();
        }
        // 获取用户指定的文件夹,业务隔离
        String dir = request.getParameter("dir");
        return uploadService.batchUpload(multipartFiles, dir);
    }
tips: 将multipartFiles定义成数组,即可接收多文件
02、service层多文件上传方法
 	/**
     * 多文件上传
     *
     * @param multipartFiles
     * @return
     */
    public List<Map<String, Object>> batchUpload(MultipartFile[] multipartFiles, String dir) {


        ArrayList<Map<String, Object>> list = new ArrayList<>();

        try {
            // 1:遍历获取每个上传的文件
            for (int i = 0; i < multipartFiles.length; i++) {
                MultipartFile multipartFile = multipartFiles[i];
                // 2:获取文件名
                String originalFilename = multipartFile.getOriginalFilename();
                // 3:取文件名后缀
                String suffix = originalFilename.substring(originalFilename.lastIndexOf("."));
                // 4:文件重命名
                String newFileName = UUID.randomUUID().toString() + suffix;
                // 5:日期目录
                SimpleDateFormat simpleDateFormat = new SimpleDateFormat("yyyy/MM/dd");
                String datePath = simpleDateFormat.format(new Date());
                // 6:上传目录
                File targetFile = new File(uploadFolder + dir, datePath);
                // 7:如果目录不存在,递归创建
                if (!targetFile.exists()) targetFile.mkdirs();
                // 8:文件上传目录
                File dirFileName = new File(targetFile, newFileName);
                // 9:文件上传
                multipartFile.transferTo(dirFileName);

                // 10:路径拼接
                String fileUrl = dir + "/" + datePath + "/" + newFileName;
                // 11:完整访问路径
                String linkUrl = rootPath + staticPatterPath + fileUrl;

                Map<String, Object> map = new HashMap<>();
                map.put("url", linkUrl); // url
                map.put("size", multipartFile.getSize());// 大小
                map.put("fileName", originalFilename);// 真实文件名称
                map.put("ext", suffix);// 后缀名
                list.add(map);
            }
            return list;
        } catch (IOException e) {
            e.printStackTrace();
            return new ArrayList<>();
        }
    }
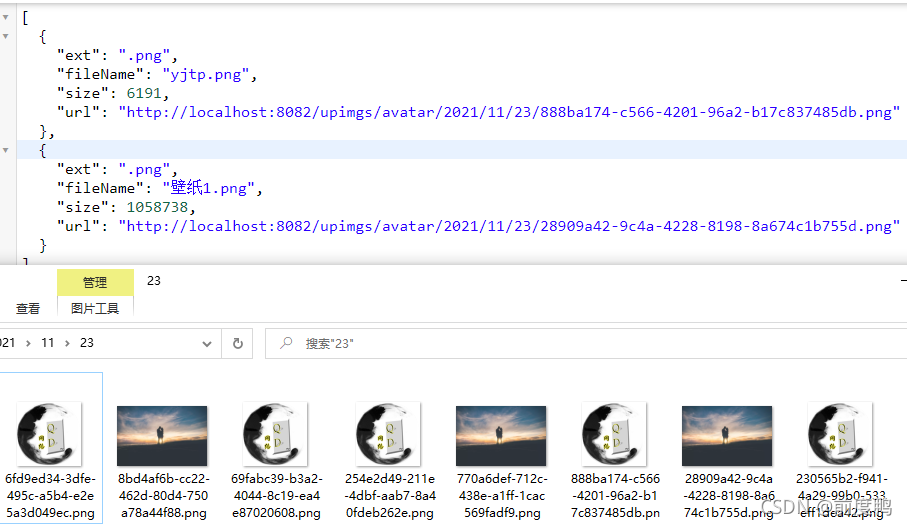
03、前端页面
    <h2>文件上传</h2>
    <form action="/upload/batchUpload" id="uploadform" method="post" enctype="multipart/form-data">
        <input type="text" name="dir" value="avatar" hidden>
        <input type="file" name="file" multiple accept="image/png,image/jpg" onchange="upload()">
        <!--<input type="submit" value="点我上传">-->
    </form>

    <script>
        function upload() {
            console.log("选择图片即可上传~")
            document.getElementById("uploadform").submit();
        }
    </script>
测试结果
方法二
01、controller层多文件上传接口方法
	/**
     * 多文件按上传
     *
     * @param request
     * @return
     */
    @PostMapping("/upload/batchUpload2")
    @ResponseBody
    public List<Map<String, Object>> batchUpload2(HttpServletRequest request) {

        // 1:得到 MultipartHttpServletRequest
        // MultipartHttpServletRequest接口简单地扩展了默认的HttpServletRequest接口,并提供一些用来处理请求文件的方法。
        MultipartHttpServletRequest multipartHttpServletRequest = (MultipartHttpServletRequest) request;
        // 2:获取上传文件列表,字段file由前台表单指定
        List<MultipartFile> fileList = multipartHttpServletRequest.getFiles("file");
        // 3:判断文件是否为空
        if (fileList.size() == 0) {
            return new ArrayList<>();
        }
        // 4:获取用户指定的文件夹,业务隔离
        String dir = request.getParameter("dir");
        return uploadService.batchUpload2(fileList, dir);
    }
02、service层多文件上传方法
	/**
     * 多文件上传
     *
     * @param multipartFiles
     * @param dir
     * @return
     */
    public List<Map<String, Object>> batchUpload2(List<MultipartFile> multipartFiles, String dir) {

        // 1:存放所有文件信息
        ArrayList<Map<String, Object>> list = new ArrayList<>();
        for (MultipartFile multipartFile : multipartFiles) {
            try {
                // 2:获取文件名
                String originalFilename = multipartFile.getOriginalFilename();
                // 3:取文件名后缀
                String suffix = originalFilename.substring(originalFilename.lastIndexOf("."));
                // 4:文件重命名
                String newFileName = UUID.randomUUID().toString() + suffix;
                // 5:日期目录
                SimpleDateFormat simpleDateFormat = new SimpleDateFormat("yyyy/MM/dd");
                String datePath = simpleDateFormat.format(new Date());
                // 6:上传目录
                File targetFile = new File(uploadFolder + dir, datePath);
                // 7:如果目录不存在,递归创建
                if (!targetFile.exists()) targetFile.mkdirs();
                // 8:文件上传目录
                File dirFileName = new File(targetFile, newFileName);
                // 9:文件上传
                multipartFile.transferTo(dirFileName);

                // 10:路径拼接
                String fileUrl = dir + "/" + datePath + "/" + newFileName;
                // 11:完整访问路径
                String linkUrl = rootPath + staticPatterPath + fileUrl;

                Map<String, Object> map = new HashMap<>();
                map.put("url", linkUrl); // url
                map.put("size", multipartFile.getSize());// 大小
                map.put("fileName", originalFilename);// 真实文件名称
                map.put("ext", suffix);// 后缀名
                list.add(map);
            } catch (Exception e) {
                e.printStackTrace();
            }
        }
        return list;
    }
测试结果也是没毛病的~ 推荐第一种写法
示例代码:https://chenyu6666.lanzoui.com/inY8Owtnngd
ok~至此,关于本机的文件上传就探讨到此,后续我们将使用阿里云oss存储继续学习文件上传。


 2万+
2万+


 被折叠的 条评论
为什么被折叠?
被折叠的 条评论
为什么被折叠?
 到【灌水乐园】发言


