


**
Nacos 配置管理-应用于分布式系统
**
目录:
一、Nacos 配置管理-应用于分布式系统-微服务创建
1.1 发布配置 ( nacos-1.1.3 )
1.2 打开 idea 创建一个父 Maven 工程 nacos_config 工程,和两个子模块(service1, service2 )。
1.3 在 父工程的 pom.xml 配置文件中导入依赖
1.4 新增 service1, service2 子工程(子模块)
1.5 在子工程 service1, service2 的 pom.xml 文件中加入依赖
1.6 创建 service1, service2 子工程的配置文件 bootstrap.yml
1.7 创建 springboot 启动类 Service1BootStrap.java, Service2BootStrap.java
1.8 分别启动两个测试类的运行 main() 方法
二、Nacos 配置管理-应用于分布式系统-微服务读取配置
2.1 修改 service1 子模块的启动类 Service1BootStrap.java 动态获取配置信息。
2.2 启动 nacos 服务( /bin/startup.cmd ) 浏览器访问:http://127.0.0.1:8848/nacos
2.3 同样,修改 service2 子模块的启动类 Service2BootStrap.java
2.4 启动 nacos 服务( /bin/startup.cmd )
三、Nacos 配置管理-应用于分布式系统-自定义扩展Data ID
3.1 打开 nacos 控制台,并点击菜单 配置管理 --> 配置列表 --> dev
3.2 修改 bootstrap.yml 配置文件,添加扩展 DataId 配置
3.3 修改 Service1BootStrap.java 启动类,添加 动态获取配置方法 getConfig2()
3.4 浏览器地址栏输入:http://localhost:56010/configs2
四、Nacos 配置管理-应用于分布式系统-配置优先级
4.1 登录 http://127.0.0.1:8848/nacos 修改配置,添加 age 内容,测试 DataId 优先级。
4.2 修改 bootstrap.yml 配置文件,添加注释
4.3 启动 nacos 服务 (运行启动类 )
4.4 浏览器地址栏输入:http://localhost:56010/configs2 测试查看优先级
一、Nacos 配置管理-应用于分布式系统-微服务创建
1.1 发布配置 ( nacos-1.1.3 )
首先在 nacos 发布配置,规划两个服务 service1, service2,
并且对这两个服务的配置进行集中维护。
启动 nacos 服务( /bin/startup.cmd )
浏览器访问:http://127.0.0.1:8848/nacos
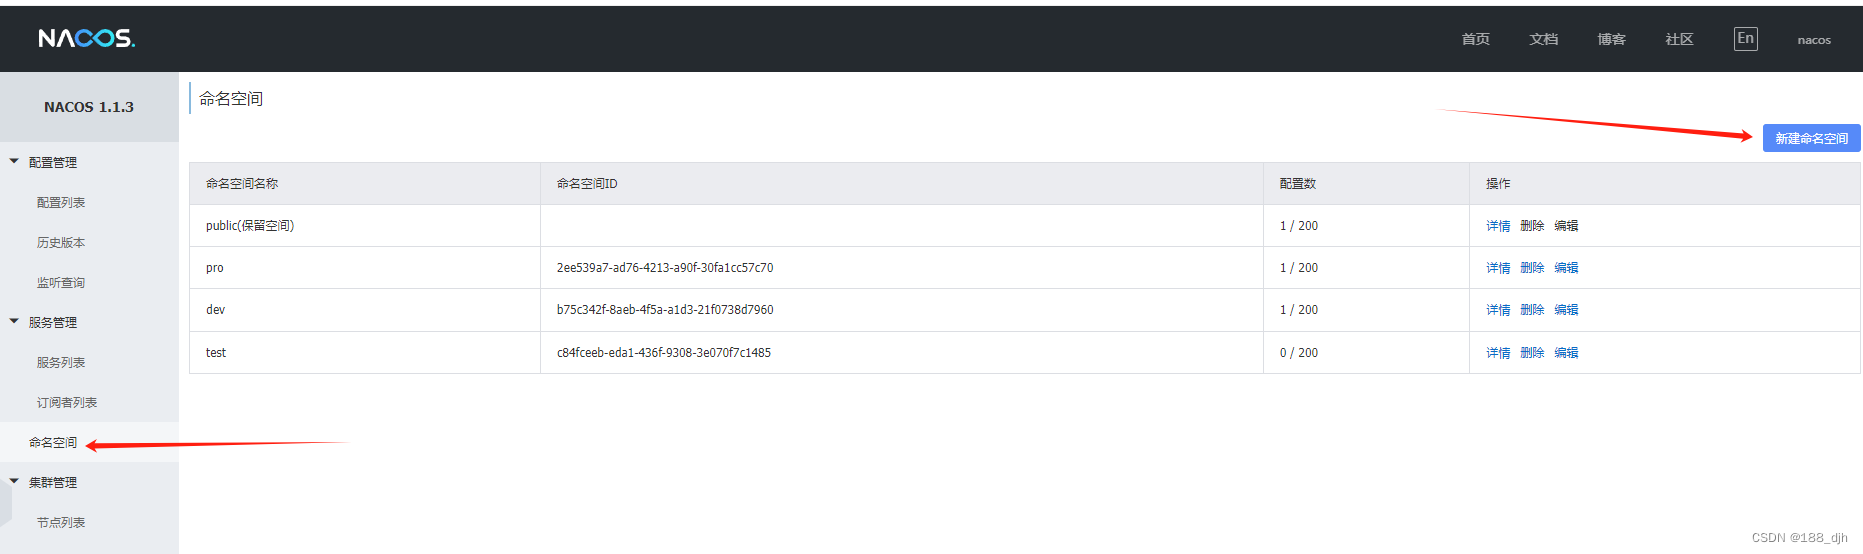
1)打开控制台,先创建 3 个命名空间 namespace
命名空间 namespace
--> 新建命名空间 namespace
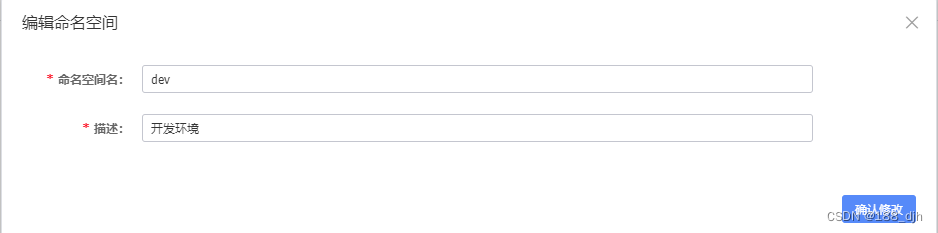
--> 命名空间名: dev
描述:开发环境
--> 确定。
命名空间 namespace
--> 新建命名空间 namespace
--> 命名空间名: pro
描述:生产环境
--> 确定。
命名空间 namespace
--> 新建命名空间 namespace
--> 命名空间名: test
描述:测试环境
--> 确定。
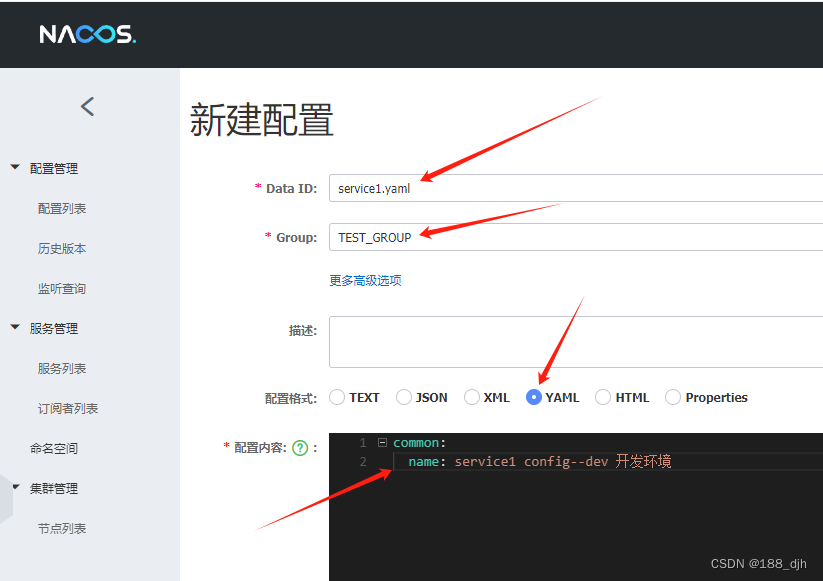
2)打开 nacos 控制台,并点击菜单 配置管理 --> 配置列表 --> dev :
添加如下配置: service1
namespace : dev
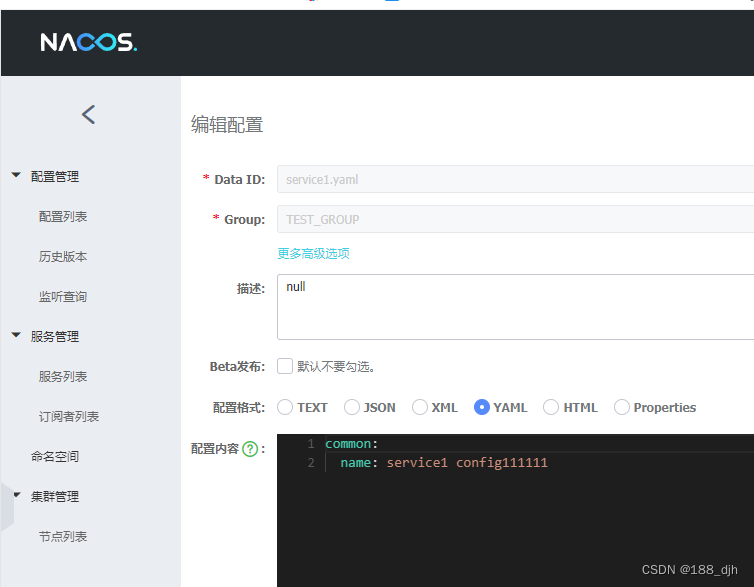
Data ID : service1.yaml
Group : TEST_GROUP
配置模式 :YAML
配置内容 :common:
name: service1 config--dev 开发环境
(注意:配置内容,遵循 yaml 文件格式,
: 后要有空格,缩进不能用 Tab键 缩进,两个空格缩进就行 )
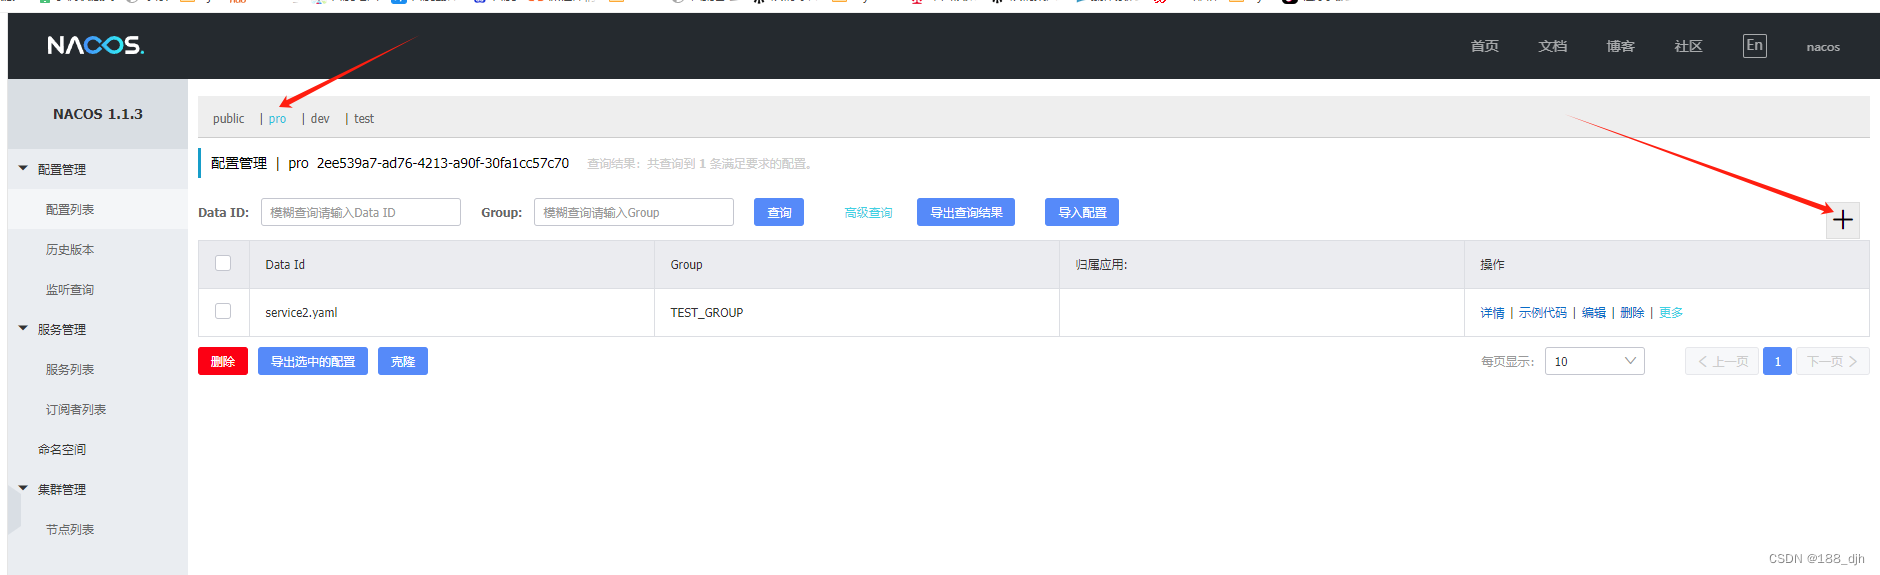
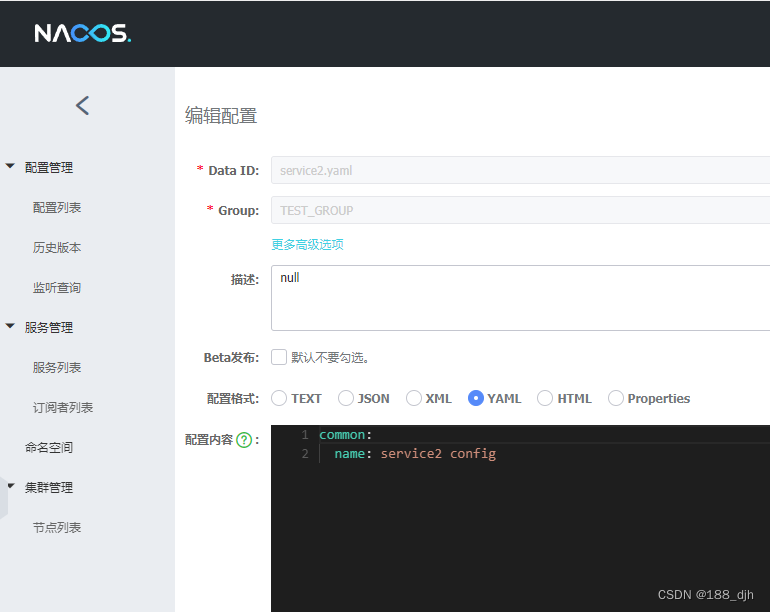
namespace : pro #生产环境
Data ID : service2.yaml
Group : TEST_GROUP #测试组
配置模式 :YAML
配置内容 :common:
name: service2 config--pro 生产环境
1.2 打开 idea 创建一个父 Maven 工程 nacos_config 工程,
和两个子模块( service1, service2  )。

--> idea
--> File
--> New Project
--> Maven
--> Groupld : ( djh.it )
	Artifactld : ( nacos_config )
	Version : 1.0-SNAPSHOT
--> Next
--> Project name: ( nacos_config )
	Project location: ( C:\java-test\idea2019\nacos_config )
--> Finish

(父工程不编写代码,可以删除 src 目录)
1.3 在 父工程的 pom.xml 配置文件中导入依赖
<?xml version="1.0" encoding="UTF-8"?>
<project xmlns="http://maven.apache.org/POM/4.0.0"
         xmlns:xsi="http://www.w3.org/2001/XMLSchema-instance"
         xsi:schemaLocation="http://maven.apache.org/POM/4.0.0 http://maven.apache.org/xsd/maven-4.0.0.xsd">
    <modelVersion>4.0.0</modelVersion>

    <groupId>djh.it</groupId>
    <artifactId>nacos_config</artifactId>
    <version>1.0-SNAPSHOT</version>
    <packaging>pom</packaging>

    <properties>
        <project.build.sourceEncoding>UTF-8</project.build.sourceEncoding>
        <project.reporting.outputEncoding>UTF-8</project.reporting.outputEncoding>
        <java.version>1.8</java.version>
    </properties>

    <dependencyManagement>
        <dependencies>
            <dependency>
                <groupId>com.alibaba.cloud</groupId>
                <artifactId>spring-cloud-alibaba-dependencies</artifactId>
                <version>2.1.0.RELEASE</version>
                <type>pom</type>
                <scope>import</scope>
            </dependency>
            <dependency>
                <groupId>org.springframework.cloud</groupId>
                <artifactId>spring-cloud-dependencies</artifactId>
                <version>Greenwich.RELEASE</version>
                <type>pom</type>
                <scope>import</scope>
            </dependency>
            <dependency>
                <groupId>org.springframework.boot</groupId>
                <artifactId>spring-boot-dependencies</artifactId>
                <version>2.1.3.RELEASE</version>
                <type>pom</type>
                <scope>import</scope>
            </dependency>
        </dependencies>
    </dependencyManagement>

    <build>
        <plugins>
            <plugin>
                <groupId>org.springframework.boot</groupId>
                <artifactId>spring-boot-maven-plugin</artifactId>
            </plugin>
        </plugins>
    </build>

</project>

<!-- C:\java-test\idea2019\nacos_config\pom.xml -->
1.4 新增 service1, service2 子工程(子模块),
创建两个子模块:

--> 右键 nacos_config 父工程
--> Modules
--> Maven
--> Groupld : ( djh.it )
	Artifactld : ( service1 )
	Version : 1.0-SNAPSHOT
--> Next
--> Module name: ( service1 )
	Content root : (  C:\java-test\idea2019\nacos_config\service1 )
	Module file location: (  C:\java-test\idea2019\nacos_config\service1 )
--> Finish

--> 右键 nacos_config 父工程
--> Modules
--> Maven
--> Groupld : ( djh.it )
	Artifactld : ( service1 )
	Version : 1.0-SNAPSHOT
--> Next
--> Module name: ( service1 )
	Content root : ( C:\java-test\idea2019\nacos_config\service2 )
	Module file location: ( C:\java-test\idea2019\nacos_config\service2 )
--> Finish
1.5 在子工程 service1, service2 的 pom.xml 文件中加入依赖:
	<?xml version="1.0" encoding="UTF-8"?>
	<project xmlns="http://maven.apache.org/POM/4.0.0"
	         xmlns:xsi="http://www.w3.org/2001/XMLSchema-instance"
	         xsi:schemaLocation="http://maven.apache.org/POM/4.0.0 http://maven.apache.org/xsd/maven-4.0.0.xsd">
	    <parent>
	        <artifactId>nacos_config</artifactId>
	        <groupId>djh.it</groupId>
	        <version>1.0-SNAPSHOT</version>
	    </parent>
	    <modelVersion>4.0.0</modelVersion>

	    <artifactId>service1</artifactId>

	    <dependencies>
	        <dependency>
	            <groupId>com.alibaba.cloud</groupId>
	            <artifactId>spring-cloud-starter-alibaba-nacos-config</artifactId>
	        </dependency>
	        <dependency>
	            <groupId>org.springframework.boot</groupId>
	            <artifactId>spring-boot-starter-web</artifactId>
	        </dependency>
	    </dependencies>

		</project>

		<!-- C:\java-test\idea2019\nacos_config\service1\pom.xml -->
		<?xml version="1.0" encoding="UTF-8"?>
		<project xmlns="http://maven.apache.org/POM/4.0.0"
		         xmlns:xsi="http://www.w3.org/2001/XMLSchema-instance"
		         xsi:schemaLocation="http://maven.apache.org/POM/4.0.0 http://maven.apache.org/xsd/maven-4.0.0.xsd">
		    <parent>
		        <artifactId>nacos_config</artifactId>
		        <groupId>djh.it</groupId>
		        <version>1.0-SNAPSHOT</version>
		    </parent>
		    <modelVersion>4.0.0</modelVersion>

		    <artifactId>service2</artifactId>

		    <dependencies>
		        <dependency>
		            <groupId>com.alibaba.cloud</groupId>
		            <artifactId>spring-cloud-starter-alibaba-nacos-config</artifactId>
		        </dependency>
		        <dependency>
		            <groupId>org.springframework.boot</groupId>
		            <artifactId>spring-boot-starter-web</artifactId>
		        </dependency>
		    </dependencies>

		</project>

		<!-- C:\java-test\idea2019\nacos_config\service2\pom.xml -->
1.6 创建 service1, service2 子工程的配置文件 bootstrap.yml
##  C:\java-test\idea2019\nacos_config\service1\src\main\resources\bootstrap.yml

server:
  port: 56010  #启动端口 命令行注入

spring:
  application:
    name: service1
  cloud:
    nacos:
      config:
        server-addr: 127.0.0.1:8848  #配置中心地址
        file-extension: yaml  #dataid 的名称是 application 的 name 加 file-extension 名称 :service1.yaml
        namespace: eae273b2-9298-4b99-b4aa-a3d5ea5df089  #开发环境
        group: TEST_GROUP  #测试组
##  C:\java-test\idea2019\nacos_config\service2\src\main\resources\bootstrap.yml

server:
  port: 56020  #启动端口 命令行注入

spring:
  application:
    name: service2
  cloud:
    nacos:
      config:
        server-addr: 127.0.0.1:8848  #配置中心地址
        file-extension: yaml  #dataid 的名称是 application 的 name 加 file-extension 名称 :service2.yaml
        namespace:2ee539a7-ad76-4213-a90f-30fa1cc57c70  # pro 生产环境  ( nacos-1.1.3 )
        group: TEST_GROUP  #测试组
1.7 创建 springboot 启动类 Service1BootStrap.java, Service2BootStrap.java
/**
 *  C:\java-test\idea2019\nacos_config\service1\src\main\java\djh\it\nacos\service1\Service1BootStrap.java
 *
 *  2024-3-21 springboot 启动类 *
 */

package djh.it.nacos.service1;

import org.springframework.beans.factory.annotation.Value;
import org.springframework.boot.SpringApplication;
import org.springframework.boot.autoconfigure.SpringBootApplication;
import org.springframework.web.bind.annotation.GetMapping;
import org.springframework.web.bind.annotation.RestController;

@SpringBootApplication
@RestController
public class Service1BootStrap {

    public static void main(String[] args) {
        SpringApplication.run(Service1BootStrap.class, args);
    }


    //通过 @Value 注解读取配置信息
    @Value("${common.name}")
    private String config1;

    @GetMapping("/configs")
    public String getConfigs(){
        //读取配置信息
        return config1;
    }

    //访问地址:浏览器地址栏输入:http://localhost:56010/configs  // 输出:service1 config--dev 开发环境
}
/**
 *  C:\java-test\idea2019\nacos_config\service2\src\main\java\djh\it\nacos\service2\Service2BootStrap.java
 *
 *  2024-3-21 springboot 启动类 *
 */

package djh.it.nacos.service2;

import org.springframework.beans.factory.annotation.Value;
import org.springframework.boot.SpringApplication;
import org.springframework.boot.autoconfigure.SpringBootApplication;
import org.springframework.web.bind.annotation.GetMapping;
import org.springframework.web.bind.annotation.RestController;

@SpringBootApplication
@RestController
public class Service2BootStrap {

    public static void main(String[] args) {
        SpringApplication.run(Service2BootStrap.class, args);
    }

    //通过 @Value 注解读取配置信息
    @Value("${common.name}")
    private String config2;

    @GetMapping("/configs")
    public String getConfigs(){
        //读取配置信息
        return config2;
    }

    //访问地址:浏览器地址栏输入:http://localhost:56020/configs   // 输出:service2 config--pro 生产环境
}
1.8 分别启动两个测试类的运行 main() 方法,
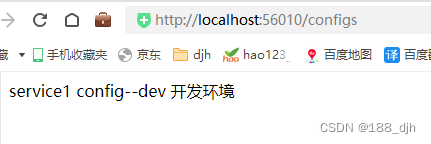
浏览器地址栏输入:http://localhost:56010/configs
输出:service1 config–dev 开发环境
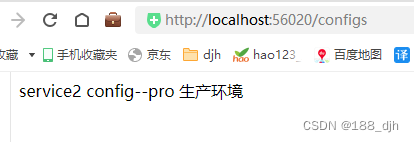
浏览器地址栏输入:http://localhost:56020/configs
输出:service2 config–pro 生产环境
二、Nacos 配置管理-应用于分布式系统-微服务读取配置
2.1   修改 service1 子模块的启动类 Service1BootStrap.java
	动态获取配置信息。
<a name="anchor02-1"></a>
/**
* C:\java-test\idea2019\nacos_config\service1\src\main\java\djh\it\nacos\service1\Service1BootStrap.java
*
* 2024-3-21 springboot 启动类 *
*/
package djh.it.nacos.service1;
import org.springframework.beans.factory.annotation.Autowired;
import org.springframework.beans.factory.annotation.Value;
import org.springframework.boot.SpringApplication;
import org.springframework.boot.autoconfigure.SpringBootApplication;
import org.springframework.boot.context.ConfigurationWarningsApplicationContextInitializer;
import org.springframework.context.ConfigurableApplicationContext;
import org.springframework.web.bind.annotation.GetMapping;
import org.springframework.web.bind.annotation.RestController;
@SpringBootApplication
@RestController
public class Service1BootStrap {
public static void main(String[] args) {
SpringApplication.run(Service1BootStrap.class, args);
}
// 注入配置文件上下文
@Autowired
private ConfigurableApplicationContext applicationContext;
//通过 @Value 注解读取配置信息
@Value("${common.name}")
private String config1;
@GetMapping("/configs")
public String getConfigs(){
//读取配置信息
// return config1;
//动态获取配置信息
return applicationContext.getEnvironment().getProperty("common.name");
}
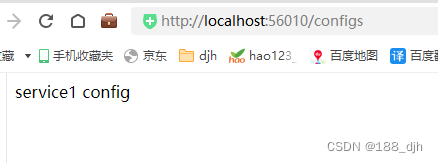
//访问地址:浏览器地址栏输入:http://localhost:56010/configs // 输出:service1 config
//访问地址:浏览器地址栏输入:http://localhost:56010/configs // 输出:service1 config 111111
}
2.2 启动 nacos 服务( /bin/startup.cmd ) 浏览器访问:http://127.0.0.1:8848/nacos
打开 nacos 控制台,并点击菜单 配置管理 --> 配置列表 --> dev
把 service1.yaml 进行【编辑】,内容改变两次
浏览器访问:http://localhost:56010/configs  查看获取参数变化。


2.3 同样,修改 service2 子模块的启动类 Service2BootStrap.java
/**
* C:\java-test\idea2019\nacos_config\service2\src\main\java\djh\it\nacos\service2\Service2BootStrap.java
*
* 2024-3-21 springboot 启动类 *
*/
package djh.it.nacos.service2;
import org.springframework.beans.factory.annotation.Autowired;
import org.springframework.beans.factory.annotation.Value;
import org.springframework.boot.SpringApplication;
import org.springframework.boot.autoconfigure.SpringBootApplication;
import org.springframework.context.ConfigurableApplicationContext;
import org.springframework.web.bind.annotation.GetMapping;
import org.springframework.web.bind.annotation.RestController;
@SpringBootApplication
@RestController
public class Service2BootStrap {
public static void main(String[] args) {
SpringApplication.run(Service2BootStrap.class, args);
}
// 注入配置文件上下文
@Autowired
ConfigurableApplicationContext applicationContext;
//通过 @Value 注解读取配置信息
@Value("${common.name}")
private String config2;
@GetMapping("/configs")
public String getConfigs(){
// //读取配置信息
// return config2;
//动态获取配置信息
return applicationContext.getEnvironment().getProperty("common.name");
}
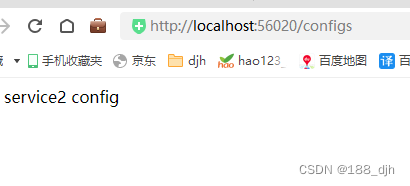
//访问地址:浏览器地址栏输入:http://localhost:56020/configs // 输出:service2 config
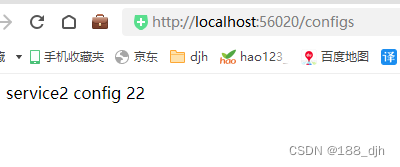
//访问地址:浏览器地址栏输入:http://localhost:56020/configs // 输出:service2 config 22
}
2.4 启动 nacos 服务( /bin/startup.cmd ) 浏览器访问:http://127.0.0.1:8848/nacos
打开 nacos 控制台,并点击菜单 配置管理 --> 配置列表 --> pro
把 service2.yaml 进行【编辑】,内容改变两次
浏览器访问:http://localhost:56020/configs  查看获取参数变化。

三、Nacos 配置管理-应用于分布式系统-自定义扩展 dataid
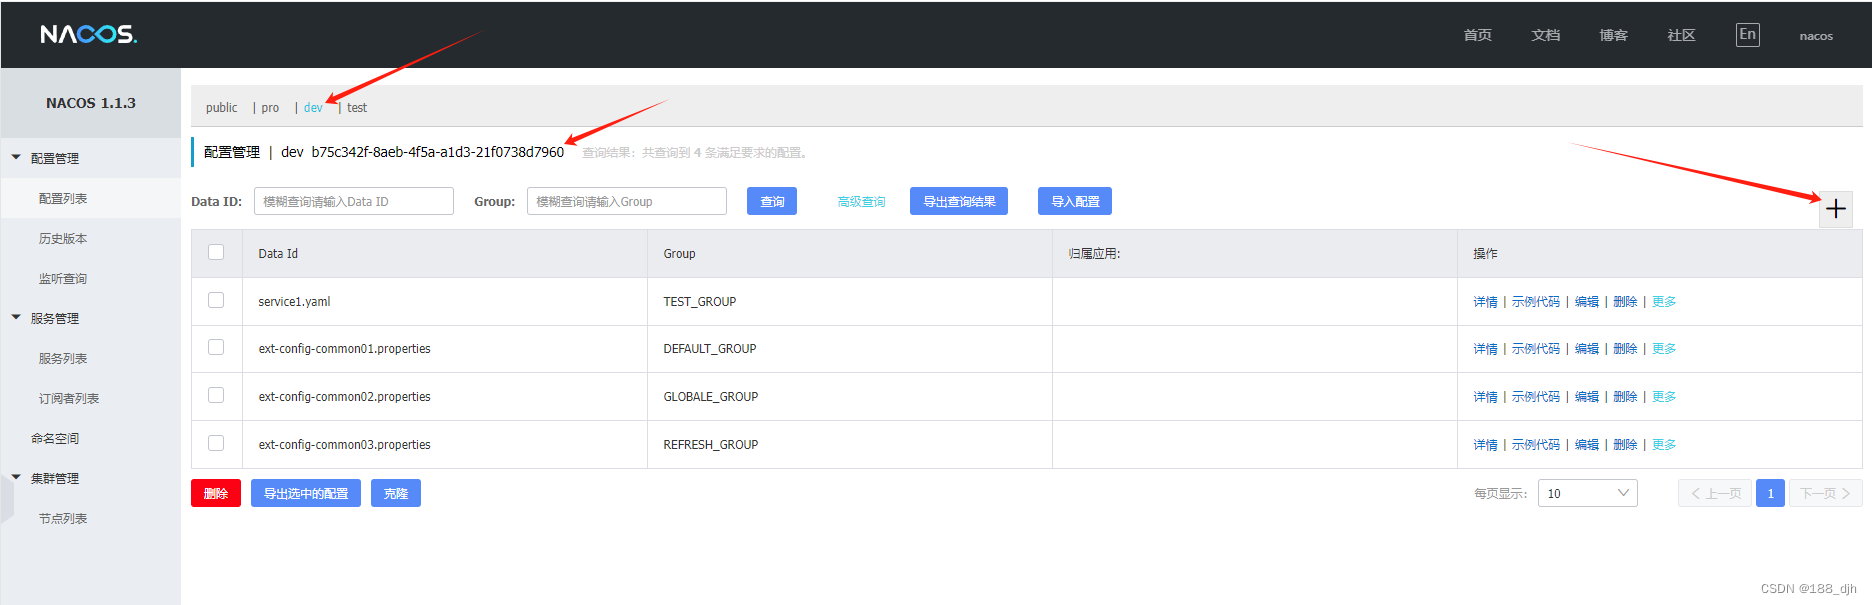
3.1 打开 nacos 控制台,并点击菜单 配置管理 --> 配置列表 --> dev :
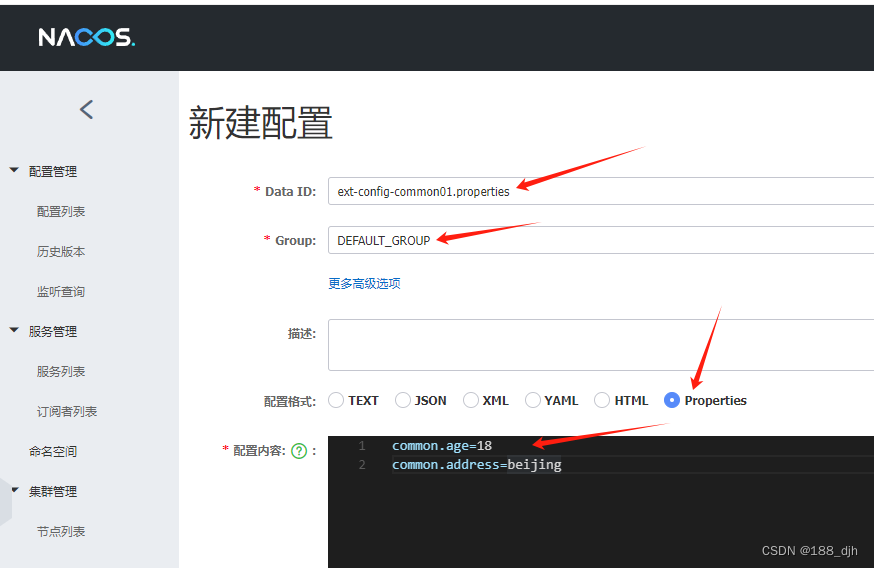
添加如下自定义扩展 Data ID 配置:
namespace : dev
Data ID : ext-config-common01.properties
Group : DEFAULT_GROUP
配置模式 :Properties
配置内容 :common.age=18
common.address=beijing
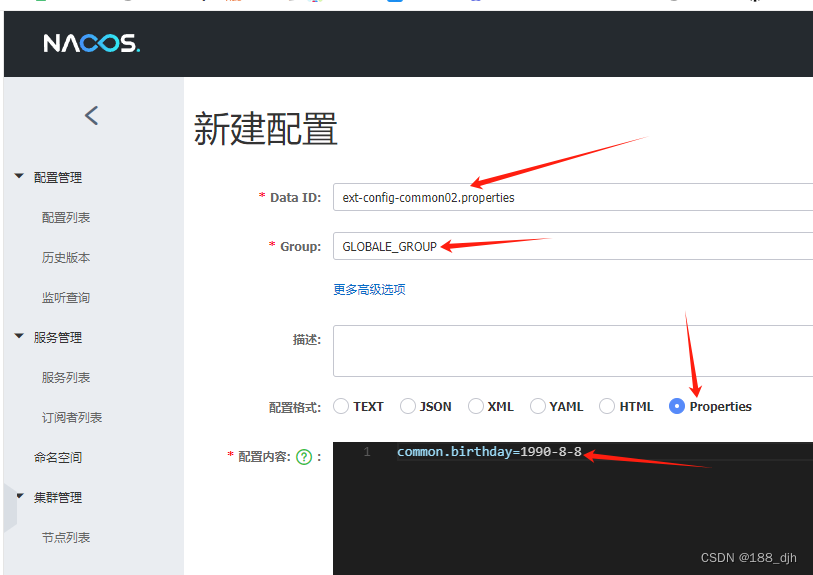
namespace : dev
Data ID : ext-config-common02.properties
Group : GLOBALE_GROUP
配置模式 :Properties
配置内容 :common.birthday=1990-8-8
namespace : dev
Data ID : ext-config-common03.properties
Group : REFRESH_GROUP
配置模式 :Properties
配置内容 :common.fullname=段子手168

3.2 修改 bootstrap.yml 配置文件,添加扩展 DataId 配置
##  C:\java-test\idea2019\nacos_config\service1\src\main\resources\bootstrap.yml

server:
  port: 56010  #启动端口 命令行注入

spring:
  application:
    name: service1  #spring应用名
  cloud:
    nacos:  # nacos作为注册中心的配置项,对应nacosDiscoveryProperties配置类
      config:
        server-addr: 127.0.0.1:8848  # nacos服务器地址
        file-extension: yaml  #dataid 的名称是 application 的 name 加 file-extension 名称 :service1.yaml
        namespace: b75c342f-8aeb-4f5a-a1d3-21f0738d7960  # dev开发环境(nacos-1.1.3)
        group: TEST_GROUP  # 测试组

        # 扩展的 DataId 配置
        # 1.Data Id 在默认的组 DEFAULT_GROUP,不支持配置的动态刷新: common.age=18  common.address=beijing
        ext-config[0]:
          data-id: ext-config-common01.properties
        # 2.Data Id 不在默认的组,不支持动态刷新:  common.birthday=1990-8-8
        ext-config[1]:
          data-id: ext-config-common02.properties
          group: GLOBALE_GROUP  # 全局组
        # 3.Data Id 既不在默认的组,也支持动态刷新: common.fullname=段子手168
        ext-config[2]:
          data-id: ext-config-common03.properties
          group: REFRESH_GROUP  # 发布组
          refresh: true  # 动态刷新
        # 自定义共享 DataId 配置,只支持 DEFAULT_GROUP 分组
#        shared-dataids: ext-config-common01.properties, ext-config-common03.properties, ext-config-common03.properties
#        refreshable: ext-config-common01.properties
3.3 修改 Service1BootStrap.java 启动类,添加 动态获取配置方法 getConfig2()
/**
 *  C:\java-test\idea2019\nacos_config\service1\src\main\java\djh\it\nacos\service1\Service1BootStrap.java
 *
 *  2024-3-21 springboot 启动类 *
 */

package djh.it.nacos.service1;

import org.springframework.beans.factory.annotation.Autowired;
import org.springframework.beans.factory.annotation.Value;
import org.springframework.boot.SpringApplication;
import org.springframework.boot.autoconfigure.SpringBootApplication;
import org.springframework.context.ConfigurableApplicationContext;
import org.springframework.web.bind.annotation.GetMapping;
import org.springframework.web.bind.annotation.RestController;

@SpringBootApplication
@RestController
public class Service1BootStrap {

    public static void main(String[] args) {
        SpringApplication.run(Service1BootStrap.class, args);
    }

    // 注入配置文件上下文
    @Autowired
    private ConfigurableApplicationContext applicationContext;

    //通过 @Value 注解读取配置信息
    @Value("${common.name}")
    private String config1;

    @GetMapping("/configs")
    public String getConfigs(){
        //读取配置信息
//        return config1;

        //动态获取配置信息
        return applicationContext.getEnvironment().getProperty("common.name");
    }

    //访问地址:浏览器地址栏输入:http://localhost:56010/configs  // 输出:service1 config
    //访问地址:浏览器地址栏输入:http://localhost:56010/configs  // 输出:service1 config 111111

    @GetMapping(value = "/configs2")
    public String getConfigs2(){
        //读取配置信息
        String name = applicationContext.getEnvironment().getProperty("common.name");
        String age = applicationContext.getEnvironment().getProperty("common.age");
        String address = applicationContext.getEnvironment().getProperty("common.address");
        String birthday = applicationContext.getEnvironment().getProperty("common.birthday");
        String fullname = applicationContext.getEnvironment().getProperty("common.fullname");

        //动态获取配置信息
        return name+"+"+age+"+"+address+"+"+birthday+"+"+fullname;
//        return age+"+"+address+"+"+birthday+"+"+fullname;

        //访问地址:浏览器地址栏输入:http://localhost:56010/configs2  // 输出:service1 config+18+beijing+1990-8-8+段子手168

        //如果是自定义共享 DataId 配置,只支持 DEFAULT_GROUP 分组
        //访问地址:浏览器地址栏输入:http://localhost:56010/configs2  // 其他分组会输出 null 值,输出:service1 config+18+beijing+null+null
    }

}
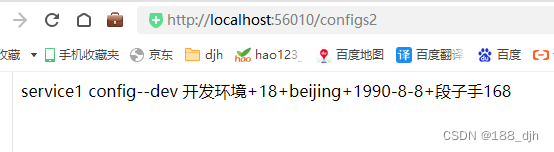
3.4 浏览器地址栏输入:http://localhost:56010/configs2
// 输出:service1 config+18+beijing+1990-8-8+段子手168
四、Nacos 配置管理-应用于分布式系统-配置优先级
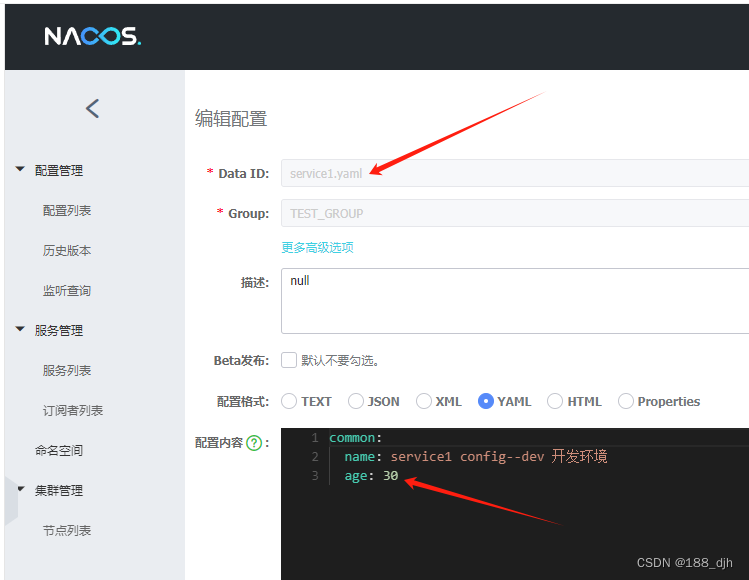
4.1 登录 http://127.0.0.1:8848/nacos 修改配置,添加 age 内容,测试 DataId 优先级。
<a name="anchor04-1"></a>
ext-config-common01.properties
common.age=18
common.address=beijing
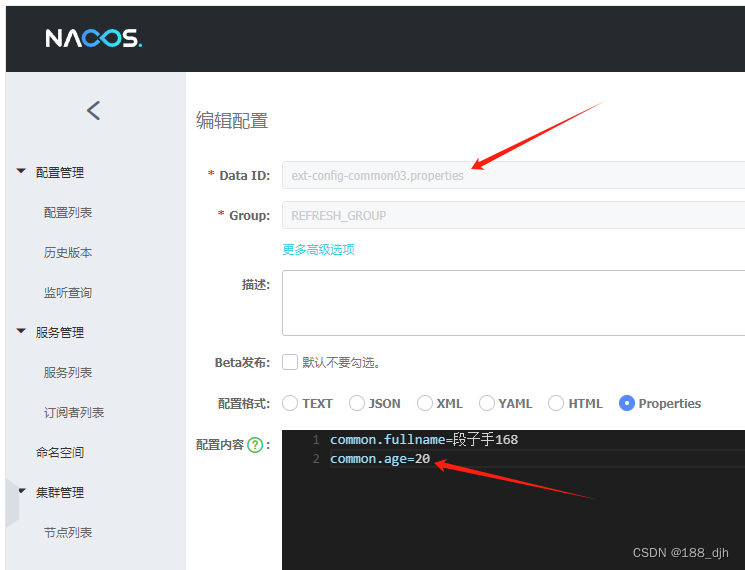
ext-config-common03.properties
common.fullname=djh
common.age=20
service1.yaml
common:
name: service1 config
age: 30
4.2 修改 bootstrap.yml 配置文件,添加注释
<a name="anchor04-2"></a>
##  C:\java-test\idea2019\nacos_config\service1\src\main\resources\bootstrap.yml

## bootstrap.yml 配置文件加载顺序优先于 application.yml 配置文件。
server:
  port: 56010  #启动端口 命令行注入

spring:
  application:
    name: service1  #spring应用名
  cloud:
    nacos:  # nacos作为注册中心的配置项,对应nacosDiscoveryProperties配置类
      config:
#        enabled: false  # 关闭配置
        # 1) 通过 application 的 name 加 file-extension 后缀名称 :service1.yaml 配置的 DataId 优先级最高。
        # server-addr: 127.0.0.1:8849, 127.0.0.1:8850, 127.0.0.1:8851  #配置中心地址
        server-addr: 127.0.0.1:8848  # nacos服务器地址
        file-extension: yaml  #dataid 的名称是 application 的 name 加 file-extension 名称 :service1.yaml
        # namespace: c3f73970-2910-4fef-b014-75b37971ed26  #开发环境(nacos-2.2.2, error)
        namespace: b75c342f-8aeb-4f5a-a1d3-21f0738d7960  # dev开发环境(nacos-1.1.3)
        group: TEST_GROUP  #测试组
        # 2)扩展的 DataId 配置 优先级次之。config external configuration
        # 1.Data Id 在默认的组 DEFAULT_GROUP,不支持配置的动态刷新: common.age=18  common.address=beijing # 优先级低于 ext-config[1]  ext-config[2]
        ext-config[0]:
          data-id: ext-config-common01.properties
        # 2.Data Id 不在默认的组,不支持动态刷新:  common.birthday=1990-8-8 # 优先级高于 ext-config[0]
        ext-config[1]:
          data-id: ext-config-common02.properties
          group: GLOBALE_GROUP  #全局组
        # 3.Data Id 既不在默认的组,也支持动态刷新: common.fullname=djh # 优先级高于 ext-config[0] 和 ext-config[1]
        ext-config[2]:
          data-id: ext-config-common03.properties
          group: REFRESH_GROUP  #发布组
          refresh: true  #动态刷新
        # 3)自定义共享 DataId 配置,只支持 DEFAULT_GROUP 分组,优先级最低。
#        shared-dataids: ext-config-common01.properties, ext-config-common03.properties, ext-config-common03.properties
#        refreshable: ext-config-common01.properties
4.3 启动 nacos 服务 (运行启动类 )
<a name="anchor04-3"></a>
/**
* C:\java-test\idea2019\nacos_config\service1\src\main\java\djh\it\nacos\service1\Service1BootStrap.java
*
* 2024-3-21 springboot 启动类 *
*/
package djh.it.nacos.service1;
import org.springframework.beans.factory.annotation.Autowired;
import org.springframework.beans.factory.annotation.Value;
import org.springframework.boot.SpringApplication;
import org.springframework.boot.autoconfigure.SpringBootApplication;
import org.springframework.context.ConfigurableApplicationContext;
import org.springframework.web.bind.annotation.GetMapping;
import org.springframework.web.bind.annotation.RestController;
@SpringBootApplication
@RestController
public class Service1BootStrap {
public static void main(String[] args) {
SpringApplication.run(Service1BootStrap.class, args);
}
// 注入配置文件上下文
@Autowired
private ConfigurableApplicationContext applicationContext;
//通过 @Value 注解读取配置信息
@Value("${common.name}")
private String config1;
@GetMapping("/configs")
public String getConfigs(){
//读取配置信息
// return config1;
//动态获取配置信息
return applicationContext.getEnvironment().getProperty("common.name");
}
//访问地址:浏览器地址栏输入:http://localhost:56010/configs // 输出:service1 config
//访问地址:浏览器地址栏输入:http://localhost:56010/configs // 输出:service1 config 111111
@GetMapping(value = "/configs2")
public String getConfigs2(){
//读取配置信息
String name = applicationContext.getEnvironment().getProperty("common.name");
String age = applicationContext.getEnvironment().getProperty("common.age");
String address = applicationContext.getEnvironment().getProperty("common.address");
String birthday = applicationContext.getEnvironment().getProperty("common.birthday");
String fullname = applicationContext.getEnvironment().getProperty("common.fullname");
//动态获取配置信息
return name+"+"+age+"+"+address+"+"+birthday+"+"+fullname;
// return age+"+"+address+"+"+birthday+"+"+fullname;
//访问地址:浏览器地址栏输入:http://localhost:56010/configs2 // 输出:service1 config+18+beijing+1990-8-8+djh
//如果是自定义共享 DataId 配置,只支持 DEFAULT_GROUP 分组
//访问地址:浏览器地址栏输入:http://localhost:56010/configs2 // 其他分组会输出 null 值,输出:service1 config+18+beijing+null+null
}
}
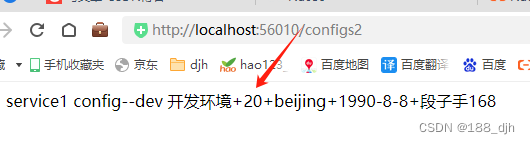
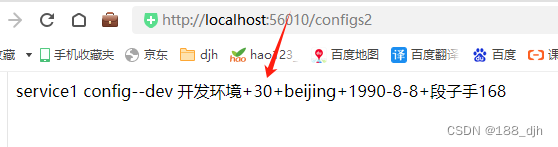
4.4 浏览器地址栏输入:http://localhost:56010/configs2
<a name="anchor04-4"></a>
//优先级最低 ext-config-common01.properties 中的 age = 18
//次之输出 ext-config-common03.properties 中 age = 20
service1 config+20+beijing+1990-8-8+djh
//优先输出 service1.yaml 中 age = 30
service1 config+30+beijing+1990-8-8+djh


 130
130


 被折叠的 条评论
为什么被折叠?
被折叠的 条评论
为什么被折叠?
 到【灌水乐园】发言


