


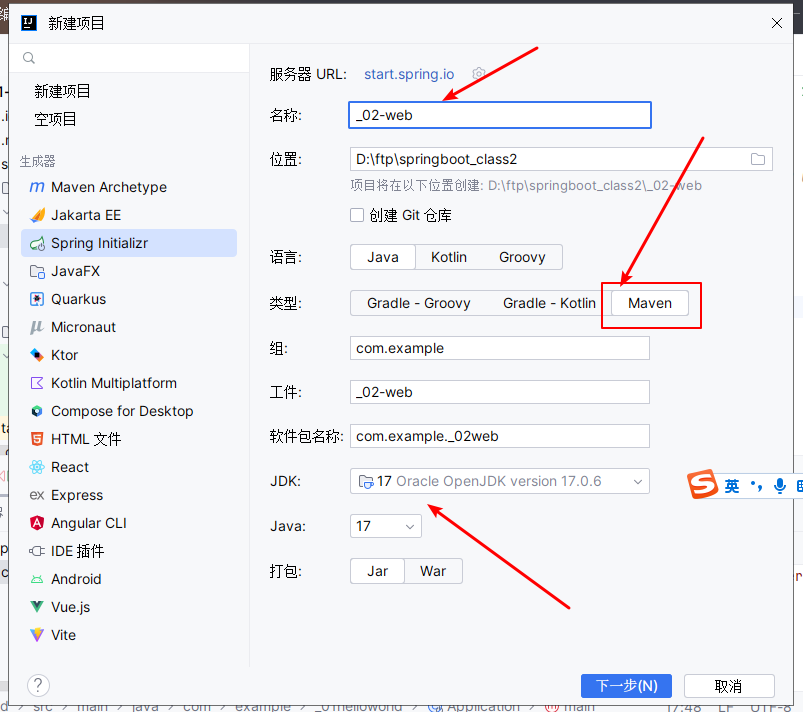
1. 新建项目
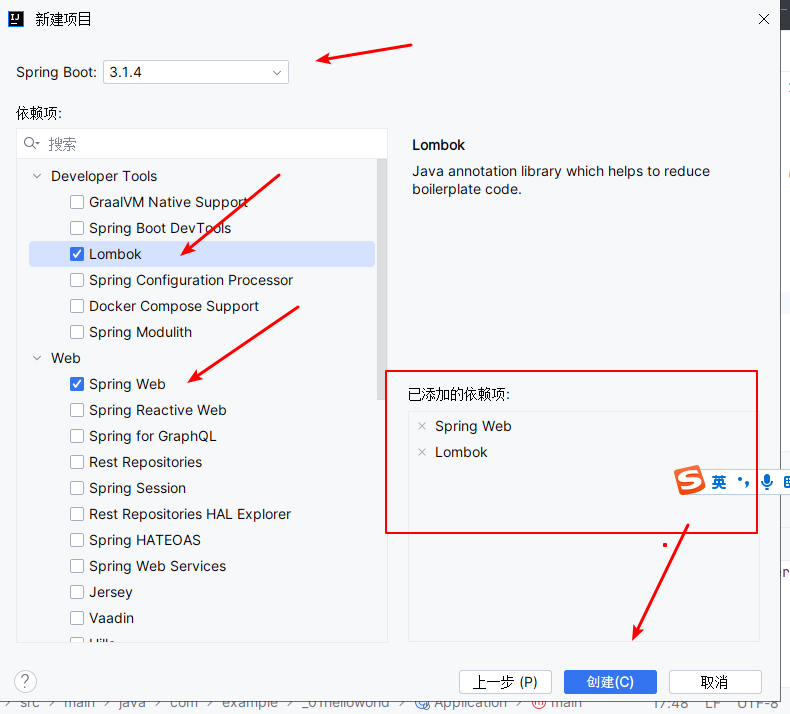
2. 选择版本 添加依赖
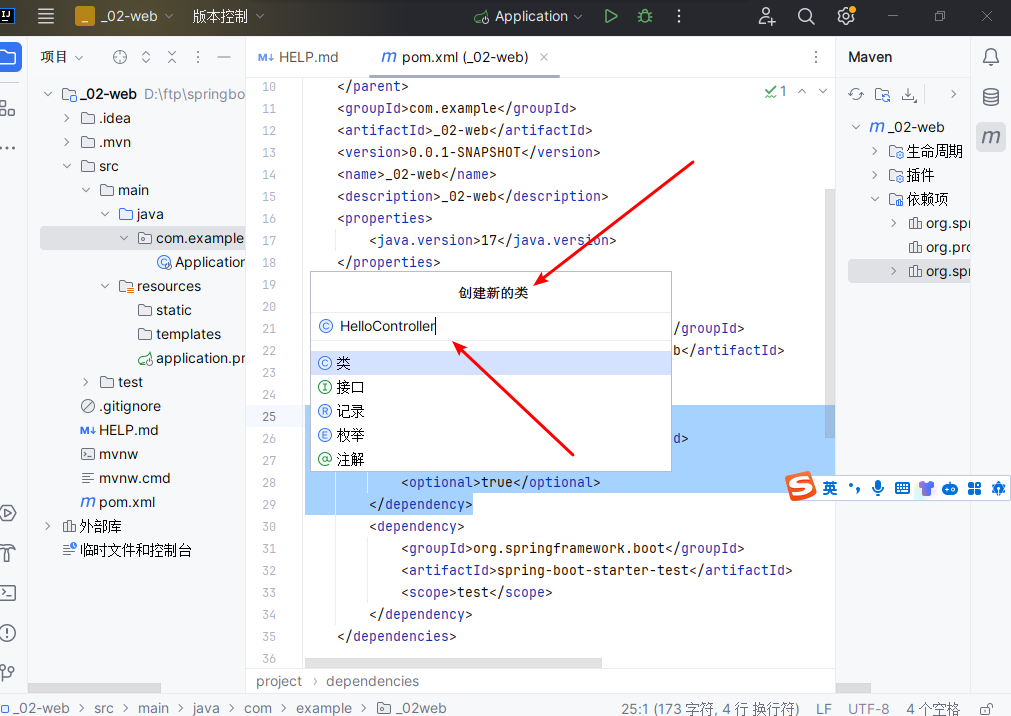
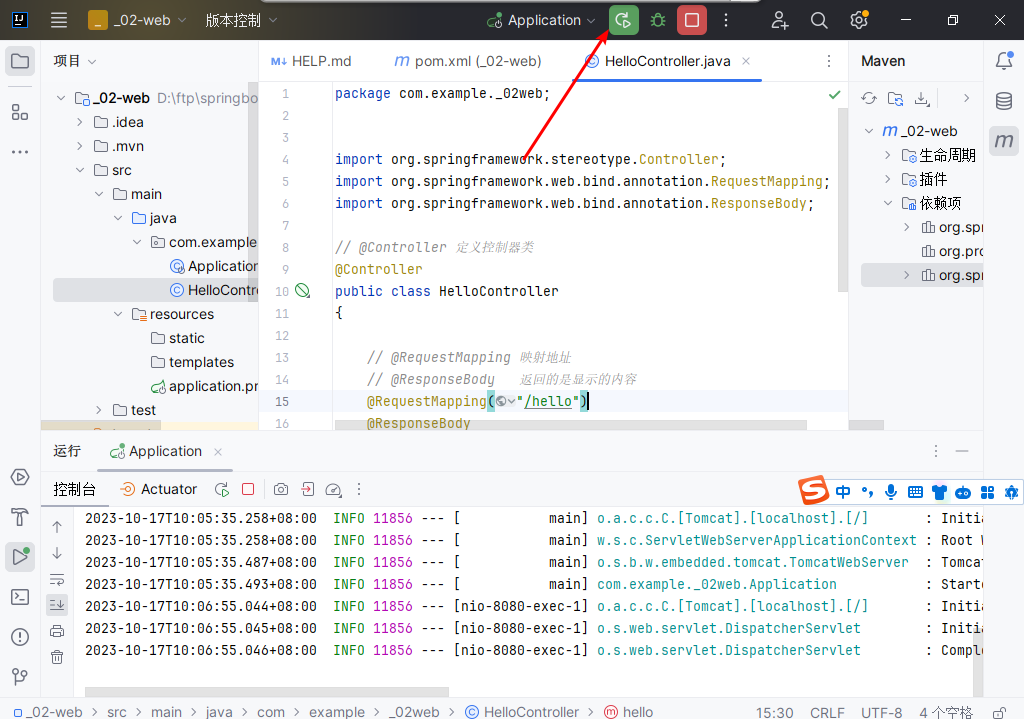
3. 新建HelloController.java
package com.example._02web;
import org.springframework.stereotype.Controller;
import org.springframework.web.bind.annotation.RequestMapping;
import org.springframework.web.bind.annotation.ResponseBody;
// @Controller 定义控制器类
@Controller
public class HelloController
{
// @RequestMapping 映射地址
// @ResponseBody 返回的是显示的内容
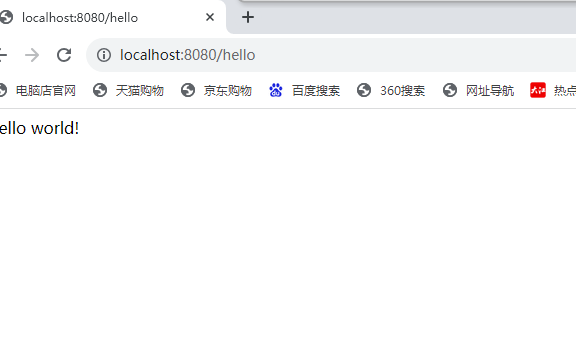
@RequestMapping("/hello")
@ResponseBody
public String hello()
{
return "Hello world!";
}
}
4. 运行项目
5. 打开浏览器查看
6. 新建学生类
package com.example._02web;

import lombok.AllArgsConstructor;
import lombok.Data;
import lombok.NoArgsConstructor;

@NoArgsConstructor
@AllArgsConstructor
@Data
public class Student {

    private int id;
    private String name;
    private int age;
}
7. helloController.java添加方法
package com.example._02web;
import org.springframework.stereotype.Controller;
import org.springframework.web.bind.annotation.RequestMapping;
import org.springframework.web.bind.annotation.ResponseBody;
// @Component 定义Srping中的Bean (放在Spring当中的Java对象)
// @Controller 定义控制器Bean
// @Service 定义业务逻辑层的Bean
// @Repository 定义数据层的Bean
@Controller
public class HelloController
{
// @RequestMapping 映射地址
// @ResponseBody 返回的是显示的内容
@RequestMapping("/hello")
@ResponseBody
public String hello()
{
return "Hello world!";
}
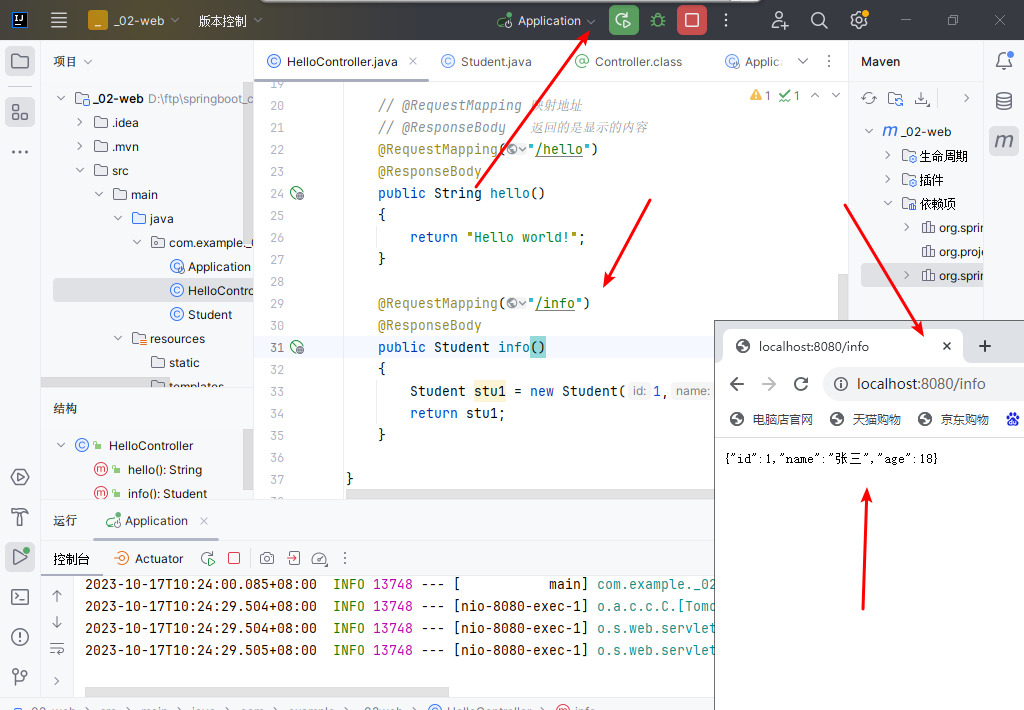
@RequestMapping("/info")
@ResponseBody
public Student info()
{
Student stu1 = new Student(1,"张三",18);
return stu1;
}
}
8. 重新运行项目,在浏览器中查看
9. 修改配置文件(测试两种不同配置文件的格式)
9.1. 修改application.propertis 修改服务器端口 及项目路径测试
server.port=9090
server.servlet.context-path=/school/
9.2. 创建applicaiton.yaml(注释掉application.propertis) 然后测试
server:
  port: 7070
  servlet:
    context-path: /school
9.3. 创建application-dev.properties和application-prod.properties和
application-dev.properties
server.port=8005
#server.servlet.context-path=/school/
application-prod.properties
server.port=8006
#server.servlet.context-path=/school/
application.properties中选择哪一个子配置生效
#server.port=9090
#server.servlet.context-path=/school/

spring.profiles.active=prod
9.4. 测试
10. 添加一个banner.txt
定制banner信息
                       _oo0oo_
                      o8888888o
                      88" . "88
                      (| -_- |)
                      0\  =  /0
                    ___/`---'\___
                  .' \\|     |// '.
                 / \\|||  :  |||// \
                / _||||| -:- |||||- \
               |   | \\\  -  /// |   |
               | \_|  ''\---/''  |_/ |
               \  .-\__  '-'  ___/-. /
             ___'. .'  /--.--\  `. .'___
          ."" '<  `.___\_<|>_/___.' >' "".
         | | :  `- \`.;`\ _ /`;.`/ - ` : | |
         \  \ `_.   \_ __\ /__ _/   .-` /  /
     =====`-.____`.___ \_____/___.-`___.-'=====
                       `=---='


     ~~~~~~~~~~~~~~~~~~~~~~~~~~~~~~~~~~~~~~~~~~~

               佛祖保佑         永无BUG
11. 添加静态页面
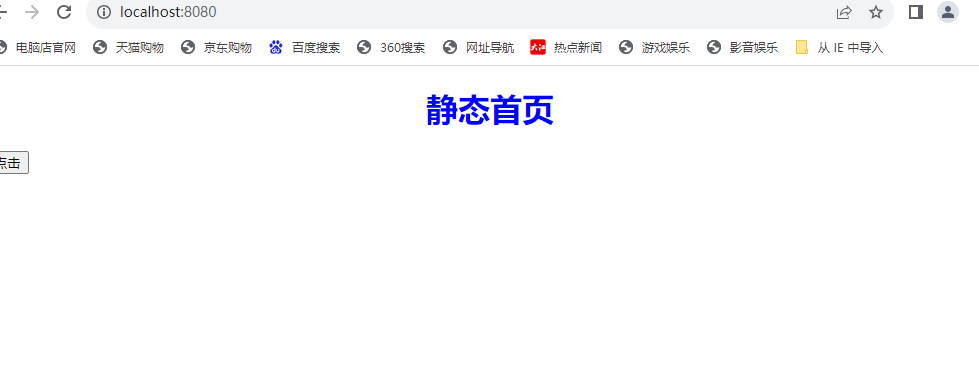
11.1. 在src/main/resources/static/新建index.html
<!DOCTYPE html>
<html lang="en">
<head>
    <meta charset="UTF-8">
    <title>首页</title>
    <link rel="stylesheet" href="css/index.css">
    <script src="js/index.js" ></script>
</head>
<body>
    <h1>静态首页</h1>
    <button onclick="foo()">点击</button>
</body>
</html>
11.2. 在src/main/resources/static/ 下新建css目录 新建index.css
h1{
    text-align: center;
    color: blue;
}
11.3. 在src/main/resources/static/新建js目录 新建index.js
function foo(){
    alert("Hello world!");
}
11.4. 测试
http://localhost:8080/


 82
82


 被折叠的 条评论
为什么被折叠?
被折叠的 条评论
为什么被折叠?
 到【灌水乐园】发言


