


对于每条语句的解释都放在了函数注释中!
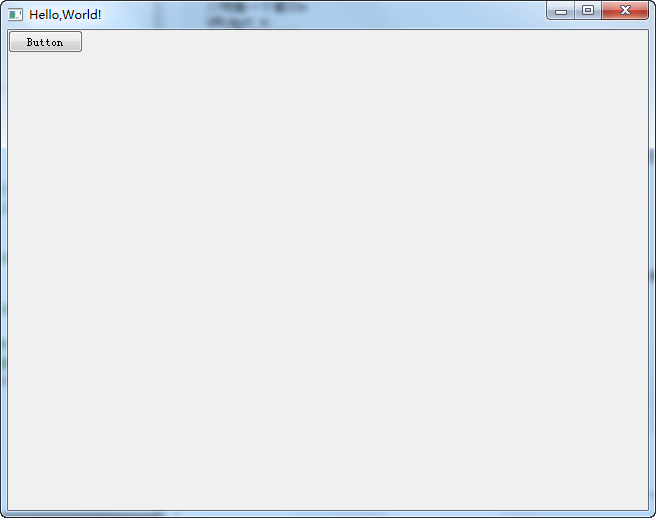
一 Qt程序初探,窗口和按钮的创建及关联
//应用程序抽象类
#include<QApplication>
//窗口类
#include<QWidget>
//按钮类
#include<QPushButton>

int main(int argc, char *argv[])
{
    //初始化应用程序
    QApplication app(argc, argv);

    //构造一个窗口w
    QWidget w;
    //设置窗口名称
    w.setWindowTitle("Hello,World!");

    //构造一个按钮,其实按钮也是一个按钮
    QPushButton button;
    //设置按钮上的文字
    button.setText("Button");
    //将按钮放在窗口里边,与窗口对象创建一个父子关系
    //窗口对象的对子关系影响显示位置,不建立这种父子关系的话就不存在相互管子,各自是独立的
    //没有父窗口的窗口成为主窗口
    button.setParent(&w);
    //为什么添加了下面一句话之后窗口就变得非常小了,只足够容纳一个按钮
    //button.show();

    //当button被点击的时候,这个窗口就被关闭了
    //QT对C++的拓展
    //第一个参数为QObject子类的对象,前面两个参数是一个对象,后面两个参数时chao
    //std::bind std::function,将两个函数绑定在一起
    QObject::connect(&button, SIGNAL(clicked()), &w, SLOT(close()));

    //显示窗口
    w.show();


    //exec中有一个消息循环,死循环
    return app.exec();
}
注意:别忘了在pro文件中添加如下代码:
QT += widgets gui
2 当行输入框及其输入时的消息提示功能及其输入密码时异常输入功能
#include<QApplication>
#include<QWidget>
//输入框头文件
#include<QLineEdit>
//提示消息
#include<QCompleter>
//#include<QDebug>

int main(int argc, char *argv[])
{
    QApplication app(argc, argv);

    QWidget w;
    w.setWindowTitle("Hello,World!");


    //添加一个输入框
    QLineEdit edit;
    edit.show();
    edit.setParent(&w);

    //输入密码,是的文字不可见
    //edit.setEchoMode(QLineEdit::Password);
    //获取密码的输入结果
   //edit.text();
    //输入提示
    edit.setPlaceholderText("请输入密码:");
    //消息提示列表
    QCompleter completer(QStringList()<<"Apple"<<"Lin"<<"Qian"<<"Qin");
    //设置completer匹配的模式
    completer.setFilterMode(Qt::MatchContains);
    //输入时自动提示输入信息
    edit.setCompleter(&completer);

    w.show();

    return app.exec();
}
界面里有一个输入框。
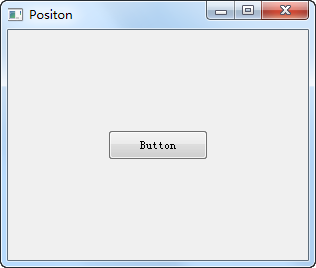
3 设置按钮的位置及其大小
#include<QApplication>
#include<QWidget>
//输入框头文件
#include<QLineEdit>
//提示消息
#include<QCompleter>
//#include<QDebug>

int main(int argc, char *argv[])
{
    QApplication app(argc, argv);

    QWidget w;
    w.setWindowTitle("Hello,World!");


    //添加一个输入框
    QLineEdit edit;
    edit.show();
    edit.setParent(&w);

    //输入密码,是的文字不可见
    //edit.setEchoMode(QLineEdit::Password);
    //获取密码的输入结果
   //edit.text();
    //输入提示
    edit.setPlaceholderText("请输入密码:");
    //消息提示列表
    QCompleter completer(QStringList()<<"Apple"<<"Lin"<<"Qian"<<"Qin");
    //设置completer匹配的模式
    completer.setFilterMode(Qt::MatchContains);
    //输入时自动提示输入信息
    edit.setCompleter(&completer);

    w.show();

    return app.exec();
}<strong>
</strong>
运行结果:不再像第一个程序一样在主界面的最左上方
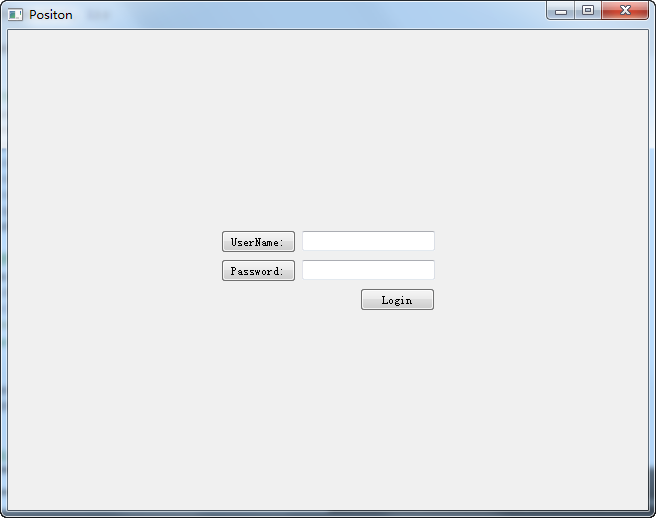
4 布局管理
#include<QApplication>
#include<QWidget>
#include<QPushButton>
#include<QLineEdit>
//窗口布局,垂直变化
#include<QVBoxLayout>
//窗口布局,水平变化
#include<QHBoxLayout>
//格子窗口
#include<QGridLayout>
//提示文字
#include<QLabel>

//#define hbox
//#define gbox
//#define lab

int main(int argc, char *argv[])
{
    QApplication app(argc, argv);

    QWidget w;
    w.setWindowTitle("Positon");

    QPushButton button;
    button.setText("UserName:");
    QPushButton button2;
    button2.setText("Password:");
//    button.setParent(&w);
    QObject::connect(&button, SIGNAL(clicked()), &w, SLOT(close()));
    w.show();

    QLineEdit edit;
    QLineEdit *password;
 //   edit.setParent(&w);

#ifdef hbox
    //layout不是一个窗口,是一个对象,主动地和主窗口创建父子关系
    //Layout在系统窗口中会自动排列窗口,会随着窗口的变化而变化
    //注意有了layout之后,button按钮和edit编辑框的setParent函数可以注释掉了
    QHBoxLayout layout;
    //右边有个弹簧
    layout.addStretch(1);
    //layout里边添加两个窗口,同时加的话把按钮挤到中间
    layout.addWidget(&button);
    //上一个按钮和下一个按钮之间有些许距离,如50个像素
    layout.addSpacing(50);
    layout.addWidget(&edit);
    //添加一个弹簧,编辑器窗口不会随着主窗口的变化而变化
    //左边有一个弹簧
    layout.addStretch(1);
#endif

#ifdef gbox
    QGridLayout layout;
    //将button按钮添加到第0行第0列
    layout.addWidget(&button, 0, 0);
    layout.addWidget(&edit, 0, 1);
    layout.addWidget(new QPushButton("10"), 1, 0);
    layout.addWidget(new QPushButton("11"), 1, 1);
    //添加弹簧把对象挤兑到左上角
    //添加第2列的弹簧
    layout.setColumnStretch(2, 1);
    //添加第2行的弹簧
    layout.setRowStretch(2, 1);
#endif

    QGridLayout layout;
    layout.setRowStretch(0,1);
    layout.setColumnStretch(3,1);
    layout.addWidget(&button, 1, 1);
    layout.addWidget(&edit,1,2);
    layout.addWidget(&button2, 2, 1);
    layout.addWidget(password = new QLineEdit(), 2, 2);
    password->setEchoMode(QLineEdit::Password);

    //Layout是可以嵌套的
    QHBoxLayout *hbox;
    layout.addLayout(hbox = new QHBoxLayout, 3, 2);
    hbox->addStretch(1);
    hbox->addWidget(new QPushButton("Login"));
    //layout.addWidget(new QPushButton("登录"), 3, 2);


    layout.setRowStretch(4,1);
    layout.setColumnStretch(0,1);

    w.show();
    //整个系统窗口中添加layout
    w.setLayout(&layout);
    app.exec();
}
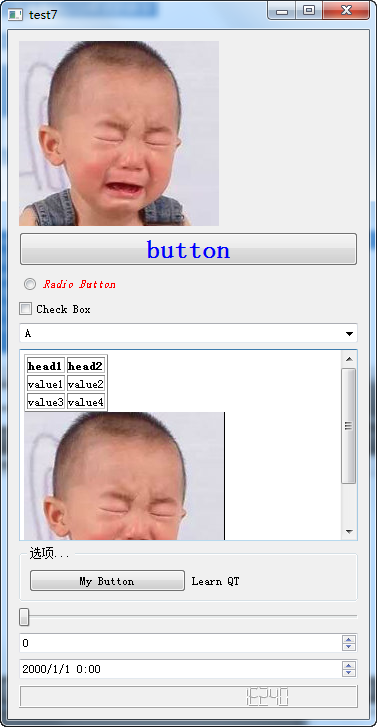
5 Qt按钮,下滑框选项,副文本项等等
首先创建一个类,在pro文件中添加QT += widgets gui [enter] CONFIG += C++11
头文件mywidget.h
#ifndef MYWIDGET_H
#define MYWIDGET_H

#include <QWidget>
#include<QTextEdit>

class MyWidget : public QWidget
{
    Q_OBJECT
public:
    explicit MyWidget(QWidget *parent = 0);
    QTextEdit* myedit;
signals:

public slots:
};

#endif // MYWIDGET_H
#include "mywidget.h"
#include<QApplication>
#include<QLabel>        //显示单一行文字或图片
#include<QPushButton>
#include<QLineEdit>     //单行输入框
#include<QComboBox>     //下滑框选项
#include<QCheckBox>     //可以打勾的框
#include<QRadioButton>  //单选框
#include<QTextEdit>     //多行文本框,副文本
#include<QTextBrowser>  //只读文本
#include<QGroupBox>     //小框,包含内容,用来分类的
#include<QSlider>       //模拟方式显示数值

#include<QSpinBox>      //数字,通过按钮可加可减
#include<QDateEdit>
#include<QDateTimeEdit>
#include<QTimeEdit>
#include<QTabWidget>    //不算控件
#include<QVBoxLayout>

#include<QCompleter>
#include<QHBoxLayout>
#include<QDebug>
#include<QPixmap>       //添加图像

#include<QLCDNumber>    //用来显示LCD样式的数字

MyWidget::MyWidget(QWidget *parent) : QWidget(parent)
{
    QVBoxLayout *layout = new QVBoxLayout(this);
    QLabel *label;          //单独显示一行文字或图片
    QComboBox *combo;       //下滑框
    QPushButton *button;
    QRadioButton *radio;
    QCompleter *completer;
    QTextEdit *edit;
    QGroupBox *groupbox;

    //label支持html格式
    layout->addWidget(label = new QLabel("<font color = red><h1><a href = \"http://www.baidu.com\">百度</a><h1></font>")); //显示一行文字
    //label显示图片,之前按钮上的文字就换成了图片
    label->setPixmap(QPixmap("pic.jpg"));
    //通过在test7.pro里边添加CONFIG+=C++11将这里的连接函数改成如下的形式
    //当label被激发的时候运行lamda表达式的内容
    connect(label, &QLabel::linkActivated, [](QString str){
        qDebug()<<str;      //打印获取的内容,此时打印www.baidu.com
    });

    layout->addWidget(button = new QPushButton("button"));
    //设置按钮字体为黑体,16个像素,通过CSS设计按钮
    //注意setStyleSheet是Widget类的一个函数,所以其中所声明的所有函数都可以调用该函数
    button->setStyleSheet("font: bold 26px; color: blue");

    layout->addWidget(radio = new QRadioButton("Radio Button"));
    radio->setStyleSheet("color:red; font:italic 12px; padding: 5px");
    connect(radio, &QRadioButton::clicked, [](bool v){
        qDebug()<<v;        //radio被选中之后就会打印输出true
    });


    layout->addWidget(new QCheckBox("Check Box"));

    //下拉框选项
    layout->addWidget(combo = new QComboBox);
    combo->addItem("A");
    combo->addItem("B");
    //将下拉框设置成可编辑的
    combo->setEditable(true);
    //编辑时有相同信息就会自动提示
    combo->setCompleter(completer = new QCompleter(QStringList()<<"Apple"<<"Lin"<<"Qian"<<"Qin"));
    completer->setFilterMode(Qt::MatchContains);
    //或者换成默认的选项
    //combo->setCompleter(new QCompleter(combo->model()));
    //注意currentIndexChanged不需要参数,因此不用加括号,只需要函数名即可
    connect(combo, &QComboBox::currentTextChanged, [](QString str){
        qDebug()<<str;
    });

    layout->addWidget(edit = new QTextEdit);
    edit->setText("<table border = 1><tr><th>head1</th><th>head2</th></tr>"
                  "<tr><td>value1</td><td>value2</td></tr>"
                  "<tr><td>value3</td><td>value4</td></tr></table>"
                  "<img src = pic.jpg></img>");
    //竖着的滚动条当需要时有,不需要时就没有
    edit->setVerticalScrollBarPolicy(Qt::ScrollBarAsNeeded);
    //横着的滚动条设置为没有
    edit->setHorizontalScrollBarPolicy(Qt::ScrollBarAlwaysOff);
    //捕获输入
    myedit = edit;
    connect(edit, &QTextEdit::textChanged, [&](){
        //因为edit在外边,所以无法直接打印内容,补习先要捕获
        //捕获方法就是在父类中重新定义一个myedit,
        qDebug()<<myedit->toPlainText();        //实时输出编辑的内容
    });

    layout->addWidget(groupbox = new QGroupBox("选项..."));
    //QGroupBox里边可以容纳更小的空间
    QHBoxLayout * hboxlay;
    groupbox->setLayout(hboxlay = new QHBoxLayout);
    hboxlay->addWidget(new QPushButton("My Button"));
    hboxlay->addWidget(new QLabel("Learn QT"));

    //Qslidet和QSpinBox接口函数都是一样的
    QSlider *slider;

    //括号中的参数代表划杠是横着的,默认的话是竖着的
    layout->addWidget(slider = new QSlider(Qt::Horizontal));
    //设置最大值,最小值
    slider->setMaximum(100);
    slider->setMinimum(0);;
    //获取其值
    //slider->value();

    QSpinBox *spinbox;
    layout->addWidget(spinbox = new QSpinBox);
    spinbox->setMaximum(100);
    spinbox->setMinimum(0);

    //slider的值变为多少就将SpinBox中的值设置为多少,二者之间相互关联
    connect(slider, SIGNAL(valueChanged(int)), spinbox, SLOT(setValue(int)));
    //spinbox的值变为多少就将slider中的值设置为多少,二者之间相互关联
    connect(spinbox, SIGNAL(valueChanged(int)), slider, SLOT(setValue(int)));

    layout->addWidget(new QDateTimeEdit);

    QLCDNumber *lcd;
    //QLCDNumber中的参数代表可以容纳多少数字
    layout->addWidget(lcd = new QLCDNumber(20));
    //按照十六进的方式显示数字
    lcd->setMode(QLCDNumber::Hex);
    lcd->display(123456);
}

int main(int argc, char *argv[])
{
    QApplication app(argc, argv);

    MyWidget w;
    w.show();

    app.exec();
}


 7465
7465

 被折叠的 条评论
为什么被折叠?
被折叠的 条评论
为什么被折叠?
 到【灌水乐园】发言


