


目录
官网地址:https://spring.io/
一、Spring 能做什么
Spring 框架是一个功能强大且灵活的框架,它可以用于构建各种类型的企业级应用程序,包括 Web 应用程序、RESTful 服务、批处理应用程序、消息驱动的应用程序等。它的设计目标是提高开发效率、降低代码复杂性,并促进可维护性和可测试性。它极大的简化了开发过程,降低了开发难度。
1、DI 依赖注入(Dependency Injection),实现松耦合、可测试和可维护的代码。通过DI等技术实现了控制反转(Inversion of Control,IoC)。
2、AOP面向切面编程(Aspect-Oriented Programming),将横切关注点(例如事务管理、日志记录等)从核心业务逻辑中分离出来,以增强代码的可重用性、可维护性和可扩展性。
3、声明式事务管理,通过声明式的方式管理事务,而无需显式编写繁琐的事务管理代码。它可以与各种事务管理器(如 JDBC、Hibernate、JPA 等)集成。
4、Web 开发支持,包括 MVC 框架、RESTful Web 服务支持、表单处理、验证、文件上传等。
5、集成各种数据访问技术,包括 JDBC、ORM(如 Hibernate、JPA)、NoSQL 数据库(如 MongoDB、Redis)等。
6、消息传递和调度,包括 JMS(Java Message Service)、AMQP(Advanced Message Queuing Protocol)、任务调度器等。
7、安全性,包括认证(身份验证)、授权(访问控制)、加密、安全标记语言(Security Expression Language)等。
8、缓存管理,如 Ehcache、Redis、Memcached 等。
9、测试支持,包括模拟对象、测试数据管理、事务管理等。
二、简单示例
1、添加Spring
(1)方式一:手动下载的jar包
https://repo.spring.io/ui/native/libs-snapshot-local/org/springframework/spring/6.0.0-SNAPSHOT/
(2)方式二:添加maven依赖
        <dependency>
            <groupId>org.springframework</groupId>
            <artifactId>spring-context</artifactId>
            <version>5.3.29</version>
        </dependency>
2、编写Bean
写一个测试bean。
package top.yiqifu.study.p001_base;
import java.util.*;
public class Test011_Bean
{
    public Test011_Bean(){
    }
    public Test011_Bean(int id, String title) {
        this.id = id;
        this.title = title;
    }

    private int id;
    private String title;
    private String[] list1;
    private List<String> list2;
    private List<String> list3;
    private Set<String> set1;
    private Map<Integer, String> map1;
    private Map<Integer, String> map2;
    private Properties config1;
    private Properties config2;

    public int getId() {
        return id;
    }
    public void setId(int id) {
        this.id = id;
    }
    public String getTitle() {
        return title;
    }
    public void setTitle(String title) {
        this.title = title;
    }
    public String[] getList1() {
        return list1;
    }
    public void setList1(String[] list1) {
        this.list1 = list1;
    }
    public List<String> getList2() {
        return list2;
    }
    public void setList2(List<String> list2) {
        this.list2 = list2;
    }
    public List<String> getList3() {
        return list3;
    }
    public void setList3(List<String> list3) {
        this.list3 = list3;
    }
    public Set<String> getSet1() {
        return set1;
    }
    public void setSet1(Set<String> set1) {
        this.set1 = set1;
    }
    public Map<Integer, String> getMap1() {
        return map1;
    }
    public void setMap1(Map<Integer, String> map1) {
        this.map1 = map1;
    }
    public Map<Integer, String> getMap2() {
        return map2;
    }
    public void setMap2(Map<Integer, String> map2) {
        this.map2 = map2;
    }
    public Properties getConfig1() {
        return config1;
    }
    public void setConfig1(Properties config1) {
        this.config1 = config1;
    }
    public Properties getConfig2() {
        return config2;
    }
    public void setConfig2(Properties config2) {
        this.config2 = config2;
    }

    @Override
    public String toString() {
        StringBuilder sb = new StringBuilder();
        sb.append("Test011_Bean {")
                .append("id=").append(id)
                .append(", title='").append(title).append('\'')
                .append(", list1=").append(Arrays.toString(list1))
                .append(", list2=").append(list2ToString())
                .append(", set1=").append(set1ToString())
                .append(", map1=").append(map1ToString())
                .append(", map2=").append(map2ToString())
                .append(", config1=").append(config1)
                .append(", config2=").append(config2)
                .append('}');
        return sb.toString();
    }

    private String list2ToString() {
        if (list2 == null) {
            return "null";
        }
        StringBuilder sb = new StringBuilder();
        sb.append("[");
        for (int i = 0; i < list2.size(); i++) {
            sb.append(list2.get(i));
            if (i < list2.size() - 1) {
                sb.append(", ");
            }
        }
        sb.append("]");
        return sb.toString();
    }

    private String set1ToString() {
        if (set1 == null) {
            return "null";
        }
        StringBuilder sb = new StringBuilder();
        sb.append("[");
        Iterator<String> iterator = set1.iterator();
        while (iterator.hasNext()) {
            sb.append(iterator.next());
            if (iterator.hasNext()) {
                sb.append(", ");
            }
        }
        sb.append("]");
        return sb.toString();
    }

    private String map1ToString() {
        if (map1 == null) {
            return "null";
        }
        StringBuilder sb = new StringBuilder();
        sb.append("{");
        Iterator<Map.Entry<Integer, String>> iterator = map1.entrySet().iterator();
        while (iterator.hasNext()) {
            Map.Entry<Integer, String> entry = iterator.next();
            sb.append(entry.getKey()).append("=").append(entry.getValue());
            if (iterator.hasNext()) {
                sb.append(", ");
            }
        }
        sb.append("}");
        return sb.toString();
    }

    private String map2ToString() {
        if (map2 == null) {
            return "null";
        }
        StringBuilder sb = new StringBuilder();
        sb.append("{");
        for (Map.Entry<Integer, String> entry : map2.entrySet()) {
            sb.append(entry.getKey()).append("=").append(entry.getValue()).append(", ");
        }
        if (!map2.isEmpty()) {
            sb.delete(sb.length() - 2, sb.length());
        }
        sb.append("}");
        return sb.toString();
    }

}
演示静态工厂的类
package top.yiqifu.study.p001_base;

public class Test021_StaticBeanFactory
{
    public static Test011_Bean create(){
        return new Test011_Bean();
    }
}
演示动态工厂的类
package top.yiqifu.study.p001_base;


public class Test022_DynamicBeanFactory
{
    public Test011_Bean create(){
        return new Test011_Bean();
    }
}
3、配置bean
在applicationContext.xml文件中配置bean。
<?xml version="1.0" encoding="UTF-8" ?>

<beans xmlns="http://www.springframework.org/schema/beans"
       xmlns:xsi="http://www.w3.org/2001/XMLSchema-instance"
       xsi:schemaLocation="http://www.springframework.org/schema/beans
        http://www.springframework.org/schema/beans/spring-beans.xsd"
>

    <bean id="test001" name="n1,n2,n3" class="top.yiqifu.study.p001_base.Test011_Bean"></bean>
    <alias name="test001" alias="test001-new"/>

    <bean id="test011" class="top.yiqifu.study.p001_base.Test021_StaticBeanFactory" factory-method="create"></bean>

    <bean id="dynamic-factory" class="top.yiqifu.study.p001_base.Test022_DynamicBeanFactory"></bean>
    <bean id="test012" factory-bean="dynamic-factory" factory-method="create"></bean>

    <bean id="test021" class="top.yiqifu.study.p001_base.Test011_Bean" scope="prototype"></bean>

    <bean id="test031" class="top.yiqifu.study.p001_base.Test011_Bean">
        <constructor-arg name="id" value="11"></constructor-arg>
        <constructor-arg index="1" value="构造方法注入值"></constructor-arg>
    </bean>

    <bean id="test041" class="top.yiqifu.study.p001_base.Test011_Bean">
        <property name="id">
            <value>12</value>
        </property>
        <property name="title" value="属性注入的值"/>
    </bean>

    <bean id="test051" class="top.yiqifu.study.p001_base.Test011_Bean">
        <property name="list1">
            <array>
                <value>数组值1</value>
                <value>数组值2</value>
                <value>数组值3</value>
            </array>
        </property>
    </bean>

    <bean id="test052" class="top.yiqifu.study.p001_base.Test011_Bean">
        <property name="list2">
            <array>
                <value>列表值1</value>
                <value>列表值2</value>
                <value>列表值3</value>
            </array>
        </property>
        <property name="list3">
            <list>
                <value>列表值1</value>
                <value>列表值2</value>
                <value>列表值3</value>
            </list>
        </property>
    </bean>

    <bean id="test061" class="top.yiqifu.study.p001_base.Test011_Bean">
        <property name="set1">
            <array>
                <value>Set值1</value>
                <value>Set值2</value>
                <value>Set值3</value>
            </array>
        </property>
    </bean>

    <bean id="test071" class="top.yiqifu.study.p001_base.Test011_Bean">
        <property name="map1">
            <props>
                <prop key="1">方式一MAP值1</prop>
                <prop key="2">方式一MAP值2</prop>
                <prop key="2">方式一MAP值3</prop>
            </props>
        </property>
    </bean>

    <bean id="test072" class="top.yiqifu.study.p001_base.Test011_Bean">
        <property name="map2">
            <map>
                <entry key="1" value="方式二MAP值1"></entry>
                <entry key="2" value="方式二MAP值2"></entry>
                <entry key="3" value="方式二MAP值3"></entry>
            </map>
        </property>
    </bean>

    <bean id="test081" class="top.yiqifu.study.p001_base.Test011_Bean">
        <property name="config1">
            <value>
                name=test-spring
                addr=127.0.0.1,
                port=8801
            </value>
        </property>
        <property name="config2">
            <props>
                <prop key="name">test-spring</prop>
                <prop key="addr">127.0.0.1</prop>
                <prop key="port">127.0.0.1</prop>
            </props>
        </property>
    </bean>

    <!--<import resource="applicationContext-01.xml"></import>-->
    <import resource="applicationContext-0*.xml"></import>
</beans>
第二个配置文件applicationContext-01.xml
<?xml version="1.0" encoding="UTF-8" ?>

<beans xmlns="http://www.springframework.org/schema/beans"
       xmlns:xsi="http://www.w3.org/2001/XMLSchema-instance"
       xsi:schemaLocation="http://www.springframework.org/schema/beans
        http://www.springframework.org/schema/beans/spring-beans.xsd"
       xmlns:c="http://www.springframework.org/schema/c"
       xmlns:p="http://www.springframework.org/schema/p"
    >

    <bean id="test091" class="top.yiqifu.study.p001_base.Test011_Bean"
          c:id="91" c:title="命名空间构造方法注入" ></bean>

    <bean id="test092" class="top.yiqifu.study.p001_base.Test011_Bean"
          p:id="92" p:title="命名空间属性注入" p:list1="4,5,6"></bean>
</beans>
4、在程序中调用bean
package top.yiqifu.study.p001_base;

import org.springframework.context.support.ClassPathXmlApplicationContext;


public class Test001_SpringBase
{
    // Spring 基础示例
    public static void main( String[] args )
    {
        //ClassPathXmlApplicationContext context = new ClassPathXmlApplicationContext("applicationContext.xml","applicationContext-01.xml");
        ClassPathXmlApplicationContext context = new ClassPathXmlApplicationContext("config/applicationContext.xml");

        // 通过 id, name, alias 获取 bean
        Test011_Bean test001 = context.getBean("test001", Test011_Bean.class);
        Test011_Bean test002 = context.getBean("n1", Test011_Bean.class);
        Test011_Bean test003 = context.getBean("n2", Test011_Bean.class);
        Test011_Bean test004 = context.getBean("n3", Test011_Bean.class);
        Test011_Bean test005 = context.getBean("test001-new", Test011_Bean.class);

        System.out.println( test001 );
        test001.setId(100);
        System.out.println( test002);

        System.out.println( test003 );
        test003.setTitle("test");
        System.out.println( test004 );

        System.out.println( test005 );


        // 通过通过静态工厂创建的bean
        Test011_Bean test011 = context.getBean("test011", Test011_Bean.class);
        // 通过通过静态工厂创建的bean
        Test011_Bean test012 = context.getBean("test012", Test011_Bean.class);

        // 修改作用域为prototype后两次获取的bean不一样
        Test011_Bean test021 = context.getBean("test021", Test011_Bean.class);
        Test011_Bean test022 = context.getBean("test021", Test011_Bean.class);
        System.out.println("未修改作用域前hash值是否相同:"+Integer.compare(test001.hashCode(),test002.hashCode()));
        System.out.println("修改作用域后hash值是否相同:"+Integer.compare(test021.hashCode(),test022.hashCode()));


        // 构造方法注入值
        Test011_Bean test031 = context.getBean("test031", Test011_Bean.class);
        System.out.println( test031 );

        // 一般属性方法注入值
        Test011_Bean test041 = context.getBean("test041", Test011_Bean.class);
        System.out.println( test041 );

        // 数组属性方法注入值
        Test011_Bean test051 = context.getBean("test051", Test011_Bean.class);
        System.out.println( test051 );

        // 列表属性方法注入值
        Test011_Bean test052 = context.getBean("test052", Test011_Bean.class);
        System.out.println( test052 );

        // Set属性方法注入值
        Test011_Bean test061 = context.getBean("test061", Test011_Bean.class);
        System.out.println( test061 );

        // map属性方法注入值
        Test011_Bean test071 = context.getBean("test071", Test011_Bean.class);
        System.out.println( test071 );
        Test011_Bean test072 = context.getBean("test072", Test011_Bean.class);
        System.out.println( test072 );

        // Properties属性方法注入值
        Test011_Bean test081 = context.getBean("test081", Test011_Bean.class);
        System.out.println( test081 );
        System.out.println( test081.getConfig1().getProperty("name") );


        // 命令空间构造方法注入值
        Test011_Bean test091 = context.getBean("test091", Test011_Bean.class);
        System.out.println( test091 );

        // 命令空间属性注入值
        Test011_Bean test092 = context.getBean("test092", Test011_Bean.class);
        System.out.println( test092 );

    }
}三、Bean基本配置
1、根据元素
<beans xmlns="http://www.springframework.org/schema/beans"
       xmlns:xsi="http://www.w3.org/2001/XMLSchema-instance"
       xsi:schemaLocation="http://www.springframework.org/schema/beans
        http://www.springframework.org/schema/beans/spring-beans.xsd"
>

</beans>
(1)指定默认命名空间:xmlns="http://www.springframework.org/schema/beans"
(2)指定xsi(xml schema instance) 规范:xmlns:xsi="http://www.w3.org/2001/XMLSchema-instance"
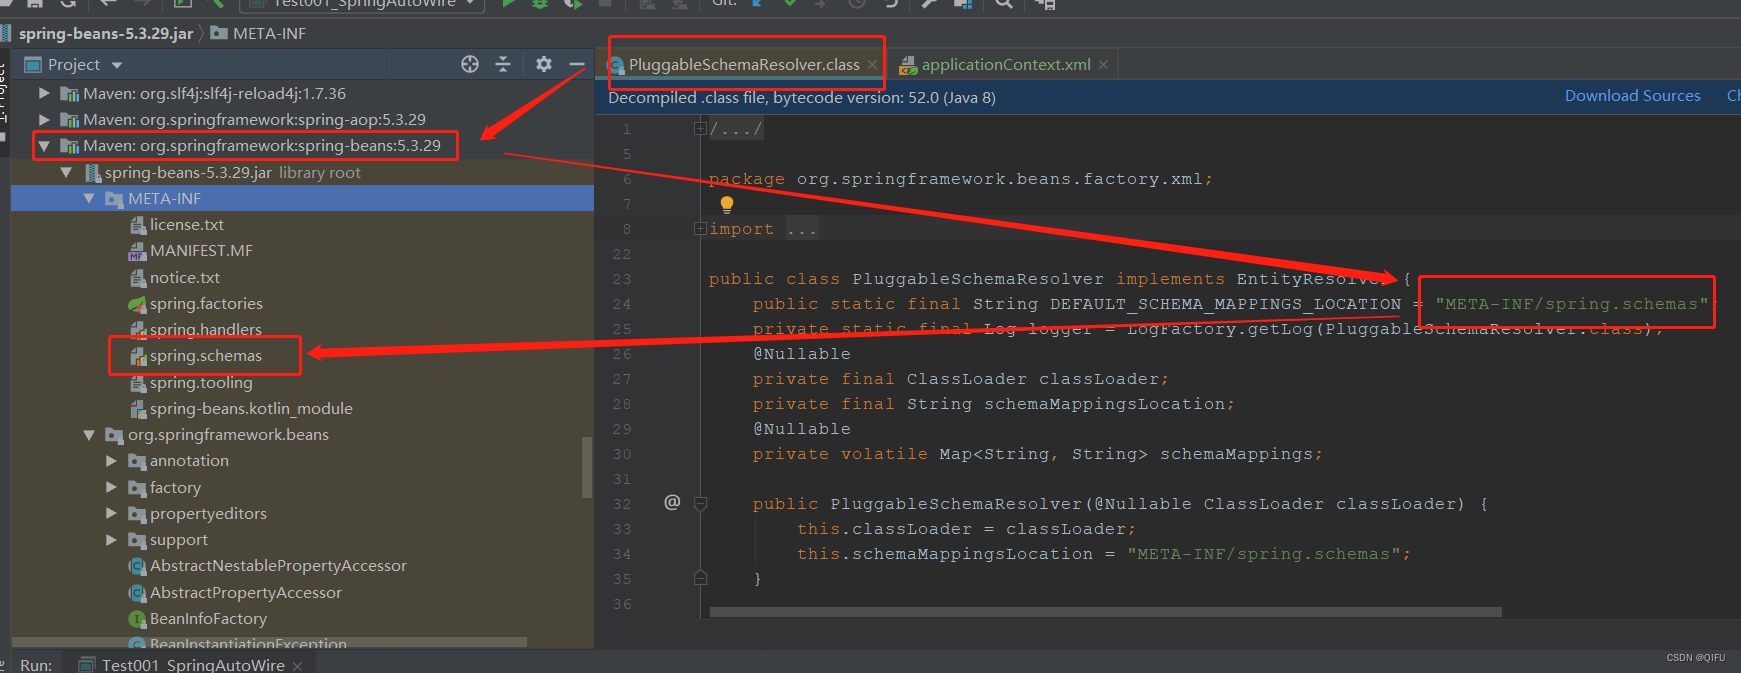
(3)指定schema资源:xsi:schemaLocation="http://www.springframework.org/schema/beans
http://www.springframework.org/schema/beans/spring-beans.xsd"
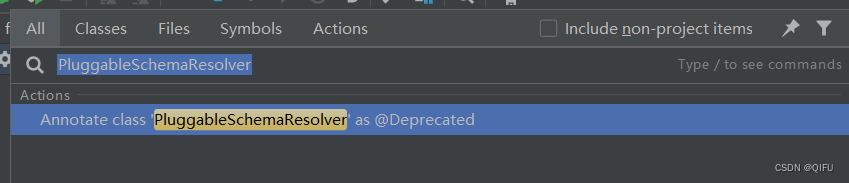
schema本地缓存资源位置可以搜索PluggableSchemaResolver类,然后找到spring.schemas文件,打开文件可以查看具体的schema文件。

2、Bean的名称
每个Bean都有一个名称,以便在使用时可以通过“context.getBean("test")”方法进行获取。
<bean id="test001" name="n1,n2,n3" class="top.yiqifu.study.p001_base.Test002_Bean"></bean>

<alias name="test001" alias="test001-new"/>
(1)id 是一个bean的唯一标识,有且仅有一个,且在所有bean中唯一。
(2)name 是一个bean的名称,可以有多个,也可以没有。
(3)alias 是一个bean的别名。
3、根据类名创建Bean
通过配置bean的class属性指定完整类名。
<bean id="test" class="top.yiqifu.study.p001_base.Test002_Bean"></bean>4、静态工厂创建Bean
Bean的class属性直接指定静态工厂类,factory-method指定工厂静态方法。
<bean id="test011" class="top.yiqifu.study.p001_base.Test003_StaticBeanFactory" factory-method="create"></bean>5、动态工厂创建Bean
先创建一个“dynamic-factory”工厂bean,然后在要创建bean的属性上配置“factory-bean”和“factory-method”。
<bean id="dynamic-factory" class="top.yiqifu.study.p001_base.Test004_DynamicBeanFactory"></bean>

<bean id="test012"  factory-bean="dynamic-factory" factory-method="create"></bean>
6、Bean的作用域
Bean的作用域主要分为singleton、prototype。singleton是单例模式,prototype是原型模式。除此之外应用于Web的还有websocket、request、session、application。
<bean id="test031" class="top.yiqifu.study.p001_base.Test002_Bean" scope="singleton"></bean>7、构造函数注入
通过constructor-arg配置构造函数参数。
<bean id="test031" class="top.yiqifu.study.p001_base.Test011_Bean">
        <constructor-arg name="id" value="10"></constructor-arg>
        <constructor-arg name="title" value="构造方法注入值"></constructor-arg>
</bean>
8、一般类型属性注入
通过property配置属性注入。
    <bean id="test041" class="top.yiqifu.study.p001_base.Test011_Bean">
        <property name="id">
            <value>12</value>
        </property>
        <property name="title" value="属性注入的值"/>
    </bean>
9、数组类型属性注入
通过property配置属性下的array元素注入。
    <bean id="test051" class="top.yiqifu.study.p001_base.Test011_Bean">
        <property name="list1">
            <array>
                <value>数组值1</value>
                <value>数组值2</value>
                <value>数组值3</value>
            </array>
        </property>
    </bean>
10、List类型属性注入
通过property配置属性下的array元素注入。
    <bean id="test052" class="top.yiqifu.study.p001_base.Test011_Bean">
        <property name="list2">
            <array>
                <value>列表值1</value>
                <value>列表值2</value>
                <value>列表值3</value>
            </array>
        </property>
    </bean>
11、Set类型属性注入
通过property配置属性下的array元素注入。
    <bean id="test061" class="top.yiqifu.study.p001_base.Test011_Bean">
        <property name="set1">
            <array>
                <value>Set值1</value>
                <value>Set值2</value>
                <value>Set值3</value>
            </array>
        </property>
    </bean>
12、Map类型属性注入
通过property配置属性下的props/map元素注入。
    <bean id="test071" class="top.yiqifu.study.p001_base.Test011_Bean">
        <property name="map1">
            <props>
                <prop key="1">方式一MAP值1</prop>
                <prop key="2">方式一MAP值2</prop>
                <prop key="2">方式一MAP值3</prop>
            </props>
        </property>
    </bean>


    <bean id="test072" class="top.yiqifu.study.p001_base.Test011_Bean">
        <property name="map2">
            <map>
                <entry key="1" value="方式二MAP值1"></entry>
                <entry key="2" value="方式二MAP值2"></entry>
                <entry key="3" value="方式二MAP值3"></entry>
            </map>
        </property>
    </bean>
13、Properties类型属性注入
通过property配置属性下的props/map元素注入。
    <bean id="test081" class="top.yiqifu.study.p001_base.Test011_Bean">
        <property name="config">
            <value>
                name=test-spring
                addr=127.0.0.1,
                port=8801
            </value>
        </property>
    </bean>
14、多配置文件
使用import元素,在配置文件中引入其他配置文件,从而将不同业务逻辑的配置区别开来。
<import resource="applicationContext-01.xml"/>或者
<import resource="applicationContext-0*.xml"/>15、命名空间注入
需要先添加命令空间
 xmlns:c="http://www.springframework.org/schema/c"
 xmlns:p="http://www.springframework.org/schema/p"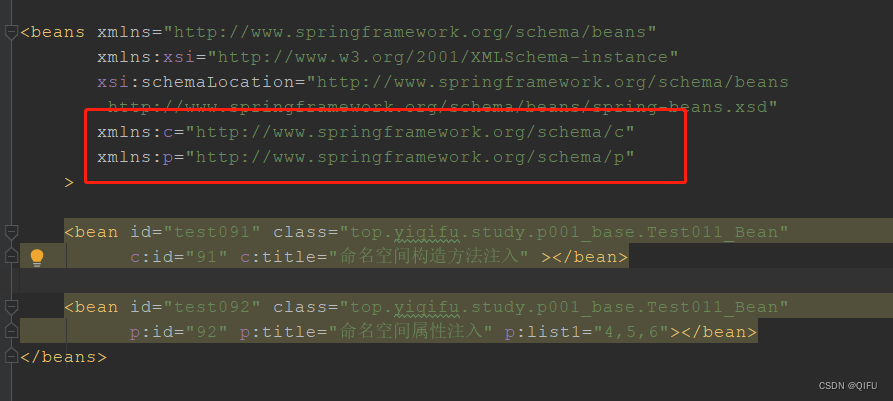
然后再通过命名空间前缀配置。
 <bean id="test081" class="top.yiqifu.study.p001_base.Test011_Bean"

c:id="15" c:title="命名空间构造方法注入" c:list1="null"></bean>四、Bean依赖,控制启动顺序
通过在bean上配置dependson来强制使用Spring 容器在某个bean先加载另一个bean。
测试BeanA
package top.yiqifu.study.p002_dependson;

public class Test012_BeanA
{
    public Test012_BeanA(){
        System.out.println("Spring 加载 BeanA");
    }

    private int id;
    private Test013_BeanB beanB;

    public int getId() {
        return id;
    }

    public void setId(int id) {
        this.id = id;
    }

    public Test013_BeanB getBeanB() {
        return beanB;
    }

    public void setBeanB(Test013_BeanB beanB) {
        this.beanB = beanB;
    }

}
测试BeanB
package top.yiqifu.study.p002_dependson;

public class Test013_BeanB
{
    public Test013_BeanB(){
        System.out.println("Spring 加载 BeanB");
    }

    private int id;

    public int getId() {
        return id;
    }

    public void setId(int id) {
        this.id = id;
    }
}
XML配置
    <!--未配置dependson-->
    <bean id="test001" class="top.yiqifu.study.p002_dependson.Test012_BeanA" >
        <property name="beanB" ref="test002"></property>
    </bean>
    <bean id="test002" class="top.yiqifu.study.p002_dependson.Test013_BeanB"></bean>

    <!--配置dependson-->
    <bean id="test011" class="top.yiqifu.study.p002_dependson.Test012_BeanA" depends-on="test012">
        <property name="beanB" ref="test012"></property>
    </bean>
    <bean id="test012" class="top.yiqifu.study.p002_dependson.Test013_BeanB"></bean>
测试类
package top.yiqifu.study.p002_dependson;

import org.springframework.context.support.ClassPathXmlApplicationContext;


public class Test001_SpringDependsOn
{
    // Spring 依赖示例
    public static void main( String[] args )
    {
        ClassPathXmlApplicationContext context = new ClassPathXmlApplicationContext("config/applicationContext-dependson.xml");

        // dependson 依赖
        //未添加 dependson 的加载顺序
        Test012_BeanA test001 = context.getBean("test001", Test012_BeanA.class);

        //添加 dependson 的加载顺序
        Test012_BeanA test011 = context.getBean("test011", Test012_BeanA.class);

    }
}五、Bean懒加载
通过在bean上配置lazy-init来让Spring 容器先不加载某个bean,等到使用时再加载这个bean。
测试类A
package top.yiqifu.study.p003_lazy;


public class Test012_BeanA
{
    public Test012_BeanA(){
        System.out.println("Spring 加载 BeanA");
    }

    private int id;
    private Test013_BeanB beanB;

    public int getId() {
        return id;
    }

    public void setId(int id) {
        this.id = id;
    }

    public Test013_BeanB getBeanB() {
        return beanB;
    }

    public void setBeanB(Test013_BeanB beanB) {
        this.beanB = beanB;
    }


}
测试类B
package top.yiqifu.study.p003_lazy;

public class Test013_BeanB
{
    public Test013_BeanB(){
        System.out.println("Spring 加载 BeanB");
    }

    private int id;

    public int getId() {
        return id;
    }

    public void setId(int id) {
        this.id = id;
    }


}
XML配置
    <!-- 未配置lazy-init -->
    <bean id="test001" class="top.yiqifu.study.p002_dependson.Test012_BeanA" >
        <property name="beanB" ref="test002"></property>
    </bean>
    <bean id="test002" class="top.yiqifu.study.p002_dependson.Test013_BeanB"></bean>

    <!-- 配置lazy-init -->
    <bean id="test011" class="top.yiqifu.study.p002_dependson.Test012_BeanA" lazy-init="true">
        <property name="beanB" ref="test012"></property>
    </bean>
    <bean id="test012" class="top.yiqifu.study.p002_dependson.Test013_BeanB"></bean>
测试类
package top.yiqifu.study.p003_lazy;

import org.springframework.context.support.ClassPathXmlApplicationContext;
import top.yiqifu.study.p002_dependson.Test012_BeanA;


public class Test001_SpringLazy
{
    // Spring 懒加载示例
    public static void main( String[] args )
    {
        ClassPathXmlApplicationContext context = new ClassPathXmlApplicationContext("config/applicationContext-lazy.xml");


        // lazy-init 懒加载
        //未添加 lazy-init 的加载顺序
        Test012_BeanA test001 = context.getBean("test001", Test012_BeanA.class);

        //添加 lazy-init 的加载顺序
        Test012_BeanA test011 = context.getBean("test011", Test012_BeanA.class);


    }
}六、Bean自动装配
通过配置全局“default-autowire="byType"”,让Spring 容器自动注入,而不需要手动配置xml。
注意:这里说的自动装配不是自动扫描Bean,Bean本身需要配置,只是如果BeanA中引用了BeanB,则不需要在BeanA上配置构造函数注入或属性注入。
测试类A,类A中引用 了类B
package top.yiqifu.study.p004_autowire;

import top.yiqifu.study.p003_lazy.Test013_BeanB;


public class Test012_BeanA
{
    public Test012_BeanA(){
        System.out.println("Spring 加载 BeanA");
    }

    private int id;
    private Test013_BeanB beanB;

    public int getId() {
        return id;
    }

    public void setId(int id) {
        this.id = id;
    }

    public Test013_BeanB getBeanB() {
        return beanB;
    }

    public void setBeanB(Test013_BeanB beanB) {
        this.beanB = beanB;
    }


}
测试类B
package top.yiqifu.study.p004_autowire;

public class Test013_BeanB
{
    public Test013_BeanB(){
        System.out.println("Spring 加载 BeanB");
    }

    private int id;

    public int getId() {
        return id;
    }

    public void setId(int id) {
        this.id = id;
    }


}
XML配置
<?xml version="1.0" encoding="UTF-8" ?>

<beans xmlns="http://www.springframework.org/schema/beans"
       xmlns:xsi="http://www.w3.org/2001/XMLSchema-instance"
       xsi:schemaLocation="http://www.springframework.org/schema/beans
        http://www.springframework.org/schema/beans/spring-beans.xsd"
       default-autowire="byType"
    >

    <bean id="test001" class="top.yiqifu.study.p002_dependson.Test012_BeanA" ></bean>
    <bean id="test002" class="top.yiqifu.study.p002_dependson.Test013_BeanB">
        <property name="id" value="10"></property>
    </bean>


</beans>
测试类
package top.yiqifu.study.p004_autowire;

import org.springframework.context.support.ClassPathXmlApplicationContext;
import top.yiqifu.study.p002_dependson.Test012_BeanA;

public class Test001_SpringAutoWire
{
    // Spring 全局自动注入示例
    public static void main( String[] args )
    {
        ClassPathXmlApplicationContext context = new ClassPathXmlApplicationContext("config/applicationContext-autowire.xml");


        // 没有手动配置属性,给BeanA注入BeanB
        Test012_BeanA test001 = context.getBean("test001", Test012_BeanA.class);
        System.out.println("通过BeanA访问BeanB的id="+test001.getBeanB().getId());


    }
}七、循环引用问题
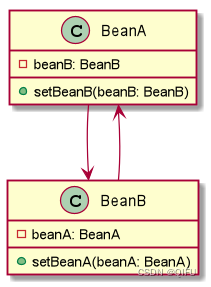
这里有两个类 BeanA 和 BeanB,它们之间存在循环引用关系。BeanA 拥有一个对 BeanB 的引用,而 BeanB 拥有一个对 BeanA 的引用。
在 Spring 容器中,当创建这两个类的实例时,由于循环引用的存在,可能会遇到问题。默认情况下,Spring 使用延迟初始化(lazy initialization)策略来处理循环引用。在创建 BeanA 实例时,它会尝试解析它所依赖的 BeanB,但由于 BeanB 还没有完全初始化,因此会返回一个未完成的 BeanB 实例。然后,当创建 BeanB 实例时,它会尝试解析它所依赖的 BeanA,但由于 BeanA 也是一个未完成的实例,同样会返回一个未完成的 BeanA 实例。
为了解决这个问题,Spring 使用了一个特殊的机制。它会将未完成的实例包装在一个代理对象中,并在需要访问该实例时,通过代理对象进行访问。当实例完成初始化后,代理对象将被替换为实际的实例,以确保循环引用问题得到解决。
八、注解的使用
1、常用注解
(1)@Component 注解是 Spring 框架中的一个基本注解,用于将类标识为一个组件。它通常用于自动扫描和装配组件,使得这些组件可以被其他组件或者应用程序使用。他是一个通用的注解,可以用于任何类。
(2)@Qualifier 用于解决依赖注入时的歧义性问题的注解。当存在多个类型兼容的 bean 实例时,可以使用 @Qualifier 注解配合其他注解(如 @Autowired)一起使用,明确指定要注入的 bean 实例。
(3)@Scope 用于定义 Spring bean 的作用域。通过 @Scope 注解,可以控制 bean 的生命周期和实例化方式。常见的作用域包括单例(Singleton)、原型(Prototype)、会话(Session)、请求(Request)等。
(4)@Autowired 用于自动装配依赖的注解。当 Spring 容器中存在与被注入类型兼容的 bean 实例时,@Autowired 注解可以自动将其注入到目标对象中。在复杂数据类型(如自定义类、集合等)的注入时,@Autowired 注解可以与其他注解(如 @Qualifier)一起使用,以解决依赖注入的歧义性。
(5)@Value 用于注入简单数据类型的注解。通过 @Value 注解,可以将配置文件中的值或者表达式注入到 Spring bean 中的属性中。通常用于注入基本类型、字符串、引用类型等简单的配置值。
(6)@Controller 注解是 Spring MVC 框架中用于标识控制器类的注解。@Controller 注解通常与请求映射方法一起使用,用于处理客户端的请求并返回相应的响应。控制器类负责接收用户请求、处理业务逻辑,并将结果返回给客户端。
(7)@Service 注解是 Spring 框架中用于标识服务层(业务逻辑层)的注解。@Service 注解通常用于标识处理业务逻辑的类,它可以被其他层(如控制器层)注入和使用。服务层负责封装业务逻辑,协调多个数据访问对象(DAO)来完成具体的业务操作。
(8)@Repository 注解是 Spring 框架中用于标识数据访问对象(DAO)的注解。@Repository 注解通常用于标识访问数据库或其他持久化机制的类,它封装了对数据的访问和操作。DAO 类负责与数据源进行交互,并提供持久化相关的操作方法。
2、配置扫描注解
扫描注解要配置context命名空间,并指定schema。
xmlns:context="http://www.springframework.org/schema/context"


http://www.springframework.org/schema/context
http://www.springframework.org/schema/context/spring-context.xsd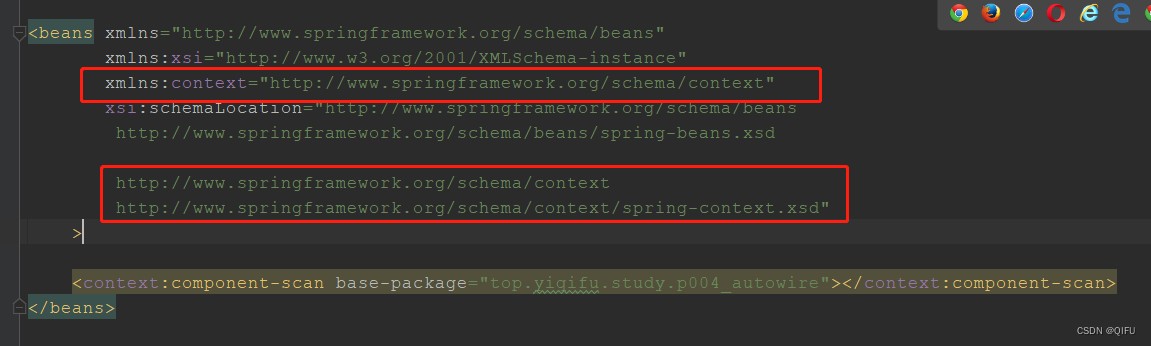
3、示例代码
测试BeanA
package top.yiqifu.study.p005_scan;

import org.springframework.beans.factory.annotation.Autowired;
import org.springframework.beans.factory.annotation.Qualifier;
import org.springframework.beans.factory.annotation.Value;
import org.springframework.stereotype.Component;

@Component("beanA")
public class Test012_BeanA
{
    @Value("11")
    private int id;

    @Autowired
    private Test013_BeanB beanB;

    @Autowired
    @Qualifier("beanC1")
    private Test020_InterfaceC beanC;

    public int getId() {
        return id;
    }

    public void setId(int id) {
        this.id = id;
    }

    public Test013_BeanB getBeanB() {
        return beanB;
    }

    public void setBeanB(Test013_BeanB beanB) {
        this.beanB = beanB;
    }

    public Test020_InterfaceC getBeanC() {
        return beanC;
    }

    public void setBeanC(Test020_InterfaceC beanC) {
        this.beanC = beanC;
    }
}
测试BeanB
package top.yiqifu.study.p005_scan;

import org.springframework.beans.factory.annotation.Value;
import org.springframework.stereotype.Component;


@Component("beanB")
public class Test013_BeanB
{

    @Value("21")
    private int id;

    public int getId() {
        return id;
    }

    public void setId(int id) {
        this.id = id;
    }


}
测试接口C
package top.yiqifu.study.p005_scan;

public interface Test020_InterfaceC
{
    int getId() ;

    void setId(int id);

}
测试类C1
package top.yiqifu.study.p005_scan;

import org.springframework.beans.factory.annotation.Value;
import org.springframework.context.annotation.Scope;
import org.springframework.stereotype.Component;


@Component("beanC1")
@Scope("prototype")
public class Test021_BeanC1 implements Test020_InterfaceC
{

    @Value("31")
    private int id;

    public int getId() {
        return id;
    }

    public void setId(int id) {
        this.id = id;
    }


}
测试类C2
package top.yiqifu.study.p005_scan;

import org.springframework.beans.factory.annotation.Value;
import org.springframework.context.annotation.Scope;
import org.springframework.stereotype.Component;


@Component("beanC2")
@Scope("prototype")
public class Test022_BeanC2 implements Test020_InterfaceC
{

    @Value("32")
    private int id;

    public int getId() {
        return id;
    }

    public void setId(int id) {
        this.id = id;
    }


}
XML配置,使用注解后的XML配置十分简洁
<?xml version="1.0" encoding="UTF-8" ?>

<beans xmlns="http://www.springframework.org/schema/beans"
       xmlns:xsi="http://www.w3.org/2001/XMLSchema-instance"
       xmlns:context="http://www.springframework.org/schema/context"
       xsi:schemaLocation="http://www.springframework.org/schema/beans
        http://www.springframework.org/schema/beans/spring-beans.xsd

        http://www.springframework.org/schema/context
        http://www.springframework.org/schema/context/spring-context.xsd"
    >

    <context:component-scan base-package="top.yiqifu.study.p005_scan"></context:component-scan>
</beans>
测试类
package top.yiqifu.study.p005_scan;

import org.springframework.context.support.ClassPathXmlApplicationContext;


public class Test001_SpringScan
{
    // Spring 注解示例
    public static void main( String[] args )
    {
        ClassPathXmlApplicationContext context = new ClassPathXmlApplicationContext("config/applicationContext-scan.xml");
        String[] beanDefinitionNames = context.getBeanDefinitionNames();
        for(String beanName : beanDefinitionNames){
            System.out.println(beanName);
        }
        context.getBean("beanC1");
        Test012_BeanA test001 = context.getBean("beanA", Test012_BeanA.class);
        System.out.println("使用注解,通过BeanA访问BeanB的id="+test001.getBeanB().getId());
        System.out.println("使用注解,通过BeanA访问BeanC的id="+test001.getBeanC().getId());
    }
}


 362
362


 被折叠的 条评论
为什么被折叠?
被折叠的 条评论
为什么被折叠?
 到【灌水乐园】发言


