


PySimpleGUI是能轻松简单地创建可视化应用程序
pyserial串口开发模块
PySimpleGUI简单示例:
import PySimpleGUI as sg
import serial

layout=[
[sg.Text('第一行')],
[sg.Button('第二行')]
]

window=sg.Window('这是个标题').Layout(layout)

button,value=window.Read()

print('button:',button)

print('value:',value)
运行结果如下:
其中layout是个二维数组,layout[0][0]代表第一行第一列,layout[1][0]代表第二行第一列,以此类推,组成一个布局。
而且其中的window.Read()会阻塞程序的进行,直到Button('第二行')被点击才退出。
常用的组件:
sg.InputText('Default text') 文本输入框
sg.InputCombo(['choice 1', 'choice 2']) 下拉列表
sg.Listbox(values=['Listbox 1', 'Listbox 2', 'Listbox 3'], size=(30, 6)) 列表框元素
sg.Slider(range=(1,500), default_value=222, size=(20,15), orientation='horizontal', font=('Helvetica', 12)) 滑块元素
sg.Radio('My first Radio!', "RADIO1", default=True) 单选按钮
sg.Checkbox('My first Checkbox!', default=True) 复选框
框架组件:
sg.Frame('title','layout')-----title=框架标题,layout=组件的布局
import PySimpleGUI as sg
import serial

child_layout=[[sg.Text('第一行')],[sg.Text('第二行')]]

layout=[
[sg.Text('第一行'),sg.Frame('标题',child_layout)]
]


window=sg.Window('这是个标题').Layout(layout)

button,value=window.Read()

print('button:',button)

print('value:',value)
运行结果如下: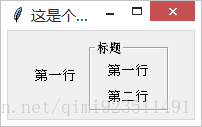
配置pyserial:
import serial

ser = serial.Serial()
ser.baudrate = 115200    #波特率
ser.port = 'COM1'        #com口
ser.stopbits=1           #停止位 1 1.5 2
ser.bytesize=8           #数据位
ser.parity='N'           #奇偶位  N没有  E偶校验  O奇校验
ser.timeout=5            #超时时间

ser.open()     #连接失败会抛出错误

ser.write('hello\n'.encode())    #发送信息

result=ser.readline().decode()  #接收信息

print(result)
把PySimpleGUI和pyserial组合起来就可以实现自己定义功能的上位机控制程序了
示例(搭建简单的ESP8266串口调试助手):
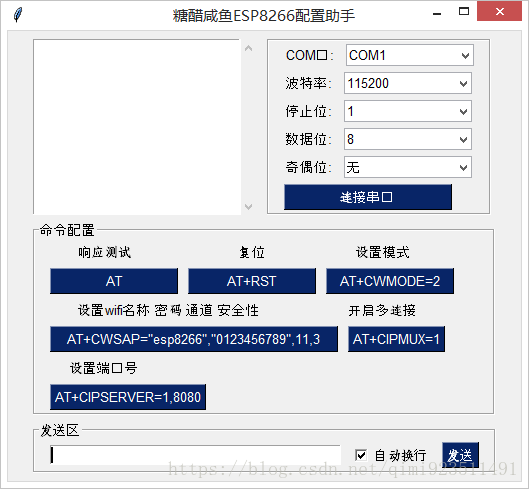
代码如下:
import PySimpleGUI as sg
from serial import Serial
from threading import Thread


com=('COM1','COM2','COM3','COM4','COM5','COM6','COM7','COM8','COM9','COM10')
baud_rate=('115200','9600','38400')
Stop_bit=('1','1.5','2')
data_bit=('8','7','6','5')
verify=('无','奇校验','偶校验')


layout1 =  [[sg.Text('COM口:'),sg.InputCombo(com,size=(15, 1))],
          [sg.Text('波特率:'),sg.InputCombo(baud_rate,size=(15, 1))],
          [sg.Text('停止位:'),sg.InputCombo(Stop_bit,size=(15, 1))],
          [sg.Text('数据位:'),sg.InputCombo(data_bit,size=(15, 1))],
          [sg.Text('奇偶位:'),sg.InputCombo(verify,size=(15, 1))],
          [sg.RButton('连接串口',size=(20,1))]]

button_size=(15,1)

Configure_button=[[sg.T('   '),sg.Text('响应测试',size=(15,1)),sg.T('   '),sg.Text('复位',size=(13,1)),sg.Text('设置模式',size=(15,1))],
        [sg.RButton('AT',size=button_size),sg.RButton('AT+RST',size=button_size),sg.RButton('AT+CWMODE=2',size=button_size)],
        [sg.T('   '),sg.Text('设置wifi名称 密码 通道 安全性'),sg.T(' '*15),sg.Text('开启多连接')],
        [sg.RButton('AT+CWSAP="esp8266","0123456789",11,3',size=(35,1)),sg.RButton('AT+CIPMUX=1')],
        [sg.T(' '),sg.Text('设置端口号')],
        [sg.RButton('AT+CIPSERVER=1,8080')]]

send_configure=[[sg.InputText('',key='input',size=(41,1)),sg.Checkbox('自动换行',default=True),sg.RButton('发送')]]

layout=[[sg.Multiline('',key='message',size=(29,5)),sg.Frame('',layout1)],
        [sg.Frame('命令配置',Configure_button)],
        [sg.Frame('发送区',send_configure)]
]


window=sg.Window('糖醋咸鱼ESP8266配置助手').Layout(layout)

ser=None
text=''

isRun=True
def readData():
    global isRun
    global text
    while isRun:
        if ser != None and ser.is_open:
            if text.count('\n')>5:
                text=text[text.index('\n')+1:]
            text+=ser.read().decode()


while True:
    button, value = window.ReadNonBlocking()
    window.FindElement('message').Update(text)
    if button==None and value==None:
        print('结束程序')
        isRun=False
        break

    if button=='连接串口':
        ser = Serial()
        ser.baudrate = int(value[1])  #波特率
        ser.port = value[0]    #com口
        ser.stopbits=int(value[2])     #停止位 1 1.5 2
        ser.bytesize=int(value[3])       #数据位

        if value[5]=='无':     #奇偶位  N没有  E偶数  O奇数
            ser.parity='N'
        elif value[5]=='奇校验':
            ser.parity = 'O'
        elif value[5] == '偶校验':
            ser.parity = 'E'

        ser.timeout=5       #超时时间
        try:
            ser.open()
            sg.Popup('连接成功')
            t = Thread(target=readData, name='read_data')
            t.start()   #开始线程
        except Exception as e:
            sg.Popup('连接失败')

    elif button=='发送':

        if ser!=None and ser.is_open:
            if value['input']!='':
                if value[5]==True:
                    ser.write((value['input']+'\n').encode())
                    ser.flush()
                else:
                    ser.write(value['input'].encode())
                    ser.flush()

            else:
                sg.Popup('请输入内容')
        else:
            sg.Popup('没有连接')
    else:
        window.FindElement('input').Update(button)    #修改发送框的内容


 602
602


 被折叠的 条评论
为什么被折叠?
被折叠的 条评论
为什么被折叠?
 到【灌水乐园】发言


