


功能简介
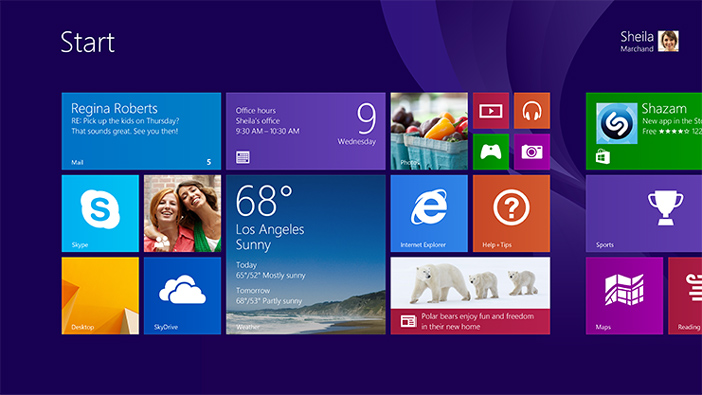
动态磁贴是UWP的一项新功能,具体效果如下,不了解UWP动态磁贴的可以看微软的官方介绍(传送门)
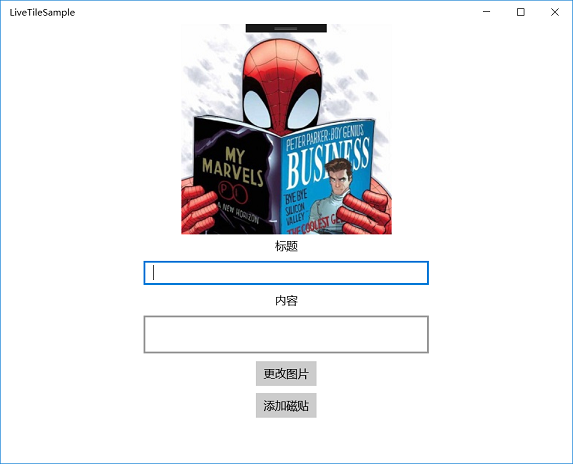
博客示例包括一个MainPage,如下图所示,包括一个Image控件和两个文本框(可以用于输入标题和内容),两个按钮,一个可以更改图片,一个可以添加磁贴;
对于你新建的磁贴,首先,你需要把你的程序拖动到右边(如下面的视频所示),或者右键选择固定到开始屏幕;你可以添加多个磁贴实现滚动效果,但是UWP的磁贴最多只会保存你最后添加的5个磁贴;
实现效果
实现过程
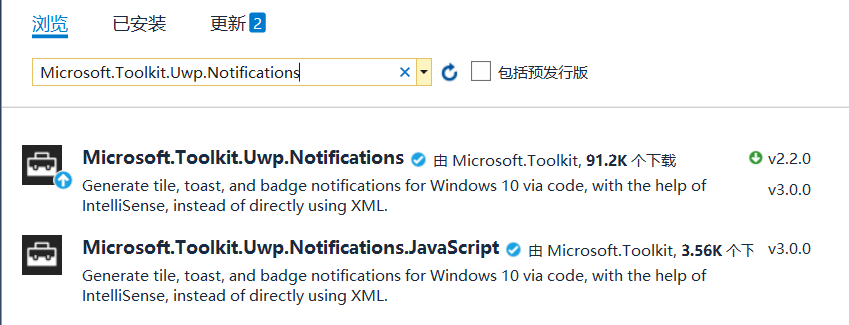
添加引用Microsoft.Toolkit.Uwp.Notifications
- 在引用右键管理NuGet程序包搜索Microsoft.Toolkit.Uwp.Notifications并安装
在App.xaml.cs的构造函数中添加代码
//App.xaml.cs
public App()
{
    this.InitializeComponent();
    this.Suspending += OnSuspending;
     // 每次启动的时候要清空队列
    TileUpdateManager.CreateTileUpdaterForApplication().Clear();
    // 实现通知循环
    TileUpdateManager.CreateTileUpdaterForApplication().EnableNotificationQueue(true);
}
需要注意的地方:
- TileUpdateManager.CreateTileUpdaterForApplication().Clear();
- TileUpdateManager.CreateTileUpdaterForApplication().EnableNotificationQueue(true);
新建类LiveTileService
//LiveTileService.cs
public class LiveTileService
{
    //添加动态磁贴,title为磁贴的标题,detail为磁贴的内容,source为背景图片
    public void AddTile(string title, string detail, string source)
    {
        //得到磁贴的对象
        TileContent content = CreateTileContent(title, detail, source);
        var notification = new TileNotification(content.GetXml());
        //添加到磁贴的队列
        TileUpdateManager.CreateTileUpdaterForApplication().Update(notification);
    }

    //创建磁贴对象并返回
    private TileContent CreateTileContent(string title, string detail, string source)
    {
        return new TileContent()
        {
            Visual = new TileVisual()
            {
                //这里限于篇幅只写了TileMedium,其实还有TileLarge和TileMedium,TileWide,对应不同磁贴的大小
                TileMedium = new TileBinding()
                {
                    Content = new TileBindingContentAdaptive()
                    {
                        Children =
                        {
                            new AdaptiveText()
                            {
                                Text = title,//设置标题
                                HintStyle = AdaptiveTextStyle.Title
                            },
                            new AdaptiveText()
                            {
                                Text = detail,//设置内容
                                HintStyle = AdaptiveTextStyle.Subtitle
                            }
                        },
                        BackgroundImage = new TileBackgroundImage()
                        {
                            Source = source //设置背景图片
                        }
                    }
                }
            }
        };
    }

}
需要注意的地方:
- AddTile 为添加磁贴的函数
- CreateTileContent中新建TileContent时注意Content不能少
在MainPage.xaml中添加控件
//MainPage.xaml
<Grid Background="{ThemeResource ApplicationPageBackgroundThemeBrush}">
    <StackPanel>
        <!-- Image的Source指向的是我的Assets文件夹中的图片,在你的代码中需要对此处进行更改 -->
        <Image x:Name="MyImage" Source="ms-appx:///Assets/spider.jpg" Width="280" Height="280"></Image>
        <TextBlock Text="标题" HorizontalAlignment="Center" Margin="5"></TextBlock>
        <TextBox x:Name="MyTitle" Width="380" Margin="5"></TextBox>
        <TextBlock Text="内容" HorizontalAlignment="Center"  Margin="5"></TextBlock>
        <TextBox x:Name="MyDetail" Width="380" Height="50" TextWrapping="Wrap"  Margin="5"></TextBox>
        <Button Content="更改图片" Click="ChangeImage" HorizontalAlignment="Center" Margin="5"></Button>
        <Button Content="添加磁贴" Click="AddTile" HorizontalAlignment="Center" Margin="5"></Button>
    </StackPanel>
</Grid>
在MainPage.xaml.cs文件中添加代码
public sealed partial class MainPage : Page
{
    //新建LiveTileService对象
    private LiveTileService liveTileService;
    //保存图片路径,添加磁贴时将使用该图片路径
    private string source;
    public MainPage()
    {
        liveTileService = new LiveTileService();
        //设置默认值
        source = "ms-appx:///Assets/spider.jpg";
        this.InitializeComponent();
    }

    private void AddTile(object sender, RoutedEventArgs e)
    {
        //添加磁贴
        liveTileService.AddTile(MyTitle.Text, MyDetail.Text, source);
    }

    private async void ChangeImage(object sender, RoutedEventArgs e)
    {
        //选取图片
        FileOpenPicker openPicker = new FileOpenPicker();
        openPicker.FileTypeFilter.Add(".jpg");
        StorageFile file = await openPicker.PickSingleFileAsync();
        if (file != null)
        {
            //设置Image为选择的图片
            BitmapImage bitmap = new BitmapImage();
            using (var stream = await file.OpenAsync(Windows.Storage.FileAccessMode.Read))
            {
                bitmap.SetSource(stream);
            }
            MyImage.Source = bitmap;

            //将图片保存在LocalFolder
            StorageFolder localFolder = ApplicationData.Current.LocalFolder;
            StorageFile fileCopy = await file.CopyAsync(localFolder, file.Name, NameCollisionOption.ReplaceExisting);
        }
        source = "ms-appdata:///local/" + file.Name;
    }

}
需要注意的地方:
- source默认值的设置
- 每次上传图片后需要保存到LocalFolder,添加磁贴时磁贴才能通过Source读取图片,关于文件存储的问题可以参考博客UWP——文件管理(二)
FYI
项目下载:LiveTileSample
项目下载之后记住把Debug模式从ARM换成X86或X64(根据你自己的机型选择),之前一开始学习的时候不知道这一点,从网上下载下来的项目都运行不了,纠结的一逼(╥╯^╰╥)


 1619
1619

 被折叠的 条评论
为什么被折叠?
被折叠的 条评论
为什么被折叠?
 到【灌水乐园】发言


