


最近一直太忙,都没时间写博客了。首先是平时需要带我的一个哥们,他底子比我稍弱,于是我便从mybatis、spring、springMVC、html、css、js、jquery一个一个的教他,在教的过程中笔者也发现了很多之前自己没有弄明白的问题,所以说想把一样东西学好并不容易。另外笔者也参与了公司的大数据项目,学会怎么写一个MR,以及hdfs、hbase、hive、impala、zookeeper的基本使用,今天就与大家分享一下MR的编写,之后的博文中再与大家一一进行分享。当然,大数据相关的东西实在太多了,也不可能都会使用,并且用得很深,所以笔者也会再接再厉。同时,由于周末笔者还要学驾照,所以真是身心疲惫,但是也是对自己的锻炼。
好了,不说废话了,直入正题。
首先,笔者给大家介绍一下这个MR的大致业务:其实,就是一个etl过程,对数据进行抽取、转换以及加载到目的端,这里目的端,既可以是hdfs,然后交给下一个MR进行处理,也可以是hbase数据仓库,还可以是hive或者imapla的数据库,这里面hive和impala的数据还可以进行同步。这个MR是从ftp上拉取文件,直接存到hdfs,然后经过MR将数据存到hdfs中,提供给另一个MR进行处理。为了介绍简单,这里笔者将从ftp上拉取数据的过程改为直接从hdfs上读取。关于如果从ftp上拉取文件直接存到hdfs,后面的博文笔者再进行介绍。
好了,笔者将分以下几步进行讲解:
一、文件以及maven环境准备
这里,笔者使用的maven依赖,所有hadoop相关的包通过dependency依赖,pom.xml如下:
<project xmlns="http://maven.apache.org/POM/4.0.0" xmlns:xsi="http://www.w3.org/2001/XMLSchema-instance" xsi:schemaLocation="http://maven.apache.org/POM/4.0.0 http://maven.apache.org/xsd/maven-4.0.0.xsd">
  <modelVersion>4.0.0</modelVersion>
  <groupId>org.qiyongkang</groupId>
  <artifactId>mr-demo</artifactId>
  <version>0.0.1-SNAPSHOT</version>
  <name>mr-demo</name>
  <description>mr-demo</description>
  <packaging>jar</packaging>

  <repositories>
      <!-- 注意,这里使用cloudera公司的maven仓库 -->
      <repository>
        <id>cloudera</id>
        <url>https://repository.cloudera.com/artifactory/cloudera-repos/</url>
      </repository>
  </repositories>

  <properties>
    <project.build.sourceEncoding>UTF-8</project.build.sourceEncoding>
    <!-- hadoop版本 -->
    <hadoop.version>2.3.0-cdh5.0.0</hadoop.version>
    <!-- hbase版本 -->
    <hbase.version>0.96.1.1-cdh5.0.0</hbase.version>
    <!-- hive版本 -->
    <hive.version>0.12.0-cdh5.0.0</hive.version>
    <!-- junit版本 -->
    <junit.version>4.8.1</junit.version>
  </properties>

  <dependencies>
      <!-- hadoop相关依赖 -->
      <dependency>
          <groupId>org.apache.hadoop</groupId>
          <artifactId>hadoop-mapreduce-client-core</artifactId>
          <version>${hadoop.version}</version>
          <exclusions>
              <exclusion>
                  <artifactId>jdk.tools</artifactId>
                  <groupId>jdk.tools</groupId>
              </exclusion>
          </exclusions>
      </dependency>

      <dependency>
          <groupId>org.apache.hadoop</groupId>
          <artifactId>hadoop-common</artifactId>
          <version>${hadoop.version}</version>
      </dependency>

      <dependency>
          <groupId>org.apache.hadoop</groupId>
          <artifactId>hadoop-hdfs</artifactId>
          <version>${hadoop.version}</version>
      </dependency>

      <dependency>
          <groupId>org.apache.hadoop</groupId>
          <artifactId>hadoop-client</artifactId>
          <version>${hadoop.version}</version>
          <exclusions>
              <exclusion>
                  <artifactId>mockito-all</artifactId>
                  <groupId>org.mockito</groupId>
              </exclusion>
          </exclusions>
      </dependency>

      <!-- MRUnit相关依赖 -->
      <dependency>
    <groupId>org.apache.mrunit</groupId>
    <artifactId>mrunit</artifactId>
    <version>0.9.0-incubating</version>
    <classifier>hadoop2</classifier>
</dependency>

<!-- junit依赖 -->
   <dependency>
     <groupId>junit</groupId>
     <artifactId>junit</artifactId>
     <version>${junit.version}</version>
     <scope>test</scope>
   </dependency>
  </dependencies>

  <build>
    <!-- 这是一个打可执行jar的插件,没有将依赖打进去,执行package命令即可 -->
    <plugins>
      <plugin>
       <groupId>org.apache.maven.plugins</groupId>
       <artifactId>maven-jar-plugin</artifactId>
       <version>2.4</version>
       <configuration>
         <archive>
            <manifest>
              <addClasspath>false</addClasspath>
              <classpathPrefix>lib/</classpathPrefix>
              <mainClass>org.qiyongkang.mr.parsetofivele.ParseDataToFileElementMR</mainClass>
            </manifest>
          </archive>
       </configuration>
      </plugin>

      <!-- 此插件用于将依赖jar全部打到一个jar包里面去,以免在hadoop运行环境添加依赖包 -->
      <plugin>
          <groupId>org.apache.maven.plugins</groupId>
          <artifactId>maven-assembly-plugin</artifactId>
          <version>2.3</version>
          <configuration>
              <descriptorRefs>
                  <descriptorRef>jar-with-dependencies</descriptorRef>
              </descriptorRefs>
              <archive>
                <manifest>
                    <addClasspath>false</addClasspath>
                    <mainClass>org.qiyongkang.mr.parsetofivele.ParseDataToFileElementMR</mainClass>
                </manifest>
              </archive>
          </configuration>
          <executions>
              <execution>
                  <id>make-assembly</id>
                  <phase>package</phase>
                  <goals>
                      <goal>assembly</goal>
                  </goals>
              </execution>
          </executions>
      </plugin>

      <!-- 拷贝依赖包 -->
      <plugin>
          <groupId>org.apache.maven.plugins</groupId>
          <artifactId>maven-dependency-plugin</artifactId>
          <executions>
              <execution>
                  <id>copy-dependencies</id>
                  <phase>package</phase>
                  <goals>
                      <goal>copy-dependencies</goal>
                  </goals>
                  <configuration>
                      <outputDirectory>${project.build.directory}/lib</outputDirectory>
                      <overWriteReleases>false</overWriteReleases>
                      <overWriteSnapshots>false</overWriteSnapshots>
                      <overWriteIfNewer>true</overWriteIfNewer>
                  </configuration>
              </execution>
          </executions>
      </plugin>
    </plugins>
  </build>
</project>
然后,我们准备一份文件,格式如下:
202.102.224.68|53|61.158.148.103|17872|22640|p.tencentmind.com|A|A_125.39.213.86|20160308100839.993|0|r
202.102.224.68|53|61.158.152.97|20366|27048|api.k.sohu.com|A|A_123.126.104.116;A_123.126.104.119;A_123.126.104.114;A_123.126.104.117;A_123.126.104.118;A_123.126.104.120;A_123.126.104.115;A_123.126.104.122|20160308100839.993|0|r
115.60.53.151|7582|202.102.224.68|53|33946|cip4.e1977.com|A||20160308100839.993|0|q
182.119.224.59|14731|202.102.224.68|53|31185|s.jpush.cn|A||20160308100839.993|0|q
202.102.224.68|53|182.118.77.145|22420|19278|file32.mafengwo.net|A|A_182.118.77.145|20160308100839.993|0|r
202.102.224.68|53|115.60.14.138|22929|31604|mmbiz.qpic.cn|A|A_42.236.95.35;A_42.236.95.36;A_42.236.95.34;A_182.118.63.200;A_182.118.63.196;A_42.236.95.33;A_42.236.95.37|20160308100839.993|0|r
115.60.109.162|3760|202.102.224.68|53|8920|a.root-servers.net|A||20160308100839.993|0|q
每一行以|分隔,然后r或者q结尾,这里我们的MR只会取r结尾的数据,并且只会取此行的某几列数据,然后以其中三行为key进行计数,作为reducer的输入,最后将结果写入到hdfs,这样便可极大的祛除无效数据,减小文件大小。
这里,笔者准备了一个1.9大小.txt文件,如:

上面的jar就是后面我们要在yarn上执行的包。
然后,执行:
su hdfs使用hdfs用户。因为这里笔者使用的生态系统环境就是上一篇博文中使用cm搭建的环境。cm会为hdfs创建一个hdfs用户,所以我们必须使用此用户进行hdfs的相关操作。
执行以下命令,将文件上传到hdfs的/test/input目录:
hadoop fs -put testData.txt /test/input执行hadoop fs -ls /test/input可看到上传到hdfs成功:

二、Mapper类编写
Mapper类ParseDataToFileElementMapper:
public static class ParseDataToFileElementMapper extends Mapper<Object, Text, Text, IntWritable> {

        private static final IntWritable one = new IntWritable(1);
        private Text mapKey = new Text();

        @Override
        protected void map(Object key, Text value, Mapper<Object, Text, Text, IntWritable>.Context context)
                throws IOException, InterruptedException {
            String[] values = value.toString().split("\\|");

            if ("r".equals(values[10])) {

                mapKey.set(values[5] + "\t" + values[0] + "\t" + values[2]);
                System.out.println(mapKey.toString());
                context.write(mapKey, one);
            }
        }

    }
这里,由于代码不多,笔者将Mapper和Reducer作为内部类,大家可以抽离出来。
三、Reducer类编写
Reducer类ParseDataToFileElementReducer:
public static class ParseDataToFileElementReducer extends Reducer<Text, IntWritable, Text, IntWritable> {
        private Text reduceKey = new Text();
        private IntWritable result = new IntWritable();

        @Override
        protected void reduce(Text key, Iterable<IntWritable> values, Reducer<Text, IntWritable, Text, IntWritable>.Context context)
                throws IOException, InterruptedException {
            //把key相同的统计一下次数
            //cname + topDomain + cip + dip
            int sum = 0;
            for (IntWritable val : values) {
              sum += val.get();
            }
            this.result.set(sum);
            this.reduceKey.set("1.1-1.1" + "\t" + key.toString());

            context.write(this.reduceKey, this.result);
        }

    }
这里,mapper会将txt数据一行行读取解析,经过shuffle后,会对key进行哈希,然后将相同的key交给一个Reducer,然后reducer对相同key进行计数,写入hdfs。
四、main函数调用MR
主类ParseDataToFileElementMR:
public static void main(String[] args) throws IOException, ClassNotFoundException, InterruptedException {
        Configuration conf = new Configuration();
        String[] otherArgs = new GenericOptionsParser(conf, args).getRemainingArgs();
        if (otherArgs.length != 2) {
          System.err.println("Usage: ParseDataToFileElementMR <in> <out>");
          System.exit(2);
        }
        Job job = Job.getInstance(conf, "ParseDataToFileElementMR");
        job.setJarByClass(ParseDataToFileElementMR.class);
        //Mapper
        job.setMapperClass(ParseDataToFileElementMapper.class);

        //Combiner
//        job.setCombinerClass(ParseDataToFileElementReducer.class);

        //Reducer
        job.setReducerClass(ParseDataToFileElementReducer.class);
        job.setNumReduceTasks(10);

        job.setOutputKeyClass(Text.class);
        job.setOutputValueClass(IntWritable.class);

        FileInputFormat.addInputPath(job, new Path(otherArgs[0]));
        FileOutputFormat.setOutputPath(job, new Path(otherArgs[1]));

        //将reduce输出文件压缩.gz
        FileOutputFormat.setCompressOutput(job, true);  //job使用压缩
        FileOutputFormat.setOutputCompressorClass(job, GzipCodec.class); //设置压缩格式

        System.exit(job.waitForCompletion(true) ? 0 : 1);
    }
这里我们指定reducer个数为1个,并指定输出格式为.gz。
五、编写MRUnit测试
接下来,我们使用MRUnit对MR进行测试,相关的jar依赖在第一步pom文件已给出,直接贴出测试代码,和junit一样执行:
package org.qiyongkang.mr.parsetofivele;

import java.util.ArrayList;
import java.util.List;

import org.apache.hadoop.io.IntWritable;
import org.apache.hadoop.io.Text;
import org.apache.hadoop.mrunit.mapreduce.MapDriver;
import org.apache.hadoop.mrunit.mapreduce.MapReduceDriver;
import org.apache.hadoop.mrunit.mapreduce.ReduceDriver;
import org.junit.Before;
import org.junit.Test;
import org.qiyongkang.mr.parsetofivele.ParseDataToFileElementMR.ParseDataToFileElementMapper;
import org.qiyongkang.mr.parsetofivele.ParseDataToFileElementMR.ParseDataToFileElementReducer;

/**
 * ClassName:ParseDataToFileElementMRTest <br/>
 * Function: TODO ADD FUNCTION. <br/>
 * Reason: TODO ADD REASON. <br/>
 * Date: 2016年3月15日 下午12:04:55 <br/>
 *
 * @author qiyongkang
 * @version
 * @since JDK 1.6
 * @see
 */
public class ParseDataToFileElementMRTest {

    MapDriver<Object, Text, Text, IntWritable> mapDriver;
    ReduceDriver<Text, IntWritable, Text, IntWritable> reduceDriver;
    MapReduceDriver<Object, Text, Text, IntWritable, Text, IntWritable> mapReduceDriver;

    @Before
    public void setUp() throws Exception {
        ParseDataToFileElementMapper mapper = new ParseDataToFileElementMapper();
        ParseDataToFileElementReducer reducer = new ParseDataToFileElementReducer();
        mapDriver = MapDriver.newMapDriver(mapper);
        reduceDriver = ReduceDriver.newReduceDriver(reducer);
        mapReduceDriver = MapReduceDriver.newMapReduceDriver(mapper, reducer);
    }

    @Test
    public void testMapper() {
        mapDriver.withInput(new Object(), new Text(
                "202.102.224.68|53|115.60.109.162|3760|8920|a.root-servers.net|A|A_198.41.0.4|20160308100839.993|0|r"));
        mapDriver.withOutput(new Text("a.root-servers.net\t202.102.224.68\t115.60.109.162"), new IntWritable(1));
        mapDriver.runTest();
    }

    @Test
    public void testReducer() {
        List<IntWritable> values = new ArrayList<IntWritable>();
        values.add(new IntWritable(1));
        values.add(new IntWritable(1));
        reduceDriver.withInput(new Text("a.root-servers.net\t202.102.224.68\t115.60.109.162"), values);
        reduceDriver.withOutput(new Text("1.1-1.1\ta.root-servers.net\t202.102.224.68\t115.60.109.162"),
                new IntWritable(2));
        reduceDriver.runTest();
    }

    @Test
    public void testMapReducer() {
        mapReduceDriver.withInput(new Object(), new Text(
                "202.102.224.68|53|115.60.109.162|3760|8920|a.root-servers.net|A|A_198.41.0.4|20160308100839.993|0|r"));
        List<IntWritable> values = new ArrayList<IntWritable>();
        values.add(new IntWritable(1));
        mapReduceDriver.withOutput(new Text("1.1-1.1\ta.root-servers.net\t202.102.224.68\t115.60.109.162"), new IntWritable(1));
        mapReduceDriver.runTest();
    }

}
这里我们可以对文件的单行进行测试,因为mapper本来就类似bufferedReader对文件一行行的读取。
六、打包
这里,笔者使用maven提供的插件进行打包,已在pom文件写出。然后,为了不将依赖包拷到hadoop环境,我们采用jar-with-dependencies这种打包方式,笔者对mr-demo-0.0.1-SNAPSHOT-jar-with-dependencies.jar反编译如下:
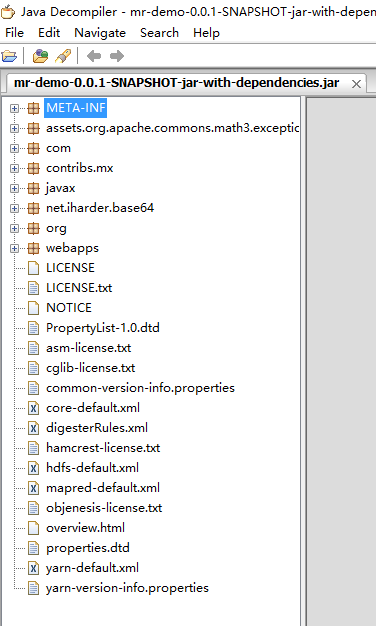
同时也指定了main函数所在类,大家可以看下pom文件。
七、在yarn上执行(MR2)
MR已写完,下面我们便可以在yarn上执行了。由于hadoop1.x使用的是MR1,而yarn上已经包括了MR2了,关于MR1与MR2的区别,笔者在后面的博文中会进行介绍。
下面开始执行:
yarn jar mr-demo-0.0.1-SNAPSHOT-jar-with-dependencies.jar /test/input /test/output这里,我们的输入文件格式是使用的.txt,其实hdfs还支持压缩格式以及其它的格式,后面再进行介绍。
然后,我们在hdfs上查看下输出目录:

这里由于reducer只指定了一个,所以只有一个输出文件。
我们把此文件get到本地,解压看看:
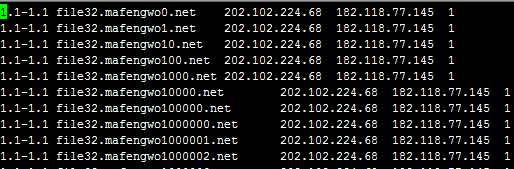
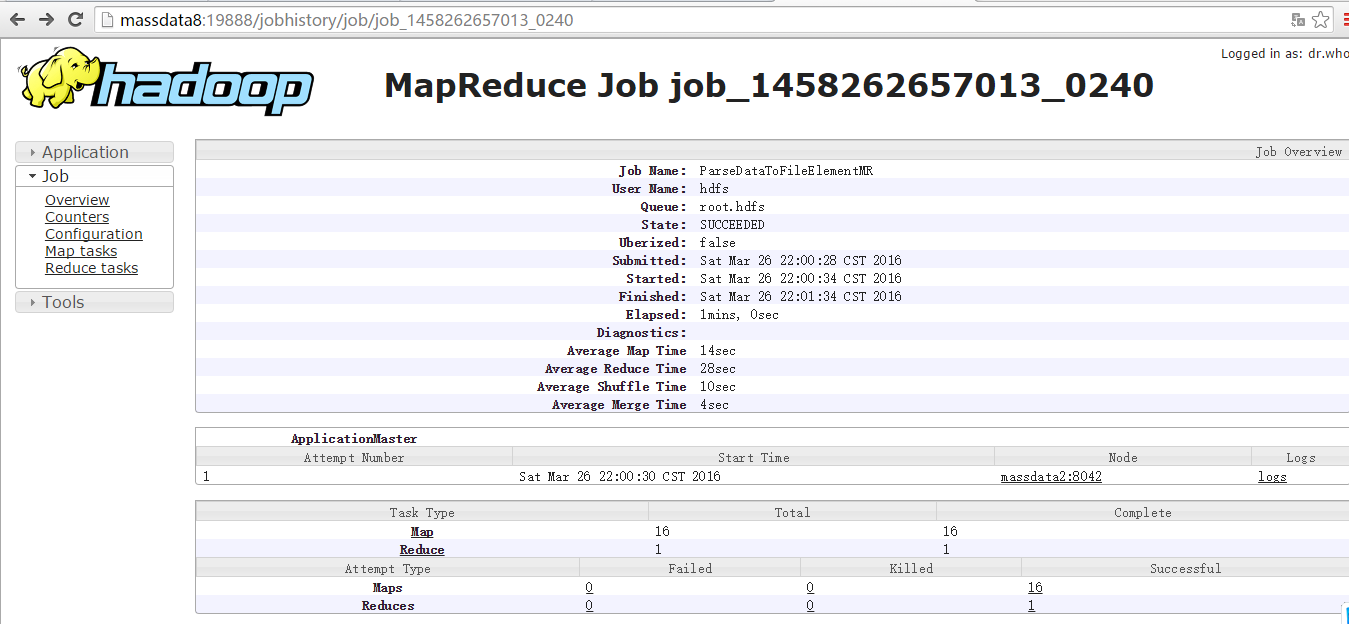
八、查看运行结果以及日志
这里,我们访问http://massdata8:19888/jobhistory,JobHistory Server的默认端口便可查看MR运行日志:
同时,也可以运行yarn application -list,查看正在运行的job。
好了,关于MR的编写就讲到这儿了,希望给刚学hadoop的童鞋提供点帮助,另外,大家也可以看看hadoop提供的mr example,学会如何写一个基本的mr。


 4443
4443

 被折叠的 条评论
为什么被折叠?
被折叠的 条评论
为什么被折叠?
 到【灌水乐园】发言


