


转自:http://blog.csdn.net/qinyuanpei/article/details/17729607
GoogleNow是Android4.1全新推出的一款应用,它可以全面了解你的使用习惯,并为你提供现在或者未来可能用到的各种信息,GoogleNow提供的信息关联度较高,几乎是瞬间返回答案,总而言之,GoogleNow是Google提出的全新搜索概念。当然,GoogleNow最为引人注目的当属它的卡片式设计。我们首先来看几张GoogleNow的图片:
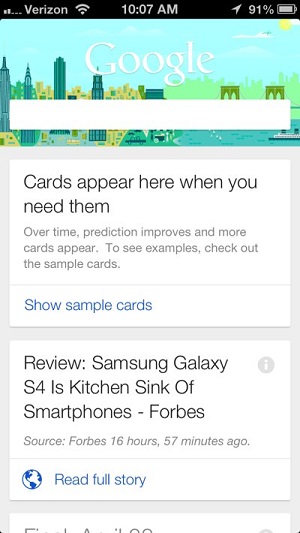
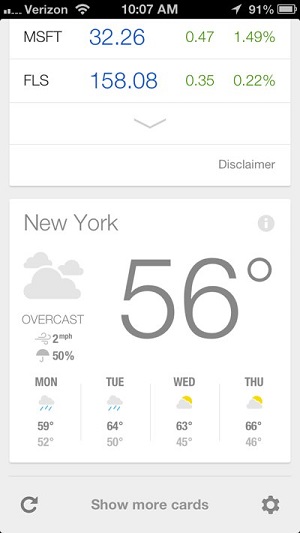
我们可以看出,这种卡片式的界面设计更为简洁,可以将用户需要的信息直接地呈现在用户面前,简洁而不失美观。那么现在我们就来一起做一个这样的卡片式界面吧!
首先我们先来建立一个布局:
- <?xml version="1.0" encoding="utf-8"?>
- <LinearLayout xmlns:android="http://schemas.android.com/apk/res/android"
- android:layout_width="match_parent"
- android:layout_height="wrap_content"
- android:orientation="vertical"
- android:background="@drawable/radius_bg"
- android:padding="15dp">
- <TextView
- android:id="@+id/Card_Title"
- android:layout_width="match_parent"
- android:layout_height="wrap_content"
- android:textSize="20sp"
- android:textIsSelectable="true"/>
- <ImageView
- android:id="@+id/Card_Pic"
- android:layout_width="match_parent"
- android:layout_height="wrap_content"
- android:contentDescription="@string/Description"
- android:scaleType="center" />
- </LinearLayout>
- <?xml version="1.0" encoding="utf-8"?>
- <shape xmlns:android="http://schemas.android.com/apk/res/android" >
- <corners android:radius="8dp"/>
- <solid android:color="#ffffff"/>
- </shape>
- package com.Android.GoogleCard;
- public class GoogleCard
- {
- private String mDescription;
- private int mDrawable;
- public GoogleCard(String mDescription,int mDrawable)
- {
- this.mDescription=mDescription;
- this.mDrawable=mDrawable;
- }
- public String getDescription()
- {
- return mDescription;
- }
- public void setDescription(String mDescription)
- {
- this.mDescription = mDescription;
- }
- public int getDrawable()
- {
- return mDrawable;
- }
- public void setDrawable(int mDrawable)
- {
- this.mDrawable = mDrawable;
- }
- }
- package com.Android.GoogleCard;
- import java.util.List;
- import android.content.Context;
- import android.view.LayoutInflater;
- import android.view.View;
- import android.view.ViewGroup;
- import android.widget.BaseAdapter;
- import android.widget.ImageView;
- import android.widget.TextView;
- public class GoogleCardAdapter extends BaseAdapter
- {
- private List<GoogleCard> mCards;
- private Context mContext;
- public GoogleCardAdapter(Context mContext,List<GoogleCard> mCards)
- {
- this.mContext=mContext;
- this.mCards=mCards;
- }
- @Override
- public int getCount()
- {
- return mCards.size();
- }
- @Override
- public Object getItem(int Index)
- {
- return mCards.get(Index);
- }
- @Override
- public long getItemId(int Index)
- {
- return Index;
- }
- @Override
- public View getView(int Index, View mView, ViewGroup mParent)
- {
- ViewHolder mHolder=new ViewHolder();
- mView=LayoutInflater.from(mContext).inflate(R.layout.layout_item, null);
- mHolder.Card_Title=(TextView)mView.findViewById(R.id.Card_Title);
- mHolder.Card_Title.setText(mCards.get(Index).getDescription());
- mHolder.Card_Pic=(ImageView)mView.findViewById(R.id.Card_Pic);
- //记住啊,这里是setImageResource()方法,不是setBackgroundResource(),否则图像会变形啊
- mHolder.Card_Pic.setImageResource(mCards.get(Index).getDrawable());
- return mView;
- }
- private static class ViewHolder
- {
- TextView Card_Title;
- ImageView Card_Pic;
- }
- }
- <LinearLayout xmlns:android="http://schemas.android.com/apk/res/android"
- xmlns:tools="http://schemas.android.com/tools"
- android:layout_width="match_parent"
- android:layout_height="match_parent"
- android:orientation="vertical"
- tools:context=".MainActivity" >
- <ListView
- android:id="@+id/ListView"
- android:layout_width="match_parent"
- android:layout_height="match_parent"
- android:divider="@null"
- android:paddingLeft="15dp"
- android:paddingRight="15dp"
- android:dividerHeight="15dp"
- android:scrollbarStyle="outsideOverlay" >
- </ListView>
- </LinearLayout>
- package com.Android.GoogleCard;
- import java.util.ArrayList;
- import java.util.List;
- import android.os.Bundle;
- import android.app.Activity;
- import android.view.Menu;
- import android.view.Window;
- import android.widget.ListView;
- public class MainActivity extends Activity {
- private ListView mListView;
- @Override
- protected void onCreate(Bundle savedInstanceState) {
- super.onCreate(savedInstanceState);
- this.requestWindowFeature(Window.FEATURE_NO_TITLE);
- setContentView(R.layout.layout_main);
- mListView=(ListView) findViewById(R.id.ListView);
- GoogleCardAdapter mAdapter=new GoogleCardAdapter(this, getItems());
- mListView.setAdapter(mAdapter);
- }
- private List<GoogleCard> getItems()
- {
- List<GoogleCard> mCards=new ArrayList<GoogleCard>();
- for(int i=0;i<20;i++)
- {
- GoogleCard mCard=new GoogleCard("这是第"+(i+1)+"张卡片", getResource(i));
- mCards.add(mCard);
- }
- return mCards;
- }
- private int getResource(int Index)
- {
- int mResult=0;
- switch(Index%2)
- {
- case 0:
- mResult=R.drawable.card_0;
- break;
- case 1:
- mResult=R.drawable.card_1;
- break;
- }
- return mResult;
- }
- @Override
- public boolean onCreateOptionsMenu(Menu menu) {
- // Inflate the menu; this adds items to the action bar if it is present.
- getMenuInflater().inflate(R.menu.main, menu);
- return true;
- }
- }
最终程序运行效果如图所示:


 1380
1380


 被折叠的 条评论
为什么被折叠?
被折叠的 条评论
为什么被折叠?
 到【灌水乐园】发言


