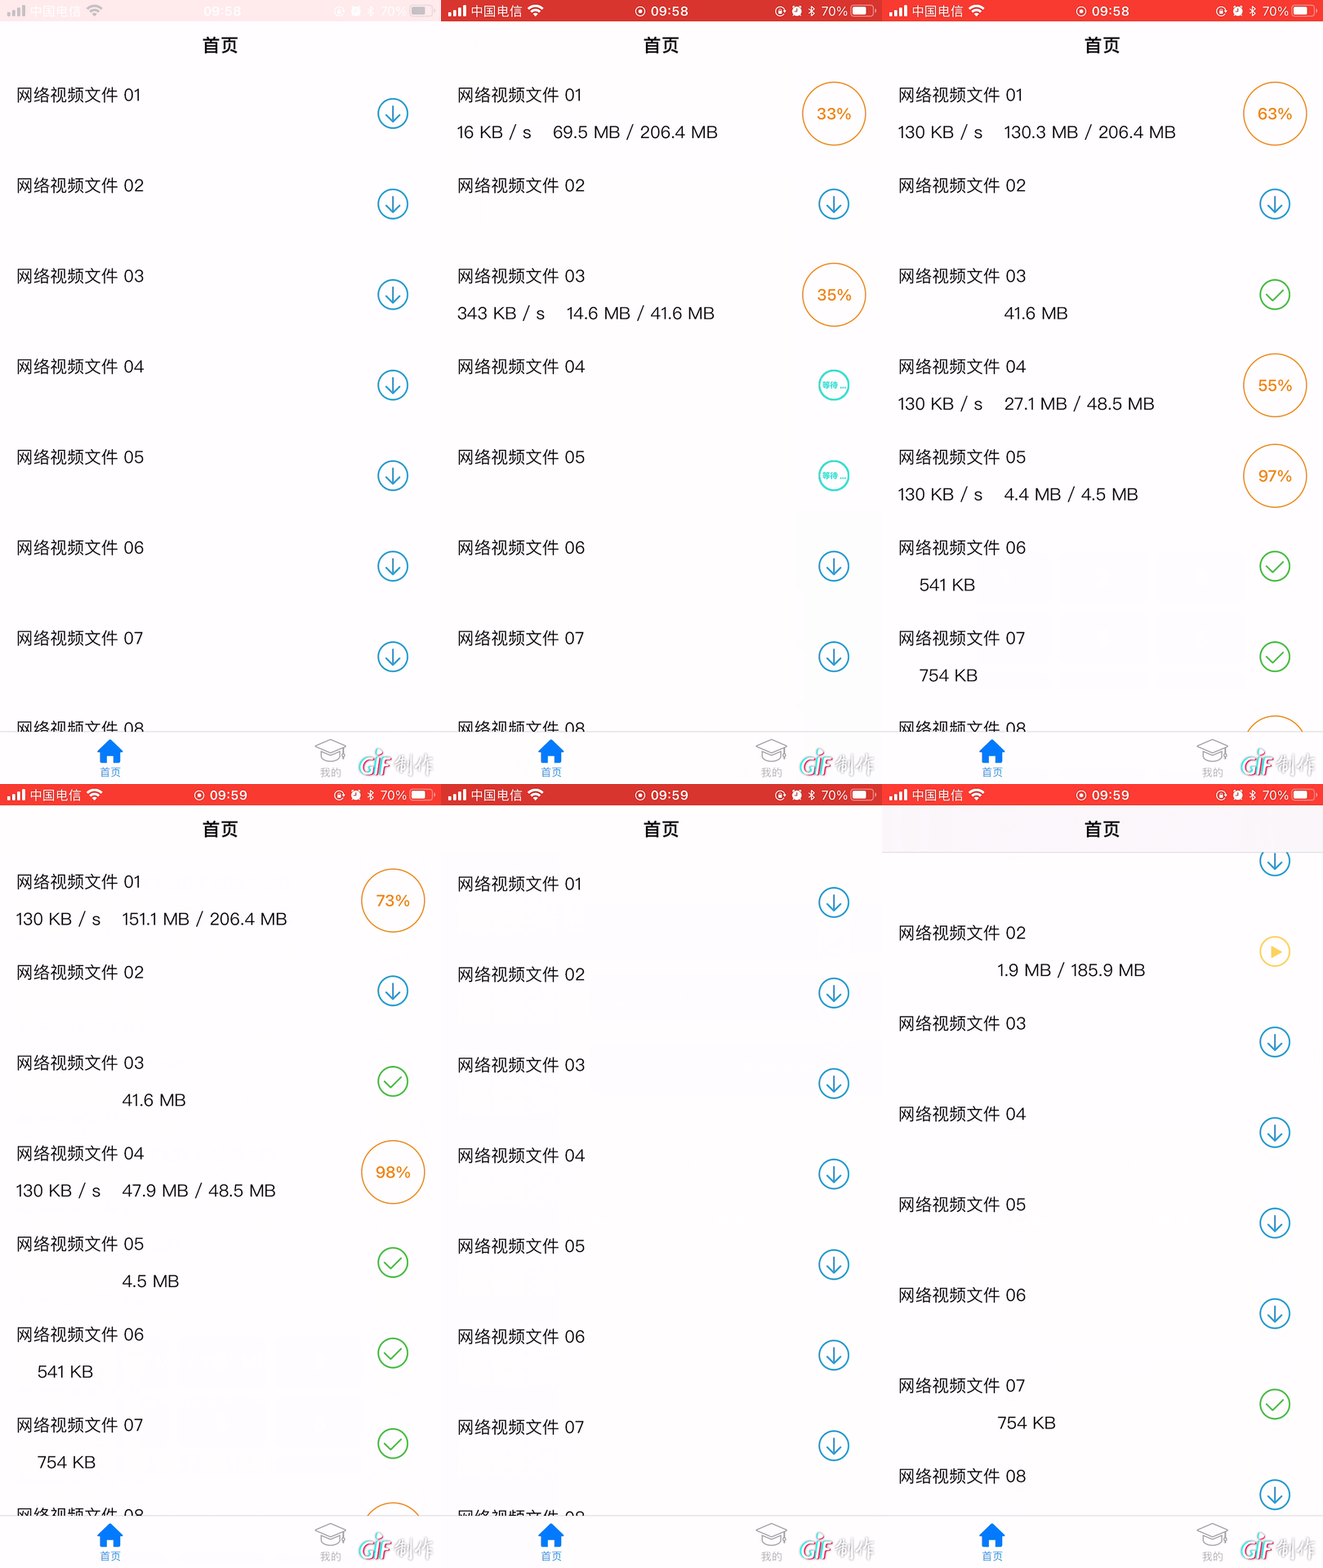
本篇讲述实现iOS文件下载功能,包含大文件下载,后台下载,杀死进程,重新启动时继续下载,设置下载并发数,监听网络改变等。
预览效果

附上Demo地址,如果觉得还行呢,就麻烦顺手给个star。
下载功能的实现
使用的网络连接的类为URLSession。在iOS7时推出,至此iOS系统才有了后台传输。在初始化URLSession前,需要先创建URLSessionConfiguration,可以理解为是URLSession需要的一个配置。URLSessionConfiguration有三种模式:
- default:可以使用缓存的Cache、Cookie、鉴权。
- ephemeral:仅内存缓存,不使用缓存的Cache、Cookie、鉴权。
- background:支持后台传输,需要一个identifier标识,用来重新连接session对象。
let configuration = URLSessionConfiguration.background(withIdentifier: "CXDownloadBackgroundSessionIdentifier"创建URLSession,设置配信息、代理、代理线程:
// Create `URLSession`, configure information, proxy, proxy thread.
session = URLSession(configuration: configuration, delegate: self, delegateQueue: queue)
在实现下载前,还需要了解一个很重要的类:URLSessionTask,无论下载多少文件,我们只需要初始化一个URLSession即可,而每个task对应一个任务,需要通过task才能实现下载,URLSessionTask是一个基类,有四个子类:
- URLSessionDataTask:下载时,内容Data对象返回,需要我们不断写入文件。
- URLSessionUploadTask:继承URLSessionDataTask,内容以Data对象返回,协议方法中可以查看请求时上传内容的过程,支持后台传输。
- URLSessionStreamTask:建立了一个TCP/IP连接,替代InputStream/OutputStream,新的API可异步读写,自动通过HTTP代理连接远程服务器。
- URLSessionDownloadTask:推荐使用该task实现文件下载,断点续传系统帮我们做了,资源会下载到一个临时文件,下载完成需将文件移动至想要的路径,系统会删除临时路劲文件,暂停时,系统会返回Data对象,恢复下载时用这个data创建task,支持后台传输。
后台下载
到这里,已经可以通过URLSessionDataTask实现断点续传了,下面介绍如何实现后台下载,其实非常简单,一共三步:
- 创建URLSession时,需要创建后台模式URLSessionConfiguration,上面已经介绍过了。
- 在AppDelegate中实现下面方法,并定义变量保存completionHandler代码块:
// 应用处于后台,所有下载任务完成调用
func application(_ application: UIApplication, handleEventsForBackgroundURLSession identifier: String, completionHandler: @escaping () -> Void) {
    CXDownloadManager.shared.setDidFinishEventsForBackgroundURLSession(completionHandler: completionHandler)
}- 在下载类中实现下面URLSessionDelegate协议方法,其实就是先执行完task的协议,保存数据、刷新界面之后再执行在AppDelegate中保存的代码块:
// 应用处于后台,所有下载任务完成及URLSession协议调用之后调
public func urlSessionDidFinishEvents(forBackgroundURLSession session: URLSession) {
    // Execute the block, the system generates a snapshot in the background, and releases the assertion that prevents the application from being suspended.
    didFinishEventsForBackgroundURLSessionHandler?()
}
程序终止,再次启动继续下载:
后台下载实现之后,再看一下如何实现进程杀死后,再次启动时继续下载,在应用程序被杀掉时,系统会自动保存应用下载session信息,重新启动应用时,如果创建和之前相同identifier的session,系统会找到对应的session数据,并响应urlSession(_ session: URLSession, task: URLSessionTask, didCompleteWithError error: Error?)方法,操作如下:
public func urlSession(_ session: URLSession, task: URLSessionTask, didCompleteWithError error: Error?) {
        guard let url = task.taskDescription else {
            return
        }
        // Process killed when downloading, callback error when restarting.
        if let err = error as? NSError,
           let reason = err.userInfo[NSURLErrorBackgroundTaskCancelledReasonKey] {
            CXDLogger.log(message: "Reason=\(reason)", level: .info)
            guard let model = CXDownloadDatabaseManager.shared.getModel(by: url)
            else {
                return
            }
            model.state = .waiting
            CXDownloadDatabaseManager.shared.updateModel(model, option: .state)
            return
        }
        let taskProcessor = downloadTaskDict[url]
        taskProcessor?.processSession(task: task, didCompleteWithError: error)
    }
并发数设置
下面介绍一下下载并发数的设置:URLSession本身就支持多任务同时下载,它会根据性能内部控制同时下载的个数,建议最多设置5个。一个任务对应一个URLSessionDataTask,所以想多任务同时下载,需要创建多个task,可以用数组或字典保存。我们定义变量去记录当前下载文件个数及用户设置的最大下载个数。
监听网络改变
用AFN监听,可以点击这里查看
为了增加用户体验,往往在设置中会给用户一个选项, 选择蜂窝网络下是否允许下载。URLSessionConfiguration本身就有一个属性allowsCellularAccess,默认为YES,允许蜂窝网络下载。如果不需要用户随时变更这个选项,是可以用这个属性。但是对于正在下载的任务,修改这个属性是无效的,即我们已经通过session创建了task对象,开启了任务,再试图用。
private func setup() {
        // Creates a database and a table.
        _ = CXDownloadDatabaseManager.shared

        currentCount = 0
        let ud = UserDefaults.standard
        let tmaxConcurrentCount = ud.integer(forKey: CXDownloadConfig.maxConcurrentCountKey)
        maxConcurrentCount = tmaxConcurrentCount > 0 ? tmaxConcurrentCount : 1
        allowsCellularAccess = ud.bool(forKey: CXDownloadConfig.allowsCellularAccessKey)

        lock = NSLock()

        // Single-threaded proxy queue.
        queue = OperationQueue()
        queue.maxConcurrentOperationCount = 1

        // Defines the background session identifier.
        let configuration = URLSessionConfiguration.background(withIdentifier: "CXDownloadBackgroundSessionIdentifier")
        // Allows cellular network download, the default is true, which is turned on here. We added a variable to control the user's switching choice.
        configuration.allowsCellularAccess = true

        // Create `URLSession`, configure information, proxy, proxy thread.
        session = URLSession(configuration: configuration, delegate: self, delegateQueue: queue)
 }
所以创建URLSessionConfiguration时把allowsCellularAccess设为YES,然后定义一个变量去控制是否允许蜂窝网络下载,在网络状态改变及用户设置修改这个选项之后,调用暂停、开启任务。
数据保存
用FMDB存储数据,可以点击这里查看
下载速度计算
声明两个变量,一个记录时间,一个记录在特定时间内接收到的数据大小,在接收服务器返回数据的urlSession(_ session: URLSession, dataTask: URLSessionDataTask, didReceive data: Data)方法中,统计接收到数据的大小,达到时间限定时,计算速度=数据/时间,然后清空变量,为方便数据库存储,这里用的时间戳。
func processSession(dataTask: URLSessionDataTask, didReceive data: Data) {
        let receivedBytes = dataTask.countOfBytesReceived + resumedFileSize
        let allBytes = dataTask.countOfBytesExpectedToReceive + resumedFileSize
        model.totalFileSize = allBytes
        model.tmpFileSize = receivedBytes

        let dataLength = data.count
        // Calculates the size of the downloaded file within the speed time.
        model.intervalFileSize += Int64(dataLength)

        let intervals = CXDToolbox.getIntervalsWithTimestamp(model.lastSpeedTime)
        if intervals > 1 {
            // Calculates speed
            model.speed = model.intervalFileSize / intervals

            model.lastSpeedTime = CXDToolbox.getTimestampWithDate(Date())
        }

        let progress = Float(receivedBytes) / Float(allBytes)
        //CXDLogger.log(message: "progress: \(progress)", level: .info)
        model.progress = progress

        // Update the specified model in database.
        CXDownloadDatabaseManager.shared.updateModel(model, option: .progressData)
        postProgressNotification()
        // Reset it.
        model.intervalFileSize = 0
}点赞+关注,第一时间获取技术干货和最新知识点,谢谢你的支持!
最后祝大家生活愉快~


 558
558

 被折叠的 条评论
为什么被折叠?


