


如何将 v-model 从祖父组件传递到孙子组件(@input|emit / 中间变量)
引言
在 Vue.js 中,v-model 是一个常用于双向数据绑定的指令。通常,我们只需要在父组件和子组件之间进行数据绑定,但有时我们需要将 v-model 从父组件传递到孙子组件。在这篇文章中,我将分享如何实现这一点,并解决 v-model 不能直接用于 props 的问题。
问题描述
在开发过程中,我遇到一个需求,需要将 v-model 从父组件传递到孙子组件。然而,由于 v-model 不能直接用于 props(如图)。
-
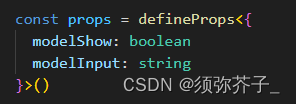
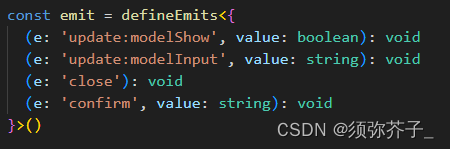
子组件定义props和emit
-
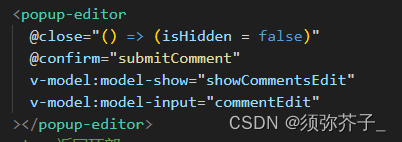
父组件绑定
-
错误❌子组件直接将prop绑定到孙子组件的v-model
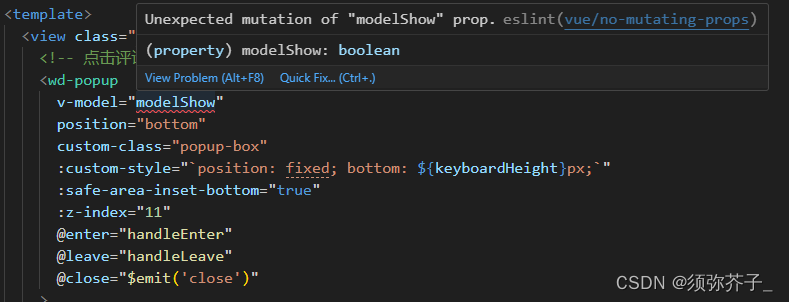
因为 props 是只读的,因此我们需要一种替代方案来实现这个功能。
编辑: 最佳实践
更新最佳实践, 下面详细阐述的情况一其实是我对 v-model 的原理理解不深的前提下的"曲线救国", 最佳实践如下:
    <wd-popup
      @update:modelValue="$emit('update:modelShow', $event)"
      :model-value="modelShow"
      position="bottom"
    >
    <!-- 其余业务逻辑省略 -->
    </wd-popup>
    const props = defineProps<{
	  modelShow: boolean
	}>()

	const emit = defineEmits<{
	  (e: 'update:modelShow', value: boolean): void
	}>()
解释
v-model 其实就是一个语法糖
- 例子:使用v-model 双向数据绑定事件时
<input v-model = 'something'> - 原理:只是一个语法糖
<input v-bind:value="something" v-on:input="something=$event.target.value"> - 所以在组件里使用的时候,相当于下面的简写:
<custom v-bind:value="something" v-on:input="something = $event.target.value"></custom>- 其中
v-bind:可简写为:,v-on:可简写为@<custom :value="something" @input="something = $event.target.value"></custom>
- 其中
要实现祖父组件的 v-model 传递到孙子组件的 v-model 核心是展开孙子组件的 v-model 语法糖
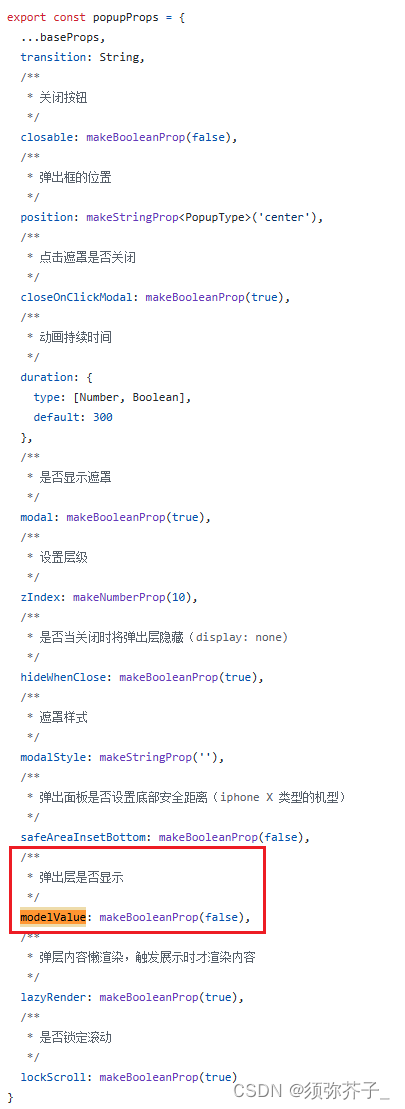
通过查看wot-ui的源码发现, wd-popup 组件的 v-model 绑定的变量是 modelValue 。v-bind: 为 modelValue, v-on: 为 update:modelValue

下面是编辑前的内容 :
详细阐述
-
情况一(非文本框孙子组件): 对于
wd-popup的 v-model,我们使用了一个中间响应变量internalModelShow来解决 v-model 不能直接用于 props 的问题:const internalModelShow = ref(props.modelShow) watch( () => props.modelShow, (newVal) => { internalModelShow.value = newVal }, ) watch(internalModelShow, (newVal) => { emit('update:modelShow', newVal) })internalModelShow的值会随着props.modelShow的变化而更新,反之亦然,通过监听internalModelShow的变化来发出update:modelShow事件,这样就实现了父组件和子组件之间的同步。 -
情况二(文本框孙子组件): 对于
wd-textarea的 v-model,我们通过将modelInput发射到 textarea 的@input事件中实现双向绑定:<wd-textarea :focus="focus" custom-class="popup-textarea" :value="modelInput" @input="$emit('update:modelInput', $event.target.value)" size="35rpx" confirm-type="send" :show-confirm-bar="false" placeholder="我有话要说..." @confirm="$emit('confirm', modelInput)" />这种方式确保了
modelInput的值可以通过@input事件传递回父组件,实现了数据的双向绑定。
完整实现
父组件
<route lang="json5">
{
layout: 'default',
style: {
navigationBarTitleText: '帖子详情',
},
}
</route>
<template>
<view class="forumdetailLayout">
<popup-editor
@close="handleClose"
@confirm="submitComment"
v-model:model-show="showCommentsEdit"
v-model:model-input="commentEdit"
/>
</view>
</template>
<script lang="ts" setup>
import { ref } from 'vue'
import PopupEditor from '@/components/popup-editor/popup-editor.vue'
const showCommentsEdit = ref(false)
const commentEdit = ref('')
const handleClose = () => {
showCommentsEdit.value = false
}
const submitComment = (val: string) => {
console.log(val)
// TODO 提交评论
showCommentsEdit.value = false
}
</script>
<style lang="scss" scoped>
.forumdetailLayout {
background-color: #f5f5f5;
}
</style>
子组件
为了传递 wd-popup 的 v-model 控制是否弹出,我们使用一个中间响应变量 internalModelShow 进行传递:
<template>
<view class="popup-editor">
<wd-popup
v-model="internalModelShow"
position="bottom"
custom-class="popup-box"
:custom-style="`position: fixed; bottom: ${keyboardHeight}px;`"
:safe-area-inset-bottom="true"
:z-index="11"
@enter="handleEnter"
@leave="handleLeave"
@close="$emit('close')"
>
<view class="popup-header">
<view class="text">发表评论</view>
</view>
<wd-textarea
:focus="focus"
custom-class="popup-textarea"
:value="modelInput"
@input="$emit('update:modelInput', $event.target.value)"
size="35rpx"
confirm-type="send"
:show-confirm-bar="false"
placeholder="我有话要说..."
@confirm="$emit('confirm', modelInput)"
/>
</wd-popup>
</view>
</template>
<script lang="ts" setup>
import { ref, watch, onMounted, onUnmounted } from 'vue'
const keyboardHeight = ref(0)
const focus = ref(false)
const props = defineProps<{
modelShow: boolean
modelInput: string
}>()
const emit = defineEmits<{
(e: 'update:modelShow', value: boolean): void
(e: 'update:modelInput', value: string): void
(e: 'close'): void
(e: 'confirm', value: string): void
}>()
// 使用一个中间响应变量 internalModelShow 进行传递
const internalModelShow = ref(props.modelShow)

watch(
  () => props.modelShow,
  (newVal) => {
    internalModelShow.value = newVal
  },
)

watch(internalModelShow, (newVal) => {
  emit('update:modelShow', newVal)
})
const handleEnter = () => {
focus.value = true
}
const handleLeave = () => {
focus.value = false
}
onMounted(() => {
// #ifdef MP-WEIXIN
uni.onKeyboardHeightChange((res) => {
keyboardHeight.value = res.height
})
// #endif
})
onUnmounted(() => {
// #ifdef MP-WEIXIN
uni.offKeyboardHeightChange((res) => {
keyboardHeight.value = res.height
})
// #endif
})
</script>
<style lang="scss" scoped>
.popup-editor {
:deep(.popup-box) {
position: fixed;
z-index: 11;
box-sizing: border-box;
display: flex;
flex-direction: column;
height: auto;
border-radius: 24rpx 24rpx 0 0;
.popup-header {
display: flex;
align-items: center;
justify-content: space-between;
width: 100vw;
padding: 17rpx calc(30rpx - 17rpx) 0 30rpx;
.text {
font-size: 27rpx;
color: #88888d;
}
}
:deep(.popup-textarea) {
height: 140rpx;
font-size: 35rpx !important;
}
}
}
</style>
结论
通过上述方法,我们可以成功将 v-model 从父组件传递到孙子组件,并解决 v-model 不能直接用于 props 的问题。希望这篇文章对你有所帮助,如果你有任何问题或建议,欢迎在评论区留言。


 933
933


 被折叠的 条评论
为什么被折叠?
被折叠的 条评论
为什么被折叠?
 到【灌水乐园】发言


