


开始
最近写一个项目用到了SweetAlertDialog,但有个需求怎么也满足不了,就是不想让Confirm按钮显示,并且可以设置时间自动关闭Dialog,并且可以设置回调,所以决定进行二次开发。项目是写好了,但是我不想每次项目走到哪都带一个Library。你不觉得这样一句话就把项目引进来很酷吗?
dependencies {
    compile 'com.marlon.sweetalert:library:1.0.2'
}
所以,这篇博客将告诉你如何将你的Library分享到JCenter
申请账号
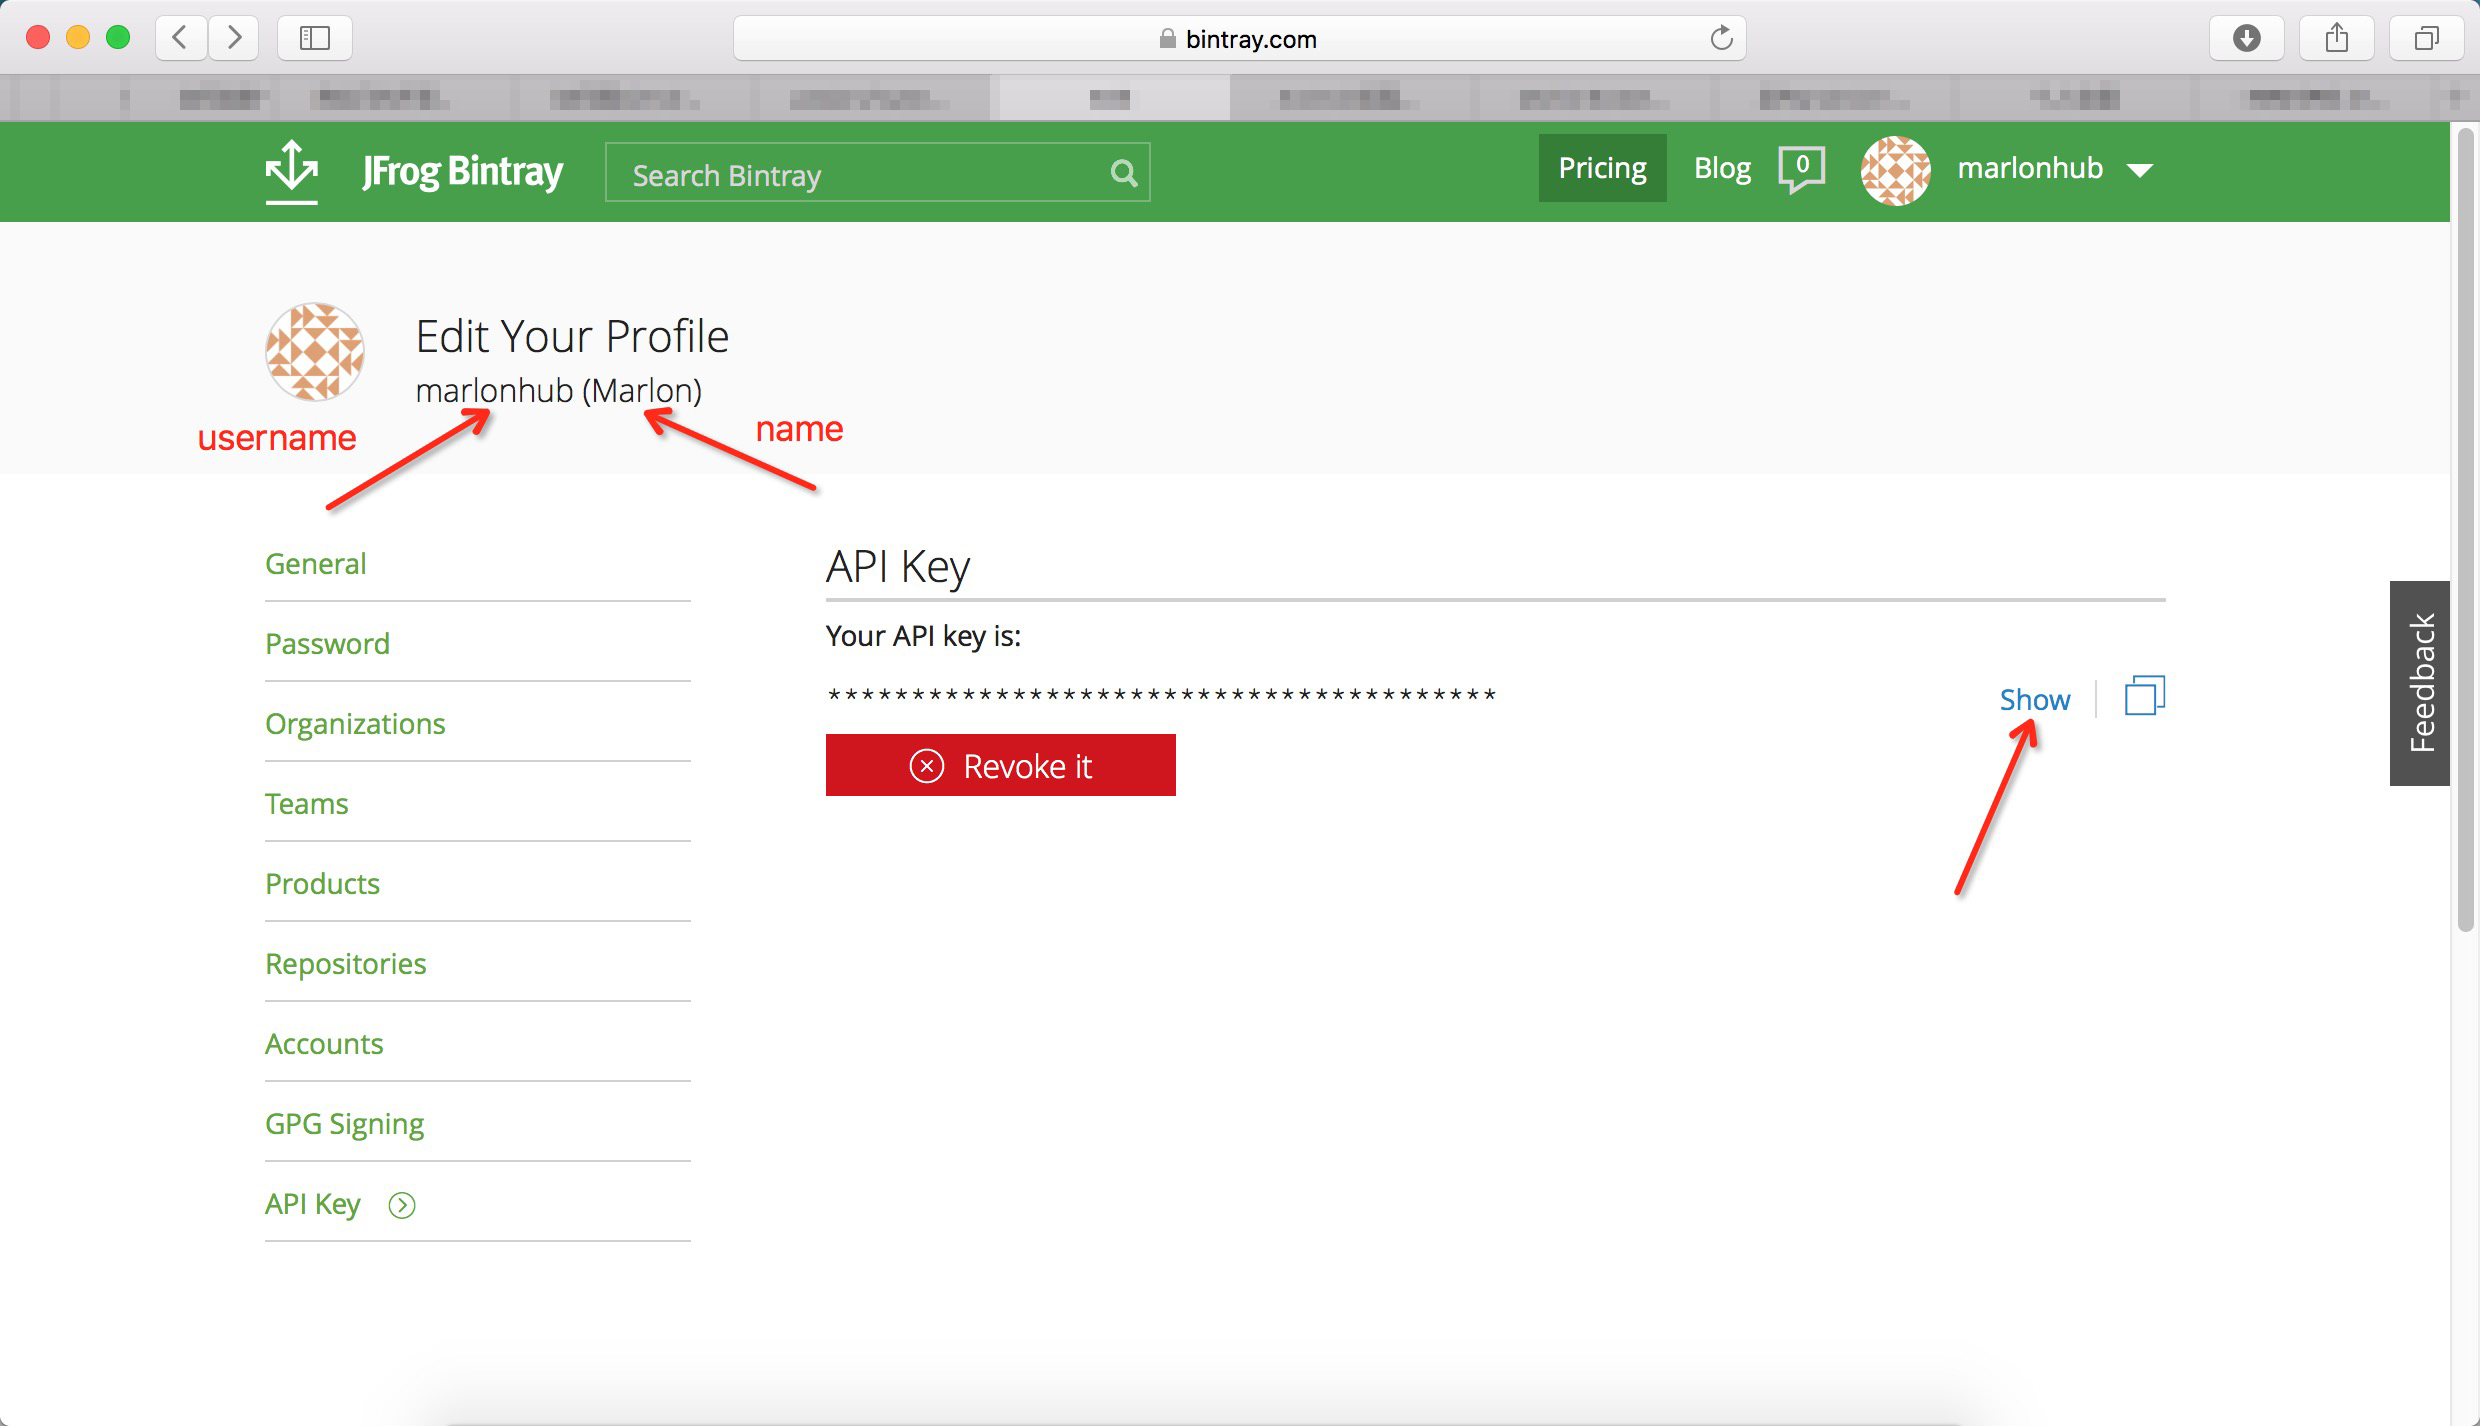
首先你要做的是申请Bintray账号,它是JCenter的托管商,注册完成之后,你需要进入你账户的编辑界面,记住你的账户名和API key,我一般将它放在local.properties文件中。因为我们待会会用到,做完这些后,你的第一步差不多即完成了。
配置工程
在你工程目录找到build.gradle,在buildscript/dependencies中添加两个classpath:
classpath 'com.jfrog.bintray.gradle:gradle-bintray-plugin:1.0'
classpath 'com.github.dcendents:android-maven-plugin:1.3'
这是两个帮助发布项目的插件,完整的project build.gradle请查看这里。
同样在工程目录找到local.properties(没有就创建,一般都会有) 底下添加 jcenter 账号和apikey:(apikey怎么拿?返回上面看去!这两个参数在将要创建的bintray.gradle中被使用)
bintray.user=marlonhub
bintray.apikey=xxxxxxxxxxxxxxxxxxxxx
配置Library
工程配置完了,接下来配置你的Library,在你的Library目录新建bintray.gradle,有关发布的操作定义都在该文件内
apply plugin: 'com.github.dcendents.android-maven'
apply plugin: 'com.jfrog.bintray'

group = PROJ_GROUP
version = PROJ_VERSION
project.archivesBaseName = PROJ_ARTIFACTID

task sourcesJar(type: Jar) {
    from android.sourceSets.main.java.srcDirs
    classifier = 'sources'
}

task javadoc(type: Javadoc) {
    source = android.sourceSets.main.java.srcDirs
    classpath +=project.files(android.getBootClasspath().join(File.pathSeparator))
}

task javadocJar(type: Jar, dependsOn: javadoc) {
    classifier = 'javadoc'
    from javadoc.destinationDir
}

artifacts {
    archives javadocJar
    archives sourcesJar

}

javadoc {
    options{
        encoding "UTF-8"
        charSet 'UTF-8'
        author true
        version true
        links "http://docs.oracle.com/javase/7/docs/api"
    }
}

install {
    repositories.mavenInstaller {
        // This generates POM.xml with proper parameters
        pom.artifactId = PROJ_ARTIFACTID
        pom {
            project {
                description PROJ_DESCRIPTION
                packaging 'aar'
                name PROJ_NAME
                url PROJ_WEBSITEURL
                licenses {
                    license {
                        name LICENSE_NAME
                        url LICENSE_URL
                    }
                }
                developers {
                    developer {
                        id DEVELOPER_ID
                        name DEVELOPER_NAME
                        email DEVELOPER_EMAIL
                    }
                }
                scm {
                    connection PROJ_VCSURL
                    developerConnection PROJ_VCSURL
                    url PROJ_WEBSITEURL
                }
            }
        }
    }
}

Properties properties = new Properties()
properties.load(project.rootProject.file('local.properties').newDataInputStream())

bintray {
    user = properties.getProperty("bintray.user")
    key = properties.getProperty("bintray.apikey")


    configurations = ['published','archives']
    publish = true

    pkg {
        repo = "maven"
        name = PROJ_NAME
        desc = PROJ_DESCRIPTION
        websiteUrl = PROJ_WEBSITEURL
        issueTrackerUrl = PROJ_ISSUETRACKERURL
        vcsUrl = PROJ_VCSURL
        licenses = ["Apache-2.0"]
        publicDownloadNumbers = true
    }
}
在你的Library目录新建bintray.gradle,有关发布的操作实现都在该文件内
PROJ_GROUP=marlon.library.sweetalertdialog       //artifactId_groud_id
PROJ_VERSION=1.0.0                  //version
PROJ_NAME=MarlonSweetAlertDialog                     //project name
PROJ_WEBSITEURL=https:https://github.com/MarlonHub/MarlonSweetAlertDialog    //project website
PROJ_ISSUETRACKERURL=https://github.com/MarlonHub/MarlonSweetAlertDialog/issues   //    project issues url
PROJ_VCSURL=https://github.com/MarlonHub/MarlonSweetAlertDialog.git  //project sourse url
PROJ_DESCRIPTION=The SweetAlertDialog From Marlon     //description
PROJ_ARTIFACTID=MarlonSweetAlertDialog          //maven_artifactId

LICENSE_NAME='The Apache Software License, Version 2.0'
LICENSE_URL='http://www.apache.org/licenses/LICENSE-2.0.txt'

DEVELOPER_ID=marlonhub
DEVELOPER_NAME=Marlon
DEVELOPER_EMAIL=199400525@qq.com
这里就是一些项目定义,一些定义在 bintray.gradle 文件中调用,这样只需要维护 gradle.properties 就可以了,上传都由上面的代码实现。
上传到JCenter
以上工作做完后就可以将Library上传到JCenter,在Android Studio界面右侧找到Gradle依次执行以下任务(一般在Tasks里面的other和publishing里面有)
- sourcesJar
- javadocJar
- javadoc
- install
- bintraryUpload
显示以下信息
BUILD SUCCESSFUL

Total time: 23.426 secs
15:55:25: External task execution finished 'bintrayUpload'.
提交审核
- 当bintrayUpload成功之后,在我的主页右下部分Latest Activity块,会看到你提交了一个项目。
- 从这个Latest Activity列表中点击你的项目
- 在右下角点击add to jcenter
- 本文框里随便输点什么提交即可,只要项目没什么问题一般都会给通过的。
- 等个几个小时会收到审核邮件
引用项目
最后,在你的项目中添加以下语句即可,以后再提交记得修改version。
dependencies {
    compile 'com.marlon.sweetalert:library:1.0.2'
}
- com.marlon.sweetalert对应GroupId
- library对应ProjectName
- 1.0.0对应version
总结
JCenter相较于Maven Central还是很方便的,另外就是在软件开发过程中,有时候也要知其然,也要知其所以然。


 2210
2210

 被折叠的 条评论
为什么被折叠?
被折叠的 条评论
为什么被折叠?
 到【灌水乐园】发言


