


阅前提示
此文章基于Spring Security 6.0
一、Spring Boot中引入Spring Security
<?xml version="1.0" encoding="UTF-8"?>
<project xmlns="http://maven.apache.org/POM/4.0.0"
         xmlns:xsi="http://www.w3.org/2001/XMLSchema-instance"
         xsi:schemaLocation="http://maven.apache.org/POM/4.0.0 http://maven.apache.org/xsd/maven-4.0.0.xsd">
    <modelVersion>4.0.0</modelVersion>

    <groupId>org.example</groupId>
    <artifactId>spring-security-demo</artifactId>
    <version>1.0-SNAPSHOT</version>

    <properties>
        <maven.compiler.source>19</maven.compiler.source>
        <maven.compiler.target>19</maven.compiler.target>
        <project.build.sourceEncoding>UTF-8</project.build.sourceEncoding>
    </properties>

    <parent>
        <groupId>org.springframework.boot</groupId>
        <artifactId>spring-boot-starter-parent</artifactId>
        <version>3.0.1</version>
    </parent>

    <dependencies>
        <dependency>
            <groupId>org.springframework.boot</groupId>
            <artifactId>spring-boot-starter-web</artifactId>
        </dependency>

        <dependency>
            <groupId>org.springframework.boot</groupId>
            <artifactId>spring-boot-starter-security</artifactId>
        </dependency>
    </dependencies>
</project>
首先创建一个Spring Boot 项目,在dependency中引入Spring Security的依赖
<dependency>
	<groupId>org.springframework.boot</groupId>
	<artifactId>spring-boot-starter-security</artifactId>
</dependency>
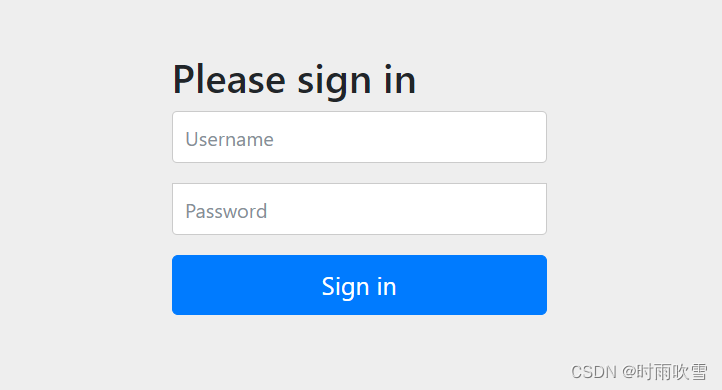
之后启动项目,打开localhost:8080。可以看到,Spring Security基于Spring Boot的AutoConfigration,将对于主页的请求拦截,访问到了登录界面
在一般情况下,这个登录界面已经可以满足我们的需求了。但在大部分情况下,这个登录界面肯定是满足不了我们的要求的别问,问就是老板提的。所以我们需要自定义登录界面
默认情况下用户名是user
密码打印在控制台,可以看到类似这样的信息

二、配置formLogin()
先来创建Spring Security的配置类
@Configuration
@EnableWebSecurity
public class WebSecurityConfig {
	@Bean
    public SecurityFilterChain securityFilterChain(HttpSecurity http) throws Exception {
        http
                .authorizeRequests((authorizeRequests) ->
                        authorizeRequests.requestMatchers("/js/**","/css/**").permitAll()
                                .anyRequest().authenticated()
                )
                .formLogin((formLogin) ->
                        formLogin
                                .usernameParameter("username")
                                .passwordParameter("password")
                                .loginPage("/login.html")
                                .loginProcessingUrl("/login")
                                .failureUrl("/login.html?error")
                                .permitAll()
                )
                .csrf(csrf -> csrf.disable());
        return http.build();
    }
}
以上代码的用途就是当请求路径匹配到 /js/** , /css/** 这类静态资源的时候,不做认证,直接放行,其他任何路径(anyRequest())都需要经过认证后才能放行。
以及本文的重点 formLogin() 的配置
- usernameParamter()配置登录用户名参数名,默认就是 username
- passwordParameter() 配置登录密码参数名,默认就是password
- loginPage()配置登录界面的路径。默认GET方法的/login
- loginProcessingUrl()配置登录按钮的路径。默认POST方法的/login
- failureUrl()配置登录失败后访问的页面路径。默认/login?error
最后别忘了permitAll(),或者将登录接口跟静态资源一起写到前面不需要认证的路径中。否则将会出现重定向过多错误。当你访问登录页面的时候需要认证,认证不通过,转到登录界面,循环,导致重定向过多错误
三、csrf配置
自Spring Security 4.0起,csrf防护默认开启,如果我们在默认的登录界面打开浏览器控制台,能看到如下代码

如果在自定义的界面中不配置_csrf参数,登录请求是会被拒绝的。这里我们先不用csrf将csrf配置成disable()
四、AuthenticationSuccessHandler与AuthenticationFailureHandler
随着传统项目不能再满足我们的需求(前后端分离,移动端流行,后端只需要提供数据),我们需要放弃重定向配置,自定义登录成功与失败后的操作
@Component
public class SecurityAuthenticationFailureHandler implements AuthenticationFailureHandler {
    @Override
    public void onAuthenticationFailure(HttpServletRequest request, HttpServletResponse response, AuthenticationException exception) throws IOException, ServletException {
        // TODO log user login failure and the number of login failure +1

        // return login failure message
        response.getWriter().println("{success:false,message:" + exception.getMessage() + "}");
    }
}
@Component
public class SecurityAuthenticationSuccessHandler implements AuthenticationSuccessHandler {

    @Override
    public void onAuthenticationSuccess(HttpServletRequest request, HttpServletResponse response, Authentication authentication) throws IOException, ServletException {
        // TODO log user login success

        // return success message
        response.getWriter().println("{success:true,message:" + authentication.getName() + "}");
    }
}
@Configuration
@EnableWebSecurity
public class WebSecurityConfig {
    @Autowired
    private SecurityAuthenticationSuccessHandler securityAuthenticationSuccessHandler;

    @Autowired
    private SecurityAuthenticationFailureHandler securityAuthenticationFailureHandler;

    @Bean
    public SecurityFilterChain securityFilterChain(HttpSecurity http) throws Exception {
        http
                .authorizeRequests((authorizeRequests) ->
                        authorizeRequests.requestMatchers("/js/**","/css/**").permitAll()
                                .anyRequest().authenticated()
                )
                .formLogin((formLogin) ->
                        formLogin
                                .usernameParameter("username")
                                .passwordParameter("password")
                                .loginProcessingUrl("/login")
                                .successHandler(securityAuthenticationSuccessHandler)
                                .failureHandler(securityAuthenticationFailureHandler)
                                .permitAll()
                )
                .csrf(csrf -> csrf.disable());
        return http.build();
    }
}
前后端分离的项目中loginPage()都不需要,只需要配置successHandler()和failureHandler()并实现AuthenticationSuccessHandler和AuthenticationFailureHandler接口


 4121
4121


 被折叠的 条评论
为什么被折叠?
被折叠的 条评论
为什么被折叠?
 到【灌水乐园】发言


