


 实验准备:4台pc,开启防火墙。
实验步骤:
网关服务器:
一、1)设置路由转发
[root@localhost network-scripts]# vim /etc/sysctl.conf
[root@localhost network-scripts]# sysctl -p
net.ipv4.ip_forward = 1
2)启动防火墙并设置为自启
[root@localhost network-scripts]# systemctl enable firewalld
3)设置默认区域为external
[root@localhost network-scripts]# firewall-cmd --set-default-zone=external
#查看默认区域
[root@localhost network-scripts]# firewall-cmd --list-all
4)设置网卡区域
[root@localhost network-scripts]# firewall-cmd --change-interface=ens37 --zone=trusted
The interface is under control of NetworkManager, setting zone to ‘trusted’.
success
[root@localhost network-scripts]# firewall-cmd --change-interface=ens38 --zone=dmz The interface is under control of NetworkManager, setting zone to ‘dmz’.
Success
5)查看区域配置情况
[root@localhost network-scripts]# firewall-cmd --get-active-zones
dmz
interfaces: ens38
external
interfaces: ens33
trusted
interfaces: ens37
6)更改ssh端口并重启 #重启需要关闭selinux
[root@localhost network-scripts]# vim /etc/ssh/sshd_config
[root@localhost network-scripts]# systemctl restart sshd
7)配置external区域添加tcp的12345端口
[root@localhost network-scripts]# firewall-cmd --zone=external --add-port=12345/tcp --permanent
Success
8)移除原有的ssh预定义服务
[root@localhost network-scripts]# firewall-cmd --zone=external --remove-service=ssh --permanent
Success
#更改之后查看一下端口是否更改 netstat -anpt | grep “ssh”
9)禁止external区域ping
[root@localhost network-scripts]# firewall-cmd --zone=external --add-icmp-block=echo-request --permanent
Success
10)重新加载firewalld防火墙配置
[root@localhost network-scripts]# firewall-cmd --reload
Success
二、1)web服务器安装http和mod-ssl并自启
[root@localhost ~]# yum -y install http mod_ssl
[root@localhost ~]# systemctl restart httpd
[root@localhost ~]# systemctl enable httpd.service
Created symlink from /etc/systemd/system/multi-user.target.wants/httpd.service to /usr/lib/systemd/system/httpd.service.
#启动之后验证是否启动
2)更改ssh端口,需要关闭selinux
[root@localhost network-scripts]# vim /etc/ssh/sshd_config
Port 12345 #去掉注释修改
[root@localhost network-scripts]# setenforce 0
[root@localhost network-scripts]# systemctl restart sshd
3)在web服务器配置区域dmz
需要将web的默认区域设置为dmz
firewall-cmd --set-default-zone=dmz
4)为dmz区域打开https及添加端口12345/tcp
[root@localhost ~]# firewall-cmd --zone=dmz --add-service=https --permanent
Success #添加https
[root@localhost ~]# firewall-cmd --zone=dmz --add-port=12345/tcp --permanent
Success #添加端口12345
[root@localhost ~]# firewall-cmd --add-icmp-block=echo-request --zone=dmz –permanent #禁止ping
success
[root@localhost ~]# firewall-cmd --zone=dmz --remove-service=ssh --permanent
Success #删除原有的ssh预定义服务
[root@localhost ~]# firewall-cmd --reload
Success #重新加载firewalld
[root@localhost ~]# firewall-cmd --list-all --zone=dmz #查看dmz配置
dmz (active)
target: default
icmp-block-inversion: no
interfaces: ens33
sources:
services: https
ports: 12345/tcp
protocols:
masquerade: no
forward-ports:
sourceports:
icmp-blocks: echo-request
rich rules:
测试:
在内网测试机测试效果图:
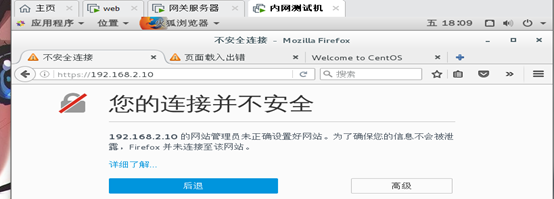
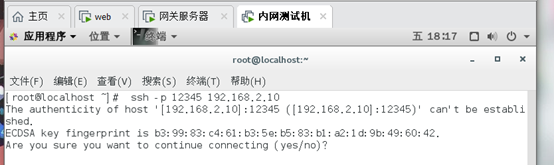
在内网测试机ssh登录web网站服务器的12345端口:
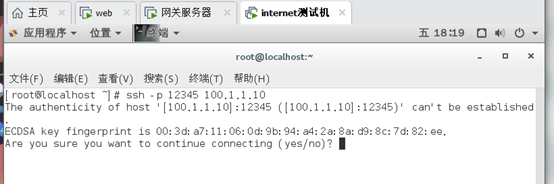
在internet测试机测试ssh端口
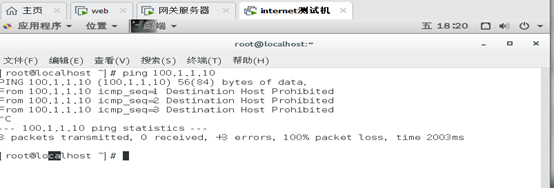
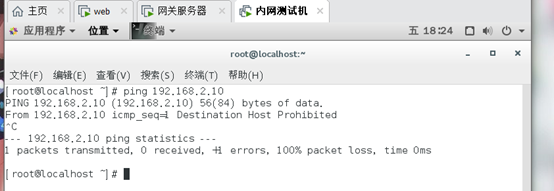
在internet区域测试ping external区域
在内网客户测试ping external区域


 1万+
1万+


 被折叠的 条评论
为什么被折叠?
被折叠的 条评论
为什么被折叠?
 到【灌水乐园】发言


