


iOS 像素与点
像素与点的关系
导入标的时候,我们都知道有1倍、2倍、3倍图。对应在1倍、2倍、3倍屏幕上使用。
那这些不同倍图(不同分辨率屏幕)与日常点的关系是什么了。
1倍屏: 1个点(point)对应1个像素(piexl),比如第一批 iPhone
2倍屏: 1个点(point)对应4个像素(piexl),横竖各3列,比如 iPhone6
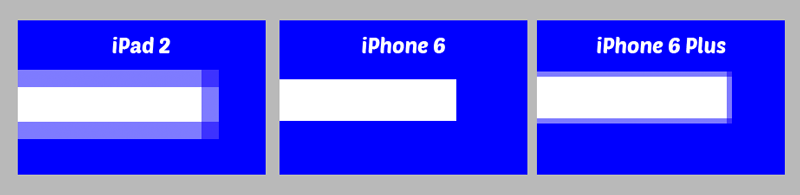
3倍屏: 1个点(point)对应9个像素(piexl),横竖各3列,比如iPhone6Plus
像素示例图如下
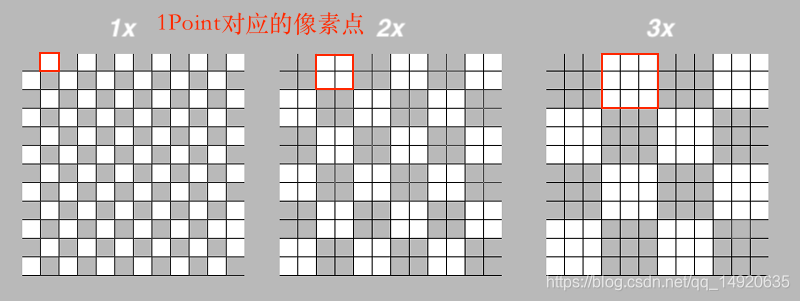
红色矩形表示一个点, 不同倍屏对应不同像素点。
在日常开发中,我们大部分只需要关注 point, 由系统去帮我们处理像素转化。
绘制1像素的线条
想不明白?
mport UIKit

class ViewWithBottomLine: UIView {
    @IBInspectable var separatorColor: UIColor = Your default color

    override func draw(_ rect: CGRect) {
        super.draw(rect)

        guard let context = UIGraphicsGetCurrentContext() else {
            return
        }

        let scale = UIScreen.main.scale

        let width = 1 / scale
        let offset = width / 2

        context.setLineWidth(width)
        context.setStrokeColor(separatorColor.cgColor)
        context.beginPath()
        context.move(to: CGPoint(x: 0, y: rect.maxY - offset))
        context.addLine(to: CGPoint(x: rect.maxX, y: rect.maxY - offset))
        context.strokePath()
    }
}
绘制一像素需要设置偏移量。
参考:https://www.jianshu.com/p/abcb18335e44
警惕奇数线条
虽然在开发中,我们只需要关注逻辑像分辨率(point),但是如果遇到奇数(宽高)线条在绘制的时候也可能产生锯齿现象。
比如当宽度为3的线条居中时,就需要调整偏移量,保证线条不发生锯齿。
发生锯齿原理
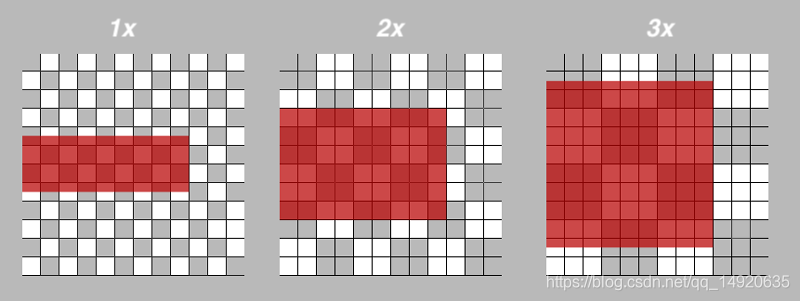
修正做法, 添加0.5的偏移量,和宽度。
let halfPointShift: CGFloat = 0.5
//to the start of the horizontal stroke
plusPath.move(to: CGPoint(
  x: halfWidth - halfPlusWidth + halfPointShift,
  y: halfHeight + halfPointShift))

//add a point to the path at the end of the stroke
plusPath.addLine(to: CGPoint(
  x: halfWidth + halfPlusWidth + halfPointShift,
  y: halfHeight + halfPointShift))
参考
Drawing and Printing Guide for iOS
CoreGraphic实现自定义按钮和轮盘-raywenderlich
抗锯齿处理: (针对图片旋转产生锯齿)1.开启 UI 控件的抗锯齿功能 2. 绘制带有一像素的透明边的图片 3. 使用更清晰的像素。


 1861
1861

 被折叠的 条评论
为什么被折叠?
被折叠的 条评论
为什么被折叠?
 到【灌水乐园】发言


