


SpringBoot最强入门教程
01 简介
1.1 spring是如何简化开发的
- 基于POJO的轻量级和最小侵入性编程,所有东西都是bean;
- 通过IOC,依赖注入(DI)和面向接口实现松耦合;
- 基于切面(AOP)和惯例进行声明式编程;
- 通过切面和模版减少样式代码,RedisTemplate,xxxTemplate;
1.2 微服务
微服务是一种架构风格,可以理解成小型服务,这些服务通过HTTP的方式进行互通。微服务并没有一个官方的定义,想要直接描述微服务比较困难,我们可以通过对比传统WEB应用,来理解什么是微服务,传统的应用成为“单体应用”。
微服务相比于传统单体服务有很多优点,比如其中一个服务需要改动时不需要对整个项目重构等等。
推荐看Martin Flow的 Microservice(英文版)
1.3 什么是springboot
springboot基于spring开发,它不是用于替换spring的解决方案,而是与spring紧密结合用于提升spring开发体验的工具,它的核心思想是 约定大于配置 ,它通过集成了大量的第三方默认配置,从而让我们大量减少配置。
Spring Boot的主要优点:
- 为所有Spring开发者更快的入门
- 开箱即用,提供各种默认配置来简化项目配置
- 内嵌式容器简化Web项目
- 没有冗余代码生成和XML配置的要求
1.4 spring项目结构
springboot的项目结构遵循的maven项目结构
其中包含程序的主启动类、application.properties 配置文件、测试类、pom.xml
打开pom.xml,看看Spring Boot项目的依赖:
<!-- 父依赖 -->
<parent>
    <groupId>org.springframework.boot</groupId>
    <artifactId>spring-boot-starter-parent</artifactId>
    <version>2.2.5.RELEASE</version>
    <relativePath/>
</parent>

<dependencies>
    <!-- web场景启动器 -->
    <dependency>
        <groupId>org.springframework.boot</groupId>
        <artifactId>spring-boot-starter-web</artifactId>
    </dependency>
    <!-- springboot单元测试 -->
    <dependency>
        <groupId>org.springframework.boot</groupId>
        <artifactId>spring-boot-starter-test</artifactId>
        <scope>test</scope>
        <!-- 剔除依赖 -->
        <exclusions>
            <exclusion>
                <groupId>org.junit.vintage</groupId>
                <artifactId>junit-vintage-engine</artifactId>
            </exclusion>
        </exclusions>
    </dependency>
</dependencies>

<build>
    <plugins>
        <!-- 打包插件 -->
        <plugin>
            <groupId>org.springframework.boot</groupId>
            <artifactId>spring-boot-maven-plugin</artifactId>
        </plugin>
    </plugins>
</build>
02 yaml
2.1 概述
YAML是 “YAML Ain’t a Markup Language” (YAML不是一种标记语言)的递归缩写。在开发的这种语言时,YAML 的意思其实是:“Yet Another Markup Language”(仍是一种标记语言)
这种语言以数据作为中心,而不是以标记语言为重点!
yamlspringboot官方推荐的配置文件格式,用于修改springboot配置的默认值,springboot的配置文件还有properties。
-
application.properties
-
- 语法结构 :key=value
-
application.yml
-
- 语法结构 :key:空格 value
2.2 yaml的基本语法
字面量:普通的值 ( 数字,布尔值,字符串 )
# 数字
number: 1
# 布尔
bool: true
# 字符串
str: 我是字符串
对象、Map(键值对)
# 普通写法
student:
	name: 张三
	age: 16
# 行内写法
student2: {name: 张三, age: 16}
数组( List、set )
# 普通写法
pets:
	- cat
	- dog
	- pig
# 行内写法
pets2: [cat, dog, pig]
2.3 yaml注入配置文件
- 首先我们在pojo包编写一个Dog的实体类
package com.example.springboot.pojo;

@Component
@Getter
@Setter
@NoArgsConstructor
@AllArgsConstructor
public class Dog {
    private String name;
    private Integer age;
}
- 我们用原来的方法给类注入属性,使用@Value
package com.example.springboot.pojo;

@Component
@Getter
@Setter
@NoArgsConstructor
@AllArgsConstructor
public class Dog {
	@Value("大黄")
    private String name;
    @Value(3)
    private Integer age;

    //有参无参构造、get、set方法、toString()方法
    //....
}
- 在测试类下测试属性是否注入
package com.king.pojo;

@SpringBootTest
public class DogTest {
    @Autowired
    Dog dog;
    @Test
    public void test(){
        System.out.println(dog);
    }
}

// 结果输出 Dog(name=大黄, age=3)
// @Value注入成功
- 我们在pojo包中编写一个更复杂的Person类
package com.king.pojo;

@Component
@Getter
@Setter
@NoArgsConstructor
@AllArgsConstructor
@ToString
public class Person {
    private String name;
    private Integer age;
    private Boolean happy;
    private Date birth;
    private Map<String,Object> maps;
    private List<Object> lists;
    private Dog dog;
}
- 创建一个application.yaml配置文件
server:
  port: 8088

person:
  name: 小明
  age: 18
  happy: true
  birthday: 2000/1/1
  map: {k1: v1, k2: v2}
  list: [o1, o2, o3]
  dog:
    name: 大黄
    age: 3
- 为Person类添加@ConfigurationProperties注解,并绑定
package com.king.pojo;
/*
@ConfigurationProperties作用:
将配置文件中配置的每一个属性的值,映射到这个组件中;
告诉SpringBoot将本类中的所有属性和配置文件中相关的配置进行绑定
参数 prefix = “person” : 将配置文件中的person下面的所有属性一一对应
*/
@Component
@Getter
@Setter
@NoArgsConstructor
@AllArgsConstructor
@ToString
@ConfigurationProperties(prefix = "person")
public class Person {
    private String name;
    private Integer age;
    private Boolean happy;
    private Date birthday;
    private Map<String,Object> map;
    private List<Object> list;
    private Dog dog;
}

// 结果输出
// Person(name=小明, age=18, happy=true, birthday=Sat Jan 01 00:00:00 CST 2000, map={k1=v1, k2=v2}, list=[o1, o2, o3], dog=Dog(name=大黄, age=3))
- 可以看到注入成功了,但是idea报错,在pom文件导入依赖
<!-- 导入配置文件处理器,配置文件进行绑定就会有提示,需要重启 -->
<dependency>
  <groupId>org.springframework.boot</groupId>
  <artifactId>spring-boot-configuration-processor</artifactId>
  <optional>true</optional>
</dependency>
2.4 多环境切换
在项目开发过程中,我们常常需要使用多个环境,通过在配置文件中配置spring.profiles.active来启用某一个环境。
- 首先我们创建两个开发环境
application-test.yaml
serve:
	port: 8082
application-dev.yaml
serve:
	port: 8083
- 此时我们可以在默认配置文件配置启动的环境
application.yaml
serve:
	port: 8081
spring:
	prefiles:
		active: test
此时test环境启动,我们可以在日志中看到启动的端口是8082
2.5 yaml的多文档块
用 “ — ” 来分割文档块
server:
  port: 8081
#选择要激活那个环境块
spring:
  profiles:
    active: prod

---
server:
  port: 8083
spring:
  profiles: dev #配置环境的名称


---

server:
  port: 8084
spring:
  profiles: prod  #配置环境的名称
此时激活的端口是8084
2.6 配置文件加载位置
外部加载配置文件的方式十分多,我们选择最常用的即可,在开发的资源文件中进行配置!
springboot 启动会扫描以下位置的application.properties或者application.yml文件作为Spring boot的默认配置文件:
优先级1:项目路径下的config文件夹配置文件
优先级2:项目路径下配置文件
优先级3:资源路径下的config文件夹配置文件
优先级4:资源路径下配置文件
优先级由高到底,高优先级的配置会覆盖低优先级的配置;
SpringBoot会从这四个位置全部加载主配置文件;互补配置;
我们还可以通过spring.config.location来改变默认的配置文件位置
项目打包好以后,我们可以使用命令行参数的形式,启动项目的时候来指定配置文件的新位置;这种情况,一般是后期运维做的多,相同配置,外部指定的配置文件优先级最高
java -jar spring-boot-config.jar --spring.config.location=F:/application.properties
03 JSR303校验
3.1 先看看如何使用
首先导入pom依赖
<dependency>
    <groupId>org.springframework.boot</groupId>
    <artifactId>spring-boot-starter-validation</artifactId>
</dependency>
Springboot中可以用@validated来校验数据,如果数据异常则会统一抛出异常,方便异常中心统一处理。我们这里来写个注解让我们的name只能支持Email格式;
@Component //注册bean
@ConfigurationProperties(prefix = "person")
@Validated  //数据校验
public class Person {

    @Email(message="邮箱格式错误") //name必须是邮箱格式
    private String name;
}
运行结果 :default message [不是一个合法的电子邮件地址];

使用数据校验,可以保证数据的正确性;
3.2 常见参数
@NotNull(message="名字不能为空")
private String userName;
@Max(value=120,message="年龄最大不能查过120")
private int age;
@Email(message="邮箱格式错误")
private String email;

空检查
@Null       验证对象是否为null
@NotNull    验证对象是否不为null, 无法查检长度为0的字符串
@NotBlank   检查约束字符串是不是Null还有被Trim的长度是否大于0,只对字符串,且会去掉前后空格.
@NotEmpty   检查约束元素是否为NULL或者是EMPTY.

Booelan检查
@AssertTrue     验证 Boolean 对象是否为 true
@AssertFalse    验证 Boolean 对象是否为 false

长度检查
@Size(min=, max=) 验证对象(Array,Collection,Map,String)长度是否在给定的范围之内
@Length(min=, max=) string is between min and max included.

日期检查
@Past       验证 Date 和 Calendar 对象是否在当前时间之前
@Future     验证 Date 和 Calendar 对象是否在当前时间之后
@Pattern    验证 String 对象是否符合正则表达式的规则

.......等等
除此以外,我们还可以自定义一些数据校验规则
04 web开发
4.1 静态资源的导入
在springboot中没有WEB-INF目录,所以我们在进行web开发时首先就是要确定静态资源放在什么位置。
首先我们搜索WebMvcAutoconfiguration类(webmvc有关的自动装配类)。
我们可以找到一个内部静态类:
@EnableConfigurationProperties({WebProperties.class})
    public static class EnableWebMvcConfiguration extends DelegatingWebMvcConfiguration implements ResourceLoaderAware{}
在这个静态类中,我们可以找到一个方法
protected void addResourceHandlers(ResourceHandlerRegistry registry) {
    super.addResourceHandlers(registry);
    // 首先判断是否自定义了静态资源的位置
    if (!this.resourceProperties.isAddMappings()) {
        logger.debug("Default resource handling disabled");
    } else {
        ServletContext servletContext = this.getServletContext();
        // 匹配所有webjar中的资源
        this.addResourceHandler(registry, "/webjars/**", "classpath:/META-INF/resources/webjars/");
        // 匹配静态资源
        this.addResourceHandler(registry, this.mvcProperties.getStaticPathPattern(), (registration) -> {
            registration.addResourceLocations(this.resourceProperties.getStaticLocations());
            if (servletContext != null) {
                registration.addResourceLocations(new Resource[]{new ServletContextResource(servletContext, "/")});
            }

        });
    }
}
4.1.1 首先看下什么是webjar
Webjars本质就是以jar包的方式引入我们的静态资源 , 我们以前要导入一个静态资源文件,直接导入即可。
使用SpringBoot需要使用Webjars,我们可以去搜索一下:
网站:https://www.webjars.org
里面有各种静态资源的maven版本
比如我们要导入jQuery
<dependency>
    <groupId>org.webjars</groupId>
    <artifactId>jquery</artifactId>
    <version>3.4.1</version>
</dependency>
导入完毕,查看webjars目录结构,并访问Jquery.js文件!

只要是静态资源,SpringBoot就会去对应的路径寻找资源,我们这里访问:http://localhost:8080/webjars/jquery/3.4.1/jquery.js

4.1.2 接下来看下普通静态资源如何导入
this.addResourceHandler(registry, this.mvcProperties.getStaticPathPattern(), (registration) -> {
            registration.addResourceLocations(this.resourceProperties.getStaticLocations());
可以看到,在匹配路径时找到了一个resourceProperties,我们ctrl+单机找到它,发现他是该方法所在静态类中通过@EnableConfigurationProperties注册的类(XXXProperties配置类)中Resource内部静态类的实例
public static class Resources {
        private static final String[] CLASSPATH_RESOURCE_LOCATIONS = new String[]{"classpath:/META-INF/resources/", "classpath:/resources/", "classpath:/static/", "classpath:/public/"};
        private String[] staticLocations;
        private boolean addMappings;
        private boolean customized;
        private final WebProperties.Resources.Chain chain;
        private final WebProperties.Resources.Cache cache;

        public Resources() {
            this.staticLocations = CLASSPATH_RESOURCE_LOCATIONS;
            this.addMappings = true;
            this.customized = false;
            this.chain = new WebProperties.Resources.Chain();
            this.cache = new WebProperties.Resources.Cache();
        }

        public String[] getStaticLocations() {
            return this.staticLocations;
        }

        ....
}
这个内部静态类在构造函数中将staticLocations赋值为常量CLASSPATH_RESOURCE_LOCATIONS
这个常量就是静态资源存放的默认位置
即:
- “classpath:/META-INF/resources/”
- “classpath:/resources/”
- “classpath:/static/”
- “classpath:/public/”
我们发现我们的目录结构src/main/resources中只有一个static目录,我们创建resources与public目录
运行springboot,在页面中访问发现静态资源无论放在这三个目录中的哪一个都会生效
4.1.2 自定义静态资源路径
我们也可以自己通过配置文件来指定一下,哪些文件夹是需要我们放静态资源文件的,在application.properties中配置;
spring.resources.static-locations=classpath:/coding/,classpath:/king/
一旦自己定义了静态文件夹的路径,原来的自动配置就都会失效了!
4.2 首页映射
springboot在没有进行任何配置时,访问会出现一个404,所以我们要配置一个默认的首页
在WebMvcAutoConfiguration类下有寻找跟首页有关的东西,发现“欢迎页面处理匹配”
@Bean
public WelcomePageHandlerMapping welcomePageHandlerMapping(ApplicationContext applicationContext, FormattingConversionService mvcConversionService, ResourceUrlProvider mvcResourceUrlProvider) {
    WelcomePageHandlerMapping welcomePageHandlerMapping = new WelcomePageHandlerMapping(new TemplateAvailabilityProviders(applicationContext), applicationContext, this.getWelcomePage(), this.mvcProperties.getStaticPathPattern());
    welcomePageHandlerMapping.setInterceptors(this.getInterceptors(mvcConversionService, mvcResourceUrlProvider));
    welcomePageHandlerMapping.setCorsConfigurations(this.getCorsConfigurations());
    return welcomePageHandlerMapping;
}
其中构造了一个WelcomPageeHandlerMapping类的对象,发现一个getWelcomePage的方法,推测是用于获取首页的,ctrl+点击,进入这个方法
private Resource getWelcomePage() {
    String[] var1 = this.resourceProperties.getStaticLocations();
    int var2 = var1.length;

    for(int var3 = 0; var3 < var2; ++var3) {
        String location = var1[var3];
        Resource indexHtml = this.getIndexHtml(location);
        if (indexHtml != null) {
            return indexHtml;
        }
    }

    ServletContext servletContext = this.getServletContext();
    if (servletContext != null) {
        return this.getIndexHtml((Resource)(new ServletContextResource(servletContext, "/")));
    } else {
        return null;
    }
}
结合之前静态资源的知识,可以看出这个方法是在静态资源文件夹中用getIndexHtml方法寻找首页文件,点开这个方法
private Resource getIndexHtml(String location) {
    return this.getIndexHtml(this.resourceLoader.getResource(location));
}

private Resource getIndexHtml(Resource location) {
    try {
        Resource resource = location.createRelative("index.html");
        if (resource.exists() && resource.getURL() != null) {
            return resource;
        }
    } catch (Exception var3) {
    }

    return null;
}
我们发现这个方法是在传入参数的位置寻找一个index.html的网页文件
于是我们在static静态资源文件夹下放入一个index.html文件,再次运行程序,发现我们配置的首页生效
4.3 图标配置
与首页配置相同,只需要在静态资源文件夹放置一个favicon.ico即可
4.4 Thymeleaf模版引擎
Thymeleaf是springboot官方推荐的模版引擎,Thymeleaf是一个高级的模版引擎,他的语法简单,功能强大。
4.4.1 Thymeleaf的引入
要想引入,只需要导入pom依赖
<!--thymeleaf-->
<dependency>
    <groupId>org.springframework.boot</groupId>
    <artifactId>spring-boot-starter-thymeleaf</artifactId>
</dependency>
Thymeleaf 官网:https://www.thymeleaf.org/
Thymeleaf 在Github 的主页:https://github.com/thymeleaf/thymeleaf
4.4.2 Thymeleaf分析
找到Thymeleaf的配置类
public class ThymeleafProperties {
    private static final Charset DEFAULT_ENCODING;
    public static final String DEFAULT_PREFIX = "classpath:/templates/";
    public static final String DEFAULT_SUFFIX = ".html";
    private boolean checkTemplate = true;
    private boolean checkTemplateLocation = true;
    private String prefix = "classpath:/templates/";
    private String suffix = ".html";
    private String mode = "HTML";
    private Charset encoding;
    private boolean cache;
    private Integer templateResolverOrder;
    private String[] viewNames;
    private String[] excludedViewNames;
    private boolean enableSpringElCompiler;
    private boolean renderHiddenMarkersBeforeCheckboxes;
    private boolean enabled;
    private final ThymeleafProperties.Servlet servlet;
    private final ThymeleafProperties.Reactive reactive;
	...
}
可以看到prefix和suffix已经默认配置,我们只需要把模版放在template文件夹下
4.4.3 语法
常用标签
咱们上面知道Thymeleaf通过特殊的标签来寻找属于Thymeleaf的部分,并渲染该部分内容,而除了上面展示过的th:text之外还有很多常用标签,并且Thymeleaf也主要通过标签来识别替换对应位置内容,Thymeleaf标签有很多很多,功能也很丰富,这里列举一些比较常用的标签如下:
| 标签 | 作用 | 示例 |
|---|---|---|
| th:id | 替换id | <input th:id="${user.id}"/> |
| th:text | 文本替换 | <p text:="${user.name}">bigsai</p> |
| th:utext | 支持html的文本替换 | <p utext:="${htmlcontent}">content</p> |
| th:object | 替换对象 | <div th:object="${user}"></div> |
| th:value | 替换值 | <input th:value="${user.name}" > |
| th:each | 迭代 | <tr th:each=“student:${user}” > |
| th:href | 替换超链接 | <a th:href="@{index.html}">超链接 |
| th:src | 替换资源 | <script type=“text/javascript” th:src="@{index.js}"></script> |
4.5 国际化
4.5.1 基本使用
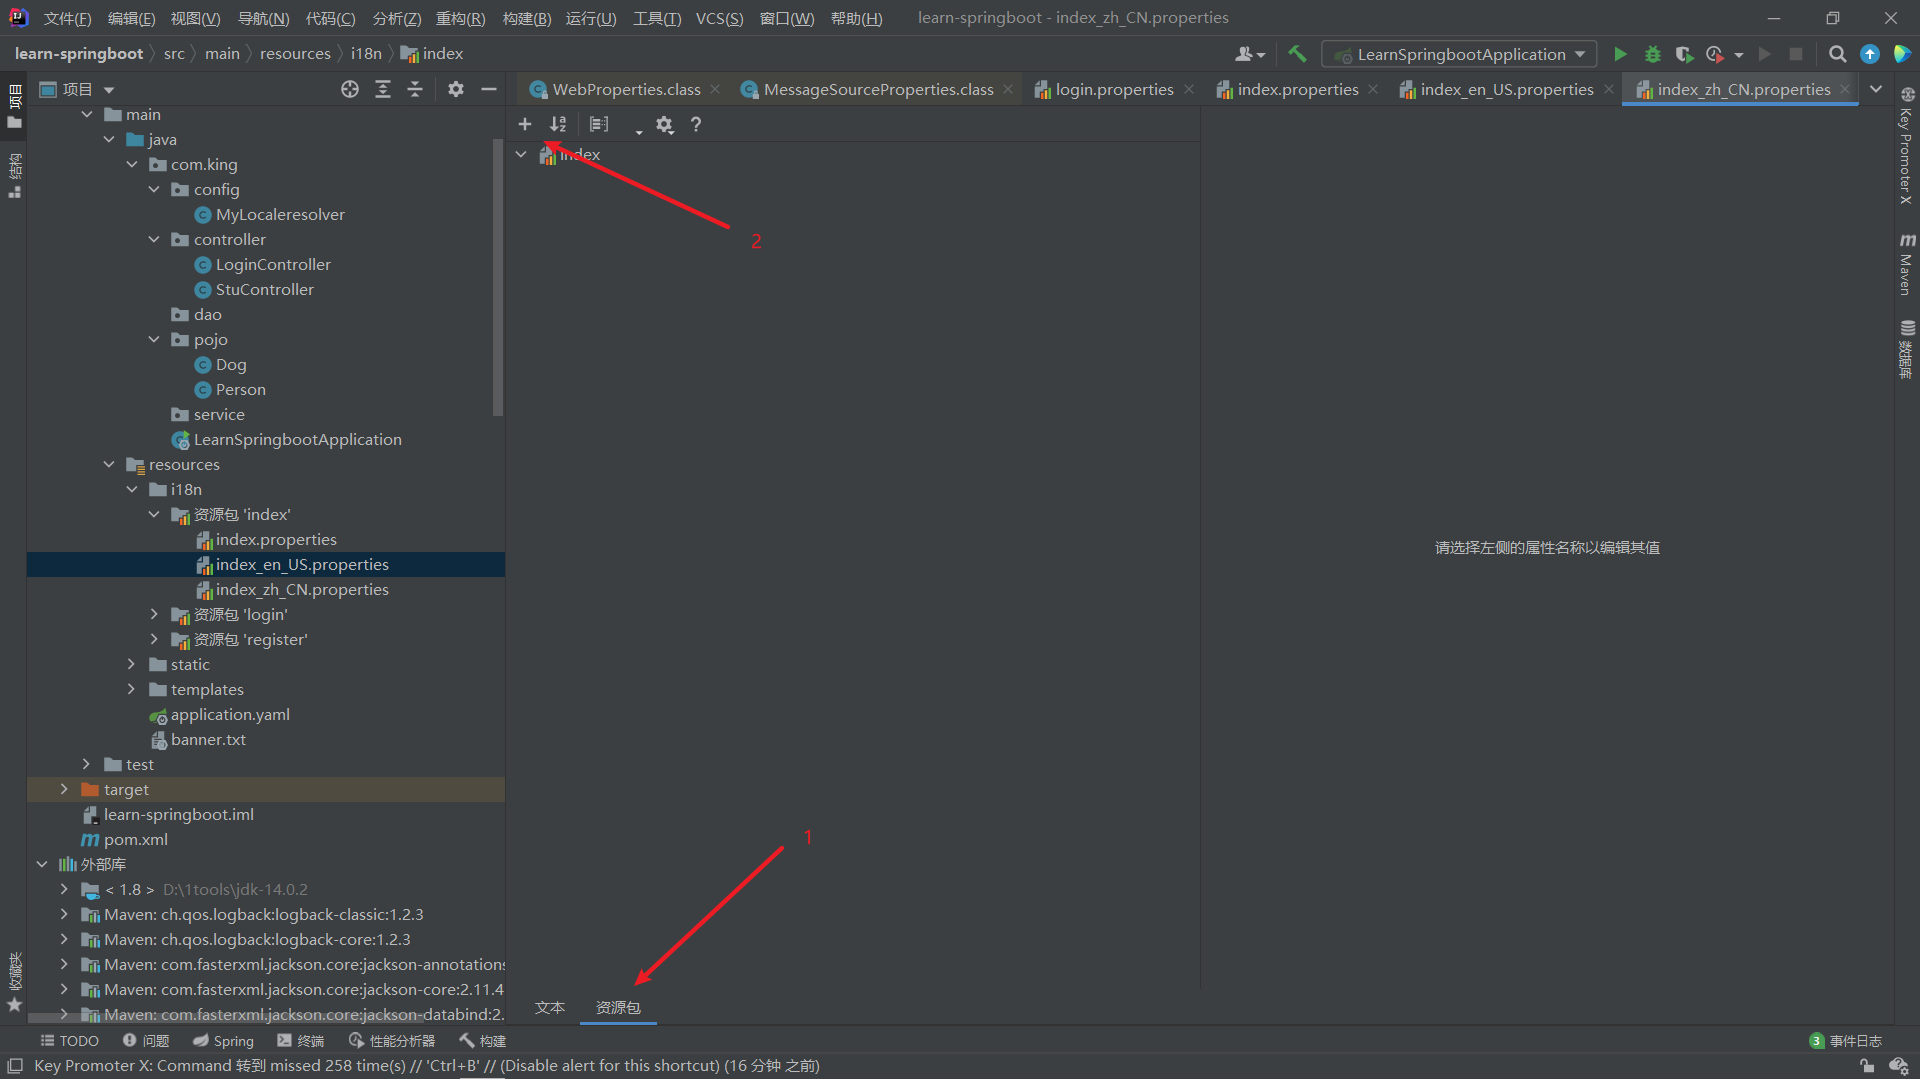
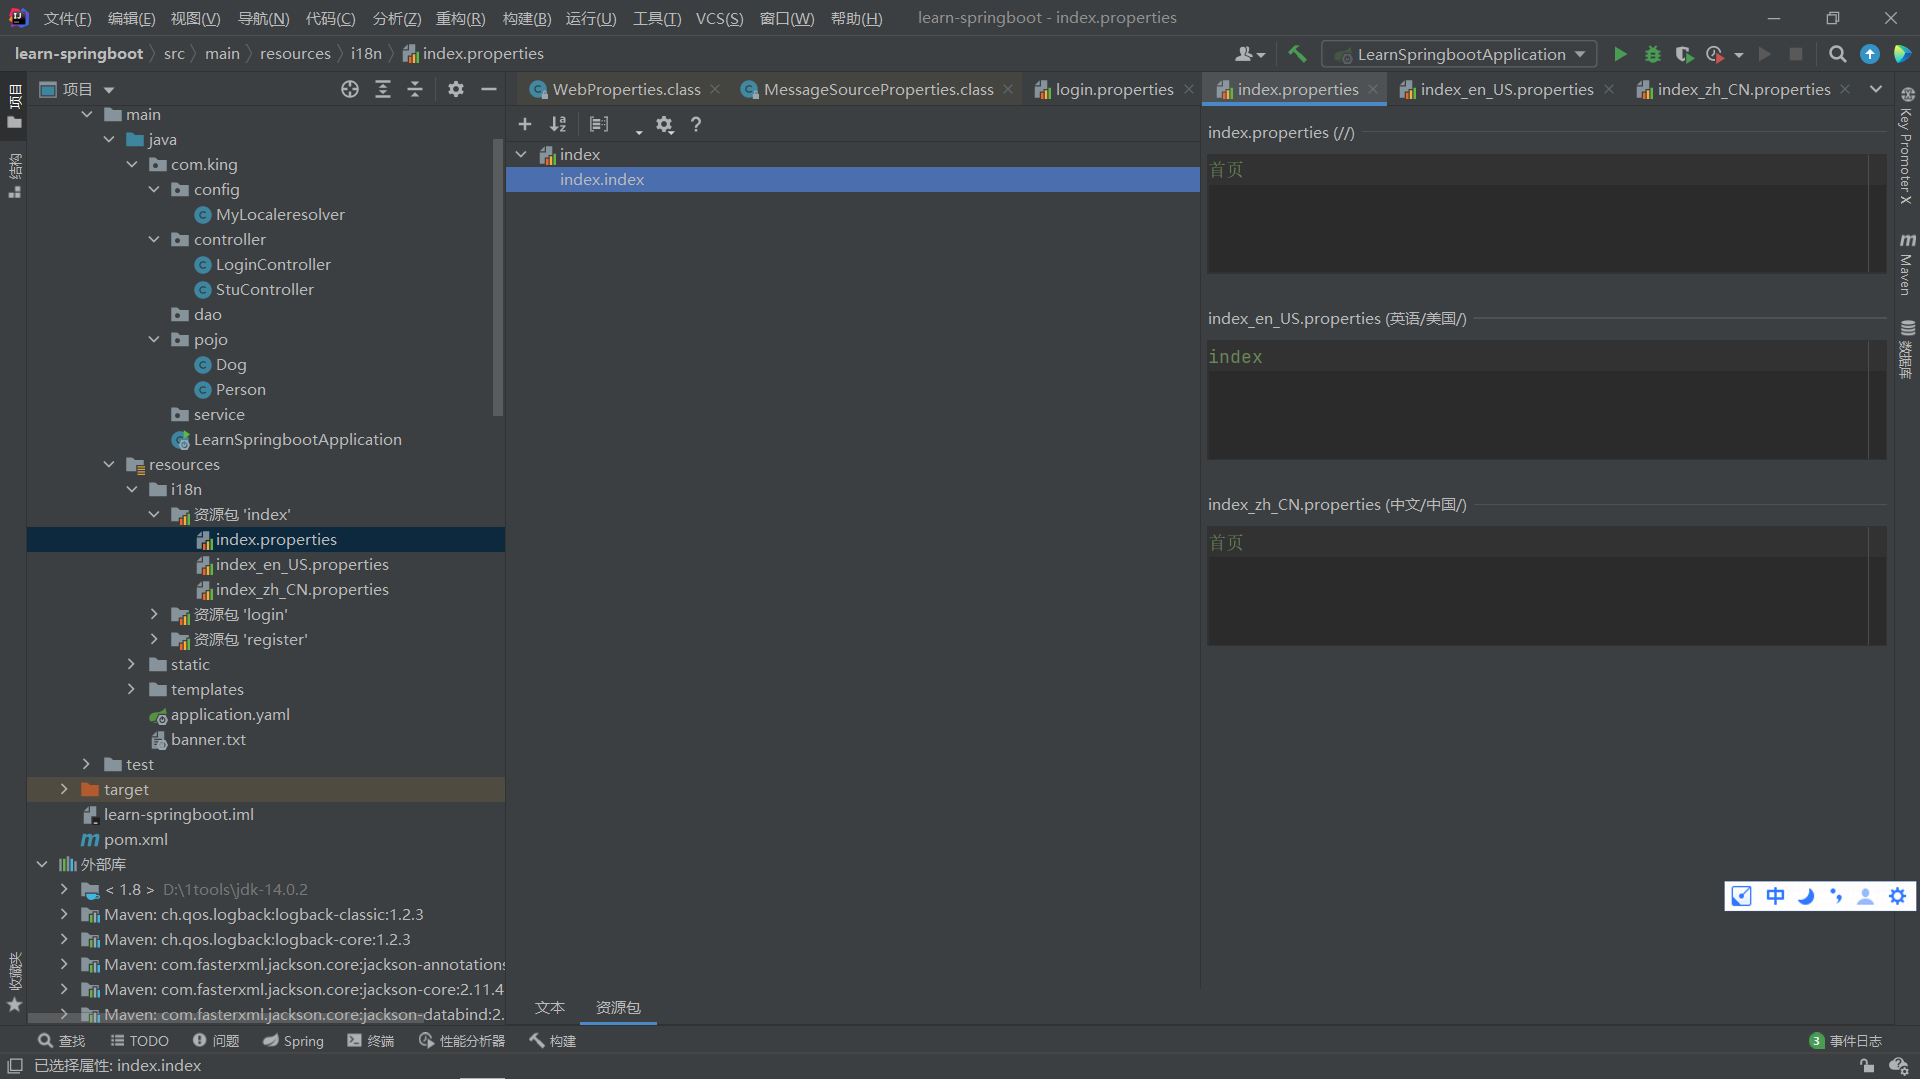
首先在resource资源文件夹下创建一个i18n(Internationalization)文件夹用于存储资源包
然后新建创建资源包,并单价小加号添加语言和地区

点击左下角的资源包,并添加要在模版引擎中需要使用的键值对
之后在application.yaml中配置spring.messages.basename
spring:
  messages:
    basename: i18n.login
之后就可以在模版引擎中通过#{}使用了
<!DOCTYPE html>
<html lang="en" xmlns:th="http://www.thymeleaf.org" >
<head>
    <meta charset="UTF-8">
    <title>Title</title>
</head>
<body>
  <h1 th:text="#{index.index}"></h1>
  <form action="/login/handle">
      <p><label>用户名<input type="text" name="username"></label></p>
      <p><label>密码<input type="text" name="password"></label></p>
      <input type="submit" value="登陆">
  </form>
</body>
</html>
此时后端就会根据浏览器的语言环境自动改变为相应的语言了。
4.5.2 配置LocaleResolver(消息解析器)
在WebMvcAutoConfiguration下搜索Locale(国际化),会发现一个@Bean
@Bean
@ConditionalOnMissingBean(
    name = {"localeResolver"}
)
public LocaleResolver localeResolver() {
    if (this.webProperties.getLocaleResolver() == org.springframework.boot.autoconfigure.web.WebProperties.LocaleResolver.FIXED) {
        return new FixedLocaleResolver(this.webProperties.getLocale());
    } else if (this.mvcProperties.getLocaleResolver() == org.springframework.boot.autoconfigure.web.servlet.WebMvcProperties.LocaleResolver.FIXED) {
        return new FixedLocaleResolver(this.mvcProperties.getLocale());
    } else {
        AcceptHeaderLocaleResolver localeResolver = new AcceptHeaderLocaleResolver();
        Locale locale = this.webProperties.getLocale() != null ? this.webProperties.getLocale() : this.mvcProperties.getLocale();
        localeResolver.setDefaultLocale(locale);
        return localeResolver;
    }
}
点进LocaleResolver,我们发现这是一个接口,有 resolveLocale 和 setLocale 两个方法。
我们可以看到,springboot首先会看用户有没有配置LocaleResolver,没有的话就创建默认的LocaleResolver,我们点进这个默认的类会发现这个AcceptHeaderLocaleResolver继承了LocaleResolver这个接口,我们看一下它对接口的实现。
public Locale resolveLocale(HttpServletRequest request) {
    Locale defaultLocale = this.getDefaultLocale();
    if (defaultLocale != null && request.getHeader("Accept-Language") == null) {
        return defaultLocale;
    } else {
        Locale requestLocale = request.getLocale();
        List<Locale> supportedLocales = this.getSupportedLocales();
        if (!supportedLocales.isEmpty() && !supportedLocales.contains(requestLocale)) {
            Locale supportedLocale = this.findSupportedLocale(request, supportedLocales);
            if (supportedLocale != null) {
                return supportedLocale;
            } else {
                return defaultLocale != null ? defaultLocale : requestLocale;
            }
        } else {
            return requestLocale;
        }
    }
}

public void setLocale(HttpServletRequest request, @Nullable HttpServletResponse response, @Nullable Locale locale) {
    throw new UnsupportedOperationException("Cannot change HTTP accept header - use a different locale resolution strategy");
}
resolveLocale方法获取了request请求,并查看请求头中是否有“Accept-Language”,如果没有就使用默认的Locale,有的话则解析这个头部信息,最终返回一个由获取信息创建的Locale对象。
知道了springboot国际化的原理,那我们也可以自己写一个ResolveLocale来取代springboot默认提供的ResolveLocale
4.6 自定义跳转addViewControllers
在继承了WebMvcConfigurer的自定义配置类中继承addViewControllers方法
@Configuration
public class MyWebMvcConfigurer implements WebMvcConfigurer {

    @Override
    public void addViewControllers(ViewControllerRegistry registry) {
        registry.addViewController("/").setViewName("login");
        registry.addViewController("/index.html").setViewName("login");
        registry.addViewController("/index").setViewName("login");
    }
}
此时在浏览器中 “/” , “/index” , “/index.html” 都会指向login模版
4.7 自定义拦截器
首先实现一个类继承HandlerInterceptor类,并重写它的方法
public class MyInterceptor implements HandlerInterceptor {
    @Override
    public boolean preHandle(HttpServletRequest request, HttpServletResponse response, Object handler) throws Exception {
        if(request.getSession().getAttribute("loginUser") == null){
            request.getRequestDispatcher("/login").forward(request,response);
            return false;
        }
        return true;
    }
}
之后在WebMVcConfigurer中添加拦截器
@Configuration
public class MyWebMvcConfigurer implements WebMvcConfigurer {
	@Override
    public void addInterceptors(InterceptorRegistry registry) {
        registry.addInterceptor(new MyInterceptor())
                .addPathPatterns("/**")
                .excludePathPatterns("/login", "/login/handler");
    }

    ....
}
05 连接数据库
5.1 整合jdbc
5.1.1 基本操作
首先创建一个新的项目,在项目启动时勾选mysql和jdbc,这时会发现pom中多了两个dependence
<dependency>
    <groupId>org.springframework.boot</groupId>
    <artifactId>spring-boot-starter-jdbc</artifactId>
</dependency>

<dependency>
    <groupId>mysql</groupId>
    <artifactId>mysql-connector-java</artifactId>
</dependency>
随后我们在application.yaml配置文件中配置数据源
spring:
  datasource:
    username: root
    password: root
    url: jdbc:mysql://localhost:3306/learn_mybatis?serveTimezone=UTC&useSSL=false&useUnicode=true&characterEncoding=utf-8
    driver-class-name: com.mysql.cj.jdbc.Driver
此时jdbc就已经配置好了,我们在测试类中输出一下Datasource
@SpringBootTest
public class DataSourceTest {
    @Autowired
    DataSource dataSource;

    @Test
    public void test1() {
        System.out.println(dataSource);
        // 输出: HikariDataSource (null)
    }
}
Springboot为我们配置了默认的数据源Hikari,是目前最快的数据源
随后我们通过Datasource获取connect对象,再从connect对象获取statement对象或preparedStatement对象对数据库进行操作,这时就跟传统的jdbc没有什么区别了
@SpringBootTest
public class DataSourceTest {
    @Autowired
    DataSource dataSource;

    @Test
    public void test1() throws SQLException {
        String sql = "select * from user_tb";

        Connection connection = dataSource.getConnection();
        Statement statement = connection.createStatement();

        ResultSet resultSet = statement.executeQuery(sql);
        System.out.println(resultSet);

    }
}
5.1.2 jdbcTemplate
Springboot为我们整合了各种XXXXTempalte方便我们操作
我们直接从容器中获取JdbcTemplate
@SpringBootTest
public class DataSourceTest {
    @Autowired
    JdbcTemplate jdbcTemplate;

    @Test
    public void test2(){
        String sql = "select * from user_tb";
        List<Map<String, Object>> users = jdbcTemplate.queryForList(sql);
        System.out.println(users);
    }

}
接下来与spring中的jdbc使用方法完全一致
5.2 整合druid
5.2.1 简介与配置项
Java程序很大一部分要操作数据库,为了提高性能操作数据库的时候,又不得不使用数据库连接池。
Druid 是阿里巴巴开源平台上一个数据库连接池实现,结合了 C3P0、DBCP 等 DB 池的优点,同时加入了日志监控。
Druid 可以很好的监控 DB 池连接和 SQL 的执行情况,天生就是针对监控而生的 DB 连接池。
Druid已经在阿里巴巴部署了超过600个应用,经过一年多生产环境大规模部署的严苛考验。
Spring Boot 2.0 以上默认使用 Hikari 数据源,可以说 Hikari 与 Driud 都是当前 Java Web 上最优秀的数据源,我们来重点介绍 Spring Boot 如何集成 Druid 数据源,如何实现数据库监控。
Github地址:https://github.com/alibaba/druid/
Github地址:https://github.com/alibaba/druid/
com.alibaba.druid.pool.DruidDataSource 基本配置参数如下:
| 配置 | 缺省值 | 说明 |
|---|---|---|
| name | 配置这个属性的意义在于,如果存在多个数据源,监控的时候可以通过名字来区分开来。 如果没有配置,将会生成一个名字,格式是:“DataSource-” + System.identityHashCode(this) | |
| jdbcUrl | 连接数据库的url,不同数据库不一样。例如: mysql : jdbc:mysql://10.20.153.104:3306/druid2 oracle : jdbc:oracle:thin:@10.20.149.85:1521:ocnauto | |
| username | 连接数据库的用户名 | |
| password | 连接数据库的密码。如果你不希望密码直接写在配置文件中,可以使用ConfigFilter。详细看这里:https://github.com/alibaba/druid/wiki/%E4%BD%BF%E7%94%A8ConfigFilter | |
| driverClassName | 根据url自动识别 | 这一项可配可不配,如果不配置druid会根据url自动识别dbType,然后选择相应的driverClassName(建议配置下) |
| initialSize | 0 | 初始化时建立物理连接的个数。初始化发生在显示调用init方法,或者第一次getConnection时 |
| maxActive | 8 | 最大连接池数量 |
| maxIdle | 8 | 已经不再使用,配置了也没效果 |
| minIdle | 最小连接池数量 | |
| maxWait | 获取连接时最大等待时间,单位毫秒。配置了maxWait之后,缺省启用公平锁,并发效率会有所下降,如果需要可以通过配置useUnfairLock属性为true使用非公平锁。 | |
| poolPreparedStatements | false | 是否缓存preparedStatement,也就是PSCache。PSCache对支持游标的数据库性能提升巨大,比如说oracle。在mysql下建议关闭。 |
| maxOpenPreparedStatements | -1 | 要启用PSCache,必须配置大于0,当大于0时,poolPreparedStatements自动触发修改为true。在Druid中,不会存在Oracle下PSCache占用内存过多的问题,可以把这个数值配置大一些,比如说100 |
| validationQuery | 用来检测连接是否有效的sql,要求是一个查询语句。如果validationQuery为null,testOnBorrow、testOnReturn、testWhileIdle都不会其作用。 | |
| testOnBorrow | true | 申请连接时执行validationQuery检测连接是否有效,做了这个配置会降低性能。 |
| testOnReturn | false | 归还连接时执行validationQuery检测连接是否有效,做了这个配置会降低性能 |
| testWhileIdle | false | 建议配置为true,不影响性能,并且保证安全性。申请连接的时候检测,如果空闲时间大于timeBetweenEvictionRunsMillis,执行validationQuery检测连接是否有效。 |
| timeBetweenEvictionRunsMillis | 有两个含义: 1) Destroy线程会检测连接的间隔时间2) testWhileIdle的判断依据,详细看testWhileIdle属性的说明 | |
| numTestsPerEvictionRun | 不再使用,一个DruidDataSource只支持一个EvictionRun | |
| minEvictableIdleTimeMillis | ||
| connectionInitSqls | 物理连接初始化的时候执行的sql | |
| exceptionSorter | 根据dbType自动识别 | 当数据库抛出一些不可恢复的异常时,抛弃连接 |
| filters | 属性类型是字符串,通过别名的方式配置扩展插件,常用的插件有: 监控统计用的filter:stat日志用的filter:log4j防御sql注入的filter:wall | |
| proxyFilters | 类型是List<com.alibaba.druid.filter.Filter>,如果同时配置了filters和proxyFilters,是组合关系,并非替换关系 |
5.2.2 基本使用
- 首先导入依赖
<dependency>
    <groupId>com.alibaba</groupId>
    <artifactId>druid-spring-boot-starter</artifactId>
    <version>1.2.1</version>
</dependency>
- 切换数据源,application.yaml中在原来的基础上加一个type
spring:
  datasource:
    username: root
    password: 123456
    url: jdbc:mysql://localhost:3306/springboot?serverTimezone=UTC&useUnicode=true&characterEncoding=utf-8
    driver-class-name: com.mysql.cj.jdbc.Driver
    type: com.alibaba.druid.pool.DruidDataSource # 自定义数据源
常用配置:
spring:
	datasource:
		#datasource的基本配置
		username: root
        password: root
        url: jdbc:mysql://localhost:3306/learn_mybatis?serveTimezone=UTC&useSSL=false&useUnicode=true&characterEncoding=utf-8
        driver-class-name: com.mysql.cj.jdbc.Driver

        #SpringBoot默认是不注入这些的,需要自己绑定
        #druid数据源专有配置
        initialSize: 5
        minIdle: 5
        maxActive: 20
        maxWait: 60000
        timeBetweenEvictionRunsMillis: 60000
        minEvictableIdleTimeMillis: 300000
        validationQuery: SELECT 1 FROM DUAL
        testWhileIdle: true
        testOnBorrow: false
        testOnReturn: false
        poolPreparedStatements: true

        #配置监控统计拦截的filters,stat:监控统计、log4j:日志记录、wall:防御sql注入
        #如果允许报错,java.lang.ClassNotFoundException: org.apache.Log4j.Properity
        #则导入log4j 依赖就行
        filters: stat,wall,log4j
        maxPoolPreparedStatementPerConnectionSize: 20
        useGlobalDataSourceStat: true
        connectionoProperties: druid.stat.mergeSql=true;druid.stat.slowSqlMillis=500
- 随后我们导入log4j
 <dependency>
     <groupId>log4j</groupId>
     <artifactId>log4j</artifactId>
     <version>1.2.17</version>
 </dependency>
- 此时我们需要自己注册一个数据源,首先创建DruidConfig类
//DruidConfig.java

@Configuration
public class DruidConfig {

    /**
     * 将自定义的 Druid数据源添加到容器中,不再让 Spring Boot 自动创建
     * 绑定全局配置文件中的 druid 数据源属性到 com.alibaba.druid.pool.DruidDataSource从而让它们生效
     * @ConfigurationProperties(prefix = "spring.datasource"):作用就是将 全局配置文件中
     * 前缀为 spring.datasource的属性值注入到 com.alibaba.druid.pool.DruidDataSource 的同名参数中
     */
    @Bean
    @ConfigurationProperties(prefix = "spring.datasource")
    DataSource druidDataSource(){
        return new DruidDataSource();
    }

}
- 我们去测试类测试一下
@SpringBootTest
class SpringbootDataJdbcApplicationTests {

    //DI注入数据源
    @Autowired
    DataSource dataSource;

    @Test
    public void contextLoads() throws SQLException {
        //看一下默认数据源
        System.out.println(dataSource.getClass());
        //获得连接
        Connection connection = dataSource.getConnection();
        System.out.println(connection);

        DruidDataSource druidDataSource = (DruidDataSource) dataSource;
        System.out.println("druidDataSource 数据源最大连接数:" + druidDataSource.getMaxActive());
        System.out.println("druidDataSource 数据源初始化连接数:" + druidDataSource.getInitialSize());

        //关闭连接
        connection.close();

        //输出:
        // class com.alibaba.druid.pool.DruidDataSource
        // com.mysql.cj.jdbc.ConnectionImpl@55951fcd
		// druidDataSource 数据源最大连接数:8
		// druidDataSource 数据源初始化连接数:0
    }
}
5.2.3 配置数据源监控
Druid 数据源具有监控的功能,并提供了一个 web 界面方便用户查看,类似安装 路由器 时,人家也提供了一个默认的 web 页面。
所以第一步需要设置 Druid 的后台管理页面,比如 登录账号、密码 等;配置后台管理;
//配置 Druid 监控管理后台的Servlet;
//内置 Servlet 容器时没有web.xml文件,所以使用 Spring Boot 的注册 Servlet 方式
@Bean
public ServletRegistrationBean statViewServlet() {
    ServletRegistrationBean bean = new ServletRegistrationBean(new StatViewServlet(), "/druid/*");

    // 这些参数可以在 com.alibaba.druid.support.http.StatViewServlet
    // 的父类 com.alibaba.druid.support.http.ResourceServlet 中找到
    Map<String, String> initParams = new HashMap<>();
    initParams.put("loginUsername", "admin"); //后台管理界面的登录账号
    initParams.put("loginPassword", "123456"); //后台管理界面的登录密码

    //后台允许谁可以访问
    //initParams.put("allow", "localhost"):表示只有本机可以访问
    //initParams.put("allow", ""):为空或者为null时,表示允许所有访问
    initParams.put("allow", "");
    //deny:Druid 后台拒绝谁访问
    //initParams.put("kuangshen", "192.168.1.20");表示禁止此ip访问

    //设置初始化参数
    bean.setInitParameters(initParams);
    return bean;
}
配置完毕后,我们可以选择访问 :http://localhost:8080/druid/login.html
在里面我们可以监控各种web与sql的信息
配置 Druid web 监控 filter 过滤器
//配置 Druid 监控 之  web 监控的 filter
//WebStatFilter:用于配置Web和Druid数据源之间的管理关联监控统计
@Bean
public FilterRegistrationBean webStatFilter() {
    FilterRegistrationBean bean = new FilterRegistrationBean();
    bean.setFilter(new WebStatFilter());

    //exclusions:设置哪些请求进行过滤排除掉,从而不进行统计
    Map<String, String> initParams = new HashMap<>();
    initParams.put("exclusions", "*.js,*.css,/druid/*,/jdbc/*");
    bean.setInitParameters(initParams);

    //"/*" 表示过滤所有请求
    bean.setUrlPatterns(Arrays.asList("/*"));
    return bean;
}
平时在工作中,按需求进行配置即可,主要用作监控!
5.3 整合mybatis
官方文档:http://mybatis.org/spring-boot-starter/mybatis-spring-boot-autoconfigure/
Maven仓库地址:https://mvnrepository.com/artifact/org.mybatis.spring.boot/mybatis-spring-boot-starter/2.1.1
- 导入 MyBatis 所需要的依赖
<dependency>
    <groupId>org.mybatis.spring.boot</groupId>
    <artifactId>mybatis-spring-boot-starter</artifactId>
    <version>2.1.1</version>
</dependency>
- 配置数据库连接信息(不变)
spring:
  datasource:
    username: root
    password: 123456
    url: jdbc:mysql://localhost:3306/springboot?serverTimezone=UTC&useUnicode=true&characterEncoding=utf-8
    driver-class-name: com.mysql.cj.jdbc.Driver
    type: com.alibaba.druid.pool.DruidDataSource

    #Spring Boot 默认是不注入这些属性值的,需要自己绑定
    #druid 数据源专有配置
    initialSize: 5
    minIdle: 5
    maxActive: 20
    maxWait: 60000
    timeBetweenEvictionRunsMillis: 60000
    minEvictableIdleTimeMillis: 300000
    validationQuery: SELECT 1 FROM DUAL
    testWhileIdle: true
    testOnBorrow: false
    testOnReturn: false
    poolPreparedStatements: true

    #配置监控统计拦截的filters,stat:监控统计、log4j:日志记录、wall:防御sql注入
    #如果允许时报错  java.lang.ClassNotFoundException: org.apache.log4j.Priority
    #则导入 log4j 依赖即可,Maven 地址:https://mvnrepository.com/artifact/log4j/log4j
    filters: stat,wall,log4j
    maxPoolPreparedStatementPerConnectionSize: 20
    useGlobalDataSourceStat: true
    connectionProperties: druid.stat.mergeSql=true;druid.stat.slowSqlMillis=500
-
测试数据库是否连接成功!
-
根据数据库,创建pojo实体类
@Data
@NoArgsConstructor
@AllArgsConstructor
public class Department {
    public String id;
    public String name;
}
- 创建mapper,这里可以在每个Mapper上增加@Mapper注解,也可以在启动类上增加@MapperScan扫描包里的所有类
package com.king.mapper;

@Repository
@
public interface DepartmentMapper {

    Department queryDepartmentById(String id);

    List<Department> queryDepartments();
}
package com.king;

@MapperScan("com.king.mapper")
@SpringBootApplication
public class LearnSpringbootApplication {

    public static void main(String[] args) {
        SpringApplication.run(LearnSpringbootApplication.class, args);
    }

}
- 在resource文件夹中创建一个mapping文件夹,在里面创建对应的 ***Mapper.xml

<?xml version="1.0" encoding="UTF-8" ?>
<!DOCTYPE mapper
        PUBLIC "-//mybatis.org//DTD Mapper 3.0//EN"
        "http://mybatis.org/dtd/mybatis-3-mapper.dtd">
<mapper namespace="com.king.mapper.DepartmentMapper">

    <select id="queryDepartmentById" resultType="com.king.pojo.Department">
        select * from dept_tb where id = #{id};
    </select>

    <select id="queryDepartments" resultType="com.king.pojo.Department">
        select * from dept_tb;
    </select>

</mapper>
- 编写application.yaml配置
spring:
  datasource:
    username: root
    password: root
    url: jdbc:mysql://localhost:3306/learn_mybatis?serveTimezone=UTC&useSSL=false&useUnicode=true&characterEncoding=utf-8
    driver-class-name: com.mysql.cj.jdbc.Driver
    type: com.alibaba.druid.pool.DruidDataSource
    #SpringBoot默认是不注入这些的,需要自己绑定
    #druid数据源专有配置
    initialSize: 5
    minIdle: 5
    maxActive: 20
    maxWait: 60000
    timeBetweenEvictionRunsMillis: 60000
    minEvictableIdleTimeMillis: 300000
    validationQuery: SELECT 1 FROM DUAL
    testWhileIdle: true
    testOnBorrow: false
    testOnReturn: false
    poolPreparedStatements: true

    #配置监控统计拦截的filters,stat:监控统计、log4j:日志记录、wall:防御sql注入
    #如果允许报错,java.lang.ClassNotFoundException: org.apache.Log4j.Property
    #则导入log4j 依赖就行
    filters: stat,wall
    maxPoolPreparedStatementPerConnectionSize: 20
    useGlobalDataSourceStat: true
    connectionoProperties: druid.stat.mergeSql=true;druid.stat.slowSqlMillis=500

mybatis:
  mapper-locations: classpath:mapping/*.xml
  type-aliases-package: com.king.pojo
- 测试
@SpringBootTest
public class DeptTest {

    @Autowired
    DepartmentMapper departmentMapper;

    @Test
    public void test(){
        System.out.println(departmentMapper);
        System.out.println(departmentMapper.queryDepartments());
        System.out.println(departmentMapper.queryDepartmentById(1));

        //输出:
        //org.apache.ibatis.binding.MapperProxy@6aa6c17
        //[Department(id=1, name=文学部), Department(id=2, name=体育部)]
		//Department(id=1, name=文学部)
    }
}
springboot原理
自动装配原理
springboot最核心的东西就是自动装配原理,那么自动装装配原理是什么呢?自动装配原理其实就是对strat提供好的xxxAutoConfiguration、配置文件进行读取,当读取完后就配置好这些类。


 3366
3366


 被折叠的 条评论
为什么被折叠?
被折叠的 条评论
为什么被折叠?
 到【灌水乐园】发言


