


- 什么是Spring Boot
- Spring Boot的优点
- Spring Boot的缺点
- 第一个例子
- 注解说明
- 参考文档
一 什么是Spring Boot
Spring Boot makes it easy to create stand-alone, production-grade Spring-based Applications that you can run. We take an opinionated view of the Spring platform and third-party libraries, so that you can get started with minimum fuss. Most Spring Boot applications need very little Spring configuration.
--<<Spring Boot Reference Guide>>
根据官网给出的定义就是Spring Boot就是可以让我们可以轻松的创建一个可以运行的独立且可应用于生产级的spring的应用.它为其原有的Spring平台和第三方库提供了大量的默认配置.因此只需要少量的配置便可以进行开发.
我个人认为其实Spring Boot就是对Spring的包和其他的第三方架包进行整合然后为他们提供大量默认配置.这样方便开发者(熟练之后挺方便的,刚开始感觉就是巨坑!).
二 Spring Boot的优点
1)配置web.xml,加载spring和spring mvc
2)配置数据库连接、配置spring事务
3)配置加载配置文件的读取,开启注解
4)配置日志文件
5) 配置完成之后部署tomcat 调试
三 Spring Boot 的缺点
由于它对各种第三方包进行整合封装,导致出现错误经常让人无从下手.为问题的定位增加了难度.(原本打算用Spring Boot 2.0的稳定版进行学习,发现无论如何就是无法成功启动.也不知道哪里出的问题).多次分装必然导致运行效率的下降!
四 第一个例子
1. 用IDEA创建一个简单的Maven项目.
2. 修改pom.xml文件
<?xml version="1.0" encoding="UTF-8"?>
<project xmlns="http://maven.apache.org/POM/4.0.0" xmlns:xsi="http://www.w3.org/2001/XMLSchema-instance"
         xsi:schemaLocation="http://maven.apache.org/POM/4.0.0 http://maven.apache.org/xsd/maven-4.0.0.xsd">
    <modelVersion>4.0.0</modelVersion>

    <groupId>com.example</groupId>
    <artifactId>SpringBoot2</artifactId>
    <version>0.0.1-SNAPSHOT</version>

    <!-- Inherit defaults from Spring Boot -->
    <parent>
        <groupId>org.springframework.boot</groupId>
        <artifactId>spring-boot-starter-parent</artifactId>
        <version>2.0.1.BUILD-SNAPSHOT</version>
    </parent>

    <!-- Add typical dependencies for a web application -->
    <dependencies>
        <dependency>
            <groupId>org.springframework.boot</groupId>
            <artifactId>spring-boot-starter-web</artifactId>
        </dependency>

        <dependency>
            <groupId>org.springframework.boot</groupId>
            <artifactId>spring-boot-devtools</artifactId>
            <optional>true</optional>
        </dependency>
        <dependency>
            <groupId>org.springframework.boot</groupId>
            <artifactId>spring-boot-configuration-processor</artifactId>
            <optional>true</optional>
        </dependency>
    </dependencies>

    <!-- Package as an executable jar -->
    <build>
        <plugins>
            <plugin>
                <groupId>org.springframework.boot</groupId>
                <artifactId>spring-boot-maven-plugin</artifactId>
            </plugin>

        </plugins>
        <!-- 	<resources>
                <resource>
                    <directory>src/main/java</directory>
                    <includes>
                        <include>**/*.properties</include>
                        <include>**/*.xml</include>
                    </includes>
                    <filtering>false</filtering>
                </resource>
                <resource>
                    <directory>src/main/resources</directory>
                    <includes>
                        <include>**/*.properties</include>
                        <include>**/*.xml</include>
                    </includes>
                    <filtering>false</filtering>
                </resource>
            </resources> -->
        <!--配置打包时不过滤非java文件结束 -->
    </build>

    <!-- Add Spring repositories -->
    <!-- (you don't need this if you are using a .RELEASE version) -->
    <repositories>
        <repository>
            <id>spring-snapshots</id>
            <url>https://repo.spring.io/snapshot</url>
            <snapshots>
                <enabled>true</enabled>
            </snapshots>
        </repository>
        <repository>
            <id>spring-milestones</id>
            <url>https://repo.spring.io/milestone</url>
        </repository>
    </repositories>
    <pluginRepositories>
        <pluginRepository>
            <id>spring-snapshots</id>
            <url>https://repo.spring.io/snapshot</url>
        </pluginRepository>
        <pluginRepository>
            <id>spring-milestones</id>
            <url>https://repo.spring.io/milestone</url>
        </pluginRepository>
    </pluginRepositories>
</project>
3. 在src/main/java中创建start类
package com.springboot2;

import org.springframework.boot.SpringApplication;
import org.springframework.boot.autoconfigure.EnableAutoConfiguration;
import org.springframework.context.annotation.ComponentScan;
import org.springframework.context.annotation.Configuration;
import org.springframework.web.bind.annotation.RequestMapping;
import org.springframework.web.bind.annotation.RestController;

@RestController// 页面跳转的控制
@Configuration//
@EnableAutoConfiguration
@ComponentScan
public class Start {

    @RequestMapping("/") //web项目网站主页的
    public String home() {
        return "Hello World!";
    }
    //启动函数
    public static void main(String[] args) {
        SpringApplication.run(Example.class, args);
    }

}
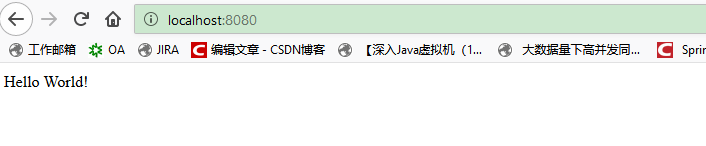
4 启动浏览器输入http://localhost:8080/,出现如下页面则表示启动成功.
五 常见的注解说明
六 参考文档
https://docs.spring.io/spring-boot/docs/2.0.1.BUILD-SNAPSHOT/reference/htmlsingle/#using-boot-maven


 1308
1308


 被折叠的 条评论
为什么被折叠?
被折叠的 条评论
为什么被折叠?
 到【灌水乐园】发言


