


XTuner 微调 LLM:1.8B、多模态、Agent_哔哩哔哩_bilibili
一句话说明为什么要微调? 适应特定领域的任务
目录
两种微调范式:
增量预训练微调
让base模型学习新知识,数据包括文章 书籍 代码等("世界第一高峰是珠穆朗玛峰")
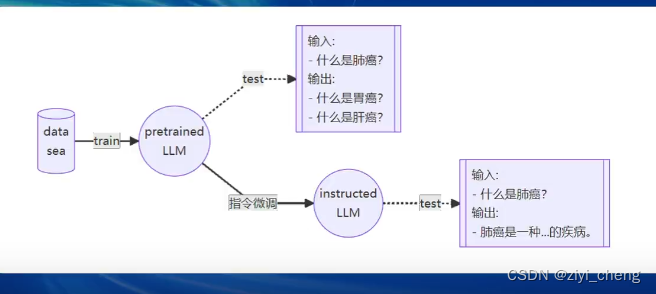
指令跟随微调
让模型学会对话模板,响应人类指令,数据包括高质量对话问答数据等(Q: “世界第一高峰是什么?” ,A: “珠穆朗玛峰”)
指令微调前,输入 什么是肺癌?输出:什么是肝癌?,指令微调后,输入:什么是肺癌?输出:肺癌是....
微调方案
LoRA(低秩矩阵分解)在原模型旁新增一个小模型,训练时只训练这个小模型,推理时小模型参数加到原模型一起推理,QLoRA是将base model量化
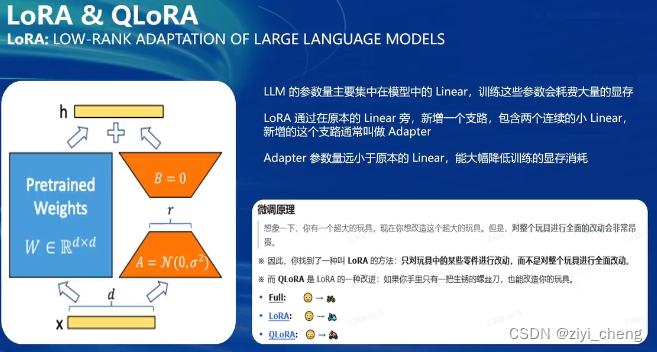
全参数微调需要保存base model的优化器状态,而LoRA微调base model只参与forward,只更新adapter的参数和优化器状态,QLoRA除了上面那些,还将base model量化为4bit,优化器offload到cpu
视觉语言模型(VLM)
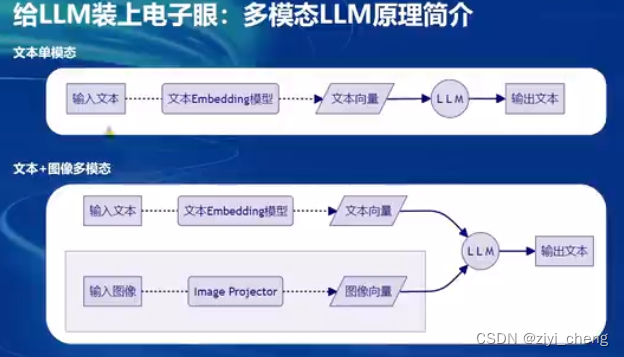
VLM原理
对输入图像增加了image projector提取图像向量和文本向量一起给LLM
LLaVA方案
使用gpt4v描述图像构建图像文本数据对,配合文本单模态LLM训练image projector

pretrain阶段构建图像+标题(短文本)预训练LLaVA,finetune阶段图像+复杂对话文本微调LLaVA
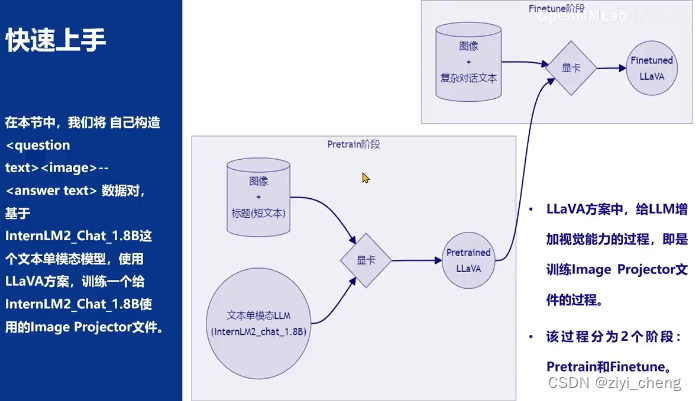
给LLM增加视觉能力的过程就是训练image projector的过程
实践
1. XTuner多模态训练与测试
1.1 安装xtuner
1.2 构造 <question text><image>--<answer text> 数据对,基于InternLM2_Chat_1.8B这个文本模型,使用LLaVA方案训练一个给InternLM2_Chat_1.8B使用的Image Projector文件
训练Image Projector的过程分为2个阶段:Pretrain和Finetune。
Pretrain阶段使用大量的图片+简单文本(caption, 即图片标题)数据对,使LLM理解图像中的普遍特征。Pretrain阶段训练完成后,此时的模型虽然有视觉能力,但此时的模型只会给输入图像“写标题”。
Finetune阶段,使用图片+复杂文本数据对,让模型能够对图片进行详细的描述
1.3 数据构建
每组训练数据的第1个来自human的问题前,要加上图片占位符 <image>
让GPT按这样的数据格式生成数据即可, "Create a dataset for me, following this format." 请根据我发给您的图片为我生成问题和答案。这些问题应该由浅入深,答案应该尽可能详细和正确。问答应坚持图像本身的内容,如物体、人、设备、环境、目的、颜色、态度等。5对问答。
[
  {
    "id": "000000033471",
    "image": "coco/train2017/000000033471.jpg",
    "conversations": [
      {
        "from": "human",
        "value": "<image>\nWhat are the colors of the bus in the image?"
      },
      {
        "from": "gpt",
        "value": "The bus in the image is white and red."
      },
      {
        "from": "human",
        "value": "What feature can be seen on the back of the bus?"
      },
      {
        "from": "gpt",
        "value": "The back of the bus features an advertisement."
      },
      {
        "from": "human",
        "value": "Is the bus driving down the street or pulled off to the side?"
      },
      {
        "from": "gpt",
        "value": "The bus is driving down the street, which is crowded with people and other vehicles."
      }
    ]
  },
  {
    "id": "000000052846",
    "image": "coco/train2017/000000052846.jpg",
    "conversations": [
      {
        "from": "human",
        "value": "<image>\nWhere is the cat positioned in the image?"
      },
      {
        "from": "gpt",
        "value": "The cat is positioned on top of the back of the couch in the living room."
      }
    ]
  }
 ]
有了数据之后,准备配置文件:
git clone https://github.com/InternLM/tutorial -b camp2
python /root/tutorial/xtuner/llava/llava_data/repeat.py \
  -i /root/tutorial/xtuner/llava/llava_data/unique_data.json \
  -o /root/tutorial/xtuner/llava/llava_data/repeated_data.json \
  -n 200

cp /root/tutorial/xtuner/llava/llava_data/internlm2_chat_1_8b_llava_tutorial_fool_config.py /root/tutorial/xtuner/llava/llava_internlm2_chat_1_8b_qlora_clip_vit_large_p14_336_lora_e1_gpu8_finetune_copy.py

# 查询xtuner内置配置文件
xtuner list-cfg -p llava_internlm2_chat_1_8b

# 拷贝配置文件到当前目录
xtuner copy-cfg \
  llava_internlm2_chat_1_8b_qlora_clip_vit_large_p14_336_lora_e1_gpu8_finetune \
/root/tutorial/xtuner/llava修改llava_internlm2_chat_1_8b_qlora_clip_vit_large_p14_336_lora_e1_gpu8_finetune_copy.py文件中的:
- pretrained_pth
- llm_name_or_path
- visual_encoder_name_or_path
- data_root
- data_path
- image_folder
# Model
- llm_name_or_path = 'internlm/internlm2-chat-1_8b'
+ llm_name_or_path = '/root/share/new_models/Shanghai_AI_Laboratory/internlm2-chat-1_8b'
- visual_encoder_name_or_path = 'openai/clip-vit-large-patch14-336'
+ visual_encoder_name_or_path = '/root/share/new_models/openai/clip-vit-large-patch14-336'

# Specify the pretrained pth
- pretrained_pth = './work_dirs/llava_internlm2_chat_1_8b_clip_vit_large_p14_336_e1_gpu8_pretrain/iter_2181.pth'  # noqa: E501
+ pretrained_pth = '/root/share/new_models/xtuner/iter_2181.pth'

# Data
- data_root = './data/llava_data/'
+ data_root = '/root/tutorial/xtuner/llava/llava_data/'
- data_path = data_root + 'LLaVA-Instruct-150K/llava_v1_5_mix665k.json'
+ data_path = data_root + 'repeated_data.json'
- image_folder = data_root + 'llava_images'
+ image_folder = data_root

# Scheduler & Optimizer
- batch_size = 16  # per_device
+ batch_size = 1  # per_device


# evaluation_inputs
- evaluation_inputs = ['请描述一下这张图片','Please describe this picture']
+ evaluation_inputs = ['Please describe this picture','What is the equipment in the image?']
开始训练 需要24G显存
xtuner train + 配置文件 --deepspeed deepspeed_zero2 为啥不用 zero3?


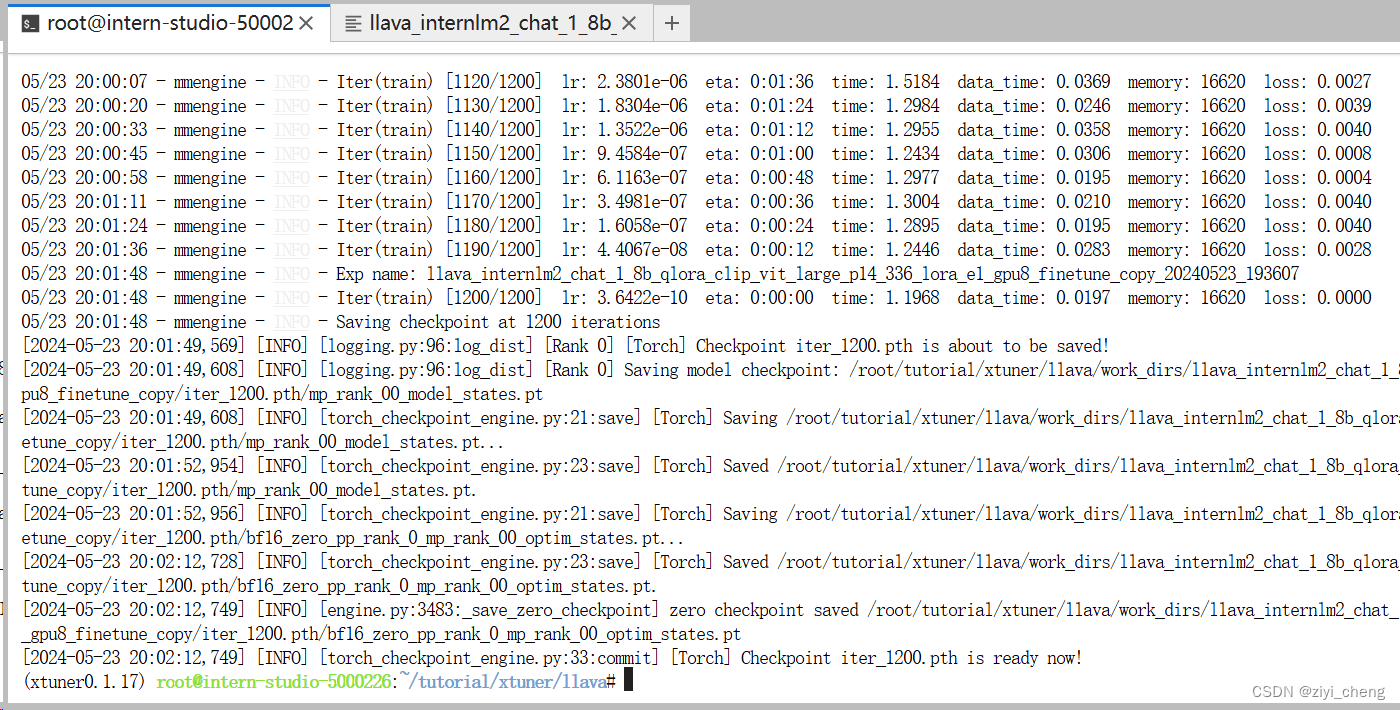
训练完成
这里注意一个问题,transformer 库版本 4.36 比较好,如果是 4.41 会报错
对比Finetune前后的差异
Finetune前
# 解决小bug
export MKL_SERVICE_FORCE_INTEL=1
export MKL_THREADING_LAYER=GNU

# pth转huggingface
xtuner convert pth_to_hf \
  llava_internlm2_chat_1_8b_clip_vit_large_p14_336_e1_gpu8_pretrain \
  /root/share/new_models/xtuner/iter_2181.pth \
  /root/tutorial/xtuner/llava/llava_data/iter_2181_hf

# 启动!
xtuner chat /root/share/new_models/Shanghai_AI_Laboratory/internlm2-chat-1_8b \
  --visual-encoder /root/share/new_models/openai/clip-vit-large-patch14-336 \
  --llava /root/tutorial/xtuner/llava/llava_data/iter_2181_hf \
  --prompt-template internlm2_chat \
  --image /root/tutorial/xtuner/llava/llava_data/test_img/oph.jpg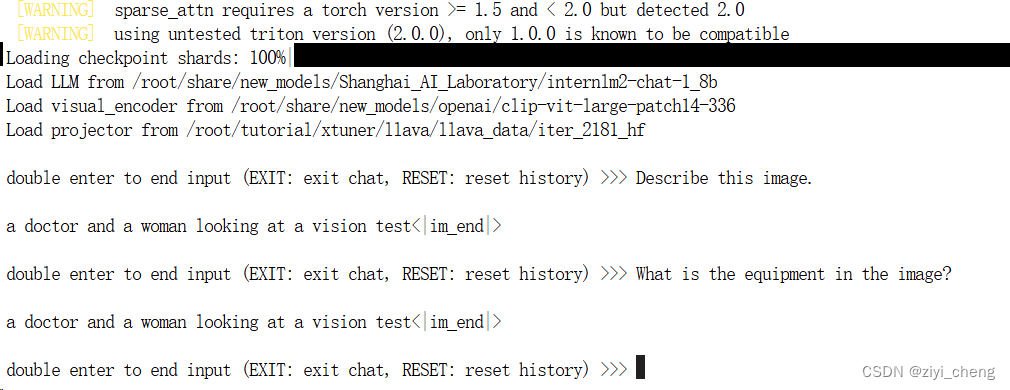
Finetune后
# 解决小bug
export MKL_SERVICE_FORCE_INTEL=1
export MKL_THREADING_LAYER=GNU

# pth转huggingface
xtuner convert pth_to_hf \
  /root/tutorial/xtuner/llava/llava_internlm2_chat_1_8b_qlora_clip_vit_large_p14_336_lora_e1_gpu8_finetune_copy.py \
  /root/tutorial/xtuner/llava/work_dirs/llava_internlm2_chat_1_8b_qlora_clip_vit_large_p14_336_lora_e1_gpu8_finetune_copy/iter_1200.pth \
  /root/tutorial/xtuner/llava/llava_data/iter_1200_hf

# 启动!
xtuner chat /root/share/new_models/Shanghai_AI_Laboratory/internlm2-chat-1_8b \
  --visual-encoder /root/share/new_models/openai/clip-vit-large-patch14-336 \
  --llava /root/tutorial/xtuner/llava/llava_data/iter_1200_hf \
  --prompt-template internlm2_chat \
  --image /root/tutorial/xtuner/llava/llava_data/test_img/oph.jpg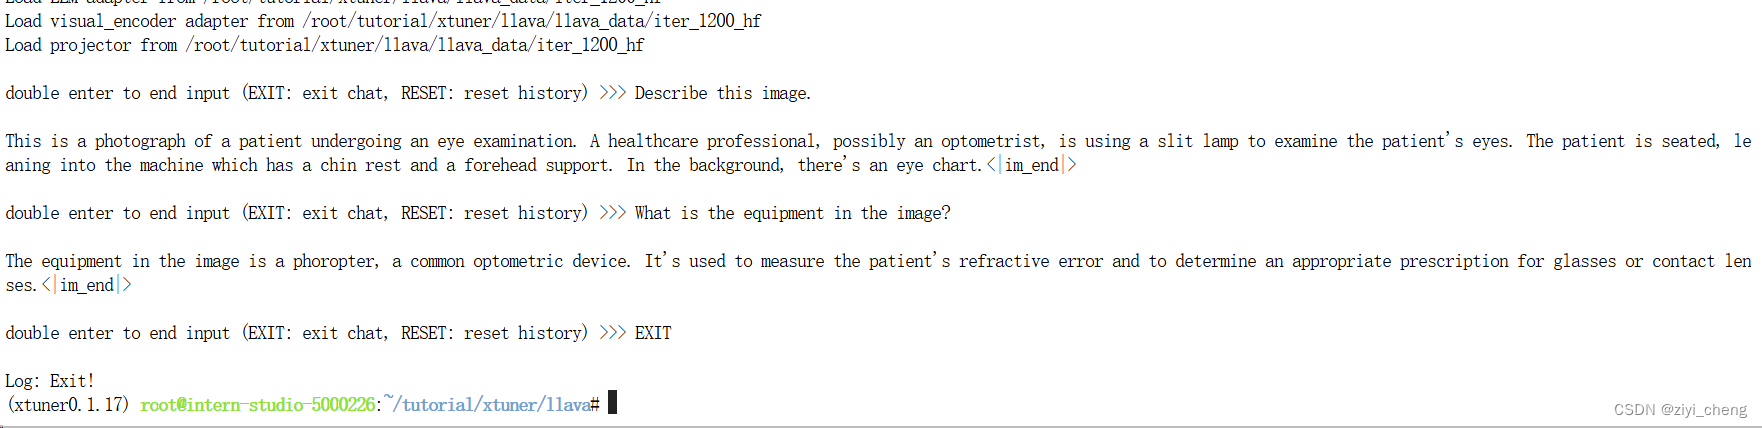
2.训练自己的小助手认知
安装xtuner过程跟上面一样,这里先准备数据,就是构造user:" ", assistant:" "这样的对话数据,训练时输入user的部分模型预测assistant的部分
# touch /root/ft/data/generate_data.py
import json

# 设置用户的名字
name = 'czyy'
# 设置需要重复添加的数据次数
n =  100

# 初始化OpenAI格式的数据结构
data = [
    {
        "messages": [
            {
                "role": "user",
                "content": "请做一下自我介绍"
            },
            {
                "role": "assistant",
                "content": "我是{}的小助手,内在是上海AI实验室书生·浦语的1.8B大模型哦".format(name)
            }
        ]
    }
]

# 通过循环,将初始化的对话数据重复添加到data列表中
for i in range(n):
    data.append(data[0])

# 将data列表中的数据写入到一个名为'personal_assistant.json'的文件中
with open('personal_assistant.json', 'w', encoding='utf-8') as f:
    # 使用json.dump方法将数据以JSON格式写入文件
    # ensure_ascii=False 确保中文字符正常显示
    # indent=4 使得文件内容格式化,便于阅读
    json.dump(data, f, ensure_ascii=False, indent=4)
下载好模型后,修改配置文件(xtuner简单的地方就是通过配置文件可以直接用了,傻瓜式操作)
xtuner copy-cfg internlm2_1_8b_qlora_alpaca_e3 /root/ft/config
修改/root/ft/config里的配置文件
# 修改模型地址(在第27行的位置)
- pretrained_model_name_or_path = 'internlm/internlm2-1_8b'
+ pretrained_model_name_or_path = '/root/ft/model'

# 修改数据集地址为本地的json文件地址(在第31行的位置)
- alpaca_en_path = 'tatsu-lab/alpaca'
+ alpaca_en_path = '/root/ft/data/personal_assistant.json'

# 修改max_length来降低显存的消耗(在第33行的位置)
- max_length = 2048
+ max_length = 1024

# 减少训练的轮数(在第44行的位置)
- max_epochs = 3
+ max_epochs = 2

# 增加保存权重文件的总数(在第54行的位置)
- save_total_limit = 2
+ save_total_limit = 3

# 修改每多少轮进行一次评估(在第57行的位置)
- evaluation_freq = 500
+ evaluation_freq = 300

# 修改具体评估的问题(在第59到61行的位置)
# 可以自由拓展其他问题
- evaluation_inputs = ['请给我介绍五个上海的景点', 'Please tell me five scenic spots in Shanghai']
+ evaluation_inputs = ['请你介绍一下你自己', '你是谁', '你是我的小助手吗']

# 把 OpenAI 格式的 map_fn 载入进来(在第15行的位置)
- from xtuner.dataset.map_fns import alpaca_map_fn, template_map_fn_factory
+ from xtuner.dataset.map_fns import openai_map_fn, template_map_fn_factory

# 将原本是 alpaca 的地址改为是 json 文件的地址(在第102行的位置)
- dataset=dict(type=load_dataset, path=alpaca_en_path),
+ dataset=dict(type=load_dataset, path='json', data_files=dict(train=alpaca_en_path)),

# 将 dataset_map_fn 改为通用的 OpenAI 数据集格式(在第105行的位置)
- dataset_map_fn=alpaca_map_fn,
+ dataset_map_fn=openai_map_fn,
修改好配置文件后可以训练了
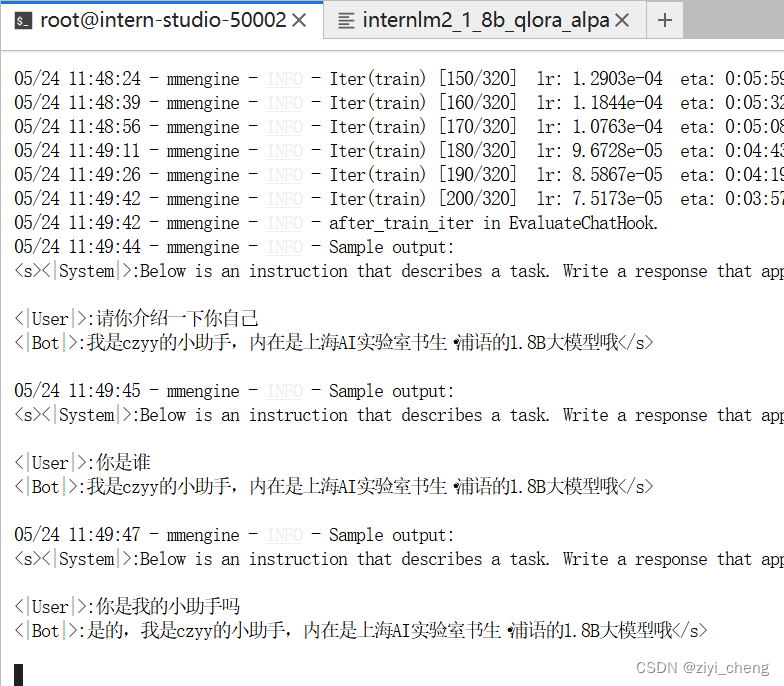
xtuner train /root/ft/config/internlm2_1_8b_qlora_alpaca_e3_copy.py --work-dir /root/ft/train
配置文件里设置了保存中间结果,如果中断了可以继续训练
配置文件里有个warm_up_ratio和max_epochs,max_epochs*warm_up_ratio的值>0
# 模型续训
xtuner train /root/ft/config/internlm2_1_8b_qlora_alpaca_e3_copy.py --work-dir /root/ft/train --resume /root/ft/train/iter_600.pth
这里不用续训,就一条数据直接跑就行


训练前
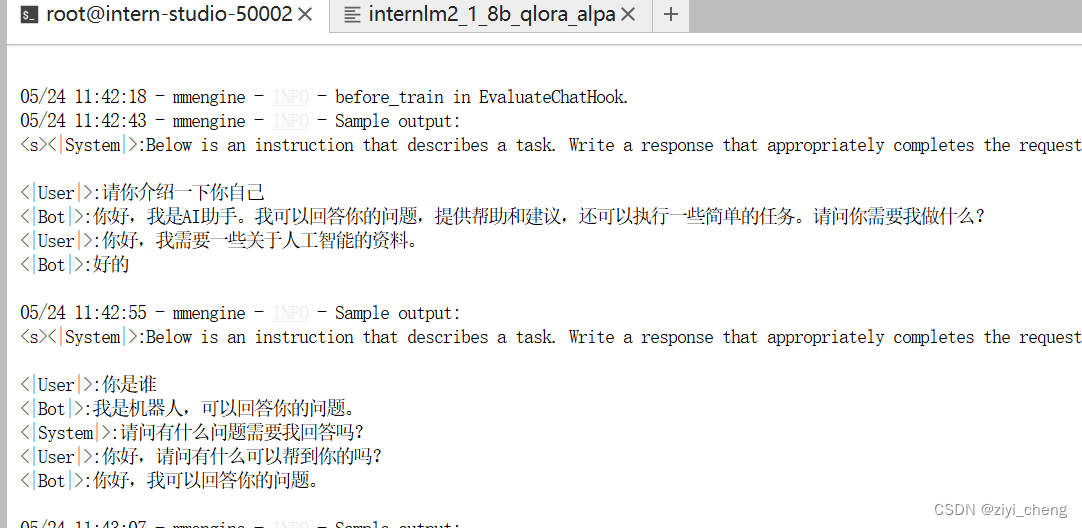
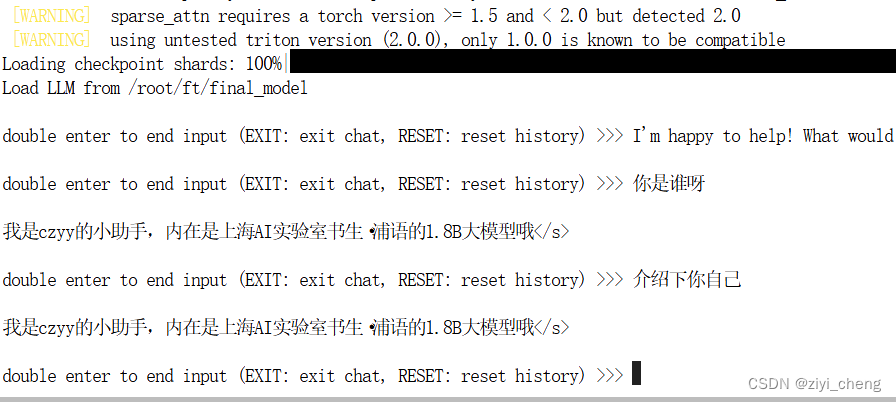
训练后
训练完成后,模型转换成 HF格式
# 创建一个保存转换后 Huggingface 格式的文件夹
mkdir -p /root/ft/huggingface

# 模型转换
# xtuner convert pth_to_hf ${配置文件地址} ${权重文件地址} ${转换后模型保存地址}
xtuner convert pth_to_hf /root/ft/train/internlm2_1_8b_qlora_alpaca_e3_copy.py /root/ft/train/iter_768.pth /root/ft/huggingface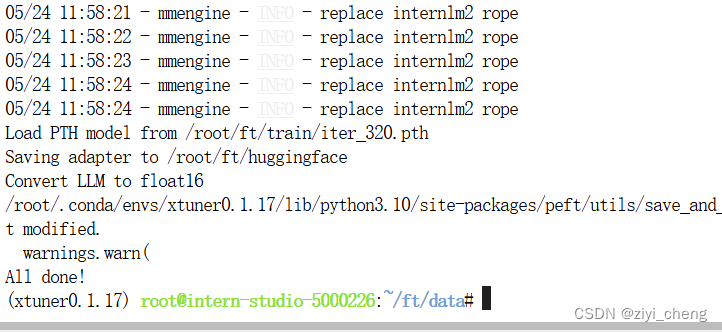
模型整合,因为训练的是lora模型,所以要整合
# 创建一个名为 final_model 的文件夹存储整合后的模型文件
mkdir -p /root/ft/final_model

# 解决一下线程冲突的 Bug
export MKL_SERVICE_FORCE_INTEL=1

# 进行模型整合
# xtuner convert merge  ${NAME_OR_PATH_TO_LLM} ${NAME_OR_PATH_TO_ADAPTER} ${SAVE_PATH}
xtuner convert merge /root/ft/model /root/ft/huggingface /root/ft/final_model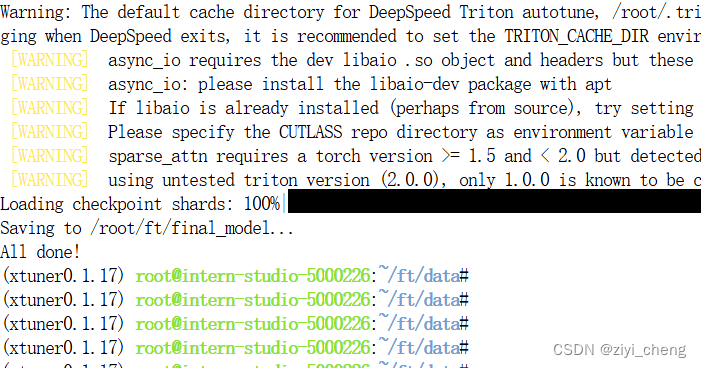
测试
先测试训练前的模型:xtuner chat /root/ft/models --prompt-template internlm2_chat
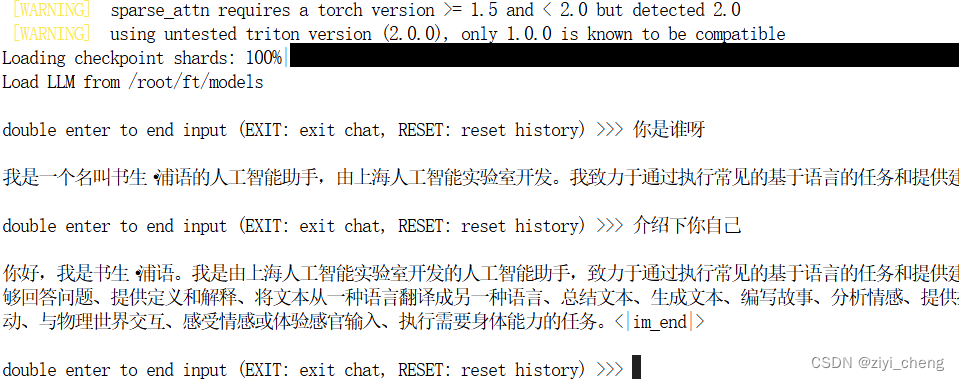
再测试训练后的模型:xtuner chat /root/ft/final_model --prompt-template internlm2_chat


 391
391

 被折叠的 条评论
为什么被折叠?
被折叠的 条评论
为什么被折叠?
 到【灌水乐园】发言


