


讲解docker部署magento2,lamp适当修改也能完成,采用的是ubuntu,如果是centos要注意改变对应的命令。
要在虚拟机中使用Docker部署Magento,可以按照以下步骤进行操作:
一,在虚拟机上安装Docker和Docker Compose:根据虚拟机的操作系统
一键安装Docker
$ curl -fsSL https://get.docker.com | bash -s docker --mirror Aliyun
Dcloud安装
$ curl -sSL https://get.daocloud.io/docker | sh
Ubuntu搭建Docker
Docker目前支持的最低Ubuntu版本为14.04 LTS,但实际上从稳定性上考虑,推荐使用16.04 LTS或18.0.4 LTS版本,或者20.04LTS版本,并且系统内核越新越好,以支持Docker最新的特性。
官方文档:https://docs.docker.com/engine/install/ubuntu/
更换源(可选,如果更换为清华源,则后面的安装步骤参数需要指定为清华源)
清华大学ubuntu源:
https://mirror.tuna.tsinghua.edu.cn/ubuntu
官方文档:
https://mirror.tuna.tsinghua.edu.cn/help/ubuntu/
vim /etc/apt/sources.list替换源
更新包索引
sudo apt-get update
手动安装docker
移除系统中可能存在的旧版本的Docker
$ sudo apt-get remove docker docker-engine docker.io containerd runc
安装可以通过https使用仓库的一些相关包
$ sudo apt-get install
apt-transport-https
ca-certificates
curl
gnupg-agent
software-properties-common
添加GPG key清华源:
$ curl -fsSL https://mirrors.tuna.tsinghua.edu.cn/docker-ce/linux/ubuntu/gpg | sudo apt-key add -
ubuntu源:
$ curl -fsSL https://download.docker.com/linux/ubuntu/gpg | sudo gpg --dearmor -o /usr/share/keyrings/docker-archive-keyring.gpg
验证指纹
sudo apt-key fingerprint 0EBFCD88
应该得到如下内容:
pub rsa4096 2017-02-22 [SCEA]9DC8 5822 9FC7 DD38 854A E2D8 8D81 803C 0EBF CD88uid [ unknown] Docker Release (CE deb)docker@docker.comsub rsa4096 2017-02-22 [S]
添加docker-ce的仓库
清华源:
$ sudo add-apt-repository
“deb [arch=amd64] https://mirrors.tuna.tsinghua.edu.cn/docker-ce/linux/ubuntu
$(lsb_release -cs) stable”
ubuntu源:
$ echo
“deb [arch=amd64 signed-by=/usr/share/keyrings/docker-archive-keyring.gpg] https://download.docker.com/linux/ubuntu
$(lsb_release -cs) stable” | sudo tee /etc/apt/sources.list.d/docker.list > /dev/null
安装docker
安装前需要再次更新源:
$ sudo apt update
$ sudo apt-get install docker-ce docker-ce-cli containerd.io
更换docker镜像源:(可选)
$ sudo vim /etc/docker/daemon.json
{
“registry-mirrors”: [“http://hub-mirror.c.163.com”]
}
启动docker
sudo systemctl start docker
二.创建一个新的目录用于存储Magento的Docker部署文件。
3.在该目录中创建一个名为docker-compose.yml的文件,并使用以下内容:
version: '3'
services:
  web:
    image: nginx:1.8
    ports:
      - "80:80"
    volumes:
      - ./magento:/var/www/html
      - ./nginx.conf:/etc/nginx/conf.d/default.conf
    depends_on:
      - php
  php:
    image: php:8.1-fpm
      #build:
      #context: ./
      #dockerfile: Dockerfile
      #container_name: 'php8'
    volumes:
      - ./magento:/var/www/html
      - /home/一般是自己创建的用户名/docker-c-lnmp/php-config/php.ini:/usr/local/etc/php/php.ini
        #environment:
      #- PHP_EXTENSIONS=bcmath,ctype,curl,dom,fileinfo,gd,hash,iconv,intl,json,libxml,mbstring,openssl,pcre,pdo_mysql,simplexml,soap,sockets,sodium,xmlwriter,xsl,zip
  db:
    image: mysql:8.0
    ports:
      - 3306:3306
    environment:
      MYSQL_DATABASE: magento2
      MYSQL_USER: magento2
      MYSQL_PASSWORD: password2
      MYSQL_ROOT_PASSWORD: root_password
      MYSQL_ROOT_HOST: '%'
    volumes:
      - ./mysql:/var/lib/mysql
  phpmyadmin:
    image: phpmyadmin/phpmyadmin
    links:
      - db:mysql
    ports:
      - 8080:80
    environment:
      PMA_HOST: db
使用phpmyadmin的好处,不用付费,不用找破解码。
四.在该目录中创建一个名为nginx.conf的文件,并使用以下内容:
server {
listen 80;
server_name 虚拟域名;
root /var/www/html/magento/pub;
index index.php index.html index.htm default.php default.htm default.html;
#include /docker-c-lnmp/magento/magento2-2.4.5-p3/nginx.conf.sample;
location ~ ^(.+\.php)(/.*)?$ {
    fastcgi_pass php:9000;
    fastcgi_index index.php;
    fastcgi_param SCRIPT_FILENAME $document_root$fastcgi_script_name;
    include fastcgi_params;
}

location / {
	try_files $uri $uri/ /index.php$is_args$args;
}

location /pub/ {
	location ~ ^/pub/media/(downloadable|customer|import|custom_options|theme_customization/.*\.xml) {
		deny all;
	}
	alias /var/www/html/magento/pub/;
	add_header X-Frame-Options "SAMEORIGIN";
}

location /static/ {
	# Uncomment the following line in production mode
	# expires max;

	# Remove signature of the static files that is used to overcome the browser cache
	location ~ ^/static/version\d*/ {
		rewrite ^/static/version\d*/(.*)$ /static/$1 last;
	}

	location ~* \.(ico|jpg|jpeg|png|gif|svg|svgz|webp|avif|avifs|js|css|eot|ttf|otf|woff|woff2|html|json|webmanifest)$ {
		add_header Cache-Control "public";
		add_header X-Frame-Options "SAMEORIGIN";
		expires +1y;

		if (!-f $request_filename) {
			rewrite ^/static/(version\d*/)?(.*)$ /static.php?resource=$2 last;
		}
	}
	location ~* \.(zip|gz|gzip|bz2|csv|xml)$ {
		add_header Cache-Control "no-store";
		add_header X-Frame-Options "SAMEORIGIN";
		expires    off;

		if (!-f $request_filename) {
		   rewrite ^/static/(version\d*/)?(.*)$ /static.php?resource=$2 last;
		}
	}
	if (!-f $request_filename) {
		rewrite ^/static/(version\d*/)?(.*)$ /static.php?resource=$2 last;
	}
	add_header X-Frame-Options "SAMEORIGIN";
}

location /media/ {


	try_files $uri $uri/ /get.php$is_args$args;

	location ~ ^/media/theme_customization/.*\.xml {
		deny all;
	}

	location ~* \.(ico|jpg|jpeg|png|gif|svg|svgz|webp|avif|avifs|js|css|eot|ttf|otf|woff|woff2)$ {
		add_header Cache-Control "public";
		add_header X-Frame-Options "SAMEORIGIN";
		expires +1y;
		try_files $uri $uri/ /get.php$is_args$args;
	}
	location ~* \.(zip|gz|gzip|bz2|csv|xml)$ {
		add_header Cache-Control "no-store";
		add_header X-Frame-Options "SAMEORIGIN";
		expires    off;
		try_files $uri $uri/ /get.php$is_args$args;
	}
	add_header X-Frame-Options "SAMEORIGIN";
}

location /media/customer/ {
	deny all;
}

location /media/downloadable/ {
	deny all;
}

location /media/import/ {
	deny all;
}

location /media/custom_options/ {
	deny all;
}

location /errors/ {
	location ~* \.xml$ {
		deny all;
	}
}

gzip on;
gzip_disable "msie6";

gzip_comp_level 6;
gzip_min_length 1100;
gzip_buffers 16 8k;
gzip_proxied any;
gzip_types
	text/plain
	text/css
	text/js
	text/xml
	text/javascript
	application/javascript
	application/x-javascript
	application/json
	application/xml
	application/xml+rss
	image/svg+xml;
gzip_vary on;

# Banned locations (only reached if the earlier PHP entry point regexes don't match)
location ~* (\.php$|\.phtml$|\.htaccess$|\.htpasswd$|\.git) {
	deny all;
}
}
五.将Magento的代码放在与docker-compose.yml文件相同的目录中,并确保代码位于名为magento的子目录中。
代码放在宿主机方便代码和容器之间同步
6.在命令行中,切换到存储Magento Docker部署文件的目录,并运行以下命令启动Docker容器:
docker-compose up -d
执行docker-compose up -d 成功后,接着登录php容器
docker exec -it f35ddf94fbf3(你自己对应的容器id) /bin/bash
切换源,不然安装扩展很慢,执行:
echo "" > /etc/apt/sources.list
echo "deb http://mirrors.aliyun.com/debian buster main" >> /etc/apt/sources.list
echo "deb http://mirrors.aliyun.com/debian-security buster/updates main" >> /etc/apt/sources.list
echo "deb http://mirrors.aliyun.com/debian buster-updates main" >> /etc/apt/sources.list
sed -i s@/deb.debian.org/@/mirrors.aliyun.com/@g /etc/apt/sources.list
sed -i s@/security.debian.org/@/mirrors.aliyun.com/@g /etc/apt/sources.list
echo "deb https://mirrors.tuna.tsinghua.edu.cn/ubuntu/ jammy main restricted universe multiverse" >> /etc/apt/sources.list

echo "deb https://mirrors.tuna.tsinghua.edu.cn/ubuntu/ jammy-updates main restricted universe multiverse" >> /etc/apt/sources.list

echo "deb https://mirrors.tuna.tsinghua.edu.cn/ubuntu/ jammy-backports main restricted universe multiverse" >> /etc/apt/sources.list
echo "deb https://mirrors.tuna.tsinghua.edu.cn/debian-security/ bookworm-security main" >> /etc/apt/sources.list

echo "deb http://mirrors.ustc.edu.cn/ubuntu/ xenial-security main restricted universe multiverse" >>/etc/apt/sources.list
echo "deb http://mirrors.ustc.edu.cn/ubuntu/ xenial-updates main restricted universe multiverse" >>/etc/apt/sources.list
echo "deb http://mirrors.ustc.edu.cn/ubuntu/ xenial-proposed main restricted universe multiverse" >>/etc/apt/sources.list
echo "deb http://mirrors.ustc.edu.cn/ubuntu/ xenial-backports main restricted universe multiverse" >>/etc/apt/sources.list
echo "deb-src http://mirrors.ustc.edu.cn/ubuntu/ xenial main restricted universe multiverse" >>/etc/apt/sources.list
echo "deb-src http://mirrors.ustc.edu.cn/ubuntu/ xenial-security main restricted universe multiverse" >>/etc/apt/sources.list
echo "deb-src http://mirrors.ustc.edu.cn/ubuntu/ xenial-updates main restricted universe multiverse" >>/etc/apt/sources.list
echo "deb-src http://mirrors.ustc.edu.cn/ubuntu/ xenial-proposed main restricted universe multiverse" >> /etc/apt/sources.list
echo "deb-src http://mirrors.ustc.edu.cn/ubuntu/ xenial-backports main restricted universe multiverse" >>/etc/apt/sources.list
运行 sudo apt update 命令来更新软件包列表
报错:Err:16 http://mirrors.ustc.edu.cn/ubuntu xenial-proposed InRelease The following signatures couldn’t be verified because the public key is not available: NO_PUBKEY 40976EAF437D05B5 NO_PUBKEY 3B4FE6ACC0B21F32
这个错误通常是由于缺少公钥导致的。要解决这个问题,可以尝试使用以下命令导入所需的公钥:
sudo apt-key adv --keyserver keyserver.ubuntu.com --recv-keys 40976EAF437D05B5 3B4FE6ACC0B21F32
这将从Ubuntu的公钥服务器上获取并导入所需的公钥。然后,可以再次运行更新命令:
sudo apt update
直到没有,E: 和Err:开头的错误提示,不然部分扩展不能安装成功
然后安装php扩展:
1.
apt-get -y update --fix-missing && \
    apt-get upgrade -y && \
    apt-get --no-install-recommends install -y apt-utils && \
rm -rf /var/lib/apt/lists/*
apt-get -y update && \
    apt-get -y --no-install-recommends install nano wget \
dialog \
libsqlite3-dev \
libsqlite3-0 && \
    apt-get -y --no-install-recommends install default-mysql-client \
zlib1g-dev \
libzip-dev \
libicu-dev && \
    apt-get -y --no-install-recommends install --fix-missing apt-utils \
build-essential \
git \
curl \
libonig-dev && \
    apt-get install -y iputils-ping && \
    apt-get -y --no-install-recommends install --fix-missing libcurl4 \
libcurl4-openssl-dev \
zip \
openssl && \
    rm -rf /var/lib/apt/lists/* && \
curl -sS https://getcomposer.org/installer | php -- --install-dir=/usr/local/bin --filename=composer
pecl install xdebug-3.1.4 && \
    docker-php-ext-enable xdebug && \
mkdir /var/log/xdebug
apt-get update && \
    apt-get -y --no-install-recommends install --fix-missing libmagickwand-dev && \
rm -rf /var/lib/apt/lists/*
docker-php-ext-install pdo_mysql && \
    docker-php-ext-install pdo_sqlite && \
    docker-php-ext-install bcmath && \
    docker-php-ext-install mysqli && \
    docker-php-ext-install curl && \
    docker-php-ext-install zip && \
    docker-php-ext-install -j$(nproc) intl && \
    docker-php-ext-install mbstring && \
    docker-php-ext-install gettext && \
    docker-php-ext-install calendar && \
docker-php-ext-install exif
apt-get -y update && \
apt-get --no-install-recommends install -y libfreetype6-dev \
libjpeg62-turbo-dev \
libpng-dev && \
rm -rf /var/lib/apt/lists/* && \
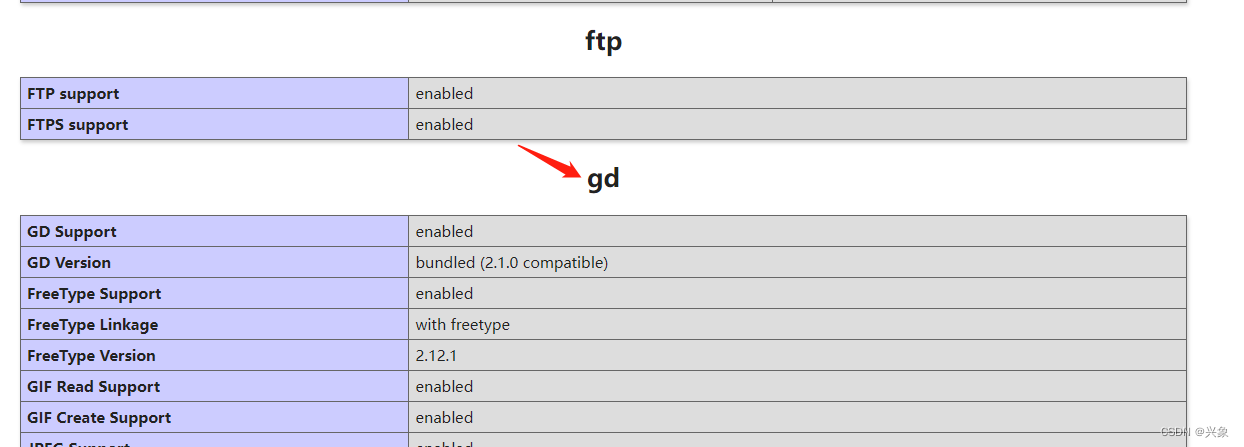
docker-php-ext-configure gd --enable-gd --with-freetype --with-jpeg && \
docker-php-ext-install gd
magento安装之前还需要先安装几个扩展:
bcmath、xsl、soap、sockets
下载php源码,支持docker-php-ext-install命令
cd /usr/src
wget https://www.php.net/distributions/php-8.1.20.tar.xz
mv php-8.1.20.tar.xz  php.tar.xz
1.bcmath
docker-php-ext-install bcmath
2.xsl
apt update
apt install libxslt-dev -y
docker-php-ext-install xsl
3.soap
apt install libxml2-dev -y
docker-php-ext-install soap
4.sockets
docker-php-ext-install sockets
Magento 开源版需要开启的PHP扩展:
ext-bcmath
ext-ctype
ext-curl
ext-dom
ext-fileinfo
ext-gd
ext-hash
ext-iconv
ext-intl
ext-json
ext-libxml
ext-mbstring
ext-openssl
ext-pcre
ext-pdo_mysql
ext-simplexml
ext-soap
ext-sockets
ext-sodium
ext-xmlwriter
ext-xsl
ext-zip
lib-libxml
lib-openssl
在这些都安装好后就可以开始安装magento2了
比如:
修改php.ini,增加内存
如果我们现在直接创建项目,会提示错误,内存不足:
Fatal error: Allowed memory size of 1610612736 bytes exhausted (tried to allocate 167772160 bytes) in phar:///usr/local/bin/composer/src/Composer/DependencyResolver/RuleSet.php on line 90
php.ini文件已经映射到宿主机,参考/home/一般是自己创建的用户名/docker-c-lnmp/php-config/php.ini:/usr/local/etc/php/php.ini
我们把这条内存限制从128M 改为 4096M,我们把内存调大到4G
memory_limit = 4096M
然后重启容器
登录phpmyadmin
虚拟域名:8080/
创建数据库magento2
更改文件访问权限
登录php容器:
cd /var/www/html
chmod -R 777 ./magento
注意:
访问magento项目,需要保证magento文件都能够被Apache访问。
因为这些文件我们是用root执行命令下载的,因此Apache不能访问,会报错
因此,这里我们需要给所有文件 777 权限才能访问。
将magento2代码放在文件docker-compose.yml配置的对应宿主机映射卷magento中
确认代码同步到php容器中,登录php容器在代码根目/var/www/html/magento录执行
composer install
等待安装完成
然后执行
php bin/magento module:disable {Magento_Elasticsearch,Magento_InventoryElasticsearch,Magento_Elasticsearch6,Magento_Elasticsearch7}
因为没有安装Elasticsearch要先禁止
然后执行:
php bin/magento setup:install --base-url=http://你配置的虚拟域名/ --backend-frontname=admin --db-host=db --db-name=magento2 --db-user=root --db-password=root_password --admin-firstname=admin --admin-lastname=admin --admin-email=admin@admin.com --admin-user=admin --admin-password=admin123 --language=zh_Hans_CN --currency=CNY --timezone=Asia/Shanghai --use-rewrites=1
等待安装完成


 2483
2483


 被折叠的 条评论
为什么被折叠?
被折叠的 条评论
为什么被折叠?
 到【灌水乐园】发言


