


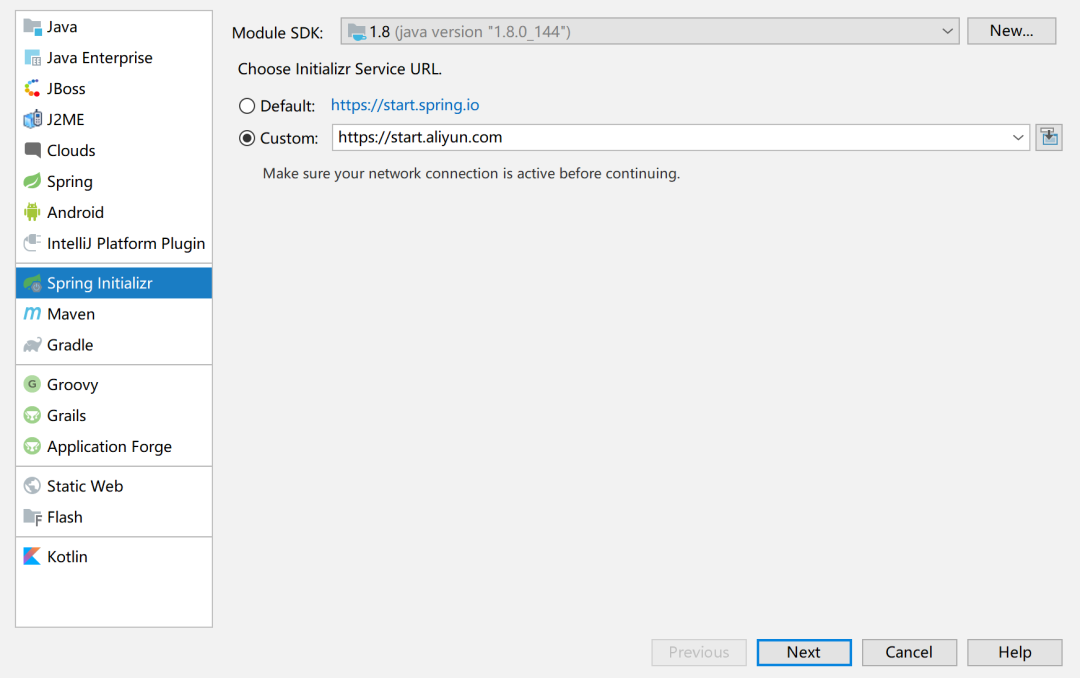
IDEA 使用 Spring initializr 创建 SpringBoot 项目超时
创建时用阿里的 service url: https://start.aliyun.com
自定义 starter
面试时,面试官可能会问你如何 实现一个自定义的 SpringBoot starter,或者说,springboot 如何加载我们自己的 jar 包
1、starter 启动原理
starter-pom 引入 autoconfigurer 包
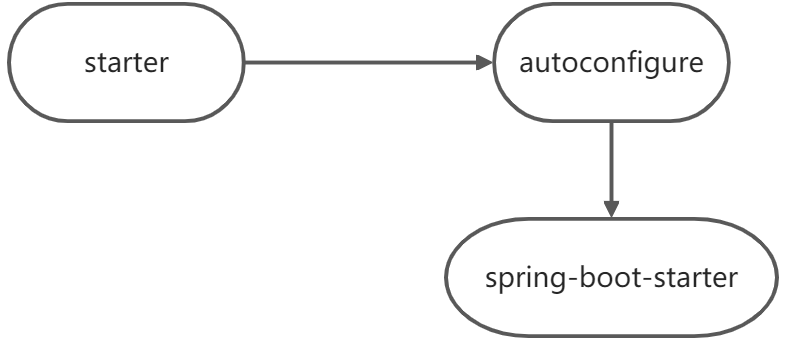
autoconfigure 包中配置使用 META-INF/spring.factories 中 EnableAutoConfiguration 的值,使得项目启动加载指定的自动配置类
编写自动配置类 xxxAutoConfiguration -> xxxxProperties
@Configuration
@Conditional
@EnableConfigurationProperties
@Bean
......
引入 starter --- xxxAutoConfiguration --- 容器中放入组件 ---- 绑定 xxxProperties ---- 配置项
2、自定义 starter
创建一个名为 boot-09-customer-starter 空工程,工程下面新建两个模块
hello-spring-boot-starter(场景启动器,普通 Maven 工程),
hello-spring-boot-starter-autoconfigure(**自动配置包,**需用用到 Spring Initializr 创建的 Maven 工程)。
hello-spring-boot-starter 无需编写什么代码,只需让该工程引入 hello-spring-boot-starter-autoconfigure 依赖:
<?xml version="1.0" encoding="UTF-8"?>
<project xmlns="http://maven.apache.org/POM/4.0.0"
         xmlns:xsi="http://www.w3.org/2001/XMLSchema-instance"
         xsi:schemaLocation="http://maven.apache.org/POM/4.0.0 http://maven.apache.org/xsd/maven-4.0.0.xsd">
    <modelVersion>4.0.0</modelVersion>

    <groupId>com.demo</groupId>
    <artifactId>hello-spring-boot-starter</artifactId>
    <version>1.0-SNAPSHOT</version>

    <dependencies>
        <!--引入自动配制包-->
        <dependency>
            <groupId>com.demo</groupId>
            <artifactId>hello-spring-boot-starter-autoconfigure</artifactId>
            <version>0.0.1-SNAPSHOT</version>
        </dependency>
    </dependencies>

</project>hello-spring-boot-starter-autoconfigure的 pom.xml 如下:
<?xml version="1.0" encoding="UTF-8"?>
<project xmlns="http://maven.apache.org/POM/4.0.0" xmlns:xsi="http://www.w3.org/2001/XMLSchema-instance"
xsi:schemaLocation="http://maven.apache.org/POM/4.0.0 https://maven.apache.org/xsd/maven-4.0.0.xsd">
<modelVersion>4.0.0</modelVersion>
<groupId>com.demo</groupId>
<artifactId>hello-spring-boot-starter-autoconfigure</artifactId>
<version>0.0.1-SNAPSHOT</version>
<name>hello-spring-boot-starter-autoconfigure</name>
<description>Demo project for Spring Boot</description>
<parent>
<groupId>org.springframework.boot</groupId>
<artifactId>spring-boot-starter-parent</artifactId>
<version>2.4.0</version>
<relativePath/> <!-- lookup parent from repository -->
</parent>
<properties>
<java.version>1.8</java.version>
</properties>
<dependencies>
<dependency>
<groupId>org.springframework.boot</groupId>
<artifactId>spring-boot-starter</artifactId>
</dependency>
</dependencies>
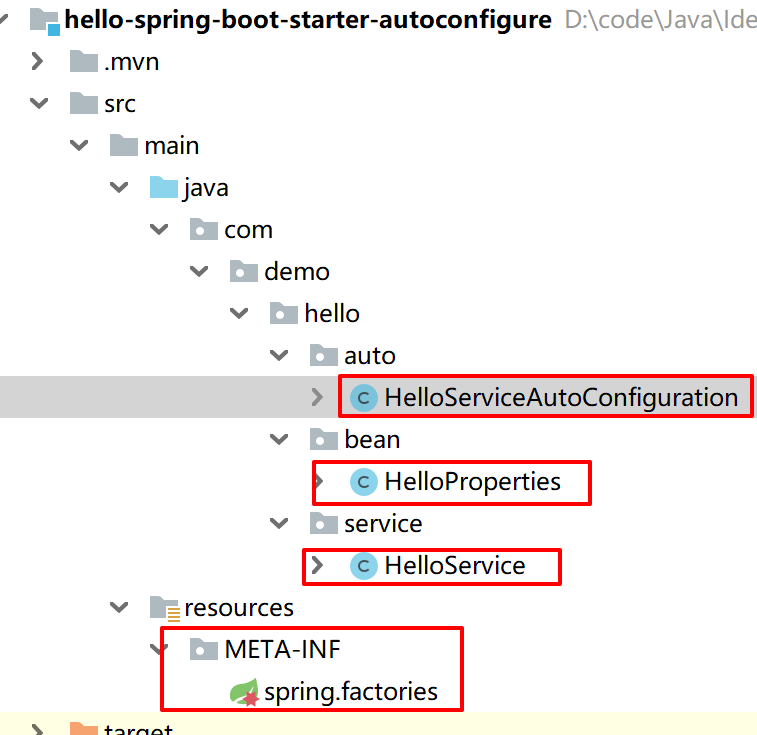
</project>hello-spring-boot-starter-autoconfigure 的项目结构如下
package com.demo.hello.auto;
import com.demo.hello.bean.HelloProperties;
import com.demo.hello.service.HelloService;
import org.springframework.boot.autoconfigure.condition.ConditionalOnMissingBean;
import org.springframework.boot.context.properties.EnableConfigurationProperties;
import org.springframework.context.annotation.Bean;
import org.springframework.context.annotation.Configuration;
/**
* @author chenjianbing
* @create 2021-09-19 19:08
* 自动配制类
*/
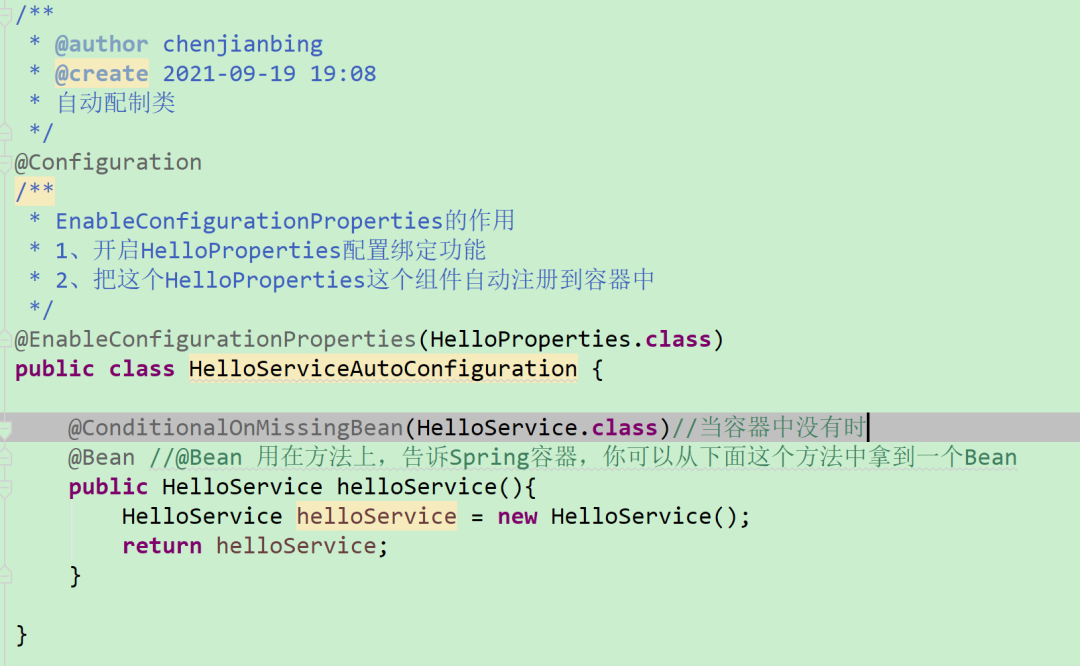
@Configuration
/**
* EnableConfigurationProperties的作用
* 1、开启HelloProperties配置绑定功能
* 2、把这个HelloProperties这个组件自动注册到容器中
*/
@EnableConfigurationProperties(HelloProperties.class)
public class HelloServiceAutoConfiguration {
@ConditionalOnMissingBean(HelloService.class)//当容器中没有时
@Bean //@Bean 用在方法上,告诉Spring容器,你可以从下面这个方法中拿到一个Bean
public HelloService helloService(){
HelloService helloService = new HelloService();
return helloService;
}
}package com.demo.hello.bean;
import org.springframework.boot.context.properties.ConfigurationProperties;
/**
* @author chenjianbing
* @create 2021-09-19 18:52
* 将properties文件中的内容,封装到JavaBean中,以供随时使用
*/
@ConfigurationProperties("bingge.hello")
public class HelloProperties {
private String prefix;
private String suffix;
public String getPrefix() {
return prefix;
}
public void setPrefix(String prefix) {
this.prefix = prefix;
}
public String getSuffix() {
return suffix;
}
public void setSuffix(String suffix) {
this.suffix = suffix;
}
}spring.factories
在 spring.factories 中显示指定这些配置类的目录,注意 “,” 后不要有空格之类的符号,就只写该类的全路径,不然会出现无法找到此 bean 的错误。
# Auto Configure
org.springframework.boot.autoconfigure.EnableAutoConfiguration=\
com.demo.hello.auto.HelloServiceAutoConfiguration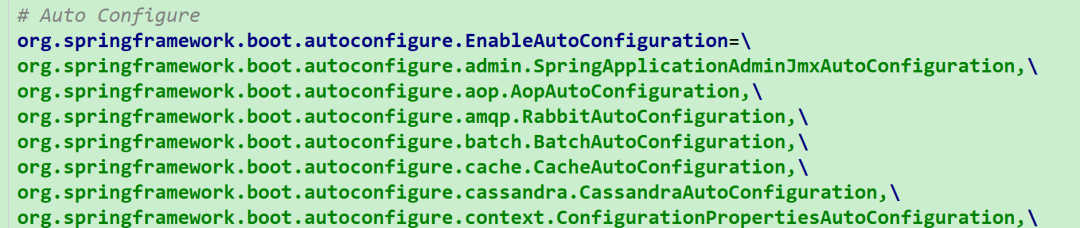
用 maven 插件,将两工程 install 到本地。记得要把 hello-spring-boot-starter-autoconfigure 的 test 包删除
接下来,测试使用自定义 starter,用 Spring Initializr 创建名为 boot-09-customer-starter-test 工程,引入 hello-spring-boot-starter 依赖,其 pom.xml 如下:
<?xml version="1.0" encoding="UTF-8"?>
<project xmlns="http://maven.apache.org/POM/4.0.0" xmlns:xsi="http://www.w3.org/2001/XMLSchema-instance"
         xsi:schemaLocation="http://maven.apache.org/POM/4.0.0 https://maven.apache.org/xsd/maven-4.0.0.xsd">
    <modelVersion>4.0.0</modelVersion>
    <groupId>com.example</groupId>
    <artifactId>boot-09-customer-starter-test</artifactId>
    <version>0.0.1-SNAPSHOT</version>
    <name>boot-09-customer-starter-test</name>
    <description>Demo project for Spring Boot</description>

    <properties>
        <java.version>1.8</java.version>
        <project.build.sourceEncoding>UTF-8</project.build.sourceEncoding>
        <project.reporting.outputEncoding>UTF-8</project.reporting.outputEncoding>
        <spring-boot.version>2.4.1</spring-boot.version>
    </properties>

    <dependencies>
        <dependency>
            <groupId>org.springframework.boot</groupId>
            <artifactId>spring-boot-starter-web</artifactId>
        </dependency>

        <dependency>
            <groupId>org.springframework.boot</groupId>
            <artifactId>spring-boot-starter-test</artifactId>
            <scope>test</scope>
        </dependency>
        <!--引入自定义的启动器-->
        <dependency>
            <groupId>com.demo</groupId>
            <artifactId>hello-spring-boot-starter</artifactId>
            <version>1.0-SNAPSHOT</version>
        </dependency>
    </dependencies>

    <dependencyManagement>
        <dependencies>
            <dependency>
                <groupId>org.springframework.boot</groupId>
                <artifactId>spring-boot-dependencies</artifactId>
                <version>${spring-boot.version}</version>
                <type>pom</type>
                <scope>import</scope>
            </dependency>
        </dependencies>
    </dependencyManagement>

    <build>
        <plugins>
            <plugin>
                <groupId>org.apache.maven.plugins</groupId>
                <artifactId>maven-compiler-plugin</artifactId>
                <version>3.8.1</version>
                <configuration>
                    <source>1.8</source>
                    <target>1.8</target>
                    <encoding>UTF-8</encoding>
                </configuration>
            </plugin>
            <plugin>
                <groupId>org.springframework.boot</groupId>
                <artifactId>spring-boot-maven-plugin</artifactId>
                <version>2.4.1</version>
                <configuration>
                    <mainClass>com.example.boot.Boot09CustomerStarterTestApplication</mainClass>
                </configuration>
                <executions>
                    <execution>
                        <id>repackage</id>
                        <goals>
                            <goal>repackage</goal>
                        </goals>
                    </execution>
                </executions>
            </plugin>
        </plugins>
    </build>

</project>
添加配置文件
application.properties
# 应用名称
spring.application.name=boot-09-customer-starter-test
# 应用服务 WEB 访问端口
server.port=8080
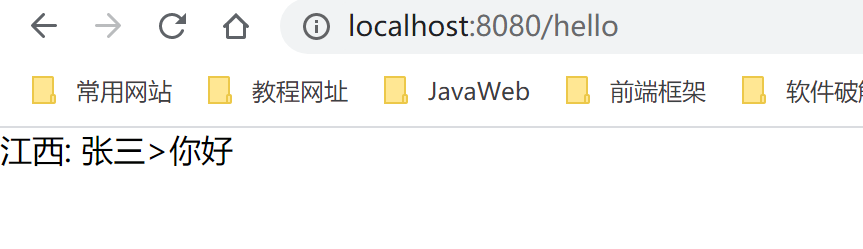
bingge.hello.prefix=江西
bingge.hello.suffix=你好添加 HelloController
package com.example.boot.controller;

import com.demo.hello.service.HelloService;
import org.springframework.beans.factory.annotation.Autowired;
import org.springframework.web.bind.annotation.GetMapping;
import org.springframework.web.bind.annotation.RestController;

/**
 * @author chenjianbing
 * @create 2021-09-19 20:26
 */

@RestController
public class HelloController {
    @Autowired
    HelloService helloService;

    @GetMapping("hello")
    public String sayHello(){
        String s = helloService.sayHello("张三");
        return s;
    }
}
启动服务
3、总结:
第一步,创建xxx-spring-boot-starter工程
第二步,引入 Spring Boot 的基础依赖
第三步,创建xxxAutoConfiguration
第四步,在xxx-spring-boot-starter工程的 resources 包下创建META-INF/spring.factories文件
作者:暗恋花香
来源链接:
https://blog.csdn.net/qq_42324086/article/details/120389011


 525
525

 被折叠的 条评论
为什么被折叠?
被折叠的 条评论
为什么被折叠?
 到【灌水乐园】发言


