


start:2020年10月5日
一、前言
最近在做毕设了,我想做一个Material Design风格的工具App,参考了几款类似的App之后我决定采用Google提供的 DrawerLayout组件进行搭建App的基本框架。经过几天的学习,我实现了我想要的效果,现在把我在学习过程中遇到的内容和问题总结在本博中,方便以后进一步的学习,当然也提供给大家学习交流,如果你需要的话。
人生,看透不如看淡。在岁月中跋涉,每个人都有自己的故事,看淡心境才会秀丽,看开心情才会明媚。累时歇一歇,随清风漫舞,烦时静一静,与花草凝眸,急时缓一缓,和自己微笑。
二、效果图


三、相关类的认识
-
DrawerLayout 抽屉布局:谷歌推出的类似SildingMenu的一种组件,可以直接在布局定义内容快速实现侧滑菜单的效果
- NavigationView 导航视图类:配合DrawerLayout实现侧滑菜单里的布局内容,包括headerLayout(头部)和menu(内容条目)两部分
- NavController 导航管理类:新一代Fragment管理器,它主要负责操作Navigation框架下的Fragment的跳转与退出、动画、监听当前Fragment信息的变化
- NavigationUI类:主要对App bar和页面切换进行管理,可以将App bar与NavController进行绑定,系统会自动为你在App bar中完成一些常见操作,eg:增加三横菜单图标、App bar标题为Fragment的label、自动切换App bar标题、返回上一级
- AppBarConfiguration类:用于传递AppBar的配置信息给NavigationUI,便于AppBar与Fragment进行绑定
四、Layout部分
DrawerLayout:
<?xml version="1.0" encoding="utf-8"?>
<androidx.drawerlayout.widget.DrawerLayout xmlns:android="http://schemas.android.com/apk/res/android"
    xmlns:app="http://schemas.android.com/apk/res-auto"
    xmlns:tools="http://schemas.android.com/tools"
    android:id="@+id/drawer_layout"
    android:layout_width="match_parent"
    android:layout_height="match_parent"
    android:fitsSystemWindows="true"
    tools:openDrawer="start">

    <include
        layout="@layout/app_bar_main"
        android:layout_width="match_parent"
        android:layout_height="match_parent" />

    <!--NavigationView必须位于所有组件代码的最下方,也就是组件显示的最上方,否则NavigationView的Item监听事件会被上层拦截-->
    <com.google.android.material.navigation.NavigationView
        android:id="@+id/nav_view"
        android:layout_width="wrap_content"
        android:layout_height="match_parent"
        android:layout_gravity="start"
        android:fitsSystemWindows="true"
        app:headerLayout="@layout/nav_header_main"
        app:menu="@menu/activity_main_drawer" />

</androidx.drawerlayout.widget.DrawerLayout>
app_bar_main:
<?xml version="1.0" encoding="utf-8"?>
<androidx.coordinatorlayout.widget.CoordinatorLayout xmlns:android="http://schemas.android.com/apk/res/android"
    xmlns:app="http://schemas.android.com/apk/res-auto"
    xmlns:tools="http://schemas.android.com/tools"
    android:layout_width="match_parent"
    android:layout_height="match_parent"
    tools:context=".MainActivity">

    <com.google.android.material.appbar.AppBarLayout
        android:layout_width="match_parent"
        android:layout_height="wrap_content"
        android:theme="@style/AppTheme.AppBarOverlay">

        <androidx.appcompat.widget.Toolbar
            android:id="@+id/toolbar"
            android:layout_width="match_parent"
            android:layout_height="?attr/actionBarSize"
            android:background="?attr/colorPrimary"
            app:popupTheme="@style/AppTheme.PopupOverlay" />

    </com.google.android.material.appbar.AppBarLayout>

    <com.google.android.material.floatingactionbutton.FloatingActionButton
        android:id="@+id/fab"
        android:layout_width="wrap_content"
        android:layout_height="wrap_content"
        android:layout_gravity="bottom|end"
        android:layout_margin="@dimen/fab_margin"
        app:srcCompat="@drawable/but_home"
        tools:ignore="VectorDrawableCompat" />

    <include layout="@layout/content_main" />

</androidx.coordinatorlayout.widget.CoordinatorLayout>
nav_header_main:
<?xml version="1.0" encoding="utf-8"?>
<LinearLayout xmlns:android="http://schemas.android.com/apk/res/android"
    xmlns:app="http://schemas.android.com/apk/res-auto"
    android:layout_width="match_parent"
    android:layout_height="@dimen/nav_header_height"
    android:background="#31cdcc"
    android:gravity="bottom"
    android:orientation="vertical"
    android:paddingLeft="@dimen/activity_horizontal_margin"
    android:paddingTop="@dimen/activity_vertical_margin"
    android:paddingRight="@dimen/activity_horizontal_margin"
    android:paddingBottom="@dimen/activity_vertical_margin"
    android:theme="@style/ThemeOverlay.AppCompat.Dark">

    <ImageView
        android:id="@+id/imageView"
        android:layout_width="wrap_content"
        android:layout_height="wrap_content"
        android:contentDescription="@string/nav_header_desc"
        android:paddingTop="@dimen/nav_header_vertical_spacing"
        app:srcCompat="@mipmap/ic_launcher_round" />

    <TextView
        android:layout_width="match_parent"
        android:layout_height="wrap_content"
        android:paddingTop="@dimen/nav_header_vertical_spacing"
        android:text="@string/nav_header_title"
        android:textAppearance="@style/TextAppearance.AppCompat.Body1" />

    <TextView
        android:id="@+id/textView"
        android:layout_width="wrap_content"
        android:layout_height="wrap_content"
        android:text="@string/nav_header_subtitle" />

</LinearLayout>
activity_main_drawer:
<?xml version="1.0" encoding="utf-8"?>
<menu xmlns:android="http://schemas.android.com/apk/res/android"
    xmlns:tools="http://schemas.android.com/tools"
    tools:showIn="navigation_view">

    <group android:checkableBehavior="single">
         <item
             android:id="@+id/nav_home"
             android:icon="@drawable/ic_menu_camera"
             android:title="@string/menu_home" />
         <item
             android:id="@+id/nav_gallery"
             android:icon="@drawable/ic_menu_gallery"
             android:title="@string/menu_gallery" />
         <item
             android:id="@+id/nav_slideshow"
             android:icon="@drawable/ic_menu_slideshow"
             android:title="@string/menu_slideshow" />
     </group>

     <item android:title="分类名">
        <menu>
            <item
                android:id="@+id/menu_com_base"
                android:icon="@drawable/ic_menu_camera"
                android:title="功能1" />
            <item
                android:id="@+id/menu_apps"
                android:icon="@drawable/ic_menu_camera"
                android:title="功能2" />
            <item
                android:id="@+id/menu_wifi_chat"
                android:icon="@drawable/ic_menu_camera"
                android:title="功能3" />
        </menu>
     </item>

</menu>
五、Java代码部分
package com.signalelf.cl;

import android.os.Bundle;
import android.view.Menu;
import android.view.MenuItem;
import android.view.View;

import com.google.android.material.floatingactionbutton.FloatingActionButton;
import com.google.android.material.navigation.NavigationView;
import com.google.android.material.snackbar.Snackbar;

import androidx.annotation.NonNull;
import androidx.appcompat.app.AppCompatActivity;
import androidx.appcompat.widget.Toolbar;
import androidx.drawerlayout.widget.DrawerLayout;
import androidx.navigation.NavController;
import androidx.navigation.Navigation;
import androidx.navigation.ui.AppBarConfiguration;
import androidx.navigation.ui.NavigationUI;

public class MainActivity extends AppCompatActivity {

    private AppBarConfiguration mAppBarConfiguration;

    @Override
    protected void onCreate(Bundle savedInstanceState) {
        //设置Activity的布局
        super.onCreate(savedInstanceState);
        setContentView(R.layout.activity_main);

        //设置顶部导航栏AppBar
        Toolbar toolbar = findViewById(R.id.toolbar);
        setSupportActionBar(toolbar);

        //悬浮按钮初始化
        final FloatingActionButton fab = findViewById(R.id.fab);
        fab.setOnClickListener(new View.OnClickListener() {
            @Override
            public void onClick(View view) {
                Snackbar.make(view, "Replace with your own action", Snackbar.LENGTH_LONG)
                        .setAction("Action", null).show();
            }
        });

        //抽屉布局初始化
        final DrawerLayout drawer = findViewById(R.id.drawer_layout);
        final NavigationView navigationView = findViewById(R.id.nav_view);
        final NavController navController = Navigation.findNavController(this, R.id.nav_host_fragment);

        // Passing each menu ID as a set of Ids because each
        // menu should be considered as top level destinations.
        mAppBarConfiguration = new AppBarConfiguration.Builder(
                R.id.nav_net_check,R.id.nav_signal_info,R.id.nav_phone_info)
                .setDrawerLayout(drawer)
                .build();

        //将App bar与NavController进行绑定,系统会自动为你在App bar中完成一些常见操作,eg:增加三横菜单图标、App bar标题为Fragment的label、自动切换App bar标题、返回上一级
        NavigationUI.setupActionBarWithNavController(this, navController, mAppBarConfiguration);
        NavigationUI.setupWithNavController(navigationView, navController);

        //给NavigationView的Menu Item设置点击事件
        navigationView.setNavigationItemSelectedListener(new NavigationView.OnNavigationItemSelectedListener() {
            @Override
            public boolean onNavigationItemSelected(@NonNull MenuItem item) {
                int itemId = item.getItemId();
                switch (itemId) {
                    case R.id.menu_net_check:
                        navController.navigate(R.id.nav_net_check);
                        drawer.close();
                        break;
                    case R.id.menu_signal_info:
                        navController.navigate(R.id.nav_signal_info);
                        drawer.close();
                        break;
                    case R.id.menu_phone_info:
                        navController.navigate(R.id.nav_phone_info);
                        drawer.close();
                        break;
                }
                return false;
            }
        });
    }

    @Override//重写菜单条目创建事件
    public boolean onCreateOptionsMenu(Menu menu) {
        // Inflate the menu; this adds items to the action bar if it is present.
        getMenuInflater().inflate(R.menu.main, menu);
        return true;
    }

    @Override//重写后退事件,可以返回上一级Fragment
    public boolean onSupportNavigateUp() {
        NavController navController = Navigation.findNavController(this, R.id.nav_host_fragment);
        return NavigationUI.navigateUp(navController, mAppBarConfiguration)
                || super.onSupportNavigateUp();
    }
}
六、新Fragment管理器——Navigation
重点:navGraph——导航图表的概念
使用:
- 我们可以将多个Fragment定义在一个Graph(图表)里面,
- 然后再在content布局里定义一个Fragment组件去引用这个图表,
- 然后再java代码中用NavController去管理我们定义的Fragment。
1.将多个Fragment定义在一个图表(Graph)里:
<?xml version="1.0" encoding="utf-8"?>
<navigation xmlns:android="http://schemas.android.com/apk/res/android"
    xmlns:app="http://schemas.android.com/apk/res-auto"
    xmlns:tools="http://schemas.android.com/tools"
    android:id="@+id/mobile_navigation"
    app:startDestination="@+id/nav_net_check">
<!--app:startDestination="@+id/nav_net_check":指定开始的目的地,也就是首次启动的Fragment-->

    <fragment
        android:id="@+id/nav_home"
        android:name="com.signalelf.cl.ui.netcheck.NetCheckFragment"
        android:label="@string/menu_home"
        tools:layout="@layout/fragment_net_check" />

    <fragment
        android:id="@+id/nav_net_check"
        android:name="com.signalelf.cl.ui.netcheck.NetCheckFragment"
        android:label="@string/menu_net_check"
        tools:layout="@layout/fragment_net_check" />

    <fragment
        android:id="@+id/nav_signal_info"
        android:name="com.signalelf.cl.ui.signalinfo.SignalInfoFragment"
        android:label="@string/menu_signal_info"
        tools:layout="@layout/fragment_signal_info" />

    <fragment
        android:id="@+id/nav_phone_info"
        android:name="com.signalelf.cl.ui.phoneinfo.PhoneInfoFragment"
        android:label="@string/menu_phone_info"
        tools:layout="@layout/fragment_phone_info" />

</navigation>
2.在内容布局的Fragment里引用这个图表:
<?xml version="1.0" encoding="utf-8"?>
<androidx.constraintlayout.widget.ConstraintLayout xmlns:android="http://schemas.android.com/apk/res/android"
    xmlns:app="http://schemas.android.com/apk/res-auto"
    xmlns:tools="http://schemas.android.com/tools"
    android:layout_width="match_parent"
    android:layout_height="match_parent"
    app:layout_behavior="@string/appbar_scrolling_view_behavior"
    tools:showIn="@layout/app_bar_main">

    <fragment
        android:id="@+id/nav_host_fragment"
        android:name="androidx.navigation.fragment.NavHostFragment"
        android:layout_width="match_parent"
        android:layout_height="match_parent"
        app:defaultNavHost="true"
        app:layout_constraintLeft_toLeftOf="parent"
        app:layout_constraintRight_toRightOf="parent"
        app:layout_constraintTop_toTopOf="parent"
        app:navGraph="@navigation/mobile_navigation" />

</androidx.constraintlayout.widget.ConstraintLayout>
3.利用NavController管理Fragment:
//实例化NavController对象
final NavController navController = Navigation.findNavController(this, R.id.nav_host_fragment);

//将Fragment与AppBar进行绑定
NavigationUI.setupActionBarWithNavController(this, navController, mAppBarConfiguration);

//Fragment跳转
navController.navigate(在Fragment图表中定义的id值);
七、初始ViewModel——Live数据管理
简介:ViewModel类是被设计用来以可感知生命周期的方式存储和管理 UI 相关数据,ViewModel中数据会一直存活即使 activity configuration发生变化,比如横竖屏切换的时候。
功能:
- 缓存Activity使用过程中的数据(LiveData)
-
网络请求异步回调问题
-
数据处理与UI展示分开管理,提高独立性
-
数据共享(Activity与Fragment,Fragment与Fragment)
使用:
1.继承ViewModel自定义数据管理类(eg:用户数据加载、数据更新):
package com.signalelf.cl.ui.netcheck;

import androidx.lifecycle.MutableLiveData;
import androidx.lifecycle.ViewModel;

public class NetCheckViewModel extends ViewModel {
    // TODO: Implement the ViewModel

    MutableLiveData<UserInfo> userInfoLiveData = new MutableLiveData<>();

    public NetCheckViewModel() {
//        可以在实例化ViewModel对象时去获取服务器里用户的数据,然后赋值给LiveData对象
        UserInfo userInfo = new UserInfo("XX", "男生");
//        setValue()只能在主线程中调用,postValue()可以在任何线程中调用。
        userInfoLiveData.postValue(userInfo);
    }

    public MutableLiveData<UserInfo> getUserInfoLiveData() {
        return userInfoLiveData;
    }

    public void updateData(){//模拟用户数据更新
        UserInfo value = userInfoLiveData.getValue();
        if (value != null){
            value.setName("YY");
            value.setGender("女生");
            userInfoLiveData.postValue(value);
        }
    }
}
2.在Activity(Fragment)中实例化我们定义的ViewModel类
//ViewModelProviders.of(this)被弃用,用ViewModelProvider(this)代替
ViewModelProvider mViewModel = new ViewModelProvider(this).get(NetCheckViewModel.class);
3.观察数据的变化,并且更新UI显示
//可以通过ViewModel中定义的get方法观察数据的变化
mViewModel.userInfoLiveData.observe(getViewLifecycleOwner(), new Observer<UserInfo>() {
            @Override
            public void onChanged(UserInfo userInfo) {
                if (userInfo != null) {
                    name.setText(userInfo.getName());
                    gender.setText(userInfo.getGender());
                }
            }
        });
八、优秀开源库
- 自由度更高的,功能更加强大的:Material Drawer(GitHub)
效果图:


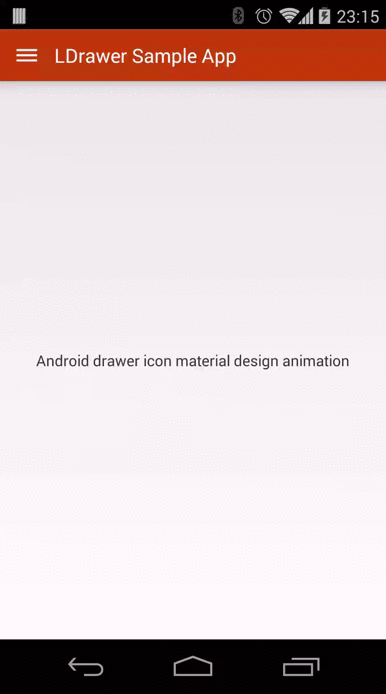
- 左上角带导航动画的:LDrawer(GitHub)
效果图:
九、总结
通过本次的学习,我总算是接触到了MD风格App基础界面的搭建,了解到了很多新的概念,同时也感受到了技术更新之快,在以前我感觉侧滑菜单实现也是比较麻烦的,但是没想到现在实现是如此的简单,不管是Google提供的DraweLayout还是其他大佬开放的第三方库使用起来都是非常方便的。其他感觉:要多多敲代码,熟悉快捷键。
畏之行之
end:by take


 539
539


 被折叠的 条评论
为什么被折叠?
被折叠的 条评论
为什么被折叠?
 到【灌水乐园】发言


